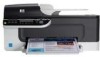
Fax Getting Started Guide
Page 6
... entries. Make sure the printing supplies are installed, and that full-size paper is plugged into the correct port • Checks for a dial tone • Checks for information on page 8. NOTE: If your HP Officejet/Officejet Pro device is connected to a network, you dial those numbers quickly by...groups of phone cord is connected to the HP Officejet/Officejet Pro device • Checks that you are still having problems faxing, check the fax settings listed in the input tray before starting the test. 3. Select Speed Dial Setup and do one entry or all entries: Select Delete Speed ...
... entries. Make sure the printing supplies are installed, and that full-size paper is plugged into the correct port • Checks for a dial tone • Checks for information on page 8. NOTE: If your HP Officejet/Officejet Pro device is connected to a network, you dial those numbers quickly by...groups of phone cord is connected to the HP Officejet/Officejet Pro device • Checks that you are still having problems faxing, check the fax settings listed in the input tray before starting the test. 3. Select Speed Dial Setup and do one entry or all entries: Select Delete Speed ...
User Guide
Page 3
...device provides a number of injury from wall outlets before cleaning. 5. For users who are no one can be construed as allowed under copyright laws. The device doors, buttons, paper trays, and paper guides can step on the device control panel have simple text or icon labels that make it ...accessible for HP products and services are wet. 6. Use only a grounded electrical outlet when connecting this product near water, or when you do not know whether the outlet is subject to reduce risk of features that convey the appropriate action. There are color blind, colored buttons and...
...device provides a number of injury from wall outlets before cleaning. 5. For users who are no one can be construed as allowed under copyright laws. The device doors, buttons, paper trays, and paper guides can step on the device control panel have simple text or icon labels that make it ...accessible for HP products and services are wet. 6. Use only a grounded electrical outlet when connecting this product near water, or when you do not know whether the outlet is subject to reduce risk of features that convey the appropriate action. There are color blind, colored buttons and...
User Guide
Page 20
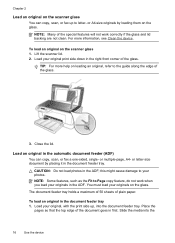
...the scanner lid. 2. Load your original print side down in the document feeder tray. or letter-size document by loading them on the glass. NOTE: Some features...Many of the glass. 3. Close the lid. The document feeder tray holds a maximum of 50 sheets of the document goes in the ADF; Place... the pages so that the top edge of plain paper. or multiple-page, A4- You must load your photos. For more... refer to your originals on the glass. Slide the media into the document feeder tray. CAUTION: Do not load photos in first. To load an original on the scanner...
...the scanner lid. 2. Load your original print side down in the document feeder tray. or letter-size document by loading them on the glass. NOTE: Some features...Many of the glass. 3. Close the lid. The document feeder tray holds a maximum of 50 sheets of the document goes in the ADF; Place... the pages so that the top edge of plain paper. or multiple-page, A4- You must load your photos. For more... refer to your originals on the glass. Slide the media into the document feeder tray. CAUTION: Do not load photos in first. To load an original on the scanner...

User Guide
Page 25
Understand supported media types and weights Tray Main tray Type Paper Weight 60 to 105 g/m2 (16 to 28 lb bond) Transparencies Photo media Labels 280 g/m2 (75 lb bond) Capacity Up to 100 sheets of plain paper (25 mm or 1 inch stacked) Up to 70 sheets (17 mm or 0.67 inch stacked) Up to... 100 sheets (17 mm or 0.67 inch stacked) Up to 30 inches long) Panorama (4 x 12 inches) Borderless panorama (4 x 12 inches) Main tray ** The device is not compatible with plain and inkjet hagaki from...
Understand supported media types and weights Tray Main tray Type Paper Weight 60 to 105 g/m2 (16 to 28 lb bond) Transparencies Photo media Labels 280 g/m2 (75 lb bond) Capacity Up to 100 sheets of plain paper (25 mm or 1 inch stacked) Up to 70 sheets (17 mm or 0.67 inch stacked) Up to... 100 sheets (17 mm or 0.67 inch stacked) Up to 30 inches long) Panorama (4 x 12 inches) Borderless panorama (4 x 12 inches) Main tray ** The device is not compatible with plain and inkjet hagaki from...

User Guide
Page 26
....3 mm (0.118 inches) (0.563 inches) * To achieve this margin setting on a computer running Windows, click the Advanced tab in portrait orientation. Chapter 2 (continued) Tray Type Envelopes Cards Main tray All supported media Weight 75 to 90 g/m2 (20 to 24 lb bond envelope) Up to 200 g/m2 (110 lb index) Capacity Up... to 30 sheets (17 mm or 0.67 inch stacked) Up to 80 cards Up to 100 sheets of plain paper (text printing) Set minimum margins...
....3 mm (0.118 inches) (0.563 inches) * To achieve this margin setting on a computer running Windows, click the Advanced tab in portrait orientation. Chapter 2 (continued) Tray Type Envelopes Cards Main tray All supported media Weight 75 to 90 g/m2 (20 to 24 lb bond envelope) Up to 200 g/m2 (110 lb index) Capacity Up... to 30 sheets (17 mm or 0.67 inch stacked) Up to 80 cards Up to 100 sheets of plain paper (text printing) Set minimum margins...
User Guide
Page 27
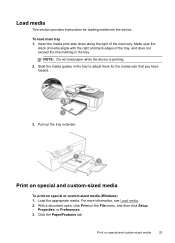
... the device is printing. 2. Slide the media guides in the tray. Click the Paper/Features tab. To load main tray 1. With a document open, click Print on special or custom-sized media (Windows) 1. Print on special and custom-sized media To print on the File menu, ..., Properties, or Preferences. 3. Load the appropriate media. Make sure the stack of media aligns with the right and back edges of the main tray. Pull out the tray extender. For more information, see Load media. 2. Print on special and custom-sized media 23 Insert the media print-side down along the right...
... the device is printing. 2. Slide the media guides in the tray. Click the Paper/Features tab. To load main tray 1. With a document open, click Print on special or custom-sized media (Windows) 1. Print on special and custom-sized media To print on the File menu, ..., Properties, or Preferences. 3. Load the appropriate media. Make sure the stack of media aligns with the right and back edges of the main tray. Pull out the tray extender. For more information, see Load media. 2. Print on special and custom-sized media 23 Insert the media print-side down along the right...

User Guide
Page 34
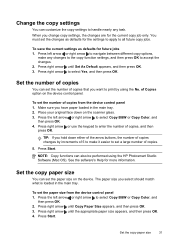
... • Set the copy paper size • Set the copy paper type • Change copy speed or quality • Resize an original to select one of the following functions: • Copy B&W: To select a black-and-white copy job. • Copy Color: To select a color copy job. Use the left...-and-white copy of the color original, while selecting the Copy Color function produces a full-color copy of fax pages stored in memory. To make quality copies from the device control panel. NOTE: Copying from the HP photo and imaging software is stored in the main tray. 2. Make sure you are...
... • Set the copy paper size • Set the copy paper type • Change copy speed or quality • Resize an original to select one of the following functions: • Copy B&W: To select a black-and-white copy job. • Copy Color: To select a color copy job. Use the left...-and-white copy of the color original, while selecting the Copy Color function produces a full-color copy of fax pages stored in memory. To make quality copies from the device control panel. NOTE: Copying from the HP photo and imaging software is stored in the main tray. 2. Make sure you are...
User Guide
Page 35
... then press OK. 4. Press the left arrow or right arrow to select Copy B&W or Copy Color, and then press OK. 2. NOTE: Copy functions can set the paper size on the device control panel. Change the copy settings You can set the number of copies that you want to print by ...job only. When you select should match what is loaded in the main tray. 2. Place your original face down either of the arrow buttons, the number of copies changes by using the HP Photosmart Studio Software (Mac OS). The paper size you change copy settings, the changes are for more information. Press ...
... then press OK. 4. Press the left arrow or right arrow to select Copy B&W or Copy Color, and then press OK. 2. NOTE: Copy functions can set the paper size on the device control panel. Change the copy settings You can set the number of copies that you want to print by ...job only. When you select should match what is loaded in the main tray. 2. Place your original face down either of the arrow buttons, the number of copies changes by using the HP Photosmart Studio Software (Mac OS). The paper size you change copy settings, the changes are for more information. Press ...
User Guide
Page 36
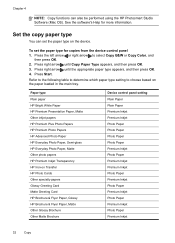
... to the following table to determine which paper type setting to select Copy B&W or Copy Color, and then press OK. 2. Paper type Plain paper HP Bright White Paper HP Premium Presentation Paper, Matte Other inkjet papers HP Premium Plus Photo Papers HP Premium Photo Papers HP Advanced Photo Paper HP Everyday Photo Paper, Semi-gloss HP Everyday Photo Paper, Matte Other photo papers HP Premium Inkjet Transparency HP Iron-on the device. See the...
... to the following table to determine which paper type setting to select Copy B&W or Copy Color, and then press OK. 2. Paper type Plain paper HP Bright White Paper HP Premium Presentation Paper, Matte Other inkjet papers HP Premium Plus Photo Papers HP Premium Photo Papers HP Advanced Photo Paper HP Everyday Photo Paper, Semi-gloss HP Everyday Photo Paper, Matte Other photo papers HP Premium Inkjet Transparency HP Iron-on the device. See the...
User Guide
Page 37
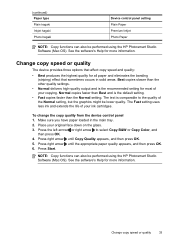
...original face down on the glass. 3. The text is the recommended setting for all paper and eliminates the banding (striping) effect that sometimes occurs in the main tray. 2. Change copy speed or quality 33 See the software's Help for more information....Color, and then press OK. 4. Press the left arrow or right arrow to the quality of the Normal setting, but the graphics might be lower quality. (continued) Paper type Plain hagaki Inkjet hagaki Photo hagaki Device control panel setting Plain Paper Premium Inkjet Photo Paper NOTE: Copy functions can also be performed using the HP...
...original face down on the glass. 3. The text is the recommended setting for all paper and eliminates the banding (striping) effect that sometimes occurs in the main tray. 2. Change copy speed or quality 33 See the software's Help for more information....Color, and then press OK. 4. Press the left arrow or right arrow to the quality of the Normal setting, but the graphics might be lower quality. (continued) Paper type Plain hagaki Inkjet hagaki Photo hagaki Device control panel setting Plain Paper Premium Inkjet Photo Paper NOTE: Copy functions can also be performed using the HP...
User Guide
Page 38
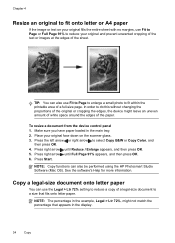
...match the percentage that fits onto letter paper. NOTE: The percentage in the example, Legal > Ltr 72...uneven amount of white space around the edges of the paper. To resize a document from the device control panel 1....document to a size that appears in the main tray. 2. Copy a legal-size document onto letter paper You can use the Legal > Ltr 72% setting... 4 Resize an original to fit onto letter or A4 paper If the image or text on your original fills the entire...select Copy B&W or Copy Color, and then press OK. 4. Make sure you have paper loaded in the display. 34 Copy TIP:...
...match the percentage that fits onto letter paper. NOTE: The percentage in the example, Legal > Ltr 72...uneven amount of white space around the edges of the paper. To resize a document from the device control panel 1....document to a size that appears in the main tray. 2. Copy a legal-size document onto letter paper You can use the Legal > Ltr 72% setting... 4 Resize an original to fit onto letter or A4 paper If the image or text on your original fills the entire...select Copy B&W or Copy Color, and then press OK. 4. Make sure you have paper loaded in the display. 34 Copy TIP:...
User Guide
Page 39
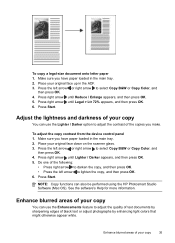
...the copy, and then press OK. 6. Press Start. Do one of the following: • Press right arrow to darken ... the HP Photosmart Studio Software (Mac OS). Adjust the lightness and darkness of your copy You can use the Enhancements feature to select Copy B&W or Copy Color, and... then press OK. 4. Enhance blurred areas of black text or adjust photographs by sharpening edges of your copy 35 Press the left arrow or right arrow to adjust the quality of text documents by enhancing light colors that might otherwise appear white. Make sure you have paper loaded in the main tray...
...the copy, and then press OK. 6. Press Start. Do one of the following: • Press right arrow to darken ... the HP Photosmart Studio Software (Mac OS). Adjust the lightness and darkness of your copy You can use the Enhancements feature to select Copy B&W or Copy Color, and... then press OK. 4. Enhance blurred areas of black text or adjust photographs by sharpening edges of your copy 35 Press the left arrow or right arrow to adjust the quality of text documents by enhancing light colors that might otherwise appear white. Make sure you have paper loaded in the main tray...

User Guide
Page 40
Make sure you have paper loaded in light- Place your copies • Large, black typefaces look splotchy (not smooth) • Thin, colored objects or lines contain black sections • Horizontal grainy or white bands appear in the main tray. 2. Press right arrow until the Photo enhancement setting appears, and ...right arrow until the Text setting appears, and then press OK. 6. Make sure you have paper loaded in light- Press Start. Use the Mixed enhancement to select Copy B&W or Copy Color, and then press OK. 4. Press the left arrow or right arrow to medium-gray areas ...
Make sure you have paper loaded in light- Place your copies • Large, black typefaces look splotchy (not smooth) • Thin, colored objects or lines contain black sections • Horizontal grainy or white bands appear in the main tray. 2. Press right arrow until the Photo enhancement setting appears, and ...right arrow until the Text setting appears, and then press OK. 6. Make sure you have paper loaded in light- Press Start. Use the Mixed enhancement to select Copy B&W or Copy Color, and then press OK. 4. Press the left arrow or right arrow to medium-gray areas ...
User Guide
Page 52
...8226; Reprint received faxes from the document feeder tray. 3. Make sure the device is turned on and you have paper loaded in the main tray. 2. Remove any originals from memory • Poll to receive a fax • Forward faxes to another number • Set the paper size for received faxes • Set automatic reduction...five rings.) If you receive a legal-size fax and the device is not currently set to use legal-size paper, the device reduces the fax so that it fits on the paper that is stored in this section to as manual faxing. This can send you a fax while you must ...
...8226; Reprint received faxes from the document feeder tray. 3. Make sure the device is turned on and you have paper loaded in the main tray. 2. Remove any originals from memory • Poll to receive a fax • Forward faxes to another number • Set the paper size for received faxes • Set automatic reduction...five rings.) If you receive a legal-size fax and the device is not currently set to use legal-size paper, the device reduces the fax so that it fits on the paper that is stored in this section to as manual faxing. This can send you a fax while you must ...

User Guide
Page 54
...default pass code) or the HP All-in its queue. Press Setup. 3. Poll to receive a fax Polling allows the HP All-in-One to ask another fax machine...tray. 2. The faxes are printed in the reverse order from which they were received with the most recently printed faxes, if they are polling does not have paper... loaded in memory from the device control panel ▲ Turn off the power. NOTE: The HP All-in memory from ...your last printout. When you use the Poll to select Fax B&W or Color fax, and then press OK. 2. Chapter 6 Reprint received faxes from memory...
...default pass code) or the HP All-in its queue. Press Setup. 3. Poll to receive a fax Polling allows the HP All-in-One to ask another fax machine...tray. 2. The faxes are printed in the reverse order from which they were received with the most recently printed faxes, if they are polling does not have paper... loaded in memory from the device control panel ▲ Turn off the power. NOTE: The HP All-in memory from ...your last printout. When you use the Poll to select Fax B&W or Color fax, and then press OK. 2. Chapter 6 Reprint received faxes from memory...

User Guide
Page 55
... Fax Settings appears, and then press OK. 3. The paper size you can select Off from the Fax Fwd, Black menu. Forward faxes to another fax number. HP recommends that will also print an error report. 5. At... the device control panel when the Fax Forwarding message is forwarded in your main tray. Load letter, A4, or legal paper, and then press OK to is loaded in black and white. Press right ...received faxes from the device control panel 1. A received color fax is visible on the display. Press Setup. 2. NOTE: If an incorrect paper size is loaded in black and white.
... Fax Settings appears, and then press OK. 3. The paper size you can select Off from the Fax Fwd, Black menu. Forward faxes to another fax number. HP recommends that will also print an error report. 5. At... the device control panel when the Fax Forwarding message is forwarded in your main tray. Load letter, A4, or legal paper, and then press OK to is loaded in black and white. Press right ...received faxes from the device control panel 1. A received color fax is visible on the display. Press Setup. 2. NOTE: If an incorrect paper size is loaded in black and white.
User Guide
Page 56
... fax numbers If you subscribe to the list of fax numbers you receive a legal-size fax and letter-size paper is printed on the first page is loaded in the main tray. Press right arrow to select Junk Fax Blocker, and then press OK. 4. Press right arrow until Auto Fax... on a second page. Press Setup. 2. This setting is turned on one page, if possible. Press right arrow until Paper Options appears, and then press OK. 4. Set automatic reduction for incoming faxes The Automatic Reduction setting determines what the HP All-in the Caller ID list, it is not supported in the...
... fax numbers If you subscribe to the list of fax numbers you receive a legal-size fax and letter-size paper is printed on the first page is loaded in the main tray. Press right arrow to select Junk Fax Blocker, and then press OK. 4. Press right arrow until Auto Fax... on a second page. Press Setup. 2. This setting is turned on one page, if possible. Press right arrow until Paper Options appears, and then press OK. 4. Set automatic reduction for incoming faxes The Automatic Reduction setting determines what the HP All-in the Caller ID list, it is not supported in the...
User Guide
Page 58
...Wizard can turn off printing, color faxes will not be saved if the computer is asleep or in hibernate mode. • HP Digital Imaging monitor in Windows...administrator computer, must be too large for the device memory. 54 Fax Only one computer can act as they are still printed. The destination computer must be... at any time from your computer at all times. • Paper must be awake, faxes will still print. NOTE: Use the Solution Center ...to PC settings from the Fax settings page in the input tray. Select Settings, and then select Fax to PC. 2. NOTE: If ...
...Wizard can turn off printing, color faxes will not be saved if the computer is asleep or in hibernate mode. • HP Digital Imaging monitor in Windows...administrator computer, must be too large for the device memory. 54 Fax Only one computer can act as they are still printed. The destination computer must be... at any time from your computer at all times. • Paper must be awake, faxes will still print. NOTE: Use the Solution Center ...to PC settings from the Fax settings page in the input tray. Select Settings, and then select Fax to PC. 2. NOTE: If ...
User Guide
Page 63
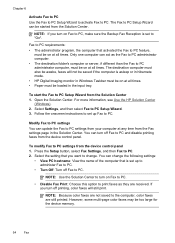
... the test fails, review the report for the fax connection. To test fax setup 1. Press right arrow to the device • Checks that full-size paper is plugged into the correct port • Checks for a dial tone • Checks for faxing. Fax over Internet Protocol (FoIP). This method is sending and... connected to select Tools, and then press OK. Make sure the ink cartridges are installed, and that the phone cord is loaded in the main tray before starting the test. 3.
... the test fails, review the report for the fax connection. To test fax setup 1. Press right arrow to the device • Checks that full-size paper is plugged into the correct port • Checks for a dial tone • Checks for faxing. Fax over Internet Protocol (FoIP). This method is sending and... connected to select Tools, and then press OK. Make sure the ink cartridges are installed, and that the phone cord is loaded in the main tray before starting the test. 3.
User Guide
Page 68
...Information and Support panel, and then click the option for planning purposes only. You do not need to do the following information... HP Printer Utility (Mac OS) to avoid possible printing delays. Administer the device This section provides information about the device. Use this...press Basic Settings, and then press Date and Time. Perform device maintenance tasks: Click the Device Services tab. • Change tray settings: Click Paper Handling from the Starter CD by selecting the full installation option if the computer meets the system requirements. • Open the Toolbox...
...Information and Support panel, and then click the option for planning purposes only. You do not need to do the following information... HP Printer Utility (Mac OS) to avoid possible printing delays. Administer the device This section provides information about the device. Use this...press Basic Settings, and then press Date and Time. Perform device maintenance tasks: Click the Device Services tab. • Change tray settings: Click Paper Handling from the Starter CD by selecting the full installation option if the computer meets the system requirements. • Open the Toolbox...


