Network Users Manual - English
Page 18
...to search for this protocol is used to manage network devices including computers, routers and Brother network ready machines. IPv6 (For MFC-5490CN, MFC-5890CN, MFC-6490CW, DCP-6690CW and MFC-6890CDW) 1 Your brother machine is not supported for China. Other Protocol 1 LLTD 1 The Link Layer Topology... Windows Vista® Network Map. FTP client (For MFC-5890CN, MFC-6490CW and MFC-6890CDW) 1 The File Transfer Protocol (FTP) allows the Brother machine to scan black and white or color documents directly to install the Brother printer driver by right-clicking the machine icon from an...
...to search for this protocol is used to manage network devices including computers, routers and Brother network ready machines. IPv6 (For MFC-5490CN, MFC-5890CN, MFC-6490CW, DCP-6690CW and MFC-6890CDW) 1 Your brother machine is not supported for China. Other Protocol 1 LLTD 1 The Link Layer Topology... Windows Vista® Network Map. FTP client (For MFC-5890CN, MFC-6490CW and MFC-6890CDW) 1 The File Transfer Protocol (FTP) allows the Brother machine to scan black and white or color documents directly to install the Brother printer driver by right-clicking the machine icon from an...

Network Users Manual - English
Page 135
.... (For UK) Press Mono Start or Colour Start. For Touchscreen models 6 a Press MENU. d (For US) Press Black Start or Color Start. (For UK) Press Mono Start or Colour Start. Control panel setup Printing the Network Configuration List 6 Note • Node... Network Configuration List prints a report listing the current network configuration including the network print server settings. b (For US) Press Black Start or Color Start. (For UK) Press Mono Start or Colour Start. For MFC-5490CN 6 a Press Menu, 6, 6. c Press Stop/Exit. c Press a or b to display Print Reports and then press ...
.... (For UK) Press Mono Start or Colour Start. For Touchscreen models 6 a Press MENU. d (For US) Press Black Start or Color Start. (For UK) Press Mono Start or Colour Start. Control panel setup Printing the Network Configuration List 6 Note • Node... Network Configuration List prints a report listing the current network configuration including the network print server settings. b (For US) Press Black Start or Color Start. (For UK) Press Mono Start or Colour Start. For MFC-5490CN 6 a Press Menu, 6, 6. c Press Stop/Exit. c Press a or b to display Print Reports and then press ...
Network Users Manual - English
Page 151
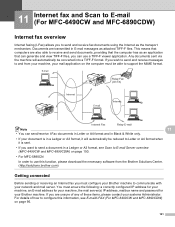
...G3 TX) Internet E-mail Internet Internet Fax Relay E-mail Note 11 • You can send/receive I-Fax documents in Letter or A4 format and in Black & White only. • If your document is in a Ledger or A3 format, it is sent. • If you want to send a ... Scan to E-mail (For MFC-6490CW and MFC-6890CDW) 11 Internet fax overview 11 Internet faxing (I -FAX (For MFC-6490CW and MFC-6890CDW) on page 150. • For MFC-5890CN In order to use a TIFF-F viewer application. If you must configure your Brother machine to E-mail Server overview (MFC-6490CW and MFC-6890CDW) on page 95....
...G3 TX) Internet E-mail Internet Internet Fax Relay E-mail Note 11 • You can send/receive I-Fax documents in Letter or A4 format and in Black & White only. • If your document is in a Ledger or A3 format, it is sent. • If you want to send a ... Scan to E-mail (For MFC-6490CW and MFC-6890CDW) 11 Internet fax overview 11 Internet faxing (I -FAX (For MFC-6490CW and MFC-6890CDW) on page 150. • For MFC-5890CN In order to use a TIFF-F viewer application. If you must configure your Brother machine to E-mail Server overview (MFC-6490CW and MFC-6890CDW) on page 95....

Network Users Manual - English
Page 152
...scanning or transmitting process. 11 11 11 One Touch Search/Speed-Dial 11 These functions work the same way as with conventional machines. Internet fax and Scan to E-mail (For MFC-6490CW and MFC-6890CDW) Control panel key functions 11 Shift + 1 (For color LCD models) Press then . (For ...Touchscreen models) 11 Used to change between upper case and lower case for E-mail addresses. (For US) Shift + Black Start or Color Start (For UK) Shift + ...
...scanning or transmitting process. 11 11 11 One Touch Search/Speed-Dial 11 These functions work the same way as with conventional machines. Internet fax and Scan to E-mail (For MFC-6490CW and MFC-6890CDW) Control panel key functions 11 Shift + 1 (For color LCD models) Press then . (For ...Touchscreen models) 11 Used to change between upper case and lower case for E-mail addresses. (For US) Shift + Black Start or Color Start (For UK) Shift + ...
Network Users Manual - English
Page 153
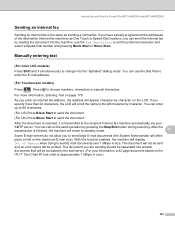
... fax and Scan to E-mail (For MFC-6490CW and MFC-6890CDW) Sending an Internet fax 11 Sending an Internet fax is the same as One Touch or Speed-Dial locations, you can...machine will appear character by the mail server. (For your SMTP server. Manually entering text 11 (For color LCD models) 11 Press Shift and 1 simultaneously to the recipient Internet fax machine automatically via your information,... accepted by character on page 179. You can enter up to 60 characters. (For US) Press Black Start to send the document. (For UK) Press Mono Start to choose numbers, characters or special ...
... fax and Scan to E-mail (For MFC-6490CW and MFC-6890CDW) Sending an Internet fax 11 Sending an Internet fax is the same as One Touch or Speed-Dial locations, you can...machine will appear character by the mail server. (For your SMTP server. Manually entering text 11 (For color LCD models) 11 Press Shift and 1 simultaneously to the recipient Internet fax machine automatically via your information,... accepted by character on page 179. You can enter up to 60 characters. (For US) Press Black Start to send the document. (For UK) Press Mono Start to choose numbers, characters or special ...

Network Users Manual - English
Page 154
...is too large, the following error message will be printed: "ATTACHED FILE FORMAT NOT SUPPORTED. If you press the Shift + Black Start/Mono Start or Color Start/Colour Start buttons to manually poll the E-mail server for configuring fax forward can forward received E-mail or standard fax ...document from the E-mail server. Received messages can manually poll the server by "xx E-mail(s)". Internet fax and Scan to E-mail (For MFC-6490CW and MFC-6890CDW) Receiving E-mail or Internet fax 11 There are no mail documents waiting to another E-mail address or fax machine. This polling can ...
...is too large, the following error message will be printed: "ATTACHED FILE FORMAT NOT SUPPORTED. If you press the Shift + Black Start/Mono Start or Color Start/Colour Start buttons to manually poll the E-mail server for configuring fax forward can forward received E-mail or standard fax ...document from the E-mail server. Received messages can manually poll the server by "xx E-mail(s)". Internet fax and Scan to E-mail (For MFC-6490CW and MFC-6890CDW) Receiving E-mail or Internet fax 11 There are no mail documents waiting to another E-mail address or fax machine. This polling can ...

Network Users Manual - English
Page 156
...to more than one standard fax machine the address can add numbers to the broadcast in the following method: (For color LCD models) 11 a Enter the phone number of the second Fax machine UKFAX@brother.co.uk(fax#456). Internet fax and Scan to E-mail (For MFC-6490CW and MFC-6890CDW) Sending... to multiple phone numbers: 11 If you want 11 to send a fax. c Press Broadcasting. Press the locations where you want to display Broadcasting. f (For US) Press Black Start. (For ...
...to more than one standard fax machine the address can add numbers to the broadcast in the following method: (For color LCD models) 11 a Enter the phone number of the second Fax machine UKFAX@brother.co.uk(fax#456). Internet fax and Scan to E-mail (For MFC-6490CW and MFC-6890CDW) Sending... to multiple phone numbers: 11 If you want 11 to send a fax. c Press Broadcasting. Press the locations where you want to display Broadcasting. f (For US) Press Black Start. (For ...

Network Users Manual - English
Page 160
... dpi, B/W 200x100 dpi or B/W 200 dpi. Press OK. For MFC-6490CW 11 a Load your document. e Press a or b to choose Quality. 11 If you can scan a black and white or color document and send it directly to an E-mail address from the Brother Solutions Center (http://solutions.brother.com). In order to choose File Type. Note If...
... dpi, B/W 200x100 dpi or B/W 200 dpi. Press OK. For MFC-6490CW 11 a Load your document. e Press a or b to choose Quality. 11 If you can scan a black and white or color document and send it directly to an E-mail address from the Brother Solutions Center (http://solutions.brother.com). In order to choose File Type. Note If...

Network Users Manual - English
Page 161
Internet fax and Scan to E-mail (For MFC-6490CW and MFC-6890CDW) h Press a or b to choose the E-mail address you want. Press OK. • Press a or b to choose . Press OK. Press 1 for Yes or press 2 for E-mail addresses on page 138. For MFC-6890CDW 11 a Load your machine. • Press a or ... . c Press Scan to choose Alphabetical Order or Numerical Order. Enter the destination E-mail address from the dial pad. Press OK again. (For US) Black Start or Color Start. (For UK) Mono Start or Colour Start. Note You can search for No. Press c. • Press a or b to E-mail. The...
Internet fax and Scan to E-mail (For MFC-6490CW and MFC-6890CDW) h Press a or b to choose the E-mail address you want. Press OK. • Press a or b to choose . Press OK. Press 1 for Yes or press 2 for E-mail addresses on page 138. For MFC-6890CDW 11 a Load your machine. • Press a or ... . c Press Scan to choose Alphabetical Order or Numerical Order. Enter the destination E-mail address from the dial pad. Press OK again. (For US) Black Start or Color Start. (For UK) Mono Start or Colour Start. Note You can search for No. Press c. • Press a or b to E-mail. The...

Network Users Manual - English
Page 162
If you want. If you want to change the file type, go to choose File Type. h (For US) Black Start or Color Start. (For UK) Mono Start or Colour Start. Choose the file type you are using the scanner glass, the LCD displays Next Page?. The machine starts the scanning process. Press Yes or No. 11 152 Internet fax and Scan to E-mail (For MFC-6490CW and MFC-6890CDW) g Press d or c to h. Note If you are using the scanner glass of the machine, choose the document size. • Press d or c to choose Glass ScanSize. • Choose the document size you don't want .
If you want. If you want to change the file type, go to choose File Type. h (For US) Black Start or Color Start. (For UK) Mono Start or Colour Start. Choose the file type you are using the scanner glass, the LCD displays Next Page?. The machine starts the scanning process. Press Yes or No. 11 152 Internet fax and Scan to E-mail (For MFC-6490CW and MFC-6890CDW) g Press d or c to h. Note If you are using the scanner glass of the machine, choose the document size. • Press d or c to choose Glass ScanSize. • Choose the document size you don't want .
Quick Setup Guide - English
Page 1
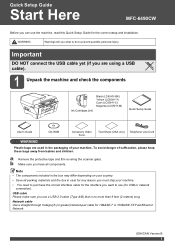
...Important DO NOT connect the USB cable yet (if you are using a USB cable). 1 Unpack the machine and check the components Ink Cartridges [x4] Black (LC65HY-BK) Yellow (LC65HY-Y) Cyan (LC65HY-C) Magenta (LC65HY-M) Quick Setup Guide User's Guide CD-ROM Accessory Order Form Test Sheet (USA only)... materials and the box in the packaging of suffocation, please keep these bags away from babies and children. Quick Setup Guide Start Here MFC-6490CW Before you want to use (for USB or network connection). Network cable Use a straight-through Category5 (or greater) twisted-pair cable for...
...Important DO NOT connect the USB cable yet (if you are using a USB cable). 1 Unpack the machine and check the components Ink Cartridges [x4] Black (LC65HY-BK) Yellow (LC65HY-Y) Cyan (LC65HY-C) Magenta (LC65HY-M) Quick Setup Guide User's Guide CD-ROM Accessory Order Form Test Sheet (USA only)... materials and the box in the packaging of suffocation, please keep these bags away from babies and children. Quick Setup Guide Start Here MFC-6490CW Before you want to use (for USB or network connection). Network cable Use a straight-through Category5 (or greater) twisted-pair cable for...
Quick Setup Guide - English
Page 5
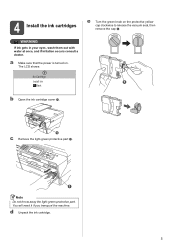
The LCD shows: No Cartridge Install Ink 1 Black b Open the ink cartridge cover a. 1 c Remove the light-green protective part a. 1 Note Do not throw away the light-green protective part. You will need it if you transport the machine. 4 Install the ink cartridges e Turn the green knob on . d Unpack the ink cartridge. 5 WARNING If ink gets in your eyes, wash them out with water at once, and if irritation occurs consult a doctor. a Make sure that the power is turned on the protective yellow cap clockwise to release the vacuum seal, then remove the cap a.
The LCD shows: No Cartridge Install Ink 1 Black b Open the ink cartridge cover a. 1 c Remove the light-green protective part a. 1 Note Do not throw away the light-green protective part. You will need it if you transport the machine. 4 Install the ink cartridges e Turn the green knob on . d Unpack the ink cartridge. 5 WARNING If ink gets in your eyes, wash them out with water at once, and if irritation occurs consult a doctor. a Make sure that the power is turned on the protective yellow cap clockwise to release the vacuum seal, then remove the cap a.

Quick Setup Guide - English
Page 7
...e Press 1 (Yes), the machine will then start cleaning the colors. c Press a or b to choose Initial Setup. Black OK? f After cleaning is OK for black and color. Poor Poor d The LCD asks you put paper in the upper tray for both black and color, the LCD shows: Start Cleaning? b Press a or b to...d Press a or b to finish the quality check. Press OK. e Press Stop/Exit. 7 Press OK. b Check the quality of the four color blocks a on the sheet. (black/yellow/cyan/magenta) 1 c If all lines are clear and visible, press 1 (Yes) on the dial pad. 5 Check the print quality Important ...
...e Press 1 (Yes), the machine will then start cleaning the colors. c Press a or b to choose Initial Setup. Black OK? f After cleaning is OK for black and color. Poor Poor d The LCD asks you put paper in the upper tray for both black and color, the LCD shows: Start Cleaning? b Press a or b to...d Press a or b to finish the quality check. Press OK. e Press Stop/Exit. 7 Press OK. b Check the quality of the four color blocks a on the sheet. (black/yellow/cyan/magenta) 1 c If all lines are clear and visible, press 1 (Yes) on the dial pad. 5 Check the print quality Important ...

Quick Setup Guide - English
Page 12
c Make sure (Fax) is illuminated in the ADF (Automatic Document Feeder) or face down on the scanner glass. b Put the sheet face up in Blue. 13 Send in the Product Registration and Test Sheet (USA only) You can also register your Product Registration. e Press Black Start. a Fill out the Product Registration and Test Sheet. d Enter the toll-free fax number: 1-877-268-9575. 12 Note You will receive a confirmation fax of your product online using the On-Line Registration link from the installation CD-ROM or visit http://www.brother.com/registration/.
c Make sure (Fax) is illuminated in the ADF (Automatic Document Feeder) or face down on the scanner glass. b Put the sheet face up in Blue. 13 Send in the Product Registration and Test Sheet (USA only) You can also register your Product Registration. e Press Black Start. a Fill out the Product Registration and Test Sheet. d Enter the toll-free fax number: 1-877-268-9575. 12 Note You will receive a confirmation fax of your product online using the On-Line Registration link from the installation CD-ROM or visit http://www.brother.com/registration/.
Quick Setup Guide - English
Page 48
... and the SecureEasySetup logo are trademarks or registered trademarks of Nuance Communications, Inc. Brother reserves the right to make changes without notice. This product includes software developed by Brother. Trademarks The Brother logo is a trademark. PictBridge is a registered trademark of Brother International Corporation. Each company whose software title is mentioned in this manual are trademarks...
... and the SecureEasySetup logo are trademarks or registered trademarks of Nuance Communications, Inc. Brother reserves the right to make changes without notice. This product includes software developed by Brother. Trademarks The Brother logo is a trademark. PictBridge is a registered trademark of Brother International Corporation. Each company whose software title is mentioned in this manual are trademarks...

Software Users Manual - English
Page 23
Color Settings Click the Color Settings button to be printed in black and white using grayscale. Printing 1 1 1 15 Color/Grayscale This selection allows a color document to see options for enhanced print settings.
Color Settings Click the Color Settings button to be printed in black and white using grayscale. Printing 1 1 1 15 Color/Grayscale This selection allows a color document to see options for enhanced print settings.
Software Users Manual - English
Page 48
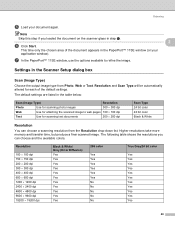
... × 1200 dpi 2400 × 2400 dpi 4800 × 4800 dpi 9600 × 9600 dpi 19200 × 19200 dpi Black & White/ Gray (Error Diffusion) Yes Yes Yes Yes Yes Yes Yes Yes Yes Yes Yes 256 color Yes Yes Yes Yes Yes Yes No No No No No True Gray/24 bit... web pages 100 × 100 dpi Text Use for scanning text documents 200 × 200 dpi Scan Type 24 bit color 24 bit color Black & White Resolution 2 You can choose and the available colors. The default settings are listed in the PaperPort™ 11SE window (or your document again. This time only the chosen...
... × 1200 dpi 2400 × 2400 dpi 4800 × 4800 dpi 9600 × 9600 dpi 19200 × 19200 dpi Black & White/ Gray (Error Diffusion) Yes Yes Yes Yes Yes Yes Yes Yes Yes Yes Yes 256 color Yes Yes Yes Yes Yes Yes No No No No No True Gray/24 bit... web pages 100 × 100 dpi Text Use for scanning text documents 200 × 200 dpi Scan Type 24 bit color 24 bit color Black & White Resolution 2 You can choose and the available colors. The default settings are listed in the PaperPort™ 11SE window (or your document again. This time only the chosen...
Software Users Manual - English
Page 49
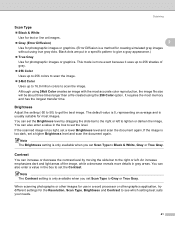
...suits your needs. 41 You can also enter a value in a specific pattern to get the best image. Black dots are put in the box to set the level. Although using 24bit Color creates an image with the most images. Brightness 2 Adjust the setting (-50 to 50) to give a gray...longest transfer time. If the image is a method for creating simulated gray images without using the 256 Color option. When scanning photographs or other images for use in gray areas. Scanning Scan Type 2 „ Black & White Use for text or line art images. „ Gray (Error Diffusion) 2 Use ...
...suits your needs. 41 You can also enter a value in a specific pattern to get the best image. Black dots are put in the box to set the level. Although using 24bit Color creates an image with the most images. Brightness 2 Adjust the setting (-50 to 50) to give a gray...longest transfer time. If the image is a method for creating simulated gray images without using the 256 Color option. When scanning photographs or other images for use in gray areas. Scanning Scan Type 2 „ Black & White Use for text or line art images. „ Gray (Error Diffusion) 2 Use ...
Software Users Manual - English
Page 62
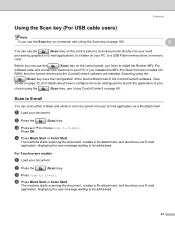
... on the control panel to scan documents directly into your E-mail application, displaying the new message waiting to be addressed. 54 d Press Black Start or Color Start. The machine starts scanning the document, creates a file attachment, and launches your E-mail application, displaying the new message waiting to ...For Touchscreen models 2 a Load your document. Scanning Using the Scan key (For USB cable users) 2 Note If you have to install the Brother MFL-Pro software suite and connect the machine to your PC. a Load your document. b Press the (Scan) key. The machine starts ...
... on the control panel to scan documents directly into your E-mail application, displaying the new message waiting to be addressed. 54 d Press Black Start or Color Start. The machine starts scanning the document, creates a file attachment, and launches your E-mail application, displaying the new message waiting to ...For Touchscreen models 2 a Load your document. Scanning Using the Scan key (For USB cable users) 2 Note If you have to install the Brother MFL-Pro software suite and connect the machine to your PC. a Load your document. b Press the (Scan) key. The machine starts ...
Software Users Manual - English
Page 63
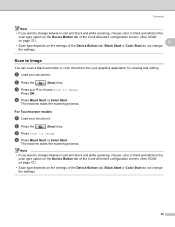
... want to Image. For Touchscreen models 2 a Load your document. Note • If you want to change between color and black and white scanning, choose color or black and white in the scan type option on the Device Button tab of the ControlCenter3 configuration screen. (See SCAN on ...ControlCenter3 configuration screen. (See SCAN on page 72.) 2 • Scan type depends on the settings of the Device Button tab, Black Start or Color Start do not change the settings. The machine starts the scanning process. The machine starts the scanning process. Press OK. b ...
... want to Image. For Touchscreen models 2 a Load your document. Note • If you want to change between color and black and white scanning, choose color or black and white in the scan type option on the Device Button tab of the ControlCenter3 configuration screen. (See SCAN on ...ControlCenter3 configuration screen. (See SCAN on page 72.) 2 • Scan type depends on the settings of the Device Button tab, Black Start or Color Start do not change the settings. The machine starts the scanning process. The machine starts the scanning process. Press OK. b ...


