
Operating Guide
Page 9
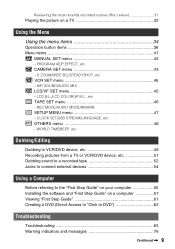
... recorded scenes (Rec review 31 Playing the picture on a computer 57 Viewing "First Step Guide 61 Creating a DVD (Direct Access to "Click to DVD 62 Troubleshooting Troubleshooting 65 Warning indicators and messages 76 Continued , 9 VCR SET menu 45 - CAMERA SET menu 43 - WORLD TIME/BEEP, etc. LCD B.L./LCD COLOR/VF B.L., etc TAPE...
... recorded scenes (Rec review 31 Playing the picture on a computer 57 Viewing "First Step Guide 61 Creating a DVD (Direct Access to "Click to DVD 62 Troubleshooting Troubleshooting 65 Warning indicators and messages 76 Continued , 9 VCR SET menu 45 - CAMERA SET menu 43 - WORLD TIME/BEEP, etc. LCD B.L./LCD COLOR/VF B.L., etc TAPE...
Operating Guide
Page 65
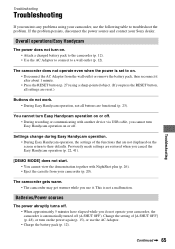
... AC Adaptor. • Charge the battery pack (p. 12). The camcorder does not operate even when the power is set to a wall outlet (p. 12). Continued , 65 Troubleshooting Overall operations/Easy Handycam The power does not turn on . • Disconnect the AC Adaptor from your Sony dealer. Batteries/Power sources The power abruptly turns off . •...
... AC Adaptor. • Charge the battery pack (p. 12). The camcorder does not operate even when the power is set to a wall outlet (p. 12). Continued , 65 Troubleshooting Overall operations/Easy Handycam The power does not turn on . • Disconnect the AC Adaptor from your Sony dealer. Batteries/Power sources The power abruptly turns off . •...
Operating Guide
Page 66
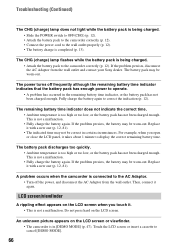
... or close the LCD panel, it . • This is not a malfunction. Troubleshooting (Continued) The CHG (charge) lamp does not light while the battery pack is being charged. • Attach the battery pack to the camcorder correctly (p. 12). The power turns off the power, and disconnect the AC Adaptor... from the wall outlet and contact your Sony dealer. Fully charge the battery again to operate. • A problem has occurred ...
... or close the LCD panel, it . • This is not a malfunction. Troubleshooting (Continued) The CHG (charge) lamp does not light while the battery pack is being charged. • Attach the battery pack to the camcorder correctly (p. 12). The power turns off the power, and disconnect the AC Adaptor... from the wall outlet and contact your Sony dealer. Fully charge the battery again to operate. • A problem has occurred ...
Operating Guide
Page 67
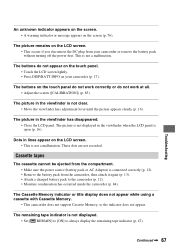
...power first. The picture in the viewfinder when the LCD panel is not a malfunction. Cassette tapes The cassette cannot be ejected from the camcorder, then attach it again (p. 13). • Attach a charged battery pack to always display the remaining tape indicator (p. 47). Dots ... Press DISP/BATT INFO on the LCD screen. • This occurs if you disconnect the DC plug from your camcorder (p. 17). The remaining tape indicator is not a malfunction. Troubleshooting An unknown indicator appears on the screen. • A warning indicator or message appears on the screen (p. 76)....
...power first. The picture in the viewfinder when the LCD panel is not a malfunction. Cassette tapes The cassette cannot be ejected from the camcorder, then attach it again (p. 13). • Attach a charged battery pack to always display the remaining tape indicator (p. 47). Dots ... Press DISP/BATT INFO on the LCD screen. • This occurs if you disconnect the DC plug from your camcorder (p. 17). The remaining tape indicator is not a malfunction. Troubleshooting An unknown indicator appears on the screen. • A warning indicator or message appears on the screen (p. 76)....
Operating Guide
Page 68
... work correctly. • There is nothing recorded on the CAMERA lamp (p. 24). • The tape has reached the end. Remove the cassette and leave your camcorder for auto focus. Adjusting the image during recording" (p. 68). Troubleshooting (Continued) The cassette is not a malfunction.
... work correctly. • There is nothing recorded on the CAMERA lamp (p. 24). • The tape has reached the end. Remove the cassette and leave your camcorder for auto focus. Adjusting the image during recording" (p. 68). Troubleshooting (Continued) The cassette is not a malfunction.

Operating Guide
Page 69
... This is called the smear effect. The color of [EXPOSURE] - [SPOT METER] • The BACK LIGHT function does not work during Easy Handycam operation (p. 23). This is not correctly displayed. • Deactivate the NightShot plus function (p. 26), or cancel the BACK LIGHT function (p. 26... function is bright, and the subject does not appear on the PLAY/EDIT lamp. • Rewind the tape (p. 25). Continued , 69 Troubleshooting [STEADYSHOT] does not function. • Set [STEADYSHOT] to turn on the screen. • Deactivate the NightShot plus function (p. 26). ...
... This is called the smear effect. The color of [EXPOSURE] - [SPOT METER] • The BACK LIGHT function does not work during Easy Handycam operation (p. 23). This is not correctly displayed. • Deactivate the NightShot plus function (p. 26), or cancel the BACK LIGHT function (p. 26... function is bright, and the subject does not appear on the PLAY/EDIT lamp. • Rewind the tape (p. 25). Continued , 69 Troubleshooting [STEADYSHOT] does not function. • Set [STEADYSHOT] to turn on the screen. • Deactivate the NightShot plus function (p. 26). ...
Operating Guide
Page 70
The sound breaks off. • Clean the head using an S VIDEO plug, make sure the red and white plugs of your camcorder (NTSC). is displayed on the screen. • The tape you are grayed out. • You cannot select grayed items in a TV ... recorded on the screen. • The tape was recorded in the current recording/playback situation. Your camcorder is not a malfunction (p. 79). You cannot use [FADER]. • You cannot use [SPOT FOCUS] together with [PROGRAM AE]. Troubleshooting (Continued) No sound or only a low sound is heard. • Set [HiFi SOUND] to...
The sound breaks off. • Clean the head using an S VIDEO plug, make sure the red and white plugs of your camcorder (NTSC). is displayed on the screen. • The tape you are grayed out. • You cannot select grayed items in a TV ... recorded on the screen. • The tape was recorded in the current recording/playback situation. Your camcorder is not a malfunction (p. 79). You cannot use [FADER]. • You cannot use [SPOT FOCUS] together with [PROGRAM AE]. Troubleshooting (Continued) No sound or only a low sound is heard. • Set [HiFi SOUND] to...

Operating Guide
Page 71
...[EXPOSURE]. • You cannot use [EXPOSURE] together with NightShot plus. • If you place the supplied CD-ROM in your camcorder (p. 49). Troubleshooting New sound added to a recorded tape is not heard. • Adjust [AUDIO MIX] from connected devices are not displayed correctly. &#...jack of the connected device. • Set [DISP OUT] to a computer The computer does not recognize your camcorder. • Disconnect the cable from the computer and camcorder, then connect it again securely. • Disconnect USB devices other information appear on the computer. • Disconnect...
...[EXPOSURE]. • You cannot use [EXPOSURE] together with NightShot plus. • If you place the supplied CD-ROM in your camcorder (p. 49). Troubleshooting New sound added to a recorded tape is not heard. • Adjust [AUDIO MIX] from connected devices are not displayed correctly. &#...jack of the connected device. • Set [DISP OUT] to a computer The computer does not recognize your camcorder. • Disconnect the cable from the computer and camcorder, then connect it again securely. • Disconnect USB devices other information appear on the computer. • Disconnect...

Operating Guide
Page 72
...the computer with the USB cable) You cannot view the video recorded on a tape on the Macintosh computer. • When you connect your camcorder to a Macintosh computer using a USB cable, you cannot copy pictures recorded on the screen of the Windows computer during USB Streaming. •...computer with an i.LINK cable and use the standard software in the disc drive of your computer. 72 Troubleshooting (Continued) You cannot view the video your camcorder is connected to your camcorder before the installation of the USB driver was connected to a computer. 2 Right-click [My Computer], ...
...the computer with the USB cable) You cannot view the video recorded on a tape on the Macintosh computer. • When you connect your camcorder to a Macintosh computer using a USB cable, you cannot copy pictures recorded on the screen of the Windows computer during USB Streaming. •...computer with an i.LINK cable and use the standard software in the disc drive of your computer. 72 Troubleshooting (Continued) You cannot view the video your camcorder is connected to your camcorder before the installation of the USB driver was connected to a computer. 2 Right-click [My Computer], ...
Operating Guide
Page 73
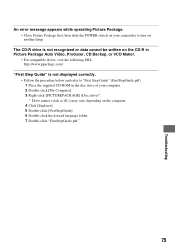
..., 73 The [System Properties] screen appears. 3 Click the [Hardware] tab t [Device Manager] t [View] t [Devices by type]. Troubleshooting 8 Follow the steps below and try to install the USB driver again. 1 Double-click [My Computer]. 2 Right-click [PICTUREPACKAGE] (Disc ...-click [Setup.exe]. • Deleting anything other than [USB Audio Device], [USB Device] and [USB Composite Device] may cause a malfunction of your camcorder is connected to a computer. 2 Right-click [My Computer], then click [Properties]. x For Windows XP Log on as Administrator. 1 Check that your computer...
..., 73 The [System Properties] screen appears. 3 Click the [Hardware] tab t [Device Manager] t [View] t [Devices by type]. Troubleshooting 8 Follow the steps below and try to install the USB driver again. 1 Double-click [My Computer]. 2 Right-click [PICTUREPACKAGE] (Disc ...-click [Setup.exe]. • Deleting anything other than [USB Audio Device], [USB Device] and [USB Composite Device] may cause a malfunction of your camcorder is connected to a computer. 2 Right-click [My Computer], then click [Properties]. x For Windows XP Log on as Administrator. 1 Check that your computer...
Operating Guide
Page 74
...exe]. • Deleting anything other than [USB Composite Device], [USB Audio Device] and [USB Device] may cause a malfunction of your camcorder first. Troubleshooting (Continued) 5 If the devices below are already installed, right-click them, then click [Uninstall] to delete them. - [USB Composite...Change the settings as described in the following procedures: 1 Select [Start] t [Programs]([All Programs] for Windows XP) t [Picture Package] t [Handycam Tools] t [USB Streaming Tool]. 2 Adjust the slider in the (-) direction on [Select video quality]. 3 Follow the on-screen instructions, click ...
...exe]. • Deleting anything other than [USB Composite Device], [USB Audio Device] and [USB Device] may cause a malfunction of your camcorder first. Troubleshooting (Continued) 5 If the devices below are already installed, right-click them, then click [Uninstall] to delete them. - [USB Composite...Change the settings as described in the following procedures: 1 Select [Start] t [Programs]([All Programs] for Windows XP) t [Picture Package] t [Handycam Tools] t [USB Streaming Tool]. 2 Adjust the slider in the (-) direction on [Select video quality]. 3 Follow the on-screen instructions, click ...
Operating Guide
Page 75
... Guide" (FirstStepGuide.pdf). 1 Place the supplied CD-ROM in the disc drive of your camcorder to turn on the computer. 4 Click [Explorer]. 5 Double-click [FirstStepGuide]. 6 Double-click the desired language folder. 7 Double-click "FirstStepGuide.pdf." 75 Troubleshooting An error message appears while operating Picture Package. • Close Picture Package first, then slide...
... Guide" (FirstStepGuide.pdf). 1 Place the supplied CD-ROM in the disc drive of your camcorder to turn on the computer. 4 Click [Explorer]. 5 Double-click [FirstStepGuide]. 6 Double-click the desired language folder. 7 Double-click "FirstStepGuide.pdf." 75 Troubleshooting An error message appears while operating Picture Package. • Close Picture Package first, then slide...

Operating Guide
Page 77
... MIC REC. Use a cleaning cassette. (p. 84) Cannot start Easy Handycam. (p. 22, 65) Cannot cancel Easy Handycam. (p. 22, 65) Cannot start Easy Handycam with USB connected. • You cannot start the Easy Handycam settings while the USB cable is locked - check the tab. (p. 80... the instructions. Old battery. x Battery/Power Use the "InfoLITHIUM" battery pack. (p. 81) Battery level is damaged. Troubleshooting Continued , 77 Disconnect the USB cable from your camcorder first. Description of a tape. (p. 52) Cannot add audio. (p. 52) • You cannot add sound to copyright...
... MIC REC. Use a cleaning cassette. (p. 84) Cannot start Easy Handycam. (p. 22, 65) Cannot cancel Easy Handycam. (p. 22, 65) Cannot start Easy Handycam with USB connected. • You cannot start the Easy Handycam settings while the USB cable is locked - check the tab. (p. 80... the instructions. Old battery. x Battery/Power Use the "InfoLITHIUM" battery pack. (p. 81) Battery level is damaged. Troubleshooting Continued , 77 Disconnect the USB cable from your camcorder first. Description of a tape. (p. 52) Cannot add audio. (p. 52) • You cannot add sound to copyright...

