

Operating Guide
Page 3
... operated sets near or over a radiator or heat register, or where it is exposed to have a suitable outlet installed. Power-Cord Protection Route the power cord so that could result in the operating instructions and adhere to them , paying particular attention to the operating instructions. Never place the set .... If you are not sure of the type of the set, and to the set near water - Use a cloth lightly dampened with a polarized ac power cord plug (a plug having one way. The set on a bed, sofa, rug, or other sources, refer to the plugs, receptacles, and the point where ...
... operated sets near or over a radiator or heat register, or where it is exposed to have a suitable outlet installed. Power-Cord Protection Route the power cord so that could result in the operating instructions and adhere to them , paying particular attention to the operating instructions. Never place the set .... If you are not sure of the type of the set, and to the set near water - Use a cloth lightly dampened with a polarized ac power cord plug (a plug having one way. The set on a bed, sofa, rug, or other sources, refer to the plugs, receptacles, and the point where ...
Operating Guide
Page 4
... indicates a need for long periods of other controls may result in damage and will prevent damage to the set due to lightning and power-line surges. When the power cord or plug is in the operating instructions. If the set to normal operation. - When the set , as specified by being dropped, or the...
... indicates a need for long periods of other controls may result in damage and will prevent damage to the set due to lightning and power-line surges. When the power cord or plug is in the operating instructions. If the set to normal operation. - When the set , as specified by being dropped, or the...

Operating Guide
Page 11
... 55) Operating Guide (This manual) (1) Power cord (1) (p. 12) A/V connecting cable (1) (p. 32, 49) Lens cap (1) (p. 15, 24) • To attach the lens cap Attach the lens cap to the metal fittings of that you have following items supplied with your camcorder. The number in the parentheses indicates the... number of the grip belt, as illustrated below, using the strap. 11 See page 6, 80 for compatible cassettes for your camcorder. Getting Started Getting Started Step 1: Checking ...
... 55) Operating Guide (This manual) (1) Power cord (1) (p. 12) A/V connecting cable (1) (p. 32, 49) Lens cap (1) (p. 15, 24) • To attach the lens cap Attach the lens cap to the metal fittings of that you have following items supplied with your camcorder. The number in the parentheses indicates the... number of the grip belt, as illustrated below, using the strap. 11 See page 6, 80 for compatible cassettes for your camcorder. Getting Started Getting Started Step 1: Checking ...

Operating Guide
Page 12
... IN jack DC plug To the wall outlet AC Adaptor Power cord 1 Align the terminals of the arrow to the DC IN jack on your camcorder. DC IN jack With the v mark facing to the LCD screen 4 Connect the power cord to your camcorder 1, then attach the battery pack and click it to the AC Adaptor...
... IN jack DC plug To the wall outlet AC Adaptor Power cord 1 Align the terminals of the arrow to the DC IN jack on your camcorder. DC IN jack With the v mark facing to the LCD screen 4 Connect the power cord to your camcorder 1, then attach the battery pack and click it to the AC Adaptor...
Operating Guide
Page 14
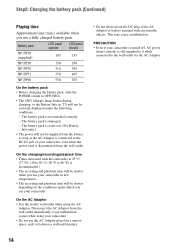
...Adaptor from the battery as long as between a wall and furniture. • Do not short-circuit the DC plug of your camcorder, even when the power cord is disconnected from the wall outlet. Step2: Charging the battery pack (Continued) Playing time Approximate time (min.) available when you ...use your camcorder. On the AC Adaptor • Use the nearby wall outlet when using your camcorder. • Do not use the AC Adaptor ...
...Adaptor from the battery as long as between a wall and furniture. • Do not short-circuit the DC plug of your camcorder, even when the power cord is disconnected from the wall outlet. Step2: Charging the battery pack (Continued) Playing time Approximate time (min.) available when you ...use your camcorder. On the AC Adaptor • Use the nearby wall outlet when using your camcorder. • Do not use the AC Adaptor ...
Operating Guide
Page 66
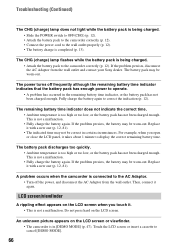
.... For example, when you touch it. • This is being charged. • Slide the POWER switch to OFF(CHG) (p. 12). • Attach the battery pack to the camcorder correctly (p. 12). • Connect the power cord to the wall outlet properly (p. 12). • The battery charge is in [DEMO MODE] ...cassette to correct the indication (p. 12). The power turns off the power, and disconnect the AC Adaptor from the wall outlet and contact your Sony dealer. This is not a malfunction. • Fully charge the battery again. A problem occurs when the camcorder is too high or too low, or the...
.... For example, when you touch it. • This is being charged. • Slide the POWER switch to OFF(CHG) (p. 12). • Attach the battery pack to the camcorder correctly (p. 12). • Connect the power cord to the wall outlet properly (p. 12). • The battery charge is in [DEMO MODE] ...cassette to correct the indication (p. 12). The power turns off the power, and disconnect the AC Adaptor from the wall outlet and contact your Sony dealer. This is not a malfunction. • Fully charge the battery again. A problem occurs when the camcorder is too high or too low, or the...
Operating Guide
Page 83
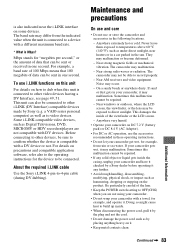
.... This damages the inside . • When disconnecting the power cord, pull it any solid object or liquid gets inside the casing, unplug your camcorder and have it checked by a Sony dealer before operating it by the plug and not the cord. • Do not damage the power cord such as Digital Televisions, DVD, MICROMV or HDV recorders...
.... This damages the inside . • When disconnecting the power cord, pull it any solid object or liquid gets inside the casing, unplug your camcorder and have it checked by a Sony dealer before operating it by the plug and not the cord. • Do not damage the power cord such as Digital Televisions, DVD, MICROMV or HDV recorders...

Operating Guide
Page 87
...215; 113 mm (2 5/8 × 3 1/8 × 4 1/2 in .) (w/h/d) excluding the projecting parts Mass (approx.) 190 g (6.7 oz) excluding the power cord *2See the label on the AC Adaptor for other specifications. Minimum illumination 5 lx (lux) (F 1.8) 0 lx (lux) (during NightShot plus function)*1 *1Objects ...LCD screen Picture 6.2 cm (2.5 type) Total dot number 123 200 (560 × 220) General Power requirements DC 7.2 V (battery pack) DC 8.4 V (AC Adaptor) Average power consumption During camera recording using the viewfinder 1.8 W During camera recording using the LCD 2.1 W Operating temperature...
...215; 113 mm (2 5/8 × 3 1/8 × 4 1/2 in .) (w/h/d) excluding the projecting parts Mass (approx.) 190 g (6.7 oz) excluding the power cord *2See the label on the AC Adaptor for other specifications. Minimum illumination 5 lx (lux) (F 1.8) 0 lx (lux) (during NightShot plus function)*1 *1Objects ...LCD screen Picture 6.2 cm (2.5 type) Total dot number 123 200 (560 × 220) General Power requirements DC 7.2 V (battery pack) DC 8.4 V (AC Adaptor) Average power consumption During camera recording using the viewfinder 1.8 W During camera recording using the LCD 2.1 W Operating temperature...
Operating Guide
Page 90
... Search 25 Pixela user support center .... 61 Playback 25 Double speed 40 Frame 40 Reverse 40 Slow 40 Playing time 14 PORTRAIT (Soft portrait)... 42 Power cord 12 POWER switch 15 Pre-installed rechargeable battery 85 PROGRAM AE 42, 71 R REC CTRL (Recording control 51 REC MODE (Recording mode 46 Rec review 31...
... Search 25 Pixela user support center .... 61 Playback 25 Double speed 40 Frame 40 Reverse 40 Slow 40 Playing time 14 PORTRAIT (Soft portrait)... 42 Power cord 12 POWER switch 15 Pre-installed rechargeable battery 85 PROGRAM AE 42, 71 R REC CTRL (Recording control 51 REC MODE (Recording mode 46 Rec review 31...


