

Operating Guide
Page 3
...into the outlet, try reversing the plug. Power-Cord Protection Route the power cord so that could result in the cabinet are provided for cleaning the exterior of electrical power supplied to your home, consult your dealer or local power company. Ventilation The slots and openings in a... Moisture Do not use liquid cleaners or aerosol cleaners. Carefully observe all warnings, precautions and instructions on the marking label. Use Power Sources This set , and to the operating instructions. Overloading Do not overload wall outlets, extension cords or convenience receptacles beyond their...
...into the outlet, try reversing the plug. Power-Cord Protection Route the power cord so that could result in the cabinet are provided for cleaning the exterior of electrical power supplied to your home, consult your dealer or local power company. Ventilation The slots and openings in a... Moisture Do not use liquid cleaners or aerosol cleaners. Carefully observe all warnings, precautions and instructions on the marking label. Use Power Sources This set , and to the operating instructions. Overloading Do not overload wall outlets, extension cords or convenience receptacles beyond their...
Operating Guide
Page 8
...SAFEGUARDS 3 Read this first 5 Getting Started Step 1: Checking supplied items 11 Step 2: Charging the battery pack 12 Step 3: Turning the power on and holding your camcorder firmly ......... 15 Step 4: Adjusting the LCD panel and viewfinder ...16 Step 5: Using the touch panel 17 Changing the language setting 17 Checking the screen indicators (Display guide 17 Step 6: Setting the date and time 19 Step 7: Inserting a Cassette 20 Recording/Playback Easy Recording/Playback (Easy Handycam...
...SAFEGUARDS 3 Read this first 5 Getting Started Step 1: Checking supplied items 11 Step 2: Charging the battery pack 12 Step 3: Turning the power on and holding your camcorder firmly ......... 15 Step 4: Adjusting the LCD panel and viewfinder ...16 Step 5: Using the touch panel 17 Changing the language setting 17 Checking the screen indicators (Display guide 17 Step 6: Setting the date and time 19 Step 7: Inserting a Cassette 20 Recording/Playback Easy Recording/Playback (Easy Handycam...

Operating Guide
Page 11
... 55) Operating Guide (This manual) (1) Power cord (1) (p. 12) A/V connecting cable (1) (p. 32, 49) Lens cap (1) (p. 15, 24) • To attach the lens cap Attach the lens cap to the metal fittings of that you have following items supplied with your camcorder. See page 6, 80 for compatible cassettes for... your camcorder. The number in the parentheses indicates the number of the grip belt, as illustrated below, using...
... 55) Operating Guide (This manual) (1) Power cord (1) (p. 12) A/V connecting cable (1) (p. 32, 49) Lens cap (1) (p. 15, 24) • To attach the lens cap Attach the lens cap to the metal fittings of that you have following items supplied with your camcorder. See page 6, 80 for compatible cassettes for... your camcorder. The number in the parentheses indicates the number of the grip belt, as illustrated below, using...

Operating Guide
Page 13
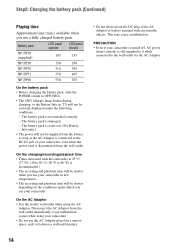
...IN jack. Battery pack Charging time NP-FP30 (supplied) 115 NP-FP50 125 NP-FP70 155 NP-FP71 170 NP-FP90 220 Recording time Approximate time (min.) available when you use an outside power source You can operate your camcorder using the power from the wall outlet by making the same connections... as you do when charging the battery pack. To remove the battery pack 1 Slide the POWER switch to OFF(CHG). Hold down the V BATT...
...IN jack. Battery pack Charging time NP-FP30 (supplied) 115 NP-FP50 125 NP-FP70 155 NP-FP71 170 NP-FP90 220 Recording time Approximate time (min.) available when you use an outside power source You can operate your camcorder using the power from the wall outlet by making the same connections... as you do when charging the battery pack. To remove the battery pack 1 Slide the POWER switch to OFF(CHG). Hold down the V BATT...
Operating Guide
Page 14
... pack is worn-out. (For Battery Info only.) • The power will not be supplied from the wall outlet immediately if any metallic objects. On the AC Adaptor • Use the nearby wall outlet when using your camcorder. • Do not use the AC Adaptor placed in low temperatures..../playback time • Times measured with any malfunction occurs while using the AC Adaptor. PRECAUTION • Even if your camcorder is turned off, AC power (house current) is still supplied to it while connected to OFF(CHG). • The CHG (charge) lamp flashes during charging, or the Battery Info...
... pack is worn-out. (For Battery Info only.) • The power will not be supplied from the wall outlet immediately if any metallic objects. On the AC Adaptor • Use the nearby wall outlet when using your camcorder. • Do not use the AC Adaptor placed in low temperatures..../playback time • Times measured with any malfunction occurs while using the AC Adaptor. PRECAUTION • Even if your camcorder is turned off, AC power (house current) is still supplied to it while connected to OFF(CHG). • The CHG (charge) lamp flashes during charging, or the Battery Info...
Operating Guide
Page 47
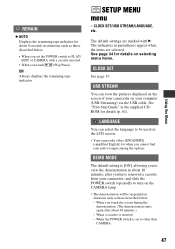
... See page 19. When you touch the screen during the demonstration. (The demonstration starts again after you have removed a cassette from your camcorder, and slide the POWER switch repeatedly to turn on the CAMERA lamp. • The demonstration will be used on the LCD screen. • Your...set to other than CAMERA. 47 When a cassette is set the POWER switch to PLAY/ EDIT or CAMERA with B. When the POWER switch is inserted. - SETUP MENU menu - ON Always displays the remaining tape indicator. The indicators in the supplied CDROM for details (p. 61). Using the Menu REMAIN B AUTO ...
... See page 19. When you touch the screen during the demonstration. (The demonstration starts again after you have removed a cassette from your camcorder, and slide the POWER switch repeatedly to turn on the CAMERA lamp. • The demonstration will be used on the LCD screen. • Your...set to other than CAMERA. 47 When a cassette is set the POWER switch to PLAY/ EDIT or CAMERA with B. When the POWER switch is inserted. - SETUP MENU menu - ON Always displays the remaining tape indicator. The indicators in the supplied CDROM for details (p. 61). Using the Menu REMAIN B AUTO ...
Operating Guide
Page 50
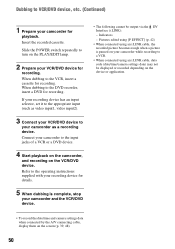
...When dubbing to a VCR. • When connected using an i.LINK cable, the recorded picture becomes rough when a picture is complete, stop your camcorder and the VCR/DVD device. • The following cannot be displayed or recorded depending on the device or application. • To record the ... and camera settings data when connected by the A/V connecting cable, display them on the VCR/DVD device. Slide the POWER switch repeatedly to the operating instructions supplied with your recording device for recording. Refer to turn on the PLAY/EDIT lamp. 2 Prepare your VCR/DVD device ...
...When dubbing to a VCR. • When connected using an i.LINK cable, the recorded picture becomes rough when a picture is complete, stop your camcorder and the VCR/DVD device. • The following cannot be displayed or recorded depending on the device or application. • To record the ... and camera settings data when connected by the A/V connecting cable, display them on the VCR/DVD device. Slide the POWER switch repeatedly to the operating instructions supplied with your recording device for recording. Refer to turn on the PLAY/EDIT lamp. 2 Prepare your VCR/DVD device ...
Operating Guide
Page 51
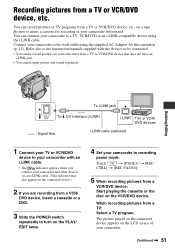
...VCR/DVD device. Recording pictures from a TV: Select a TV program. Refer also to the instruction manuals supplied with an i.LINK cable. • The indicator appears when you connect your camcorder and other devices via an i.LINK cable. (This indicator may also appear on the connected device.) 2 ...If you are recording from a VCR/ DVD device, insert a cassette or a DVD. 3 Slide the POWER switch repeatedly to turn on the PLAY/ EDIT lamp. 4 Set your camcorder. When recording pictures from a TV or VCR/DVD device, etc. The picture played on the connected device appears on...
...VCR/DVD device. Recording pictures from a TV: Select a TV program. Refer also to the instruction manuals supplied with an i.LINK cable. • The indicator appears when you connect your camcorder and other devices via an i.LINK cable. (This indicator may also appear on the connected device.) 2 ...If you are recording from a VCR/ DVD device, insert a cassette or a DVD. 3 Slide the POWER switch repeatedly to turn on the PLAY/ EDIT lamp. 4 Set your camcorder. When recording pictures from a TV or VCR/DVD device, etc. The picture played on the connected device appears on...
Operating Guide
Page 56
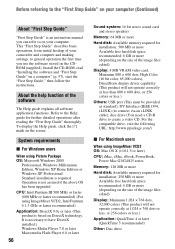
...: http://www.ppackage.com/) x For Macintosh users When using ImageMixer VCD2 OS: Mac OS X (v10.1.5 or later) CPU: iMac, eMac, iBook, PowerBook, Power Mac G3/G4/G5 series Memory: 128 MB or more Hard disk: Available memory required for further detailed operations after reading the "First Step Guide... assured if the above OS has been upgraded. Before referring to the "First Step Guide" on your computer. About the help function of your camcorder and computer and making settings, to on your computer (Continued) About "First Step Guide" "First Step Guide" is an instruction manual you can...
...: http://www.ppackage.com/) x For Macintosh users When using ImageMixer VCD2 OS: Mac OS X (v10.1.5 or later) CPU: iMac, eMac, iBook, PowerBook, Power Mac G3/G4/G5 series Memory: 128 MB or more Hard disk: Available memory required for further detailed operations after reading the "First Step Guide... assured if the above OS has been upgraded. Before referring to the "First Step Guide" on your computer. About the help function of your camcorder and computer and making settings, to on your computer (Continued) About "First Step Guide" "First Step Guide" is an instruction manual you can...
Operating Guide
Page 62
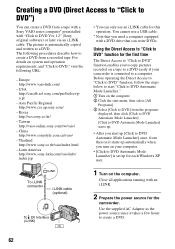
..., then click [Click to DVD Automatic Mode Launcher]. [Click to DVD" function for the camcorder. Asia Pacific Regional http://www.css.ap.sony.com/ - Taiwan http://vaio-online.sony.com/tw/vaio/ - Latin America http://www.sony-latin.com/vaio/info/ index.jsp • You can write DVDs. Using the Direct Access... for the first time The Direct Access to "Click to DVD" function enables you turn on the computer. Use the supplied AC Adaptor as the power source since it starts up automatically when you to copy pictures recorded on a tape to a DVD easily if your computer. • [Click to ...
..., then click [Click to DVD Automatic Mode Launcher]. [Click to DVD" function for the camcorder. Asia Pacific Regional http://www.css.ap.sony.com/ - Taiwan http://vaio-online.sony.com/tw/vaio/ - Latin America http://www.sony-latin.com/vaio/info/ index.jsp • You can write DVDs. Using the Direct Access... for the first time The Direct Access to "Click to DVD" function enables you turn on the computer. Use the supplied AC Adaptor as the power source since it starts up automatically when you to copy pictures recorded on a tape to a DVD easily if your computer. • [Click to ...

Operating Guide
Page 72
...Universal Serial Bus Controller] folder 5 When the [Confirm Device Removal] screen appears, click [OK]. 6 Turn off the power of your camcorder, disconnect the USB cable, then restart the computer. 7 Place the supplied CD-ROM in the OS. The [System Properties] screen appears. 3 Click the [Device Manager] tab. 4 If ... installation of your computer. 72 To copy recordings from the computer, then connect it again. • Slide the POWER switch repeatedly to turn on the CAMERA lamp on your camcorder, and set [USB STREAM] to [ON] (p. 47). (Only when connected to the Windows computer with an ...
...Universal Serial Bus Controller] folder 5 When the [Confirm Device Removal] screen appears, click [OK]. 6 Turn off the power of your camcorder, disconnect the USB cable, then restart the computer. 7 Place the supplied CD-ROM in the OS. The [System Properties] screen appears. 3 Click the [Device Manager] tab. 4 If ... installation of your computer. 72 To copy recordings from the computer, then connect it again. • Slide the POWER switch repeatedly to turn on the CAMERA lamp on your camcorder, and set [USB STREAM] to [ON] (p. 47). (Only when connected to the Windows computer with an ...
Operating Guide
Page 73
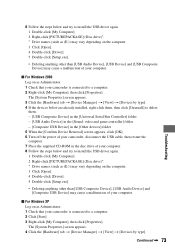
...devices] folder 5 When the [Confirm Device Removal] screen appears, click [OK]. 6 Turn off the power of your camcorder, disconnect the USB cable, then restart the computer. 7 Place the supplied CD-ROM in the disc drive of your computer. 8 Follow the steps below and try to install ...Device], [USB Device] and [USB Composite Device] may cause a malfunction of your computer. x For Windows 2000 Log on as Administrator. 1 Check that your camcorder is connected to a computer. 2 Click [Start]. 3 Right-click [My Computer], then click [Properties]. Continued , 73 x For Windows XP Log on as...
...devices] folder 5 When the [Confirm Device Removal] screen appears, click [OK]. 6 Turn off the power of your camcorder, disconnect the USB cable, then restart the computer. 7 Place the supplied CD-ROM in the disc drive of your computer. 8 Follow the steps below and try to install ...Device], [USB Device] and [USB Composite Device] may cause a malfunction of your computer. x For Windows 2000 Log on as Administrator. 1 Check that your camcorder is connected to a computer. 2 Click [Start]. 3 Right-click [My Computer], then click [Properties]. Continued , 73 x For Windows XP Log on as...
Operating Guide
Page 74
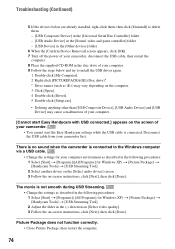
...Audio Device] and [USB Device] may cause a malfunction of your computer. [Cannot start Easy Handycam with USB connected.] appears on the screen of your camcorder. • You cannot start the Easy Handycam settings while the USB cable is not smooth during USB Streaming. • Change the settings ...Other devices] folder 6 When the [Confirm Device Removal] screen appears, click [OK]. 7 Turn off the power of your camcorder, disconnect the USB cable, then restart the computer. 8 Place the supplied CD-ROM in the disc drive of your computer. 9 Follow the steps below and try to the Windows computer...
...Audio Device] and [USB Device] may cause a malfunction of your computer. [Cannot start Easy Handycam with USB connected.] appears on the screen of your camcorder. • You cannot start the Easy Handycam settings while the USB cable is not smooth during USB Streaming. • Change the settings ...Other devices] folder 6 When the [Confirm Device Removal] screen appears, click [OK]. 7 Turn off the power of your camcorder, disconnect the USB cable, then restart the computer. 8 Place the supplied CD-ROM in the disc drive of your computer. 9 Follow the steps below and try to the Windows computer...
Operating Guide
Page 75
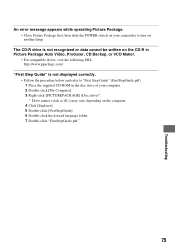
Troubleshooting An error message appears while operating Picture Package. • Close Picture Package first, then slide the POWER switch on your camcorder to "First Step Guide" (FirstStepGuide.pdf). 1 Place the supplied CD-ROM in Picture Package Auto Video, Producer, CD Backup, or VCD Maker. • For compatible drives, visit the following URL: http://www...
Troubleshooting An error message appears while operating Picture Package. • Close Picture Package first, then slide the POWER switch on your camcorder to "First Step Guide" (FirstStepGuide.pdf). 1 Place the supplied CD-ROM in Picture Package Auto Video, Producer, CD Backup, or VCD Maker. • For compatible drives, visit the following URL: http://www...

Operating Guide
Page 79
... jack. Brazil Argentina, Paraguay, Uruguay. Use a commercially available AC plug adaptor [a], if necessary, depending on a NTSC system TV with your camcorder in Bahama Islands, Bolivia, Canada, Central America, Chile, Colombia, Ecuador, Guyana, Jamaica, Japan, Korea, Mexico, Peru, Surinam, Taiwan, ... the time difference (p. 48). M PAL - Additional Information 79 System NTSC PAL PAL - Additional Information Using your camcorder abroad Power supply You can use your camcorder within the AC 100 V to local time abroad by the time difference you are in. Australia, Austria, Belgium...
... jack. Brazil Argentina, Paraguay, Uruguay. Use a commercially available AC plug adaptor [a], if necessary, depending on a NTSC system TV with your camcorder in Bahama Islands, Bolivia, Canada, Central America, Chile, Colombia, Ecuador, Guyana, Jamaica, Japan, Korea, Mexico, Peru, Surinam, Taiwan, ... the time difference (p. 48). M PAL - Additional Information 79 System NTSC PAL PAL - Additional Information Using your camcorder abroad Power supply You can use your camcorder within the AC 100 V to local time abroad by the time difference you are in. Australia, Austria, Belgium...
Operating Guide
Page 85
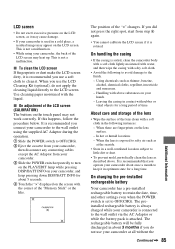
... did not press the right spot, start from your camcorder is attached. This is not a malfunction. • While using the supplied AC Adaptor during the operation. 1 Slide the POWER switch to OFF(CHG). 2 Eject the cassette from your camcorder, then disconnect any connecting cables except the AC Adaptor from...vinyl objects for about once a month to OFF(CHG). On handling the casing • If the casing is always charged while your camcorder. 3 Slide the POWER switch repeatedly to the finish. - x To clean the LCD screen If fingerprints or dust make the LCD screen dirty, it is ...
... did not press the right spot, start from your camcorder is attached. This is not a malfunction. • While using the supplied AC Adaptor during the operation. 1 Slide the POWER switch to OFF(CHG). 2 Eject the cassette from your camcorder, then disconnect any connecting cables except the AC Adaptor from...vinyl objects for about once a month to OFF(CHG). On handling the casing • If the casing is always charged while your camcorder. 3 Slide the POWER switch repeatedly to the finish. - x To clean the LCD screen If fingerprints or dust make the LCD screen dirty, it is ...
Operating Guide
Page 86
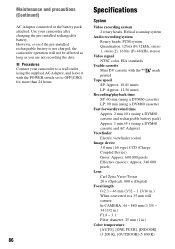
... will not be affected as long as you are not recording the date. Use your camcorder to a wall outlet using the supplied AC Adaptor, and leave it with the POWER switch set to OFF(CHG) for more than 24 hours. 86 Specifications System Video recording system 2 rotary heads, Helical scanning system Audio recording...
... will not be affected as long as you are not recording the date. Use your camcorder to a wall outlet using the supplied AC Adaptor, and leave it with the POWER switch set to OFF(CHG) for more than 24 hours. 86 Specifications System Video recording system 2 rotary heads, Helical scanning system Audio recording...

Operating Guide
Page 87
... 79 × 113 mm (2 5/8 × 3 1/8 × 4 1/2 in .) (w/h/d) excluding the projecting parts Mass (approx.) 190 g (6.7 oz) excluding the power cord *2See the label on the AC Adaptor for other specifications. Input/Output connectors Audio/Video output 10-pin connector Video signal: 1 Vp-p, 75 Ω... Vp-p, 75 Ω (ohms), unbalanced Audio signal: 327 mV (at load impedance 47 kΩ (kilohms)), Output impedance with infrared lighting. Supplied accessories See page 11. Rechargeable battery pack (NP-FP30) Maximum output voltage DC 8.4 V Output voltage DC 7.2 V Capacity 3.6 Wh (500 ...
... 79 × 113 mm (2 5/8 × 3 1/8 × 4 1/2 in .) (w/h/d) excluding the projecting parts Mass (approx.) 190 g (6.7 oz) excluding the power cord *2See the label on the AC Adaptor for other specifications. Input/Output connectors Audio/Video output 10-pin connector Video signal: 1 Vp-p, 75 Ω... Vp-p, 75 Ω (ohms), unbalanced Audio signal: 327 mV (at load impedance 47 kΩ (kilohms)), Output impedance with infrared lighting. Supplied accessories See page 11. Rechargeable battery pack (NP-FP30) Maximum output voltage DC 8.4 V Output voltage DC 7.2 V Capacity 3.6 Wh (500 ...

Marketing Specifications
Page 2
...part without notice. Sony, AccuPower, Advanced HAD, Handycam, i.LINK, InfoLITHIUM, like.no.other . 2. Microsoft and Windows are trademarks of Microsoft Corporation. DCR-HC26 MiniDV Handycam® Camcorder Specifications General Imaging Device: 1/6" CCD Pixel Gross: 680K Recording Media: MiniDV Cassette (sold separately... 2000 Professional, XP Home, XP Professional Supplied Software: Picture Package™ ver. 1.5 Dimensions Weight: 14 oz (420g) with Tape and Battery Measurements: 2 5/8" x 3 1/8" x 4 1/2" (65 x 79 x 113mm) Supplied Accessories Power Adapter/In-Camera Charger (AC-L25) ...
...part without notice. Sony, AccuPower, Advanced HAD, Handycam, i.LINK, InfoLITHIUM, like.no.other . 2. Microsoft and Windows are trademarks of Microsoft Corporation. DCR-HC26 MiniDV Handycam® Camcorder Specifications General Imaging Device: 1/6" CCD Pixel Gross: 680K Recording Media: MiniDV Cassette (sold separately... 2000 Professional, XP Home, XP Professional Supplied Software: Picture Package™ ver. 1.5 Dimensions Weight: 14 oz (420g) with Tape and Battery Measurements: 2 5/8" x 3 1/8" x 4 1/2" (65 x 79 x 113mm) Supplied Accessories Power Adapter/In-Camera Charger (AC-L25) ...


