

Operating Guide
Page 13
... Recording with the other hand. The battery pack will not lose its charge in the direction of the arrow with viewfinder while the LCD panel closed. * Typical recording time shows the time when you repeat recording start/stop, turning the power on/off when the battery is fully charged. ...-FP70 155 NP-FP71 170 NP-FP90 220 Recording time Approximate time (min.) available when you use an outside power source You can operate your camcorder using the power from the wall outlet by making the same connections as you fully charge a fully discharged battery pack. Getting Started 5 The CHG...
... Recording with the other hand. The battery pack will not lose its charge in the direction of the arrow with viewfinder while the LCD panel closed. * Typical recording time shows the time when you repeat recording start/stop, turning the power on/off when the battery is fully charged. ...-FP70 155 NP-FP71 170 NP-FP90 220 Recording time Approximate time (min.) available when you use an outside power source You can operate your camcorder using the power from the wall outlet by making the same connections as you fully charge a fully discharged battery pack. Getting Started 5 The CHG...
Operating Guide
Page 14
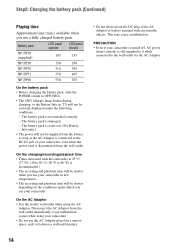
...: Charging the battery pack (Continued) Playing time Approximate time (min.) available when you use your camcorder. Disconnect the AC Adaptor from the wall outlet. This may cause a malfunction. Battery pack LCD panel opened LCD panel closed NP-FP30 (supplied) NP-FP50 105 135 150 190 NP-FP70 310 395 NP-FP71 370...
...: Charging the battery pack (Continued) Playing time Approximate time (min.) available when you use your camcorder. Disconnect the AC Adaptor from the wall outlet. This may cause a malfunction. Battery pack LCD panel opened LCD panel closed NP-FP30 (supplied) NP-FP50 105 135 150 190 NP-FP70 310 395 NP-FP71 370...

Operating Guide
Page 16
... the LCD panel and viewfinder The LCD panel Open the LCD panel 90 degrees to the camcorder (1), then rotate it until the picture is convenient during playback operations. • See ...the picture seen on the LCD screen is poor. Viewfinder 90 degrees (max.) 1 90 degrees to the camcorder • Do not press the buttons on the LCD frame accidentally when you open or adjust the LCD ... the LCD panel 180 degrees to record or play (2). 180 degrees (max.) 2 The viewfinder You can close the LCD panel with the LCD screen facing out. Viewfinder lens adjustment lever Move it to the best angle...
... the LCD panel and viewfinder The LCD panel Open the LCD panel 90 degrees to the camcorder (1), then rotate it until the picture is convenient during playback operations. • See ...the picture seen on the LCD screen is poor. Viewfinder 90 degrees (max.) 1 90 degrees to the camcorder • Do not press the buttons on the LCD frame accidentally when you open or adjust the LCD ... the LCD panel 180 degrees to record or play (2). 180 degrees (max.) 2 The viewfinder You can close the LCD panel with the LCD screen facing out. Viewfinder lens adjustment lever Move it to the best angle...
Operating Guide
Page 20
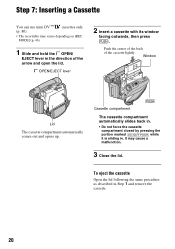
OPEN/EJECT lever 2 Insert a cassette with its window facing outwards, then press . It may cause a malfunction. 3 Close the lid. Push the center of the back of the arrow and open the lid. Step 7: Inserting a Cassette You can use mini DV cassettes only ... cassette compartment automatically comes out and opens up. Cassette compartment The cassette compartment automatically slides back in. • Do not force the cassette compartment closed by pressing the portion marked {DO NOT PUSH} while it is sliding in the direction of the cassette lightly. To eject the cassette Open the...
OPEN/EJECT lever 2 Insert a cassette with its window facing outwards, then press . It may cause a malfunction. 3 Close the lid. Push the center of the back of the arrow and open the lid. Step 7: Inserting a Cassette You can use mini DV cassettes only ... cassette compartment automatically comes out and opens up. Cassette compartment The cassette compartment automatically slides back in. • Do not force the cassette compartment closed by pressing the portion marked {DO NOT PUSH} while it is sliding in the direction of the cassette lightly. To eject the cassette Open the...
Operating Guide
Page 26
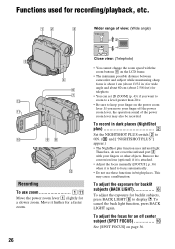
... display .. Therefore, do not cover the infrared port 3 with the zoom buttons qa on the LCD frame. • The minimum possible distance between camcorder and subject while maintaining sharp focus is hard to keep your finger off center subject (SPOT FOCUS 0 See [SPOT FOCUS] on the power zoom lever.... To cancel the back light function, press BACK LIGHT again. Close view: (Telephoto) • You cannot change the zoom speed with your fingers or other objects. If you want to zoom to a level greater ...
... display .. Therefore, do not cover the infrared port 3 with the zoom buttons qa on the LCD frame. • The minimum possible distance between camcorder and subject while maintaining sharp focus is hard to keep your finger off center subject (SPOT FOCUS 0 See [SPOT FOCUS] on the power zoom lever.... To cancel the back light function, press BACK LIGHT again. Close view: (Telephoto) • You cannot change the zoom speed with your fingers or other objects. If you want to zoom to a level greater ...

Operating Guide
Page 34
... TAPE SET REC MODE REMAIN TAPE SET REC MODE SP REMAIN LP TAPE SET REC MODE LP REMAIN EXEC RET. After finishing the settings, touch (close) to select the item, then touch [EXEC]. (The process in step 3 and 4 is the same as that in the direction of [ RET.] takes you do... not have to touch . (Close). Each touch of the arrow repeatedly to turn on PAGE1/PAGE2/PAGE3 during normal operation For details of the items, see page 36. 1 Touch . 2 Touch...
... TAPE SET REC MODE REMAIN TAPE SET REC MODE SP REMAIN LP TAPE SET REC MODE LP REMAIN EXEC RET. After finishing the settings, touch (close) to select the item, then touch [EXEC]. (The process in step 3 and 4 is the same as that in the direction of [ RET.] takes you do... not have to touch . (Close). Each touch of the arrow repeatedly to turn on PAGE1/PAGE2/PAGE3 during normal operation For details of the items, see page 36. 1 Touch . 2 Touch...
Operating Guide
Page 35
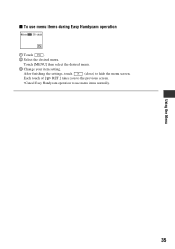
Using the Menu 35 After finishing the settings, touch (close) to use menu items during Easy Handycam operation 60min STBY 0:00:00 FN 1 Touch . 2 Select the desired menu. Touch [MENU] then select the desired menu. 3 Change your item setting. x To use menu items normally. Each touch of [ RET.] takes you to the previous screen. •Cancel Easy Handycam operation to hide the menu screen.
Using the Menu 35 After finishing the settings, touch (close) to use menu items during Easy Handycam operation 60min STBY 0:00:00 FN 1 Touch . 2 Select the desired menu. Touch [MENU] then select the desired menu. 3 Change your item setting. x To use menu items normally. Each touch of [ RET.] takes you to the previous screen. •Cancel Easy Handycam operation to hide the menu screen.
Operating Guide
Page 36
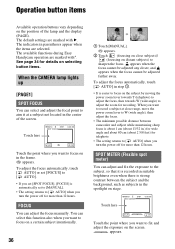
... manually. appears. FOCUS You can adjust and fix the exposure to the subject, so that it at close subjects)/ (focusing on the subject by moving the power zoom lever towards T (telephoto) to adjust the...you turn the power off for more than 12 hours. The available functions during Easy Handycam operation are selected. You can select and adjust the focal point to aim it ...brightness even when there is automatically set [SPOT FOCUS], [FOCUS] is strong contrast between camcorder and subject while maintaining sharp focus is easier to focus on distant subjects) to [ AUTO...
... manually. appears. FOCUS You can adjust and fix the exposure to the subject, so that it at close subjects)/ (focusing on the subject by moving the power zoom lever towards T (telephoto) to adjust the...you turn the power off for more than 12 hours. The available functions during Easy Handycam operation are selected. You can select and adjust the focal point to aim it ...brightness even when there is automatically set [SPOT FOCUS], [FOCUS] is strong contrast between camcorder and subject while maintaining sharp focus is easier to focus on distant subjects) to [ AUTO...
Operating Guide
Page 37
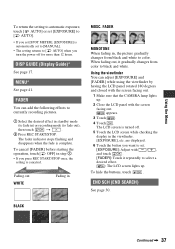
... You can adjust [EXPOSURE] and [FADER] while using the viewfinder by having the LCD panel rotated 180 degrees and closed with the screen facing out. 1 Make sure that the CAMERA lamp lights up. 2 Close the LCD panel with / , and touch . [FADER]: Touch it gradually changes from black and white to select a desired...
... You can adjust [EXPOSURE] and [FADER] while using the viewfinder by having the LCD panel rotated 180 degrees and closed with the screen facing out. 1 Make sure that the CAMERA lamp lights up. 2 Close the LCD panel with / , and touch . [FADER]: Touch it gradually changes from black and white to select a desired...
Operating Guide
Page 38
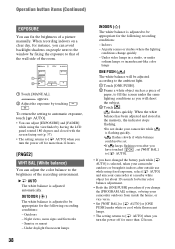
...exposure, touch [ AUTO]. • You can avoid backlight shadows on people next to the window by having the LCD panel rotated 180 degrees and closed with the screen facing out (p. 37). • The setting returns to [ AUTO] when you change quickly - OUTDOOR ( ) The white balance... indoors on a clear day, for instance, you can adjust [EXPOSURE] and [FADER] while using fixed exposure, select [ AUTO] and aim your camcorder while is flashing quickly. • flashes slowly if white balance could not be appropriate for the following recording conditions: - Sunrise or sunset - flashes ...
...exposure, touch [ AUTO]. • You can avoid backlight shadows on people next to the window by having the LCD panel rotated 180 degrees and closed with the screen facing out (p. 37). • The setting returns to [ AUTO] when you change quickly - OUTDOOR ( ) The white balance... indoors on a clear day, for instance, you can adjust [EXPOSURE] and [FADER] while using fixed exposure, select [ AUTO] and aim your camcorder while is flashing quickly. • flashes slowly if white balance could not be appropriate for the following recording conditions: - Sunrise or sunset - flashes ...

Operating Guide
Page 57
... Installing the software and "First Step Guide" on a computer You need to the computer. 2 Turn on a tape to the computer. Close all applications running on the computer before installing the software. 3 Place the supplied CD-ROM in the disc drive of Picture Package is not... OS. Using a Computer The software version of your computer. The installation screen appears. To copy recordings from a tape, connect your camcorder to "First Step Guide." Windows computer: Picture Package (including ImageMixer VCD2) Macintosh computer: ImageMixer VCD2 For the details on your computer before ...
... Installing the software and "First Step Guide" on a computer You need to the computer. 2 Turn on a tape to the computer. Close all applications running on the computer before installing the software. 3 Place the supplied CD-ROM in the disc drive of Picture Package is not... OS. Using a Computer The software version of your computer. The installation screen appears. To copy recordings from a tape, connect your camcorder to "First Step Guide." Windows computer: Picture Package (including ImageMixer VCD2) Macintosh computer: ImageMixer VCD2 For the details on your computer before ...

Operating Guide
Page 60
...]. 9 When the user acceptance screen is listed on the computer. The installation of ImageMixer VCD2 starts. • For details on connecting your camcorder and computer, see "First Step Guide" on the supplied CD-ROM (p. 61). • If you have any questions about Picture Package, contact...to software's on the computer before installing the software. 3 Place the supplied CD-ROM in the disc drive of your name and password. Close all applications running on -line help. Installing the software and "First Step Guide" on a computer (Continued) The computer turns off once,...
...]. 9 When the user acceptance screen is listed on the computer. The installation of ImageMixer VCD2 starts. • For details on connecting your camcorder and computer, see "First Step Guide" on the supplied CD-ROM (p. 61). • If you have any questions about Picture Package, contact...to software's on the computer before installing the software. 3 Place the supplied CD-ROM in the disc drive of your name and password. Close all applications running on -line help. Installing the software and "First Step Guide" on a computer (Continued) The computer turns off once,...
Operating Guide
Page 62
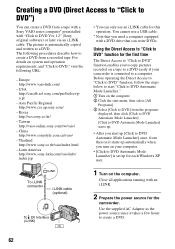
...visit the following procedures describe how to create a DVD from a recorded tape. Close all applications running with "Click to DVD Ver.1.2" (Sony original software) or later via an i.LINK cable. Latin America http://www.sony-latin.com/vaio/info/ index.jsp • You can write DVDs. Asia Pacific.... Creating a DVD (Direct Access to "Click to DVD") You can create a DVD from a tape with a Sony VAIO series computer* preinstalled with an i.LINK. 2 Prepare the power source for the camcorder. The picture is connected to a computer. For details on a tape to a DVD easily if your computer. &#...
...visit the following procedures describe how to create a DVD from a recorded tape. Close all applications running with "Click to DVD Ver.1.2" (Sony original software) or later via an i.LINK cable. Latin America http://www.sony-latin.com/vaio/info/ index.jsp • You can write DVDs. Asia Pacific.... Creating a DVD (Direct Access to "Click to DVD") You can create a DVD from a tape with a Sony VAIO series computer* preinstalled with an i.LINK. 2 Prepare the power source for the camcorder. The picture is connected to a computer. For details on a tape to a DVD easily if your computer. &#...
Operating Guide
Page 66
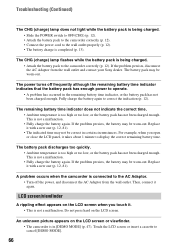
...not been charged enough. Do not press hard on the LCD screen when you open or close the LCD panel, it takes about 1 minute to cancel [DEMO MODE]. 66 The battery...out. This is in certain circumstances. An unknown picture appears on the LCD screen or viewfinder. • The camcorder is not a malfunction. • Fully charge the battery again. Then, connect it . • This ...8226; Attach the battery pack to the camcorder correctly (p. 12). The power turns off the power, and disconnect the AC Adaptor from the wall outlet and contact your Sony dealer. If the problem persists, the ...
...not been charged enough. Do not press hard on the LCD screen when you open or close the LCD panel, it takes about 1 minute to cancel [DEMO MODE]. 66 The battery...out. This is in certain circumstances. An unknown picture appears on the LCD screen or viewfinder. • The camcorder is not a malfunction. • Fully charge the battery again. Then, connect it . • This ...8226; Attach the battery pack to the camcorder correctly (p. 12). The power turns off the power, and disconnect the AC Adaptor from the wall outlet and contact your Sony dealer. If the problem persists, the ...
Operating Guide
Page 67
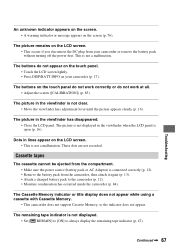
... dots are not recorded. The Cassette Memory indicator or title display does not appear while using a cassette with Cassette Memory. • This camcorder does not support Cassette Memory, so the indicator does not appear. Troubleshooting An unknown indicator appears on the screen. • A warning indicator... 76). The picture is not displayed in the viewfinder has disappeared. • Close the LCD panel. The picture remains on the LCD screen. • This occurs if you disconnect the DC plug from the camcorder, then attach it again (p. 13). • Attach a charged battery pack to...
... dots are not recorded. The Cassette Memory indicator or title display does not appear while using a cassette with Cassette Memory. • This camcorder does not support Cassette Memory, so the indicator does not appear. Troubleshooting An unknown indicator appears on the screen. • A warning indicator... 76). The picture is not displayed in the viewfinder has disappeared. • Close the LCD panel. The picture remains on the LCD screen. • This occurs if you disconnect the DC plug from the camcorder, then attach it again (p. 13). • Attach a charged battery pack to...
Operating Guide
Page 74
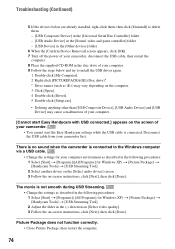
Picture Package does not function correctly. • Close Picture Package, then restart the computer. 74 There is no sound when the camcorder is connected to the Windows computer via a USB cable. • Change the settings for your computer environment as described in ...than [USB Composite Device], [USB Audio Device] and [USB Device] may cause a malfunction of your computer. [Cannot start Easy Handycam with USB connected.] appears on the screen of your camcorder, disconnect the USB cable, then restart the computer. 8 Place the supplied CD-ROM in the following procedures: 1 Select [Start]...
Picture Package does not function correctly. • Close Picture Package, then restart the computer. 74 There is no sound when the camcorder is connected to the Windows computer via a USB cable. • Change the settings for your computer environment as described in ...than [USB Composite Device], [USB Audio Device] and [USB Device] may cause a malfunction of your computer. [Cannot start Easy Handycam with USB connected.] appears on the screen of your camcorder, disconnect the USB cable, then restart the computer. 8 Place the supplied CD-ROM in the following procedures: 1 Select [Start]...
Operating Guide
Page 75
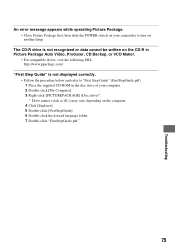
The CD-R drive is not recognized or data cannot be written on the CD-R in the disc drive of your camcorder to "First Step Guide" (FirstStepGuide.pdf). 1 Place the supplied CD-ROM in Picture Package Auto Video, Producer, CD Backup,...Double-click [FirstStepGuide]. 6 Double-click the desired language folder. 7 Double-click "FirstStepGuide.pdf." 75 Troubleshooting An error message appears while operating Picture Package. • Close Picture Package first, then slide the POWER switch on your computer. 2 Double-click [My Computer]. 3 Right-click [PICTUREPACKAGE] (Disc drive)*. * Drive names ...
The CD-R drive is not recognized or data cannot be written on the CD-R in the disc drive of your camcorder to "First Step Guide" (FirstStepGuide.pdf). 1 Place the supplied CD-ROM in Picture Package Auto Video, Producer, CD Backup,...Double-click [FirstStepGuide]. 6 Double-click the desired language folder. 7 Double-click "FirstStepGuide.pdf." 75 Troubleshooting An error message appears while operating Picture Package. • Close Picture Package first, then slide the POWER switch on your computer. 2 Double-click [My Computer]. 3 Right-click [PICTUREPACKAGE] (Disc drive)*. * Drive names ...
Operating Guide
Page 84
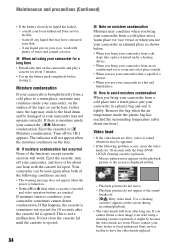
... place, moisture may condense inside your camcorder, on the surface of the following problem occurs, clean the video heads for a long time • Periodically turn off any liquid gets in blue. - Do not close the cassette lid until the cassette is displayed in your local authorized Sony service facility. - Playback pictures do not...
... place, moisture may condense inside your camcorder, on the surface of the following problem occurs, clean the video heads for a long time • Periodically turn off any liquid gets in blue. - Do not close the cassette lid until the cassette is displayed in your local authorized Sony service facility. - Playback pictures do not...

Marketing Specifications
Page 1
...for pure digital transfer between two compatible devices. Fader Effect(s) Enhance your videos with Sony's Picture Effect Modes. Choose from Black, Mosaic, Monotone and White. Effects available...close up to 10 feet away using the LCD screen or in overhead or low angle shots Stamina® Battery Power Management System3 Using the optional NP-FP90 InfoLITHIUM® Battery, the DCR-HC26... Digital Zoom Interpolation means that extreme digital zooming is easy with the compact DCR-HC26 MiniDV Handycam camcorder. The high resolution 123K pixel LCD screen rotates up to 500 lines of...
...for pure digital transfer between two compatible devices. Fader Effect(s) Enhance your videos with Sony's Picture Effect Modes. Choose from Black, Mosaic, Monotone and White. Effects available...close up to 10 feet away using the LCD screen or in overhead or low angle shots Stamina® Battery Power Management System3 Using the optional NP-FP90 InfoLITHIUM® Battery, the DCR-HC26... Digital Zoom Interpolation means that extreme digital zooming is easy with the compact DCR-HC26 MiniDV Handycam camcorder. The high resolution 123K pixel LCD screen rotates up to 500 lines of...


