

Operating Guide
Page 3
..., try reversing the plug. Do not use attachments not recommended by the manufacturer, as a bookcase, or built-in . Accessories Do not place the set from battery power, or other materials. - Carefully observe all warnings, precautions and instructions on an unstable cart, stand, tripod, bracket, or table. If you are provided for...
..., try reversing the plug. Do not use attachments not recommended by the manufacturer, as a bookcase, or built-in . Accessories Do not place the set from battery power, or other materials. - Carefully observe all warnings, precautions and instructions on an unstable cart, stand, tripod, bracket, or table. If you are provided for...
Operating Guide
Page 5
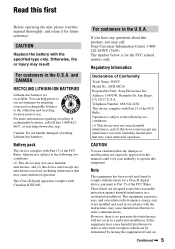
... limits for future reference. Note This equipment has been tested and found to radio communications. CAUTION Replace the battery with Canadian ICES-003. Regulatory Information Declaration of Conformity Trade Name: SONY Model No.: DCR-HC26 Responsible Party: Sony Electronics Inc. You can help preserve our environment by turning the equipment off and on, Continued , 5 Otherwise...
... limits for future reference. Note This equipment has been tested and found to radio communications. CAUTION Replace the battery with Canadian ICES-003. Regulatory Information Declaration of Conformity Trade Name: SONY Model No.: DCR-HC26 Responsible Party: Sony Electronics Inc. You can help preserve our environment by turning the equipment off and on, Continued , 5 Otherwise...
Operating Guide
Page 6
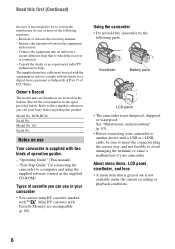
...software (stored on a circuit different from that is grayed out is not dustproof, dripproof or waterproof. Viewfinder Battery pack LCD panel • The camcorder is not available under the current recording or playback conditions. 6 See "Maintenance and precautions" (p. 83). • Before...Record the serial number in your camcorder to another device with Cassette Memory are located on use mini DV cassettes marked with two kinds of FCC Rules. AC- "Operating Guide" (This manual) - Reorient or relocate the receiving antenna. - DCR-HC26 Serial No. Serial No. Read...
...software (stored on a circuit different from that is grayed out is not dustproof, dripproof or waterproof. Viewfinder Battery pack LCD panel • The camcorder is not available under the current recording or playback conditions. 6 See "Maintenance and precautions" (p. 83). • Before...Record the serial number in your camcorder to another device with Cassette Memory are located on use mini DV cassettes marked with two kinds of FCC Rules. AC- "Operating Guide" (This manual) - Reorient or relocate the receiving antenna. - DCR-HC26 Serial No. Serial No. Read...
Operating Guide
Page 8
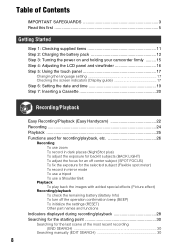
... 3 Read this first 5 Getting Started Step 1: Checking supplied items 11 Step 2: Charging the battery pack 12 Step 3: Turning the power on and holding your camcorder firmly ......... 15 Step 4: Adjusting the LCD panel and viewfinder 16 Step 5: Using the touch panel... 17 Changing the language setting 17 Checking the screen indicators (Display guide 17 Step 6: Setting the date and time 19 Step 7: Inserting a Cassette 20 Recording/Playback Easy Recording/Playback (Easy Handycam...
... 3 Read this first 5 Getting Started Step 1: Checking supplied items 11 Step 2: Charging the battery pack 12 Step 3: Turning the power on and holding your camcorder firmly ......... 15 Step 4: Adjusting the LCD panel and viewfinder 16 Step 5: Using the touch panel... 17 Changing the language setting 17 Checking the screen indicators (Display guide 17 Step 6: Setting the date and time 19 Step 7: Inserting a Cassette 20 Recording/Playback Easy Recording/Playback (Easy Handycam...

Operating Guide
Page 10
Additional Information Using your camcorder abroad 79 Usable cassette tapes 80 About the "InfoLITHIUM" battery pack 81 About i.LINK 82 Maintenance and precautions 83 Specifications 86 Index ...89 10
Additional Information Using your camcorder abroad 79 Usable cassette tapes 80 About the "InfoLITHIUM" battery pack 81 About i.LINK 82 Maintenance and precautions 83 Specifications 86 Index ...89 10

Operating Guide
Page 11
...battery pack NP-FP30 (1) (p. 12, 81) CD-ROM "Picture Package Ver.1.5.1" (1) (p. 55) Operating Guide (This manual) (1) Power cord (1) (p. 12) A/V connecting cable (1) (p. 32, 49) Lens cap (1) (p. 15, 24) • To attach the lens cap Attach the lens cap to the metal fittings of that you have following items supplied with your camcorder.... The number in the parentheses indicates the number of the grip belt, as illustrated below, using the strap. 11 See page 6, 80 for compatible cassettes for your camcorder. Getting Started Getting Started...
...battery pack NP-FP30 (1) (p. 12, 81) CD-ROM "Picture Package Ver.1.5.1" (1) (p. 55) Operating Guide (This manual) (1) Power cord (1) (p. 12) A/V connecting cable (1) (p. 32, 49) Lens cap (1) (p. 15, 24) • To attach the lens cap Attach the lens cap to the metal fittings of that you have following items supplied with your camcorder.... The number in the parentheses indicates the number of the grip belt, as illustrated below, using the strap. 11 See page 6, 80 for compatible cassettes for your camcorder. Getting Started Getting Started...

Operating Guide
Page 12
... to OFF(CHG) (The default setting). Step 2: Charging the battery pack You can charge the "InfoLITHIUM" battery pack (P series) (p. 81) after attaching it into place 2. 2 3 Connect the AC Adaptor to the DC IN jack on your camcorder. POWER switch 2 Slide the POWER switch in the direction of... the battery pack and your camcorder 1, then attach the battery pack and click it ...
... to OFF(CHG) (The default setting). Step 2: Charging the battery pack You can charge the "InfoLITHIUM" battery pack (P series) (p. 81) after attaching it into place 2. 2 3 Connect the AC Adaptor to the DC IN jack on your camcorder. POWER switch 2 Slide the POWER switch in the direction of... the battery pack and your camcorder 1, then attach the battery pack and click it ...

Operating Guide
Page 13
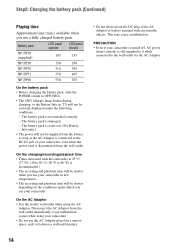
...FP71 170 NP-FP90 220 Recording time Approximate time (min.) available when you repeat recording start/stop, turning the power on/off when the battery is fully charged. Bottom: Recording with viewfinder while the LCD panel closed. * Typical recording time shows the time when you use an ...outside power source You can operate your camcorder using the power from the wall outlet by making the same connections as you fully charge a fully discharged battery pack. To remove the battery pack 1 Slide the POWER switch to OFF(CHG). Charging time Approximate time...
...FP71 170 NP-FP90 220 Recording time Approximate time (min.) available when you repeat recording start/stop, turning the power on/off when the battery is fully charged. Bottom: Recording with viewfinder while the LCD panel closed. * Typical recording time shows the time when you use an ...outside power source You can operate your camcorder using the power from the wall outlet by making the same connections as you fully charge a fully discharged battery pack. To remove the battery pack 1 Slide the POWER switch to OFF(CHG). Charging time Approximate time...
Operating Guide
Page 14
...°F) is disconnected from the wall outlet. Disconnect the AC Adaptor from the battery as long as between a wall and furniture. • Do not short-circuit the DC plug of your camcorder, even when the power cord is recommended.) • The recording and playback ...under which you use a fully charged battery pack. This may cause a malfunction. Step2: Charging the battery pack (Continued) Playing time Approximate time (min.) available when you use your camcorder. The battery pack is not attached correctly. - The battery pack is worn-out. (For Battery Info only.) • The power...
...°F) is disconnected from the wall outlet. Disconnect the AC Adaptor from the battery as long as between a wall and furniture. • Do not short-circuit the DC plug of your camcorder, even when the power cord is recommended.) • The recording and playback ...under which you use a fully charged battery pack. This may cause a malfunction. Step2: Charging the battery pack (Continued) Playing time Approximate time (min.) available when you use your camcorder. The battery pack is not attached correctly. - The battery pack is worn-out. (For Battery Info only.) • The power...
Operating Guide
Page 15
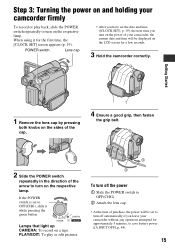
... green button. If the POWER switch is set to save battery power ([A.SHUT OFF], p. 48). 15 PLAY/EDIT: To play back, slide the POWER switch repeatedly to turn on the respective lamp. Step 3: Turning the power on and holding your camcorder firmly To record or play or edit pictures. 4 1 ... fasten the grip belt. 2 Slide the POWER switch repeatedly in the direction of your camcorder without any operation attempted for approximately 5 minutes, to OFF(CHG), slide it for a few seconds. 3 Hold the camcorder correctly. Lamps that light up CAMERA: To record on the LCD screen for the first...
... green button. If the POWER switch is set to save battery power ([A.SHUT OFF], p. 48). 15 PLAY/EDIT: To play back, slide the POWER switch repeatedly to turn on the respective lamp. Step 3: Turning the power on and holding your camcorder firmly To record or play or edit pictures. 4 1 ... fasten the grip belt. 2 Slide the POWER switch repeatedly in the direction of your camcorder without any operation attempted for approximately 5 minutes, to OFF(CHG), slide it for a few seconds. 3 Hold the camcorder correctly. Lamps that light up CAMERA: To record on the LCD screen for the first...

Operating Guide
Page 16
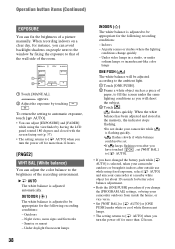
... panel with the LCD screen facing out. Step 4: Adjusting the LCD panel and viewfinder The LCD panel Open the LCD panel 90 degrees to the camcorder (1), then rotate it until the picture is clear. • You can adjust the brightness of the viewfinder backlight by selecting [VF B.L.] (p. 45). (LCD/...VF SET) - • You can adjust the [FADER] and the [EXPOSURE] setting using the viewfinder to avoid wearing down the battery, or when the picture seen on the LCD frame accidentally when you open or adjust the LCD panel. • If you rotate the LCD panel...
... panel with the LCD screen facing out. Step 4: Adjusting the LCD panel and viewfinder The LCD panel Open the LCD panel 90 degrees to the camcorder (1), then rotate it until the picture is clear. • You can adjust the brightness of the viewfinder backlight by selecting [VF B.L.] (p. 45). (LCD/...VF SET) - • You can adjust the [FADER] and the [EXPOSURE] setting using the viewfinder to avoid wearing down the battery, or when the picture seen on the LCD frame accidentally when you open or adjust the LCD panel. • If you rotate the LCD panel...
Operating Guide
Page 19
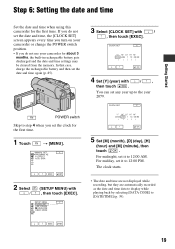
Step 6: Setting the date and time Getting Started Set the date and time when using this camcorder for about 3 months, the built-in rechargeable battery gets discharged and the date and time settings may be cleared from the memory. SETUP MENU CLOCK SET USB STREAM LANGUAGE DEMO ..., then touch [EXEC]. CLOCK SET Y MDHM 2 0 0 6 J A N 1 1 2 : 0 0 AM OK 5 Set [M] (month), [D] (day), [H] (hour) and [M] (minute), then touch . If you do not use your camcorder or change the POWER switch position. • If you set it to 12:00 AM. You can set the date and time again (p. 85). For...
Step 6: Setting the date and time Getting Started Set the date and time when using this camcorder for about 3 months, the built-in rechargeable battery gets discharged and the date and time settings may be cleared from the memory. SETUP MENU CLOCK SET USB STREAM LANGUAGE DEMO ..., then touch [EXEC]. CLOCK SET Y MDHM 2 0 0 6 J A N 1 1 2 : 0 0 AM OK 5 Set [M] (month), [D] (day), [H] (hour) and [M] (minute), then touch . If you do not use your camcorder or change the POWER switch position. • If you set it to 12:00 AM. You can set the date and time again (p. 85). For...
Operating Guide
Page 27
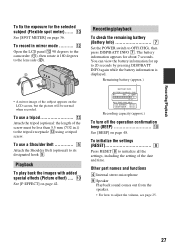
....) BATTERY INFO BATTERY CHARGE LEVEL 0% 50% 100% REC TIME AVAILABLE LCD SCREEN : 86 min VIEWFINDER : 99 min Recording capacity (approx.) To turn off the operation confirmation beep (BEEP 0 See [BEEP] on page 42. Recording/Playback To fix the exposure for about 7 seconds. qs Open the LCD panel qs 90 degrees to the camcorder...
....) BATTERY INFO BATTERY CHARGE LEVEL 0% 50% 100% REC TIME AVAILABLE LCD SCREEN : 86 min VIEWFINDER : 99 min Recording capacity (approx.) To turn off the operation confirmation beep (BEEP 0 See [BEEP] on page 42. Recording/Playback To fix the exposure for about 7 seconds. qs Open the LCD panel qs 90 degrees to the camcorder...
Operating Guide
Page 28
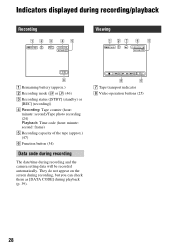
Indicators displayed during recording/playback Recording 12 3 4 5 Viewing 1 27 4 5 6 A Remaining battery (approx.) B Recording mode (SP or LP) (46) C Recording status ([STBY] (standby) or [REC] (recording)) D Recording: Tape counter (hour: minute: second)/Tape photo recording (24) Playback: ...
Indicators displayed during recording/playback Recording 12 3 4 5 Viewing 1 27 4 5 6 A Remaining battery (approx.) B Recording mode (SP or LP) (46) C Recording status ([STBY] (standby) or [REC] (recording)) D Recording: Tape counter (hour: minute: second)/Tape photo recording (24) Playback: ...
Operating Guide
Page 38
... setting to automatic exposure, touch [ AUTO]. • You can adjust [EXPOSURE] and [FADER] while using fixed exposure, select [ AUTO] and aim your camcorder at a nearby white object for about 10 seconds for the following recording conditions: - Night views, neon signs and fireworks - Sunrise or sunset - Under daylight ... recording environment. OUTDOOR ( ) The white balance is adjusted to be set [WHT BAL] to [ AUTO]. • If you have changed the battery pack while [ AUTO] is adjusted automatically. Indoors - AL EXPOSURE 2 1 Touch [MANUAL]. Outdoors - flashes quickly.
... setting to automatic exposure, touch [ AUTO]. • You can adjust [EXPOSURE] and [FADER] while using fixed exposure, select [ AUTO] and aim your camcorder at a nearby white object for about 10 seconds for the following recording conditions: - Night views, neon signs and fireworks - Sunrise or sunset - Under daylight ... recording environment. OUTDOOR ( ) The white balance is adjusted to be set [WHT BAL] to [ AUTO]. • If you have changed the battery pack while [ AUTO] is adjusted automatically. Indoors - AL EXPOSURE 2 1 Touch [MANUAL]. Outdoors - flashes quickly.
Operating Guide
Page 45
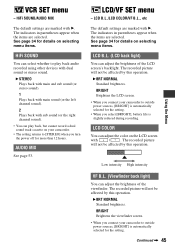
...B.L. (Viewfinder back light) You can adjust the brightness of the viewfinder. BRIGHT Brightens the viewfinder screen. • When you connect your camcorder to outside power sources, [BRIGHT] is automatically selected for the setting. • When you turn the power off for details on your... settings are marked with sub sound (or the right channel sound). • You can select whether to [STEREO] when you select [BRIGHT], battery life is automatically selected for details on selecting menu items. HiFi SOUND You can play back, but cannot record a dual sound track cassette on ...
...B.L. (Viewfinder back light) You can adjust the brightness of the viewfinder. BRIGHT Brightens the viewfinder screen. • When you connect your camcorder to outside power sources, [BRIGHT] is automatically selected for the setting. • When you turn the power off for details on your... settings are marked with sub sound (or the right channel sound). • You can select whether to [STEREO] when you select [BRIGHT], battery life is automatically selected for details on selecting menu items. HiFi SOUND You can play back, but cannot record a dual sound track cassette on ...
Operating Guide
Page 46
... mode on one tape, the playback picture may be distorted or the time code may be interrupted when you play back the tape on other camcorders or VCRs. • When you select [BRIGHT], battery life is slightly reduced during recording. The indicators in the SP (Standard Play) mode on a cassette.
... mode on one tape, the playback picture may be distorted or the time code may be interrupted when you play back the tape on other camcorders or VCRs. • When you select [BRIGHT], battery life is slightly reduced during recording. The indicators in the SP (Standard Play) mode on a cassette.
Operating Guide
Page 65
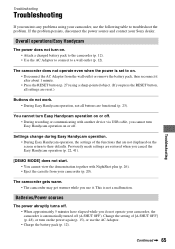
... the AC Adaptor. • Charge the battery pack (p. 12). Overall operations/Easy Handycam The power does not turn on . • Disconnect the AC Adaptor from your camcorder, the camcorder is not a malfunction. The camcorder gets warm. • The camcorder may get warmer while you run into any... with NightShot plus (p. 26). • Eject the cassette from the wall outlet or remove the battery pack, then reconnect it . Continued , 65 Troubleshooting Troubleshooting Troubleshooting If you use it after about 1 minute. • Press the RESET button (p. 27) using your Sony dealer.
... the AC Adaptor. • Charge the battery pack (p. 12). Overall operations/Easy Handycam The power does not turn on . • Disconnect the AC Adaptor from your camcorder, the camcorder is not a malfunction. The camcorder gets warm. • The camcorder may get warmer while you run into any... with NightShot plus (p. 26). • Eject the cassette from the wall outlet or remove the battery pack, then reconnect it . Continued , 65 Troubleshooting Troubleshooting Troubleshooting If you use it after about 1 minute. • Press the RESET button (p. 27) using your Sony dealer.
Operating Guide
Page 66
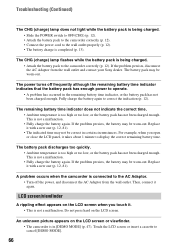
... has not been charged enough. Troubleshooting (Continued) The CHG (charge) lamp does not light while the battery pack is being charged. • Attach the battery pack to the camcorder correctly (p. 12). Replace it with a new one (p. 12, 81). • The indicated time may be worn-out. Replace it ...the LCD panel, it again. The power turns off the power, and disconnect the AC Adaptor from the wall outlet and contact your Sony dealer. The battery pack discharges too quickly. • Ambient temperature is completed (p. 13). Touch the LCD screen or insert a cassette to correct the...
... has not been charged enough. Troubleshooting (Continued) The CHG (charge) lamp does not light while the battery pack is being charged. • Attach the battery pack to the camcorder correctly (p. 12). Replace it with a new one (p. 12, 81). • The indicated time may be worn-out. Replace it ...the LCD panel, it again. The power turns off the power, and disconnect the AC Adaptor from the wall outlet and contact your Sony dealer. The battery pack discharges too quickly. • Ambient temperature is completed (p. 13). Touch the LCD screen or insert a cassette to correct the...
Operating Guide
Page 67
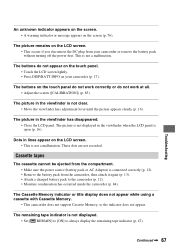
... indicator is not displayed. • Set [ REMAIN] to [ON] to the camcorder (p. 12). • Moisture condensation has occurred inside the camcorder (p. 84). This is connected correctly (p. 12). • Remove the battery pack from the camcorder, then attach it again (p. 13). • Attach a charged battery pack to always display the remaining tape indicator (p. 47). Troubleshooting An...
... indicator is not displayed. • Set [ REMAIN] to [ON] to the camcorder (p. 12). • Moisture condensation has occurred inside the camcorder (p. 84). This is connected correctly (p. 12). • Remove the battery pack from the camcorder, then attach it again (p. 13). • Attach a charged battery pack to always display the remaining tape indicator (p. 47). Troubleshooting An...


