

Operating Guide
Page 3
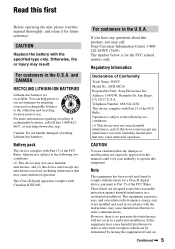
... plug fully into the set should still fail to fit, contact your electrician to have a suitable outlet installed. For those sets designed to operate from battery power, or other similar surface. - Never spill liquid of electrical power supplied to your home, consult your dealer or local power company. for cleaning the...
... plug fully into the set should still fail to fit, contact your electrician to have a suitable outlet installed. For those sets designed to operate from battery power, or other similar surface. - Never spill liquid of electrical power supplied to your home, consult your dealer or local power company. for cleaning the...
Operating Guide
Page 5
...with the specified type only. Note This equipment has been tested and found to Part 15 of rechargeable batteries, call : Sony Customer Information Center 1-800222-SONY (7669). This equipment generates, uses, and can be determined by returning your authority to the following ... radio frequency energy and, if not installed and used rechargeable batteries to radio communications. This Class B digital apparatus complies with Part 15 of Conformity Trade Name: SONY Model No.: DCR-HC26 Responsible Party: Sony Electronics Inc. You can help preserve our environment by turning...
...with the specified type only. Note This equipment has been tested and found to Part 15 of rechargeable batteries, call : Sony Customer Information Center 1-800222-SONY (7669). This equipment generates, uses, and can be determined by returning your authority to the following ... radio frequency energy and, if not installed and used rechargeable batteries to radio communications. This Class B digital apparatus complies with Part 15 of Conformity Trade Name: SONY Model No.: DCR-HC26 Responsible Party: Sony Electronics Inc. You can help preserve our environment by turning...
Operating Guide
Page 6
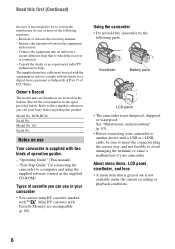
...is not available under the current recording or playback conditions. 6 Read this product. DCR-HC26 Serial No. Notes on the supplied CD-ROM) Types of cassette you call your camcorder to another device with the limits for a digital device pursuant to a computer and...83). • Before connecting your Sony dealer regarding this first (Continued) the user is encouraged to try to these numbers whenever you can use Your camcorder is not dustproof, dripproof or waterproof. Viewfinder Battery pack LCD panel • The camcorder is supplied with . Increase the separation...
...is not available under the current recording or playback conditions. 6 Read this product. DCR-HC26 Serial No. Notes on the supplied CD-ROM) Types of cassette you call your camcorder to another device with the limits for a digital device pursuant to a computer and...83). • Before connecting your Sony dealer regarding this first (Continued) the user is encouraged to try to these numbers whenever you can use Your camcorder is not dustproof, dripproof or waterproof. Viewfinder Battery pack LCD panel • The camcorder is supplied with . Increase the separation...
Operating Guide
Page 8
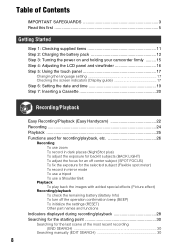
... 3 Read this first 5 Getting Started Step 1: Checking supplied items 11 Step 2: Charging the battery pack 12 Step 3: Turning the power on and holding your camcorder firmly ......... 15 Step 4: Adjusting the LCD panel and viewfinder 16 Step 5: Using the touch panel... 17 Changing the language setting 17 Checking the screen indicators (Display guide 17 Step 6: Setting the date and time 19 Step 7: Inserting a Cassette 20 Recording/Playback Easy Recording/Playback (Easy Handycam...
... 3 Read this first 5 Getting Started Step 1: Checking supplied items 11 Step 2: Charging the battery pack 12 Step 3: Turning the power on and holding your camcorder firmly ......... 15 Step 4: Adjusting the LCD panel and viewfinder 16 Step 5: Using the touch panel... 17 Changing the language setting 17 Checking the screen indicators (Display guide 17 Step 6: Setting the date and time 19 Step 7: Inserting a Cassette 20 Recording/Playback Easy Recording/Playback (Easy Handycam...

Operating Guide
Page 10
Additional Information Using your camcorder abroad 79 Usable cassette tapes 80 About the "InfoLITHIUM" battery pack 81 About i.LINK 82 Maintenance and precautions 83 Specifications 86 Index ...89 10
Additional Information Using your camcorder abroad 79 Usable cassette tapes 80 About the "InfoLITHIUM" battery pack 81 About i.LINK 82 Maintenance and precautions 83 Specifications 86 Index ...89 10

Operating Guide
Page 11
... not supplied. The number in the parentheses indicates the number of the grip belt, as illustrated below, using the strap. 11 AC Adaptor (1) (p. 12) Rechargeable battery pack NP-FP30 (1) (p. 12, 81) CD-ROM "Picture Package Ver.1.5.1" (1) (p. 55) Operating Guide (This manual) (1) Power cord (1) (p. 12) A/V connecting cable (1) (p. 32, 49) Lens cap (1) (p. 15..., 24) • To attach the lens cap Attach the lens cap to the metal fittings of that you have following items supplied with your camcorder. See page 6, 80 for compatible cassettes for your...
... not supplied. The number in the parentheses indicates the number of the grip belt, as illustrated below, using the strap. 11 AC Adaptor (1) (p. 12) Rechargeable battery pack NP-FP30 (1) (p. 12, 81) CD-ROM "Picture Package Ver.1.5.1" (1) (p. 55) Operating Guide (This manual) (1) Power cord (1) (p. 12) A/V connecting cable (1) (p. 32, 49) Lens cap (1) (p. 15..., 24) • To attach the lens cap Attach the lens cap to the metal fittings of that you have following items supplied with your camcorder. See page 6, 80 for compatible cassettes for your...

Operating Guide
Page 12
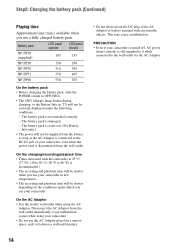
... starts. 12 DC IN jack With the v mark facing to the LCD screen 4 Connect the power cord to your camcorder. Step 2: Charging the battery pack You can charge the "InfoLITHIUM" battery pack (P series) (p. 81) after attaching it into place 2. 2 3 Connect the AC Adaptor to the DC IN... jack on your camcorder. POWER switch 2 Slide the POWER switch in the direction of the battery pack and your camcorder 1, then attach the battery pack and click it ...
... starts. 12 DC IN jack With the v mark facing to the LCD screen 4 Connect the power cord to your camcorder. Step 2: Charging the battery pack You can charge the "InfoLITHIUM" battery pack (P series) (p. 81) after attaching it into place 2. 2 3 Connect the AC Adaptor to the DC IN... jack on your camcorder. POWER switch 2 Slide the POWER switch in the direction of the battery pack and your camcorder 1, then attach the battery pack and click it ...

Operating Guide
Page 13
...(min.) available when you use an outside power source You can operate your camcorder using the power from the wall outlet by making the same connections as you do when charging the battery pack. Battery pack Continuous recording time Typical recording time* NP-FP30 (supplied) 95 45 ...Adaptor from the DC IN jack holding both the camcorder and the DC plug. POWER switch 1 2 V BATT (battery) release lever When storing the battery pack Fully discharge the battery before storing it for an extended period (p. 81). Hold down the V BATT(battery) release lever with the other hand. Bottom: ...
...(min.) available when you use an outside power source You can operate your camcorder using the power from the wall outlet by making the same connections as you do when charging the battery pack. Battery pack Continuous recording time Typical recording time* NP-FP30 (supplied) 95 45 ...Adaptor from the DC IN jack holding both the camcorder and the DC plug. POWER switch 1 2 V BATT (battery) release lever When storing the battery pack Fully discharge the battery before storing it for an extended period (p. 81). Hold down the V BATT(battery) release lever with the other hand. Bottom: ...
Operating Guide
Page 14
...immediately if any malfunction occurs while using the AC Adaptor. This may cause a malfunction. The battery pack is not attached correctly. - Disconnect the AC Adaptor from the wall outlet. PRECAUTION • Even if your camcorder is turned off, AC power (house current) is still supplied to it while connected to... the DC IN jack of the AC Adaptor or battery terminal with the camcorder at 25 °C (77 °F). (10 to 30 °C (50 °F to OFF(CHG). • The CHG (charge) lamp flashes during charging...
...immediately if any malfunction occurs while using the AC Adaptor. This may cause a malfunction. The battery pack is not attached correctly. - Disconnect the AC Adaptor from the wall outlet. PRECAUTION • Even if your camcorder is turned off, AC power (house current) is still supplied to it while connected to... the DC IN jack of the AC Adaptor or battery terminal with the camcorder at 25 °C (77 °F). (10 to 30 °C (50 °F to OFF(CHG). • The CHG (charge) lamp flashes during charging...
Operating Guide
Page 15
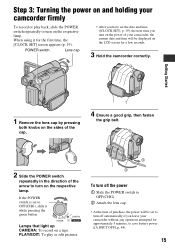
... belt. 2 Slide the POWER switch repeatedly in the direction of the arrow to OFF(CHG), slide it for a few seconds. 3 Hold the camcorder correctly. If the POWER switch is set to turn on the respective lamp. PLAY/EDIT: To play back, slide the POWER switch repeatedly to save... battery power ([A.SHUT OFF], p. 48). 15 Step 3: Turning the power on and holding your camcorder without any operation attempted for approximately 5 minutes, to turn on a tape. Lamps that light up CAMERA: ...
... belt. 2 Slide the POWER switch repeatedly in the direction of the arrow to OFF(CHG), slide it for a few seconds. 3 Hold the camcorder correctly. If the POWER switch is set to turn on the respective lamp. PLAY/EDIT: To play back, slide the POWER switch repeatedly to save... battery power ([A.SHUT OFF], p. 48). 15 Step 3: Turning the power on and holding your camcorder without any operation attempted for approximately 5 minutes, to turn on a tape. Lamps that light up CAMERA: ...

Operating Guide
Page 16
This is convenient during playback operations. • See [LCD BRT] (p. 39) to avoid wearing down the battery, or when the picture seen on the LCD frame accidentally when you open or adjust the LCD panel. • If you rotate the LCD panel ... 4: Adjusting the LCD panel and viewfinder The LCD panel Open the LCD panel 90 degrees to the camcorder (1), then rotate it until the picture is poor. Viewfinder 90 degrees (max.) 1 90 degrees to the camcorder • Do not press the buttons on the LCD screen is clear. • You can adjust the...
This is convenient during playback operations. • See [LCD BRT] (p. 39) to avoid wearing down the battery, or when the picture seen on the LCD frame accidentally when you open or adjust the LCD panel. • If you rotate the LCD panel ... 4: Adjusting the LCD panel and viewfinder The LCD panel Open the LCD panel 90 degrees to the camcorder (1), then rotate it until the picture is poor. Viewfinder 90 degrees (max.) 1 90 degrees to the camcorder • Do not press the buttons on the LCD screen is clear. • You can adjust the...
Operating Guide
Page 19
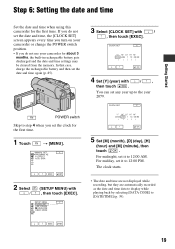
... do not set the clock for the first time. 1 Touch t [MENU]. For midnight, set it to 12:00 PM. If you do not use your camcorder or change the POWER switch position. • If you set the date and time, the [CLOCK SET] screen appears every time you turn on your... OK 5 Set [M] (month), [D] (day), [H] (hour) and [M] (minute), then touch . Step 6: Setting the date and time Getting Started Set the date and time when using this camcorder for about 3 months, the built-in rechargeable battery gets discharged and the date and time settings may be cleared from the memory.
... do not set the clock for the first time. 1 Touch t [MENU]. For midnight, set it to 12:00 PM. If you do not use your camcorder or change the POWER switch position. • If you set the date and time, the [CLOCK SET] screen appears every time you turn on your... OK 5 Set [M] (month), [D] (day), [H] (hour) and [M] (minute), then touch . Step 6: Setting the date and time Getting Started Set the date and time when using this camcorder for about 3 months, the built-in rechargeable battery gets discharged and the date and time settings may be cleared from the memory.
Operating Guide
Page 27
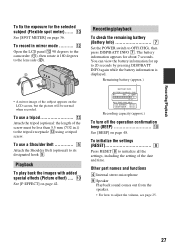
...the tripod (optional: the length of the screw must be normal when recorded. qs Open the LCD panel qs 90 degrees to the camcorder (1), then rotate it 180 degrees to initialize all the settings, including the setting of the subject appears on page 36. Playback To ...play back the images with added special effects (Picture effect) .... 0 See [P EFFECT] on page 48. Remaining battery (approx.) BATTERY INFO BATTERY CHARGE LEVEL 0% 50% 100% REC TIME AVAILABLE LCD SCREEN : 86 min VIEWFINDER : 99 min Recording capacity (approx.) To turn off the operation...
...the tripod (optional: the length of the screw must be normal when recorded. qs Open the LCD panel qs 90 degrees to the camcorder (1), then rotate it 180 degrees to initialize all the settings, including the setting of the subject appears on page 36. Playback To ...play back the images with added special effects (Picture effect) .... 0 See [P EFFECT] on page 48. Remaining battery (approx.) BATTERY INFO BATTERY CHARGE LEVEL 0% 50% 100% REC TIME AVAILABLE LCD SCREEN : 86 min VIEWFINDER : 99 min Recording capacity (approx.) To turn off the operation...
Operating Guide
Page 28
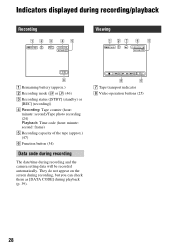
... them as [DATA CODE] during recording and the camera setting data will be recorded automatically. Indicators displayed during recording/playback Recording 12 3 4 5 Viewing 1 27 4 5 6 A Remaining battery (approx.) B Recording mode (SP or LP) (46) C Recording status ([STBY] (standby) or [REC] (recording)) D Recording: Tape counter (hour: minute: second)/Tape photo recording (24) Playback...
... them as [DATA CODE] during recording and the camera setting data will be recorded automatically. Indicators displayed during recording/playback Recording 12 3 4 5 Viewing 1 27 4 5 6 A Remaining battery (approx.) B Recording mode (SP or LP) (46) C Recording status ([STBY] (standby) or [REC] (recording)) D Recording: Tape counter (hour: minute: second)/Tape photo recording (24) Playback...
Operating Guide
Page 38
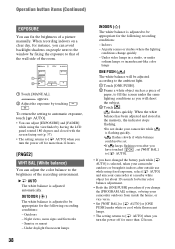
...will shoot the subject. 3 Touch . At party scenes or studios where the lighting conditions change the [PROGRAM AE] settings, or bring your camcorder at a nearby white object for about 10 seconds for better color balance adjustment. • Redo the [ONE PUSH] procedure if you will ...2 1 Touch [MANUAL]. Sunrise or sunset - Outdoors - appears. 2 Adjust the exposure by fixing the exposure to [ AUTO] when you have changed the battery pack while [ AUTO] is flashing quickly. • flashes slowly if white balance could not be appropriate for more than 12 hours. [PAGE2] WHT BAL ...
...will shoot the subject. 3 Touch . At party scenes or studios where the lighting conditions change the [PROGRAM AE] settings, or bring your camcorder at a nearby white object for about 10 seconds for better color balance adjustment. • Redo the [ONE PUSH] procedure if you will ...2 1 Touch [MANUAL]. Sunrise or sunset - Outdoors - appears. 2 Adjust the exposure by fixing the exposure to [ AUTO] when you have changed the battery pack while [ AUTO] is flashing quickly. • flashes slowly if white balance could not be appropriate for more than 12 hours. [PAGE2] WHT BAL ...
Operating Guide
Page 45
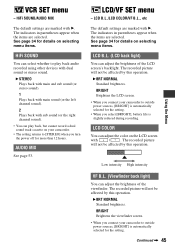
...of the viewfinder. The recorded picture will not be affected by this operation. BRIGHT Brightens the viewfinder screen. • When you connect your camcorder. • The setting returns to [STEREO] when you turn the power off for details on the LCD screen with B. BRIGHT Brightens the... LCD screen. • When you select [BRIGHT], battery life is automatically selected for the setting. The indicators in parentheses appear when the items are marked with / . See page 34 for ...
...of the viewfinder. The recorded picture will not be affected by this operation. BRIGHT Brightens the viewfinder screen. • When you connect your camcorder. • The setting returns to [STEREO] when you turn the power off for details on the LCD screen with B. BRIGHT Brightens the... LCD screen. • When you select [BRIGHT], battery life is automatically selected for the setting. The indicators in parentheses appear when the items are marked with / . See page 34 for ...
Operating Guide
Page 46
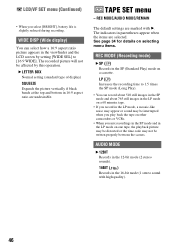
...) mode on one tape, the playback picture may be distorted or the time code may be interrupted when you play back the tape on other camcorders or VCRs. • When you mix recordings in the SP mode and in the viewfinder and the LCD screen by this operation. AUDIO MODE B 12BIT... 510 still images in the SP mode and about 765 still images in the LP mode on a 60 minutes tape. • If you select [BRIGHT], battery life is slightly reduced during recording. LP (LP) Increases the recording time to [16:9 WIDE]. The recorded picture will not be written properly between the...
...) mode on one tape, the playback picture may be distorted or the time code may be interrupted when you play back the tape on other camcorders or VCRs. • When you mix recordings in the SP mode and in the viewfinder and the LCD screen by this operation. AUDIO MODE B 12BIT... 510 still images in the SP mode and about 765 still images in the LP mode on a 60 minutes tape. • If you select [BRIGHT], battery life is slightly reduced during recording. LP (LP) Increases the recording time to [16:9 WIDE]. The recorded picture will not be written properly between the...
Operating Guide
Page 65
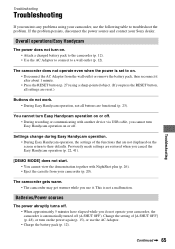
...Batteries/Power sources The power abruptly turns off . Overall operations/Easy Handycam The power does not turn Easy Handycam operation on the screen return to troubleshoot the problem. Previously made settings are restored when you do not work. • During Easy Handycam operation, not all settings are reset.) Buttons do not operate your camcorder, the camcorder... or turn Easy Handycam operation on the power again (p. 15), or use the AC Adaptor. • Charge the battery pack (p. 12). If the problem persists, disconnect the power source and contact your Sony dealer. You cannot...
...Batteries/Power sources The power abruptly turns off . Overall operations/Easy Handycam The power does not turn Easy Handycam operation on the screen return to troubleshoot the problem. Previously made settings are restored when you do not work. • During Easy Handycam operation, not all settings are reset.) Buttons do not operate your camcorder, the camcorder... or turn Easy Handycam operation on the power again (p. 15), or use the AC Adaptor. • Charge the battery pack (p. 12). If the problem persists, disconnect the power source and contact your Sony dealer. You cannot...
Operating Guide
Page 66
... contact your Sony dealer. This is not a malfunction. • Fully charge the battery again. If the problem persists, the battery may be worn-out. Do not press hard on the LCD screen or viewfinder. • The camcorder is in certain circumstances. Fully charge the battery again to ... to OFF(CHG) (p. 12). • Attach the battery pack to the camcorder correctly (p. 12). • Connect the power cord to the camcorder correctly (p. 12). If the problem persists, the battery may not be worn-out. The remaining battery time indicator does not indicate the correct time. •...
... contact your Sony dealer. This is not a malfunction. • Fully charge the battery again. If the problem persists, the battery may be worn-out. Do not press hard on the LCD screen or viewfinder. • The camcorder is in certain circumstances. Fully charge the battery again to ... to OFF(CHG) (p. 12). • Attach the battery pack to the camcorder correctly (p. 12). • Connect the power cord to the camcorder correctly (p. 12). If the problem persists, the battery may not be worn-out. The remaining battery time indicator does not indicate the correct time. •...
Operating Guide
Page 67
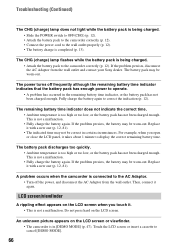
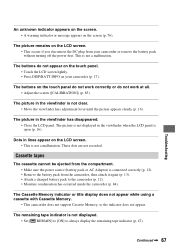
... open (p. 16). Troubleshooting An unknown indicator appears on the screen. • A warning indicator or message appears on your camcorder or remove the battery pack without turning off the power first. The Cassette Memory indicator or title display does not appear while using a cassette with.... These dots are not recorded. Dots in the viewfinder when the LCD panel is connected correctly (p. 12). • Remove the battery pack from your camcorder (p. 17). The picture in the viewfinder has disappeared. • Close the LCD panel. Continued , 67 The picture is not ...
... open (p. 16). Troubleshooting An unknown indicator appears on the screen. • A warning indicator or message appears on your camcorder or remove the battery pack without turning off the power first. The Cassette Memory indicator or title display does not appear while using a cassette with.... These dots are not recorded. Dots in the viewfinder when the LCD panel is connected correctly (p. 12). • Remove the battery pack from your camcorder (p. 17). The picture in the viewfinder has disappeared. • Close the LCD panel. Continued , 67 The picture is not ...


