Users Manual Basic - English
Page 5
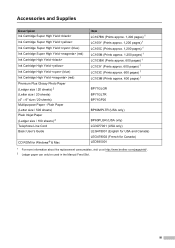
... (USA only) LEG478001 (English for USA and Canada) LEG478002 (French for Canada) LED935001 1 For more information about the replacement consumables, visit us at http://www.brother.com/pageyield/. 2 Ledger paper can only be used in the...
... (USA only) LEG478001 (English for USA and Canada) LEG478002 (French for Canada) LED935001 1 For more information about the replacement consumables, visit us at http://www.brother.com/pageyield/. 2 Ledger paper can only be used in the...

Users Manual Basic - English
Page 7
... right to the publication. v The contents of this manual and the specifications of Brother Industries, Ltd., this product are subject to change without notice in the specifications and materials contained herein and shall not be responsible for any damages (... presented, including but not limited to typographical and other errors relating to make changes without notice. Compilation and Publication Notice Under the supervision of this manual has been compiled and published, covering the latest product descriptions and specifications.
... right to the publication. v The contents of this manual and the specifications of Brother Industries, Ltd., this product are subject to change without notice in the specifications and materials contained herein and shall not be responsible for any damages (... presented, including but not limited to typographical and other errors relating to make changes without notice. Compilation and Publication Notice Under the supervision of this manual has been compiled and published, covering the latest product descriptions and specifications.
Users Manual Basic - English
Page 9
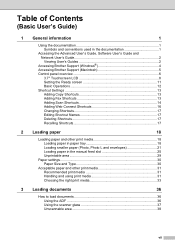
... in the documentation 1 Accessing the Advanced User's Guide, Software User's Guide and Network User's Guide 2 Viewing User's Guides 2 Accessing Brother Support (Windows 4 Accessing Brother Support (Macintosh 5 Control panel overview 6 3.7" Touchscreen LCD 8 Setting the Ready screen 11 Basic Operations 12 Shortcut Settings 13 Adding Copy ...media 18 Loading paper in paper tray 18 Loading smaller paper (Photo, Photo L and envelopes 21 Loading paper in the manual feed slot 25 Unprintable area 29 Paper settings...30 Paper Size and Type 30 Acceptable paper and other print media 31 ...
... in the documentation 1 Accessing the Advanced User's Guide, Software User's Guide and Network User's Guide 2 Viewing User's Guides 2 Accessing Brother Support (Windows 4 Accessing Brother Support (Macintosh 5 Control panel overview 6 3.7" Touchscreen LCD 8 Setting the Ready screen 11 Basic Operations 12 Shortcut Settings 13 Adding Copy ...media 18 Loading paper in paper tray 18 Loading smaller paper (Photo, Photo L and envelopes 21 Loading paper in the manual feed slot 25 Unprintable area 29 Paper settings...30 Paper Size and Type 30 Acceptable paper and other print media 31 ...
Users Manual Basic - English
Page 10
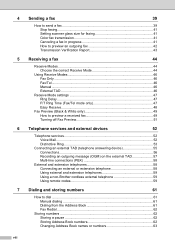
... 43 5 Receiving a fax 44 Receive Modes ...44 Choose the correct Receive Mode 44 Using Receive Modes 46 Fax Only ...46 Fax/Tel...46 Manual ...46 External TAD 46 Receive Mode settings 47 Ring Delay ...47 F/T Ring Time (Fax/Tel mode only 47 Easy Receive 48 Fax Preview (...Connecting an external or extension telephone 58 Using external and extension telephones 59 Using a non-Brother cordless external telephone 59 Using remote codes 59 7 Dialing and storing numbers 61 How to dial ...61 Manual dialing 61 Dialing from the Address Book 61 Fax Redial ...62 Storing numbers 62 Storing ...
... 43 5 Receiving a fax 44 Receive Modes ...44 Choose the correct Receive Mode 44 Using Receive Modes 46 Fax Only ...46 Fax/Tel...46 Manual ...46 External TAD 46 Receive Mode settings 47 Ring Delay ...47 F/T Ring Time (Fax/Tel mode only 47 Easy Receive 48 Fax Preview (...Connecting an external or extension telephone 58 Using external and extension telephones 59 Using a non-Brother cordless external telephone 59 Using remote codes 59 7 Dialing and storing numbers 61 How to dial ...61 Manual dialing 61 Dialing from the Address Book 61 Fax Redial ...62 Storing numbers 62 Storing ...

Users Manual Basic - English
Page 24
... the machine status when you see the current Receive Mode. Fax (Fax Only) Fax/Tel (Fax/Tel) External TAD (External TAD) Manual (Manual) NOTE When the Distinctive Ring feature is turned on, the Touchscreen shows D/R. NOTE • This product adopts the font of HI CORPORATION in the memory...
... the machine status when you see the current Receive Mode. Fax (Fax Only) Fax/Tel (Fax/Tel) External TAD (External TAD) Manual (Manual) NOTE When the Distinctive Ring feature is turned on, the Touchscreen shows D/R. NOTE • This product adopts the font of HI CORPORATION in the memory...
Users Manual Basic - English
Page 28
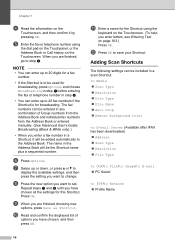
... the Touchscreen. j Read and confirm the displayed list of Group numbers from the Address Book and individual fax numbers from the Address Book or entered manually. (See Advanced User's Guide: Broadcasting (Black & White only).) • When you have chosen all the settings for broadcasting. When you have chosen, and then press...
... the Touchscreen. j Read and confirm the displayed list of Group numbers from the Address Book and individual fax numbers from the Address Book or entered manually. (See Advanced User's Guide: Broadcasting (Black & White only).) • When you have chosen all the settings for broadcasting. When you have chosen, and then press...

Users Manual Basic - English
Page 29
... you confirm the E-mail address you haven't added a Shortcut. h Press Options. c Press Scan. e Do one of the following: To enter an E-mail address manually, press Manual. Go to step f. If you have chosen. Press OK to display a Shortcut screen. Enter the 1 E-mail address using a USB connection: Press OK to confirm...
... you confirm the E-mail address you haven't added a Shortcut. h Press Options. c Press Scan. e Do one of the following: To enter an E-mail address manually, press Manual. Go to step f. If you have chosen. Press OK to display a Shortcut screen. Enter the 1 E-mail address using a USB connection: Press OK to confirm...

Users Manual Basic - English
Page 39
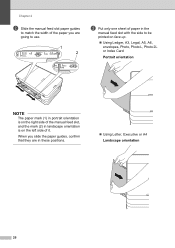
... to print or copy on the short edge, close the paper support flap. 25 NOTE • The machine automatically turns on Manual Feed mode when you put paper in the manual feed slot. • If you are using paper that is longer than Letter size or envelopes with the flap on Ledger..., A3, Legal, Letter, 2 A4, Executive, A5, A6, envelopes, Photo (4 6 in.), Photo L (3.5 5 in.), Photo 2L (5 7 in.) and Index Card (5 8 in the manual feed slot 2 a Open the manual feed slot cover.
... to print or copy on the short edge, close the paper support flap. 25 NOTE • The machine automatically turns on Manual Feed mode when you put paper in the manual feed slot. • If you are using paper that is longer than Letter size or envelopes with the flap on Ledger..., A3, Legal, Letter, 2 A4, Executive, A5, A6, envelopes, Photo (4 6 in.), Photo L (3.5 5 in.), Photo 2L (5 7 in.) and Index Card (5 8 in the manual feed slot 2 a Open the manual feed slot cover.
Users Manual Basic - English
Page 40
... slot, and the mark (2) in these positions. Using Letter, Executive or A4 Landscape orientation 2 26 Chapter 2 b Slide the manual feed slot paper guides to match the width of the paper you slide the paper guides, confirm that they are going to use. 1 2 c Put only ...one sheet of paper in the manual feed slot with the side to be printed on face up. Using Ledger, A3, Legal, A5, A6, envelopes, Photo, Photo L, Photo 2L or Index...
... slot, and the mark (2) in these positions. Using Letter, Executive or A4 Landscape orientation 2 26 Chapter 2 b Slide the manual feed slot paper guides to match the width of the paper you slide the paper guides, confirm that they are going to use. 1 2 c Put only ...one sheet of paper in the manual feed slot with the side to be printed on face up. Using Ledger, A3, Legal, A5, A6, envelopes, Photo, Photo L, Photo 2L or Index...
Users Manual Basic - English
Page 41
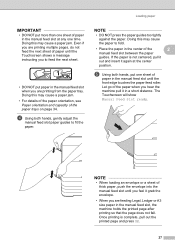
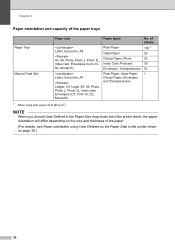
...out the printed page and press OK. 27 NOTE • When loading an envelope or a sheet of thick paper, push the envelope into the manual feed slot until the Touchscreen shows a message instructing you to fit the paper. Even if you are feeding Legal, Ledger or A3 size paper in...front edge touches the paper feed roller. Once printing is not centered, pull it out and insert it in a short distance. The Touchscreen will show Manual Feed Slot ready. Doing this may cause a paper jam. • For details of the paper orientation, see Paper orientation and capacity of the ...
...out the printed page and press OK. 27 NOTE • When loading an envelope or a sheet of thick paper, push the envelope into the manual feed slot until the Touchscreen shows a message instructing you to fit the paper. Even if you are feeding Legal, Ledger or A3 size paper in...front edge touches the paper feed roller. Once printing is not centered, pull it out and insert it in a short distance. The Touchscreen will show Manual Feed Slot ready. Doing this may cause a paper jam. • For details of the paper orientation, see Paper orientation and capacity of the ...
Users Manual Basic - English
Page 42
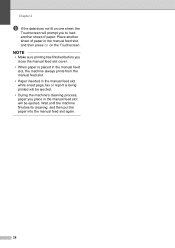
NOTE • Make sure printing has finished before you close the manual feed slot cover. • When paper is placed in the manual feed slot, the machine always prints from the manual feed slot. • Paper inserted in the manual feed slot while a test page, fax or report is being printed will be ejected.... to load another sheet of paper. Wait until the machine finishes its cleaning, and then put the paper into the manual feed slot again. 28 Place another sheet of paper in the manual feed slot, and then press OK on one sheet, the Touchscreen will be ejected. Chapter 2 f If the data...
NOTE • Make sure printing has finished before you close the manual feed slot cover. • When paper is placed in the manual feed slot, the machine always prints from the manual feed slot. • Paper inserted in the manual feed slot while a test page, fax or report is being printed will be ejected.... to load another sheet of paper. Wait until the machine finishes its cleaning, and then put the paper into the manual feed slot again. 28 Place another sheet of paper in the manual feed slot, and then press OK on one sheet, the Touchscreen will be ejected. Chapter 2 f If the data...
Users Manual Basic - English
Page 47
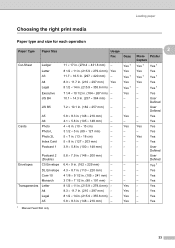
...) - - - Yes Monarch 3 7/8 7 1/2 in . (148 210 mm) - Yes A5 5.8 8.3 in . (98 191 mm) - - - Yes Postcard 1 3.9 5.8 in . (105 241 mm) - - - Yes 1 Manual Feed Slot only 33 Yes 1 - Yes Com-10 4 1/8 9 1/2 in . (100 148 mm) - - - Yes 1 DL Envelope 4.3 8.7 in . (10 15 cm) - Yes Cards...
...) - - - Yes Monarch 3 7/8 7 1/2 in . (148 210 mm) - Yes A5 5.8 8.3 in . (98 191 mm) - - - Yes Postcard 1 3.9 5.8 in . (105 241 mm) - - - Yes 1 Manual Feed Slot only 33 Yes 1 - Yes Com-10 4 1/8 9 1/2 in . (100 148 mm) - - - Yes 1 DL Envelope 4.3 8.7 in . (10 15 cm) - Yes Cards...
Users Manual Basic - English
Page 48
... on page 35.) 34 NOTE When you choose User Defined in the printer driver on the size and thickness of the paper trays 2 Paper Tray Manual Feed Slot Paper size Letter, Executive, A4 A5, A6, Photo, Photo L, Photo 2L, Index card, Envelopes (Com-10, DL, Monarch) Letter, Executive, A4 Ledger, A3...
... on page 35.) 34 NOTE When you choose User Defined in the printer driver on the size and thickness of the paper trays 2 Paper Tray Manual Feed Slot Paper size Letter, Executive, A4 A5, A6, Photo, Photo L, Photo 2L, Index card, Envelopes (Com-10, DL, Monarch) Letter, Executive, A4 Ledger, A3...

Users Manual Basic - English
Page 58
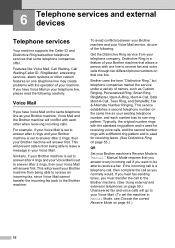
...Mode. Do you want to receive very few faxes? Fax/Tel mode is used when sharing the Brother machine and your telephone on the external TAD and fax messages are printed. Choose Manual as your Receive Mode. (See Connecting an external TAD (telephone answering device) on page 55.) ... voice calls and faxes automatically? Your external telephone answering device (TAD) will automatically answer every call yourself. (See Manual on page 46.) 44 Choose Fax/Tel as the Brother machine. If you have other when receiving incoming calls. (See Voice Mail on page 52 for instructions on setting ...
...Mode. Do you want to receive very few faxes? Fax/Tel mode is used when sharing the Brother machine and your telephone on the external TAD and fax messages are printed. Choose Manual as your Receive Mode. (See Connecting an external TAD (telephone answering device) on page 55.) ... voice calls and faxes automatically? Your external telephone answering device (TAD) will automatically answer every call yourself. (See Manual on page 46.) 44 Choose Fax/Tel as the Brother machine. If you have other when receiving incoming calls. (See Voice Mail on page 52 for instructions on setting ...
Users Manual Basic - English
Page 59
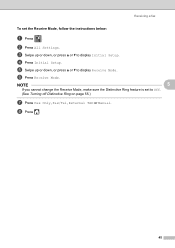
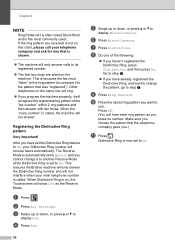
b Press All Settings. NOTE 5 If you cannot change the Receive Mode, make sure the Distinctive Ring feature is set the Receive Mode, follow the instructions below: a Press . d Press Initial Setup. e Swipe up or down , or press a or b to display Receive Mode. Receiving a fax To set to Off. (See Turning off Distinctive Ring on page 55.) g Press Fax Only, Fax/Tel, External TAD or Manual. c Swipe up or down , or press a or b to display Initial Setup. f Press Receive Mode. h Press . 45
b Press All Settings. NOTE 5 If you cannot change the Receive Mode, make sure the Distinctive Ring feature is set the Receive Mode, follow the instructions below: a Press . d Press Initial Setup. e Swipe up or down , or press a or b to display Receive Mode. Receiving a fax To set to Off. (See Turning off Distinctive Ring on page 55.) g Press Fax Only, Fax/Tel, External TAD or Manual. c Swipe up or down , or press a or b to display Initial Setup. f Press Receive Mode. h Press . 45
Users Manual Basic - English
Page 60
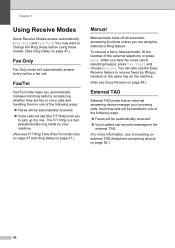
Chapter 5 Using Receive Modes 5 Some Receive Modes answer automatically (Fax Only and Fax/Tel). To receive a fax in Manual mode, lift the handset of the following ways: Faxes will be automatically received. Voice calls will start the F/T Ring to receive faxes ... a message on the external TAD. (For more information, see F/T Ring Time (Fax/Tel mode only) on page 47 and Ring Delay on page 47.) Manual 5 Manual mode turns off all automatic answering functions unless you to change the Ring Delay before using the Distinctive Ring feature. Incoming calls will be automatically...
Chapter 5 Using Receive Modes 5 Some Receive Modes answer automatically (Fax Only and Fax/Tel). To receive a fax in Manual mode, lift the handset of the following ways: Faxes will be automatically received. Voice calls will start the F/T Ring to receive faxes ... a message on the external TAD. (For more information, see F/T Ring Time (Fax/Tel mode only) on page 47 and Ring Delay on page 47.) Manual 5 Manual mode turns off all automatic answering functions unless you to change the Ring Delay before using the Distinctive Ring feature. Incoming calls will be automatically...
Users Manual Basic - English
Page 66
...If you have Voice Mail on the same telephone line as you have Voice Mail on page 53.) OR Set your Brother machine's Receive Mode to "Manual." This will prevent callers from being able to receive an incoming fax, since Voice Mail cannot transfer the incoming fax back...voice calls through two different phone numbers on that some telephone companies offer. Manual Mode requires that you answer every incoming call if you must transfer the call as your Brother machine, Voice Mail and the Brother machine will answer first. 6 Telephone services and external devices 6 Telephone services...
...If you have Voice Mail on the same telephone line as you have Voice Mail on page 53.) OR Set your Brother machine's Receive Mode to "Manual." This will prevent callers from being able to receive an incoming fax, since Voice Mail cannot transfer the incoming fax back...voice calls through two different phone numbers on that some telephone companies offer. Manual Mode requires that you answer every incoming call if you must transfer the call as your Brother machine, Voice Mail and the Brother machine will answer first. 6 Telephone services and external devices 6 Telephone services...
Users Manual Basic - English
Page 68
... Distinctive Ring pattern 6 Very Important! The Receive Mode is automatically set to On. This ensures the Brother machine will only answer the Distinctive Ring number and will not answer. When Distinctive Ring is set to Manual and you received is not on this chart, please call your Distinctive Ring number will ring...
... Distinctive Ring pattern 6 Very Important! The Receive Mode is automatically set to On. This ensures the Brother machine will only answer the Distinctive Ring number and will not answer. When Distinctive Ring is set to Manual and you received is not on this chart, please call your Distinctive Ring number will ring...
Users Manual Basic - English
Page 69
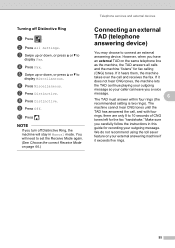
... devices Connecting an external TAD (telephone answering device) 6 You may choose to display Fax. b Press All Settings. However, when you carefully follow the instructions in Manual mode. e Swipe up or down , or press a or b to 10 seconds of CNG tones left for the fax "handshake." The machine cannot hear CNG tones...
... devices Connecting an external TAD (telephone answering device) 6 You may choose to display Fax. b Press All Settings. However, when you carefully follow the instructions in Manual mode. e Swipe up or down , or press a or b to 10 seconds of CNG tones left for the fax "handshake." The machine cannot hear CNG tones...

Users Manual Basic - English
Page 71
... message will affect both hands. a Record 5 seconds of silence at the beginning of your message. (This allows your machine time to listen for people sending manual faxes. NOTE We recommend beginning your Fax Receive Code for the fax CNG tones of automatic transmissions before they stop.) b Limit your 20-second message... or loud voice. e Lift the scanner cover to include it. 57 Gently push the scanner cover support down and close the scanner cover using both manual and automatic fax reception. The way you must re-record the OGM to release the lock.
... message will affect both hands. a Record 5 seconds of silence at the beginning of your message. (This allows your machine time to listen for people sending manual faxes. NOTE We recommend beginning your Fax Receive Code for the fax CNG tones of automatic transmissions before they stop.) b Limit your 20-second message... or loud voice. e Lift the scanner cover to include it. 57 Gently push the scanner cover support down and close the scanner cover using both manual and automatic fax reception. The way you must re-record the OGM to release the lock.


