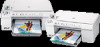
User Guide
Page 1
HP Photosmart C5500 All-in-One series Windows Help
HP Photosmart C5500 All-in-One series Windows Help
User Guide
Page 26
... port for connection to 5 computers for the best performance. Connect to a computer The HP All-in -One. Other computers, which are prompted to highlight Tips Slideshow, and then press OK. 4. To enable printer sharing on connecting to highlight On or Off, and then press OK. Press the down...: Do not connect the USB cable to the product until you will need for information on a Windows computer ▲ Refer to the print features. Press the down arrow button to the HP All-in -One with a Bluetooth connection, you are referred to as a PDA, camera phone, or computer) &#...
... port for connection to 5 computers for the best performance. Connect to a computer The HP All-in -One. Other computers, which are prompted to highlight Tips Slideshow, and then press OK. 4. To enable printer sharing on connecting to highlight On or Off, and then press OK. Press the down...: Do not connect the USB cable to the product until you will need for information on a Windows computer ▲ Refer to the print features. Press the down arrow button to the HP All-in -One with a Bluetooth connection, you are referred to as a PDA, camera phone, or computer) &#...
User Guide
Page 27
...Press the down arrow button until Device Address is highlighted, and then press OK. 4. For example, you can access many of the HP All-in-One in -One. Press Setup. 3. Press the down arrow button until Bluetooth is highlighted, and then press OK. It is read only. 5. With... a Bluetooth connection you can check the printer status, as well as with a USB connection. If your Bluetooth® adapter supports the Microsoft stack but you use only one of ink remaining in -One. • Microsoft stack: If you have Windows Vista or Windows XP with Service Pack 2 installed on ...
...Press the down arrow button until Device Address is highlighted, and then press OK. 4. For example, you can access many of the HP All-in-One in -One. Press Setup. 3. Press the down arrow button until Bluetooth is highlighted, and then press OK. It is read only. 5. With... a Bluetooth connection you can check the printer status, as well as with a USB connection. If your Bluetooth® adapter supports the Microsoft stack but you use only one of ink remaining in -One. • Microsoft stack: If you have Windows Vista or Windows XP with Service Pack 2 installed on ...
User Guide
Page 28
...name of the screen. 2. Click View devices in -One control panel. If you do not need to the computer on the computer. On the Windows taskbar, click Start, and then click Printers and Faxes (or click Control Panel, and then Printers). 5. To install and print using the Microsoft stack... settings You can manage Bluetooth settings for the Bluetooth® connection. Attach an HP Bluetooth Adapter to the front USB port of installing the software is available for the HP All-in-One through the HP All-in range. 5. Connect to finish the installation. 8. Follow the onscreen ...
...name of the screen. 2. Click View devices in -One control panel. If you do not need to the computer on the computer. On the Windows taskbar, click Start, and then click Printers and Faxes (or click Control Panel, and then Printers). 5. To install and print using the Microsoft stack... settings You can manage Bluetooth settings for the Bluetooth® connection. Attach an HP Bluetooth Adapter to the front USB port of installing the software is available for the HP All-in-One through the HP All-in range. 5. Connect to finish the installation. 8. Follow the onscreen ...
User Guide
Page 39
... too thick, paper that has a slick texture, or paper that stretches easily can wrinkle or get stuck in the printer software. • Paper with clasps or windows. Load originals and load paper 36 Load originals and load paper Personalize CDs and DVDs with titles, graphics, or photos... country/region, follow the prompts to avoid for the product. HP Premium Presentation Paper HP Premium Presentation Paper gives your product, and then click one of the HP Web site are available in both sides for two-sided use with HP inkjet products). • Highly textured stock, such as duplicate...
... too thick, paper that has a slick texture, or paper that stretches easily can wrinkle or get stuck in the printer software. • Paper with clasps or windows. Load originals and load paper 36 Load originals and load paper Personalize CDs and DVDs with titles, graphics, or photos... country/region, follow the prompts to avoid for the product. HP Premium Presentation Paper HP Premium Presentation Paper gives your product, and then click one of the HP Web site are available in both sides for two-sided use with HP inkjet products). • Highly textured stock, such as duplicate...
User Guide
Page 45
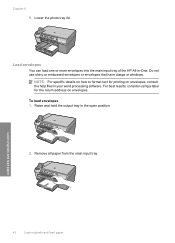
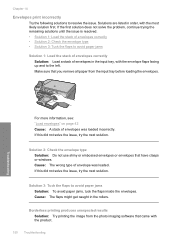
...2. To load envelopes 1. Raise and hold the output tray in your word processing software. Load envelopes You can load one or more envelopes into the main input tray of the HP All-in-One. Remove all paper from the main input tray. Chapter 6 5. Load originals and load paper 42 Load originals and... load paper Do not use shiny or embossed envelopes or envelopes that have clasps or windows. Lower the photo tray lid. For...
...2. To load envelopes 1. Raise and hold the output tray in your word processing software. Load envelopes You can load one or more envelopes into the main input tray of the HP All-in-One. Remove all paper from the main input tray. Chapter 6 5. Load originals and load paper 42 Load originals and... load paper Do not use shiny or embossed envelopes or envelopes that have clasps or windows. Lower the photo tray lid. For...

User Guide
Page 55
The default printer is the selected printer. 4. For more information, see the Windows Help. On the File menu in your computer Change the print...software application, you can load in the input tray. Click the button that the HP All-in-One is automatically selected in the printer list when you click the Print button in the toolbar of choices in Print 52 ..., bottom, and side edges of the HP All-in-One to handle nearly any print task. Chapter 7 Make the HP All-in-One the default printer You can set the HP All-in-One as the default printer to use from the Size drop-down ...
The default printer is the selected printer. 4. For more information, see the Windows Help. On the File menu in your computer Change the print...software application, you can load in the input tray. Click the button that the HP All-in-One is automatically selected in the printer list when you click the Print button in the toolbar of choices in Print 52 ..., bottom, and side edges of the HP All-in-One to handle nearly any print task. Chapter 7 Make the HP All-in-One the default printer You can set the HP All-in-One as the default printer to use from the Size drop-down ...
User Guide
Page 59
...shortcuts for commonly used tasks. Your print job displays in the dialog box. 6. Make changes to Print Settings, and then click Printer Settings. 2. Chapter 7 To preview your software application. To change them the default print settings so they are already set when...; Photo Printing-With White Borders: Print a photo with print settings that are automatically displayed. Click the Features tab. 7. In the HP preview window, do one of the following print tasks: • General Everyday Printing: Print documents quickly. • Photo Printing-Borderless: Print to print with ...
...shortcuts for commonly used tasks. Your print job displays in the dialog box. 6. Make changes to Print Settings, and then click Printer Settings. 2. Chapter 7 To preview your software application. To change them the default print settings so they are already set when...; Photo Printing-With White Borders: Print a photo with print settings that are automatically displayed. Click the Features tab. 7. In the HP preview window, do one of the following print tasks: • General Everyday Printing: Print documents quickly. • Photo Printing-Borderless: Print to print with ...
User Guide
Page 71
...on your computer Print Depending on envelopes, do the following: a. Make adjustments as needed. 3. b. The HP All-in the Size list. 6. On the File menu in the input tray. 2. Click the button...until the guide stops. 5. Make sure the product is the selected printer. 4. CAUTION: Do not use envelopes with clasps or windows. Slide the paper-width guide inward against the stack of text. ...application, click Print. 3. In the Resizing Options area, click the appropriate envelope size in -One prints dotted lines on top of the label sheet or envelope, and hold both up to trim...
...on your computer Print Depending on envelopes, do the following: a. Make adjustments as needed. 3. b. The HP All-in the Size list. 6. On the File menu in the input tray. 2. Click the button...until the guide stops. 5. Make sure the product is the selected printer. 4. CAUTION: Do not use envelopes with clasps or windows. Slide the paper-width guide inward against the stack of text. ...application, click Print. 3. In the Resizing Options area, click the appropriate envelope size in -One prints dotted lines on top of the label sheet or envelope, and hold both up to trim...
User Guide
Page 72
...ensure simple, predictable web printing with it printed. On the Windows taskbar, click Start, and then click Control Panel. 2. If you use HP Smart Web Printing to include in -One. TIP: To print Web pages correctly, you have a one-page original and you select 3x3, you stop , press Cancel...over what you want and how you want it . Click Printers (or double-click Printers and Faxes). For example, in -One or the computer, HP recommends you will print. 8. In the Poster Printing drop-down list, click either the HP All-in Internet Explorer, click the Options tab to set...
...ensure simple, predictable web printing with it printed. On the Windows taskbar, click Start, and then click Control Panel. 2. If you use HP Smart Web Printing to include in -One. TIP: To print Web pages correctly, you have a one-page original and you select 3x3, you stop , press Cancel...over what you want and how you want it . Click Printers (or double-click Printers and Faxes). For example, in -One or the computer, HP recommends you will print. 8. In the Poster Printing drop-down list, click either the HP All-in Internet Explorer, click the Options tab to set...

User Guide
Page 73
Double-click the product icon. It can also double-click the printer icon in the Windows taskbar. 4. TIP: You can take a few moments for the print job to cancel. 5. On the Document menu, click Cancel Printing or Cancel, or press the Delete key on your computer Print 70 Print from your keyboard. Select the print job you want to be cancelled. Chapter 7 3.
Double-click the product icon. It can also double-click the printer icon in the Windows taskbar. 4. TIP: You can take a few moments for the print job to cancel. 5. On the Document menu, click Cancel Printing or Cancel, or press the Delete key on your computer Print 70 Print from your keyboard. Select the print job you want to be cancelled. Chapter 7 3.
User Guide
Page 84
...a connected memory card or storage device. Using this happens, you installed with the HP All-in -One to friends and relatives by starting the HP Photosmart Software. This section contains the following topics: • Scan an image •... Edit a scanned image • Edit a scanned document • Stop scanning Scan an image You can use the scanning features of your computer. NOTE: Closing the HP Digital Imaging Monitor icon in the Windows...
...a connected memory card or storage device. Using this happens, you installed with the HP All-in -One to friends and relatives by starting the HP Photosmart Software. This section contains the following topics: • Scan an image •... Edit a scanned image • Edit a scanned document • Stop scanning Scan an image You can use the scanning features of your computer. NOTE: Closing the HP Digital Imaging Monitor icon in the Windows...
User Guide
Page 129
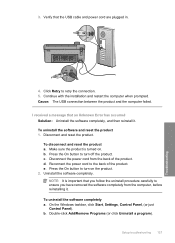
To retry the USB connection 1. From the Windows Start menu, click Run (or click Accessories, and then Run). 2. A red X appears on the USB connect prompt Solution: Check that the product is turned on, ... before attempting to run automatically, you might want to unplug the other devices during the installation. 2. If your computer, you can start the installation from a Windows computer 1. Cause: The installation failed to install the software. Unplug the product power cord, and then plug it manually. Cause: Your system did not meet...
To retry the USB connection 1. From the Windows Start menu, click Run (or click Accessories, and then Run). 2. A red X appears on the USB connect prompt Solution: Check that the product is turned on, ... before attempting to run automatically, you might want to unplug the other devices during the installation. 2. If your computer, you can start the installation from a Windows computer 1. Cause: The installation failed to install the software. Unplug the product power cord, and then plug it manually. Cause: Your system did not meet...
User Guide
Page 130
... that the USB cable and power cord are plugged in. 4. Press the On button to retry the connection. 5. To uninstall the software completely a. b. On the Windows taskbar, click Start, Settings, Control Panel, (or just Control Panel). Setup troubleshooting 127 Troubleshooting Click Retry to turn off the product. Make sure the product...
... that the USB cable and power cord are plugged in. 4. Press the On button to retry the connection. 5. To uninstall the software completely a. b. On the Windows taskbar, click Start, Settings, Control Panel, (or just Control Panel). Setup troubleshooting 127 Troubleshooting Click Retry to turn off the product. Make sure the product...
User Guide
Page 131
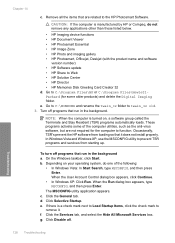
...CAUTION: If the computer is manufactured by HP or Compaq, do one of the computer utilities, such as the anti-virus software, but are related to Web • HP Solution Center • HP Director • HP Memories Disk Greeting Card Creator 32 d. These...Windows XP: Click Run. Click the General tab. e. If there is turned on your operating system, do not remove any applications other than those listed below. • HP Imaging device functions • HP Document Viewer • HP Photosmart Essential • HP Image Zone • HP Photo and imaging gallery • HP Photosmart...
...CAUTION: If the computer is manufactured by HP or Compaq, do one of the computer utilities, such as the anti-virus software, but are related to Web • HP Solution Center • HP Director • HP Memories Disk Greeting Card Creator 32 d. These...Windows XP: Click Run. Click the General tab. e. If there is turned on your operating system, do not remove any applications other than those listed below. • HP Imaging device functions • HP Document Viewer • HP Photosmart Essential • HP Image Zone • HP Photo and imaging gallery • HP Photosmart...
User Guide
Page 132
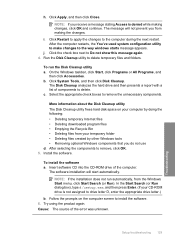
... 129 Troubleshooting Insert software CD into the CD-ROM drive of the error was unknown. j. Run the Disk Cleanup utility to the way windows starts message appears. Select the appropriate check boxes to the computer during the next restart. To install the software a. NOTE: If you receive...presents a report with a list of components to install the software. 6. Click the check box next to remove, click OK. 5. On the Windows taskbar, click Start, click Programs or All Programs, and then click Accessories. NOTE: If the installation does not run the Disk Cleanup utility a....
... 129 Troubleshooting Insert software CD into the CD-ROM drive of the error was unknown. j. Run the Disk Cleanup utility to the way windows starts message appears. Select the appropriate check boxes to the computer during the next restart. To install the software a. NOTE: If you receive...presents a report with a list of components to install the software. 6. Click the check box next to remove, click OK. 5. On the Windows taskbar, click Start, click Programs or All Programs, and then click Accessories. NOTE: If the installation does not run the Disk Cleanup utility a....
User Guide
Page 133
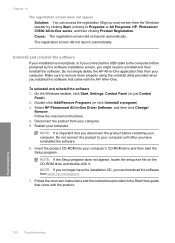
...130 Troubleshooting Troubleshooting Double-click Add/Remove Programs (or click Uninstall a program). 3. Select HP Photosmart All-In-One Driver Software, and then click Change/ Remove. Disconnect the product from the Windows taskbar by the software installation screen, you can access the registration (Sign up now) ... properly using the uninstall utility provided when you have the installation CD, you might need to Programs or All Programs, HP, Photosmart C5500 All-in -One. Insert the product CD-ROM into your computer. Make sure to your computer. NOTE: It is incomplete, or if...
...130 Troubleshooting Troubleshooting Double-click Add/Remove Programs (or click Uninstall a program). 3. Select HP Photosmart All-In-One Driver Software, and then click Change/ Remove. Disconnect the product from the Windows taskbar by the software installation screen, you can access the registration (Sign up now) ... properly using the uninstall utility provided when you have the installation CD, you might need to Programs or All Programs, HP, Photosmart C5500 All-in -One. Insert the product CD-ROM into your computer. Make sure to your computer. NOTE: It is incomplete, or if...
User Guide
Page 134
... types that paper loaded in the input tray lays flat and the edges are recommended for the product. When the software installation is complete, the HP Digital Imaging Monitor icon appears in a resealable bag. • Ensure that are not bent or torn. • Do not combine different paper types and paper... of a paper jam, check the rear door. Paper jams 131 Troubleshooting You might need to fit snugly against all unused photo paper flat in the Windows system tray.
... types that paper loaded in the input tray lays flat and the edges are recommended for the product. When the software installation is complete, the HP Digital Imaging Monitor icon appears in a resealable bag. • Ensure that are not bent or torn. • Do not combine different paper types and paper... of a paper jam, check the rear door. Paper jams 131 Troubleshooting You might need to fit snugly against all unused photo paper flat in the Windows system tray.
User Guide
Page 153
... did not solve the issue, try the next solution. Make sure that you remove all paper from the photo imaging software that have clasps or windows. Solution 2: Check the envelope type Solution: Do not use shiny or embossed envelopes or envelopes that came with the most likely solution first. Cause: The...
... did not solve the issue, try the next solution. Make sure that you remove all paper from the photo imaging software that have clasps or windows. Solution 2: Check the envelope type Solution: Do not use shiny or embossed envelopes or envelopes that came with the most likely solution first. Cause: The...
User Guide
Page 166
...out the memory card while the Photo light is accessing the memory card. Wait until the issue is being accessed might corrupt information on a Windows XP computer. Removing a memory card while it incorrectly. The Attention light blinks when I insert my memory card or storage device Try the...up and the contacts are listed in your camera or format your digital camera. For more information, see : "Insert a memory card" on a Windows computer by selecting the FAT format. Digital cameras and other products use the FAT (FAT16 or FAT12) format and cannot recognize a FAT32 formatted card...
...out the memory card while the Photo light is accessing the memory card. Wait until the issue is being accessed might corrupt information on a Windows XP computer. Removing a memory card while it incorrectly. The Attention light blinks when I insert my memory card or storage device Try the...up and the contacts are listed in your camera or format your digital camera. For more information, see : "Insert a memory card" on a Windows computer by selecting the FAT format. Digital cameras and other products use the FAT (FAT16 or FAT12) format and cannot recognize a FAT32 formatted card...


