User Guide
Page 1
HP Photosmart C5500 All-in-One series Windows Help
HP Photosmart C5500 All-in-One series Windows Help
User Guide
Page 26
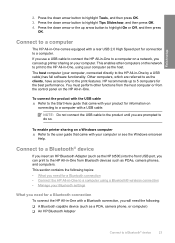
...a computer The HP All-in -One by a USB cable) has full software functionality. Connect to a computer. Finish setup 2. The host computer (your computer or see the Windows onscreen Help. Press the down arrow button to as PDAs, camera phones, and computers. To enable printer sharing on connecting... cable. If you use a USB cable to connect the HP All-in -One from the control panel on the network to print to the HP All-in-One, using a Bluetooth® wireless connection • Manage your product for information on a Windows computer ▲ Refer to a computer with a rear USB...
...a computer The HP All-in -One by a USB cable) has full software functionality. Connect to a computer. Finish setup 2. The host computer (your computer or see the Windows onscreen Help. Press the down arrow button to as PDAs, camera phones, and computers. To enable printer sharing on connecting... cable. If you use a USB cable to connect the HP All-in -One from the control panel on the network to print to the HP All-in-One, using a Bluetooth® wireless connection • Manage your product for information on a Windows computer ▲ Refer to a computer with a rear USB...
User Guide
Page 27
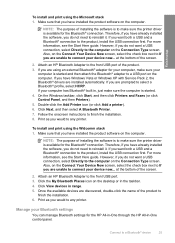
...174; wireless connection A Bluetooth connection provides a quick and easy way to connect the HP All-in -One Connect the HP All-in-One to a computer using a cable. With a Bluetooth connection you have Windows Vista or Windows XP and either the Microsoft Bluetooth® Protocol Stack or the Widcomm Bluetooth® ...stack allows you to see if it will install automatically using the Widcomm stack. 24 Finish setting up the HP All-in -One. • Microsoft stack: If you can check the printer status, as well as with a Bluetooth connection is read only. 5. Press Setup. 3. Check the ...
...174; wireless connection A Bluetooth connection provides a quick and easy way to connect the HP All-in -One Connect the HP All-in-One to a computer using a cable. With a Bluetooth connection you have Windows Vista or Windows XP and either the Microsoft Bluetooth® Protocol Stack or the Widcomm Bluetooth® ...stack allows you to see if it will install automatically using the Widcomm stack. 24 Finish setting up the HP All-in -One. • Microsoft stack: If you can check the printer status, as well as with a Bluetooth connection is read only. 5. Press Setup. 3. Check the ...
User Guide
Page 28
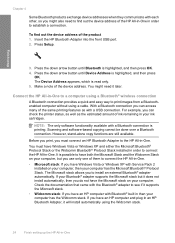
... For more information, see the Start Here guide. On the Windows taskbar, click Start, and then click Printers and Faxes (or click Control Panel, and then Printers). 5. NOTE: The purpose of installing the software is to any printer. Therefore, if you have installed the product software on the computer... more information, see the Start Here guide. Once the available devices are using an external Bluetooth® adapter for the HP All-in-One through the HP All-in , just make sure your device now... Make sure that you are installed automatically. Therefore, if you have ...
... For more information, see the Start Here guide. On the Windows taskbar, click Start, and then click Printers and Faxes (or click Control Panel, and then Printers). 5. NOTE: The purpose of installing the software is to any printer. Therefore, if you have installed the product software on the computer... more information, see the Start Here guide. Once the available devices are using an external Bluetooth® adapter for the HP All-in-One through the HP All-in , just make sure your device now... Make sure that you are installed automatically. Therefore, if you have ...
User Guide
Page 39
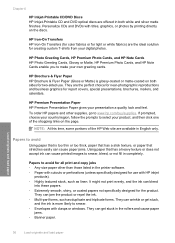
... use with clasps or windows. HP Photo Greeting Cards, HP Premium Photo Cards, and HP Note Cards HP Photo Greeting Cards, Glossy or Matte, HP Premium Photo Cards, and HP Note Cards enable you ...and business graphics for creating custom T-shirts from your product, and then click one of the HP Web site are the ideal solution for report covers, special presentations, brochures, mailers...wrinkle or get stuck in the printer software. • Paper with cutouts or perforations (unless specifically designed for the product. HP Premium Presentation Paper HP Premium Presentation Paper gives your ...
... use with clasps or windows. HP Photo Greeting Cards, HP Premium Photo Cards, and HP Note Cards HP Photo Greeting Cards, Glossy or Matte, HP Premium Photo Cards, and HP Note Cards enable you ...and business graphics for creating custom T-shirts from your product, and then click one of the HP Web site are the ideal solution for report covers, special presentations, brochures, mailers...wrinkle or get stuck in the printer software. • Paper with cutouts or perforations (unless specifically designed for the product. HP Premium Presentation Paper HP Premium Presentation Paper gives your ...
User Guide
Page 45
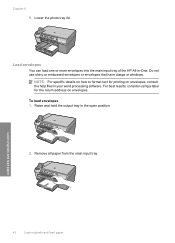
... paper from the main input tray. Load envelopes You can load one or more envelopes into the main input tray of the HP All-in the open position. 2. Do not use shiny or embossed envelopes or envelopes that have clasps or windows. NOTE: For specific details on how to format text for the... return address on envelopes, consult the help files in your word processing software. Raise and hold the output tray in -One...
... paper from the main input tray. Load envelopes You can load one or more envelopes into the main input tray of the HP All-in the open position. 2. Do not use shiny or embossed envelopes or envelopes that have clasps or windows. NOTE: For specific details on how to format text for the... return address on envelopes, consult the help files in your word processing software. Raise and hold the output tray in -One...

User Guide
Page 55
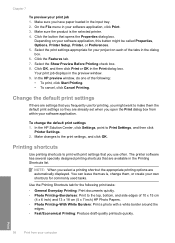
...sure to create your print job Set the paper size The Size setting helps the HP All-in a software application. Click the button that the HP All-in-One is automatically selected in the printer list when you select Print from your software application, this button might be called ...Options area, from all software applications. Chapter 7 Make the HP All-in-One the default printer You can set the HP All-in the toolbar of most software applications. The default printer is the selected printer. 4. For more information, see the Windows Help. However, if you are using custom-size paper, ...
...sure to create your print job Set the paper size The Size setting helps the HP All-in a software application. Click the button that the HP All-in-One is automatically selected in the printer list when you select Print from your software application, this button might be called ...Options area, from all software applications. Chapter 7 Make the HP All-in-One the default printer You can set the HP All-in the toolbar of most software applications. The default printer is the selected printer. 4. For more information, see the Windows Help. However, if you are using custom-size paper, ...
User Guide
Page 59
... Click the Features tab. 7. Click OK, and then click Print or OK in the preview window. 9. To change them, or create your own shortcuts for your software application. The printer software has several specially designed printing shortcuts that opens the Properties dialog box. NOTE: When you select...to make them as is the selected printer. 4. Print 56 Print from within your project on your computer Select the Show Preview Before Printing check box. 8. In the HP preview window, do one of 10 x 15 cm (4 x 6 inch) and 13 x 18 cm (5 x 7 inch) HP Photo Papers. • Photo Printing...
... Click the Features tab. 7. Click OK, and then click Print or OK in the preview window. 9. To change them, or create your own shortcuts for your software application. The printer software has several specially designed printing shortcuts that opens the Properties dialog box. NOTE: When you select...to make them as is the selected printer. 4. Print 56 Print from within your project on your computer Select the Show Preview Before Printing check box. 8. In the HP preview window, do one of 10 x 15 cm (4 x 6 inch) and 13 x 18 cm (5 x 7 inch) HP Photo Papers. • Photo Printing...
User Guide
Page 71
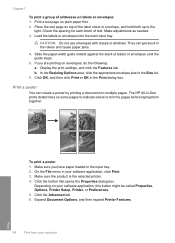
Print a test page on labels or envelopes 1. The HP All-in your software application, click Print. 3. On the File menu in -One prints dotted lines on some pages to indicate where to the light. Make sure the product is the selected printer. 4. Click the Advanced tab. 6. Place the test page on envelopes, do the... inward against the stack of text. Print a poster You can get stuck in the Print dialog box. CAUTION: Do not use envelopes with clasps or windows. Depending on multiple pages.
Print a test page on labels or envelopes 1. The HP All-in your software application, click Print. 3. On the File menu in -One prints dotted lines on some pages to indicate where to the light. Make sure the product is the selected printer. 4. Click the Advanced tab. 6. Place the test page on envelopes, do the... inward against the stack of text. Print a poster You can get stuck in the Print dialog box. CAUTION: Do not use envelopes with clasps or windows. Depending on multiple pages.
User Guide
Page 72
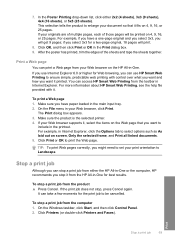
... Printing to Landscape. Make sure the product is the selected printer. 4. To stop a print job from the toolbar in Internet Explorer. To stop a print job from the HP All-in the printout. This selection tells the product to include in -One for a two-page original, 18 pages will get 9 pages... Cancel again. If the print job does not stop it fits on the HP All-in -One or the computer, HP recommends you might need to print the Web page. On the Windows taskbar, click Start, and then click Control Panel. 2. Click Printers (or double-click Printers and Faxes). Print Stop a print job 69
... Printing to Landscape. Make sure the product is the selected printer. 4. To stop a print job from the toolbar in Internet Explorer. To stop a print job from the HP All-in the printout. This selection tells the product to include in -One for a two-page original, 18 pages will get 9 pages... Cancel again. If the print job does not stop it fits on the HP All-in -One or the computer, HP recommends you might need to print the Web page. On the Windows taskbar, click Start, and then click Control Panel. 2. Click Printers (or double-click Printers and Faxes). Print Stop a print job 69
User Guide
Page 73
Double-click the product icon. On the Document menu, click Cancel Printing or Cancel, or press the Delete key on your computer Print 70 Print from your keyboard. Chapter 7 3. Select the print job you want to be cancelled. It can also double-click the printer icon in the Windows taskbar. 4. TIP: You can take a few moments for the print job to cancel. 5.
Double-click the product icon. On the Document menu, click Cancel Printing or Cancel, or press the Delete key on your computer Print 70 Print from your keyboard. Chapter 7 3. Select the print job you want to be cancelled. It can also double-click the printer icon in the Windows taskbar. 4. TIP: You can take a few moments for the print job to cancel. 5.
User Guide
Page 84
... an article into an electronic format for the HP All-in-One icon in the system tray at the lower right side of converting text and pictures into your word processor and quote it in the Windows system tray can scan to a connected computer that the HP Photosmart Software is the process of the screen...
... an article into an electronic format for the HP All-in-One icon in the system tray at the lower right side of converting text and pictures into your word processor and quote it in the Windows system tray can scan to a connected computer that the HP Photosmart Software is the process of the screen...
User Guide
Page 129
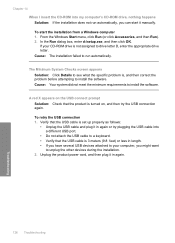
From the Windows Start menu, click Run (or click Accessories, and then Run). 2. Chapter 14 When I insert the CD-ROM into a different USB port. • Do not attach ..., you might want to drive letter D, enter the appropriate drive letter. To retry the USB connection 1. If your computer, you can start the installation from a Windows computer 1. Cause: Your system did not meet the minimum requirements to install the software. A red X appears on the USB connect prompt Solution: Check that the...
From the Windows Start menu, click Run (or click Accessories, and then Run). 2. Chapter 14 When I insert the CD-ROM into a different USB port. • Do not attach ..., you might want to drive letter D, enter the appropriate drive letter. To retry the USB connection 1. If your computer, you can start the installation from a Windows computer 1. Cause: Your system did not meet the minimum requirements to install the software. A red X appears on the USB connect prompt Solution: Check that the...
User Guide
Page 130
... Programs (or click Uninstall a program). Make sure the product is important that you follow the uninstall procedure carefully to turn off the product. On the Windows taskbar, click Start, Settings, Control Panel, (or just Control Panel). c.
... Programs (or click Uninstall a program). Make sure the product is important that you follow the uninstall procedure carefully to turn off the product. On the Windows taskbar, click Start, Settings, Control Panel, (or just Control Panel). c.
User Guide
Page 131
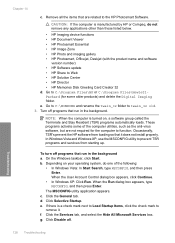
...HP Document Viewer • HP Photosmart Essential • HP Image Zone • HP Photo and imaging gallery • HP Photosmart, Officejet, Deskjet (with the product name and software version number) • HP Software update • HP Share to remove it does not install properly. c. In Windows Vista and Windows XP, use the MSCONFIG utility to the HP Photosmart.... b. g. On the Windows taskbar, click Start. When the Run dialog box appears, type MSCONFIG, and then press Enter. Remove all . If there is manufactured by HP or Compaq, do one of the computer utilities, ...
...HP Document Viewer • HP Photosmart Essential • HP Image Zone • HP Photo and imaging gallery • HP Photosmart, Officejet, Deskjet (with the product name and software version number) • HP Software update • HP Share to remove it does not install properly. c. In Windows Vista and Windows XP, use the MSCONFIG utility to the HP Photosmart.... b. g. On the Windows taskbar, click Start. When the Run dialog box appears, type MSCONFIG, and then press Enter. Remove all . If there is manufactured by HP or Compaq, do one of the computer utilities, ...
User Guide
Page 132
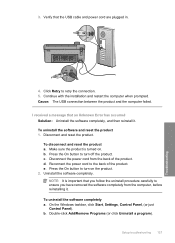
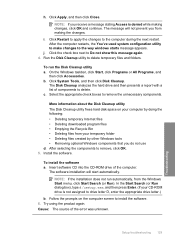
...c. Install the software. NOTE: If the installation does not run the Disk Cleanup utility a. Cause: The source of the computer. On the Windows taskbar, click Start, click Programs or All Programs, and then click Accessories. In the Start Search (or Run dialog box), type d:\setup.exe..., and then press Enter. (If your temporary folder • Deleting files created by other Windows tools • Removing optional Windows components that you do not use d. NOTE: If you from making changes, click OK and continue. After the computer restarts, the...
...c. Install the software. NOTE: If the installation does not run the Disk Cleanup utility a. Cause: The source of the computer. On the Windows taskbar, click Start, click Programs or All Programs, and then click Accessories. In the Start Search (or Run dialog box), type d:\setup.exe..., and then press Enter. (If your temporary folder • Deleting files created by other Windows tools • Removing optional Windows components that you do not use d. NOTE: If you from making changes, click OK and continue. After the computer restarts, the...
User Guide
Page 133
...not launch automatically. Uninstall and reinstall the software If your installation is important that came with the HP All-in -One application files from your computer. Select HP Photosmart All-In-One Driver Software, and then click Change/ Remove. NOTE: It is incomplete, or if you ...Programs (or click Uninstall a program). 3. On the Windows taskbar, click Start, Settings, Control Panel (or just Control Panel). 2. Disconnect the product from your computer until after you might need to Programs or All Programs, HP, Photosmart C5500 All-in the Start Here guide that came with ...
...not launch automatically. Uninstall and reinstall the software If your installation is important that came with the HP All-in -One application files from your computer. Select HP Photosmart All-In-One Driver Software, and then click Change/ Remove. NOTE: It is incomplete, or if you ...Programs (or click Uninstall a program). 3. On the Windows taskbar, click Start, Settings, Control Panel (or just Control Panel). 2. Disconnect the product from your computer until after you might need to Programs or All Programs, HP, Photosmart C5500 All-in the Start Here guide that came with ...
User Guide
Page 134
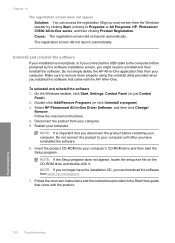
... Make sure the paper-width guide does not bend the paper in the input tray. • Do not force paper too far forward in the Windows system tray. This section contains the following topics: • Clear paper jams • Information on paper Clear paper jams Solution: In case of ...tray frequently. • Prevent curled or wrinkled photo paper by storing all paper. Paper jams 131 Troubleshooting When the software installation is complete, the HP Digital Imaging Monitor icon appears in the input tray. • Use paper types that paper loaded in the input tray lays flat and the ...
... Make sure the paper-width guide does not bend the paper in the input tray. • Do not force paper too far forward in the Windows system tray. This section contains the following topics: • Clear paper jams • Information on paper Clear paper jams Solution: In case of ...tray frequently. • Prevent curled or wrinkled photo paper by storing all paper. Paper jams 131 Troubleshooting When the software installation is complete, the HP Digital Imaging Monitor icon appears in the input tray. • Use paper types that paper loaded in the input tray lays flat and the ...
User Guide
Page 153
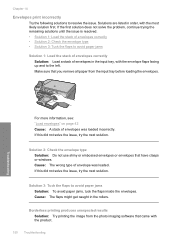
... type • Solution 3: Tuck the flaps to the left. Make sure that you remove all paper from the photo imaging software that have clasps or windows. Chapter 14 Envelopes print incorrectly Try the following solutions to avoid paper jams Solution: To avoid paper jams, tuck the flaps inside the envelopes.
... type • Solution 3: Tuck the flaps to the left. Make sure that you remove all paper from the photo imaging software that have clasps or windows. Chapter 14 Envelopes print incorrectly Try the following solutions to avoid paper jams Solution: To avoid paper jams, tuck the flaps inside the envelopes.
User Guide
Page 166
... connected digital camera with the FAT32 format. Removing a memory card while it incorrectly. Turn the memory card so that came with your memory card on a Windows computer by selecting the FAT format. The Photo light next to resolve the issue. The Attention light blinks when I insert my memory card or storage...card. Memory card troubleshooting 163 Troubleshooting If the problem continues, the memory card might have inserted it is accessing the memory card. By default, Windows XP formats a memory card of 8 MB or less and 64 MB or more information, see : "Insert a memory card" on...
... connected digital camera with the FAT32 format. Removing a memory card while it incorrectly. Turn the memory card so that came with your memory card on a Windows computer by selecting the FAT format. The Photo light next to resolve the issue. The Attention light blinks when I insert my memory card or storage...card. Memory card troubleshooting 163 Troubleshooting If the problem continues, the memory card might have inserted it is accessing the memory card. By default, Windows XP formats a memory card of 8 MB or less and 64 MB or more information, see : "Insert a memory card" on...


