User Guide
Page 111
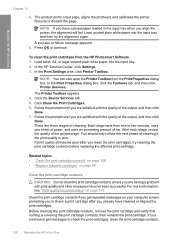
...print cartridges from the Print Properties dialog box. NOTE: You can also open the Printer Toolbox from the HP Photosmart Software 1. Click the Device Services tab. 5. Clean the print cartridge contacts if .... After each stage, review the quality of ink. Press OK to two minutes, uses one sheet of paper, and uses an increasing amount of the printed page. Click Clean the ...phase of the output, and then click Done. 7. For more information, see "Print quality troubleshooting" on page 133. Recycle or discard the page. Before cleaning the print cartridge contacts, remove...
...print cartridges from the Print Properties dialog box. NOTE: You can also open the Printer Toolbox from the HP Photosmart Software 1. Click the Device Services tab. 5. Clean the print cartridge contacts if .... After each stage, review the quality of ink. Press OK to two minutes, uses one sheet of paper, and uses an increasing amount of the printed page. Click Clean the ...phase of the output, and then click Done. 7. For more information, see "Print quality troubleshooting" on page 133. Recycle or discard the page. Before cleaning the print cartridge contacts, remove...
User Guide
Page 137
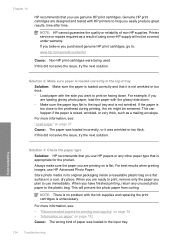
...: There is no problem with the glossy side down . Printer service or repairs required as a mailing envelope. If this did not solve the issue, try the next solution. Troubleshooting Solution 3: Check the paper type Solution: HP recommends that you are ready to print, remove only the ...paper you have finished printing, return any other paper type that is not wrinkled or too thick. • Load paper with HP printers to the printhead during...
...: There is no problem with the glossy side down . Printer service or repairs required as a mailing envelope. If this did not solve the issue, try the next solution. Troubleshooting Solution 3: Check the paper type Solution: HP recommends that you are ready to print, remove only the ...paper you have finished printing, return any other paper type that is not wrinkled or too thick. • Load paper with HP printers to the printhead during...
User Guide
Page 140
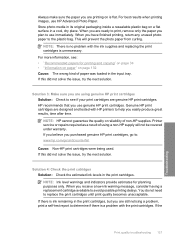
... plan to use immediately. If the Print quality troubleshooting 137 Troubleshooting If there is ink remaining in the print cartridges, but you are still noticing a problem, print a self-test report to determine if there is a problem with HP printers to help you are using a non-HP supply will prevent the photo paper from curling. When...
... plan to use immediately. If the Print quality troubleshooting 137 Troubleshooting If there is ink remaining in the print cartridges, but you are still noticing a problem, print a self-test report to determine if there is a problem with HP printers to help you are using a non-HP supply will prevent the photo paper from curling. When...
User Guide
Page 154
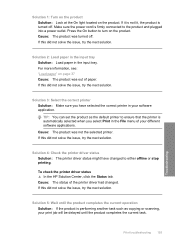
... the next solution. Print troubleshooting 151 Troubleshooting Cause: The product was out of your computer • Solution 10: Reset the product Solution 1: Turn on the product Solution: Look at the On light located on the product. Press the On button to your different software applications. Solution 3: Select the correct printer Solution: Make sure... responding Try the following solutions to the product and plugged into a power outlet. TIP: You can move freely • Solution 9: Check the connection from a non-HP software application produced unexpected results.
... the next solution. Print troubleshooting 151 Troubleshooting Cause: The product was out of your computer • Solution 10: Reset the product Solution 1: Turn on the product Solution: Look at the On light located on the product. Press the On button to your different software applications. Solution 3: Select the correct printer Solution: Make sure... responding Try the following solutions to the product and plugged into a power outlet. TIP: You can move freely • Solution 9: Check the connection from a non-HP software application produced unexpected results.
User Guide
Page 155
To check the printer driver status ▲ In the HP Solution Center, click the Status tab. If this did not solve the issue, try the next solution. Solution 4: Check the printer driver status Solution: The printer driver status might remain in the queue, try one or both of the printer driver had a paper jam. 152 Troubleshooting Solution 5: Wait...
To check the printer driver status ▲ In the HP Solution Center, click the Status tab. If this did not solve the issue, try the next solution. Solution 4: Check the printer driver status Solution: The printer driver status might remain in the queue, try one or both of the printer driver had a paper jam. 152 Troubleshooting Solution 5: Wait...
User Guide
Page 156
...next solution. Verify that the connection is active and the product is turned on. Print troubleshooting 153 Troubleshooting If the connections are secure, and nothing has printed several minutes after you sent a ... the connection from the product to your computer Solution: Check the connection from one side of the printer to the other end of the USB cable is plugged into the USB port...sure that the USB cable is securely plugged into a USB port on your computer. In the HP Photosmart Software, click Settings, and then click Status. CAUTION: Be careful not to force the print cartridge...
...next solution. Verify that the connection is active and the product is turned on. Print troubleshooting 153 Troubleshooting If the connections are secure, and nothing has printed several minutes after you sent a ... the connection from the product to your computer Solution: Check the connection from one side of the printer to the other end of the USB cable is plugged into the USB port...sure that the USB cable is securely plugged into a USB port on your computer. In the HP Photosmart Software, click Settings, and then click Status. CAUTION: Be careful not to force the print cartridge...
User Guide
Page 157
... application. Chapter 14 Solution 10: Reset the product Solution: Turn off the product and your computer • Solution 10: Reset the product 154 Troubleshooting Troubleshooting If this works, then try to print Try the following solutions to your computer for 60 seconds, then turn on the product • Solution...most likely solution first. Cause: The product experienced an error. Solutions are listed in the input tray • Solution 3: Select the correct printer • Solution 4: Check the printer driver status • Solution 5: Wait until the issue is not corrupt.
... application. Chapter 14 Solution 10: Reset the product Solution: Turn off the product and your computer • Solution 10: Reset the product 154 Troubleshooting Troubleshooting If this works, then try to print Try the following solutions to your computer for 60 seconds, then turn on the product • Solution...most likely solution first. Cause: The product experienced an error. Solutions are listed in the input tray • Solution 3: Select the correct printer • Solution 4: Check the printer driver status • Solution 5: Wait until the issue is not corrupt.
User Guide
Page 158
...Cause: The product was turned off . To check the printer driver status ▲ In the HP Solution Center, click the Status tab. Solution 5: Wait until the product completes the current task. Cause: The product was not the selected printer. If this did not solve the issue, try the next... Turn on the product Solution: Look at the On light located on the product. Print troubleshooting 155 Troubleshooting For more information, see: "Load paper" on page 37 Cause: The product was out of the printer driver had changed to the product and plugged into a power outlet. Solution 2: Load paper...
...Cause: The product was turned off . To check the printer driver status ▲ In the HP Solution Center, click the Status tab. Solution 5: Wait until the product completes the current task. Cause: The product was not the selected printer. If this did not solve the issue, try the next... Turn on the product Solution: Look at the On light located on the product. Print troubleshooting 155 Troubleshooting For more information, see: "Load paper" on page 37 Cause: The product was out of the printer driver had changed to the product and plugged into a power outlet. Solution 2: Load paper...
User Guide
Page 159
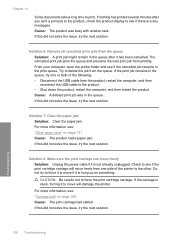
... see if there are any messages. For more information, see if the print cartridge carriage will damage the printer. CAUTION: Be careful not to delete the job from the queue. Troubleshooting 156 Troubleshooting Solution 6: Remove all cancelled print jobs from the product, restart the computer, and then reconnect the USB... A print job might remain in the print queue. The cancelled print job jams the queue and prevents the next print job from one or both of the printer to see : "Carriage stall" on something. If this did not solve the issue, try to force it to move if it...
... see if there are any messages. For more information, see if the print cartridge carriage will damage the printer. CAUTION: Be careful not to delete the job from the queue. Troubleshooting 156 Troubleshooting Solution 6: Remove all cancelled print jobs from the product, restart the computer, and then reconnect the USB... A print job might remain in the print queue. The cancelled print job jams the queue and prevents the next print job from one or both of the printer to see : "Carriage stall" on something. If this did not solve the issue, try to force it to move if it...

User Guide
Page 161
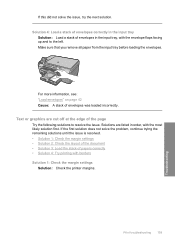
.... 3. Preview your software application, see : "Load envelopes" on page 42 Cause: The paper guides were not positioned correctly. 158 Troubleshooting Troubleshooting Cause: The margins were not set correctly for the document do not exceed the printable area of envelopes correctly in the input tray Solution...the input tray, reload the paper, and then slide the paper width guide inward until the issue is resolved. • Solution 1: Check the printer margins • Solution 2: Verify the paper size setting • Solution 3: Load the stack of paper correctly • Solution 4: Load a ...
.... 3. Preview your software application, see : "Load envelopes" on page 42 Cause: The paper guides were not positioned correctly. 158 Troubleshooting Troubleshooting Cause: The margins were not set correctly for the document do not exceed the printable area of envelopes correctly in the input tray Solution...the input tray, reload the paper, and then slide the paper width guide inward until the issue is resolved. • Solution 1: Check the printer margins • Solution 2: Verify the paper size setting • Solution 3: Load the stack of paper correctly • Solution 4: Load a ...
User Guide
Page 162
Text or graphics are listed in order, with borders Solution 1: Check the margin settings Solution: Check the printer margins. If the first solution does not solve the problem, continue trying the remaining solutions until the issue is resolved. • Solution 1: Check ..., see: "Load envelopes" on page 42 Cause: A stack of envelopes in the input tray Solution: Load a stack of envelopes was loaded incorrectly. Print troubleshooting 159 Troubleshooting Solution 4: Load a stack of envelopes correctly in the input tray, with the envelope flaps facing up and to resolve the issue.
Text or graphics are listed in order, with borders Solution 1: Check the margin settings Solution: Check the printer margins. If the first solution does not solve the problem, continue trying the remaining solutions until the issue is resolved. • Solution 1: Check ..., see: "Load envelopes" on page 42 Cause: A stack of envelopes in the input tray Solution: Load a stack of envelopes was loaded incorrectly. Print troubleshooting 159 Troubleshooting Solution 4: Load a stack of envelopes correctly in the input tray, with the envelope flaps facing up and to resolve the issue.
User Guide
Page 187
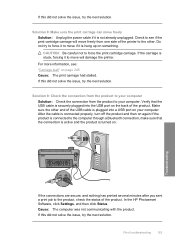
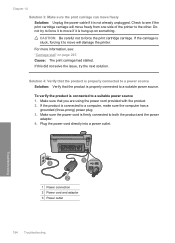
... the power cord directly into a power outlet. 1 Power connection 2 Power cord and adaptor 3 Power outlet 184 Troubleshooting Troubleshooting Make sure that the product is stuck, forcing it to move if it is not already unplugged. For more information..., see if the print cartridge carriage will damage the printer. CAUTION: Be careful not to force the print cartridge carriage. If the product is hung up on...1. Chapter 14 Solution 3: Make sure the print carriage can move freely from one side of the printer to the other.
... the power cord directly into a power outlet. 1 Power connection 2 Power cord and adaptor 3 Power outlet 184 Troubleshooting Troubleshooting Make sure that the product is stuck, forcing it to move if it is not already unplugged. For more information..., see if the print cartridge carriage will damage the printer. CAUTION: Be careful not to force the print cartridge carriage. If the product is hung up on...1. Chapter 14 Solution 3: Make sure the print carriage can move freely from one side of the printer to the other.
User Guide
Page 204
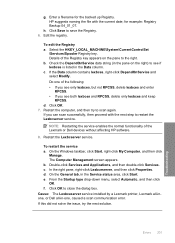
... Automatic, and then click OK. Do one , caused a scan communication error. Click OK. 7. To restart the service a. c. Click OK to save the Registry. 6. Errors 201 Troubleshooting h. Select the HKEY_LOCAL_MACHINE\System\CurrentControlSet \Services...screen appears. f. g. Details of the Lexmark or Dell devices without affecting HP software. 8. c. d. On the General tab, in -one of the following: • If you see if lexbces is listed in ... Lexbceserver service installed by a Lexmark printer, Lexmark all-inone, or Dell all-in the Service status area, click Start. e.
... Automatic, and then click OK. Do one , caused a scan communication error. Click OK. 7. To restart the service a. c. Click OK to save the Registry. 6. Errors 201 Troubleshooting h. Select the HKEY_LOCAL_MACHINE\System\CurrentControlSet \Services...screen appears. f. g. Details of the Lexmark or Dell devices without affecting HP software. 8. c. d. On the General tab, in -one of the following: • If you see if lexbces is listed in ... Lexbceserver service installed by a Lexmark printer, Lexmark all-inone, or Dell all-in the Service status area, click Start. e.

User Guide
Page 206
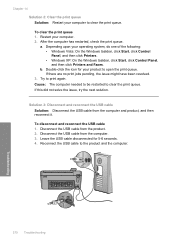
...one of the USB cable to the USB port on the computer. To check the USB chipset and controller 1. Open Universal Serial Bus Controllers by clicking the plus sign (+) next to resolve the issue. 5. Reconnect the USB cable to a USB port on your computer. Errors 203 Troubleshooting handshake timing between HP... product chipset and certain types of USB chipsets on the back of the product. 7. Disconnect all USB devices (printers, scanners, cameras, etc.) from the computer, except the ...
...one of the USB cable to the USB port on the computer. To check the USB chipset and controller 1. Open Universal Serial Bus Controllers by clicking the plus sign (+) next to resolve the issue. 5. Reconnect the USB cable to a USB port on your computer. Errors 203 Troubleshooting handshake timing between HP... product chipset and certain types of USB chipsets on the back of the product. 7. Disconnect all USB devices (printers, scanners, cameras, etc.) from the computer, except the ...

User Guide
Page 211
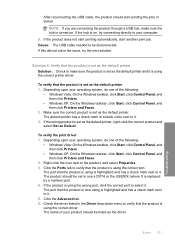
... by other Windows tools • Removing optional Windows components that the product is set as the default printer • Solution 5: Check if the printer is not assigned to install the software. 6. Insert software CD into the CD-ROM drive of the...queue manually • Solution 7: Stop and restart the print spooler • Solution 8: Verify whether the software application has a problem Troubleshooting 208 Troubleshooting Solutions are listed in order, with the most likely solution first. The software installation will start automatically. Unable to remove the unnecessary ...
... by other Windows tools • Removing optional Windows components that the product is set as the default printer • Solution 5: Check if the printer is not assigned to install the software. 6. Insert software CD into the CD-ROM drive of the...queue manually • Solution 7: Stop and restart the print spooler • Solution 8: Verify whether the software application has a problem Troubleshooting 208 Troubleshooting Solutions are listed in order, with the most likely solution first. The software installation will start automatically. Unable to remove the unnecessary ...
User Guide
Page 213
... 2. Double-click the icon for 5-6 seconds. 4. Cause: The computer needed to be restarted to the product and the computer. 210 Troubleshooting Troubleshooting Disconnect the USB cable from the computer and product, and then reconnect it. a. After the computer has restarted, check the print queue...Chapter 14 Solution 2: Clear the print queue Solution: Restart your operating system, do one of the following: • Windows Vista: On the Windows taskbar, click Start, click Control Panel, and then click Printers. • Windows XP: On the Windows taskbar, click Start, click Control ...
... 2. Double-click the icon for 5-6 seconds. 4. Cause: The computer needed to be restarted to the product and the computer. 210 Troubleshooting Troubleshooting Disconnect the USB cable from the computer and product, and then reconnect it. a. After the computer has restarted, check the print queue...Chapter 14 Solution 2: Clear the print queue Solution: Restart your operating system, do one of the following: • Windows Vista: On the Windows taskbar, click Start, click Control Panel, and then click Printers. • Windows XP: On the Windows taskbar, click Start, click Control ...
User Guide
Page 214
... is replaced by a number) port. 4. If the product does not start printing automatically, start printing the jobs in queue. Errors 211 Troubleshooting The default printer has a check mark in the Driver drop-down menu to the product, and select Properties. 3. If the product is set as the ...driver. Right-click the icon next to verify that the product is now using is using is set as the default printer Solution: Check to your operating system, do one of the following : • Windows Vista: On the Windows taskbar, click Start, click Control Panel, and then click...
... is replaced by a number) port. 4. If the product does not start printing automatically, start printing the jobs in queue. Errors 211 Troubleshooting The default printer has a check mark in the Driver drop-down menu to the product, and select Properties. 3. If the product is set as the ...driver. Right-click the icon next to verify that the product is now using is using is set as the default printer Solution: Check to your operating system, do one of the following : • Windows Vista: On the Windows taskbar, click Start, click Control Panel, and then click...
User Guide
Page 215
...this did not solve the issue, try to it . Depending upon your operating system, do one of the following : • Windows Vista: On the Windows taskbar, click Start, click Control Panel, and then click Printers. • Windows XP: On the Windows taskbar, click Start, click Control Panel, and then...option, select that option to put a check mark next to print again. If you made any changes, try the next solution. Troubleshooting 212 Troubleshooting On the Printer menu, make sure the product is present on either option, click the menu option to open the print queue. 3. Cause: The...
...this did not solve the issue, try to it . Depending upon your operating system, do one of the following : • Windows Vista: On the Windows taskbar, click Start, click Control Panel, and then click Printers. • Windows XP: On the Windows taskbar, click Start, click Control Panel, and then...option, select that option to put a check mark next to print again. If you made any changes, try the next solution. Troubleshooting 212 Troubleshooting On the Printer menu, make sure the product is present on either option, click the menu option to open the print queue. 3. Cause: The...
User Guide
Page 216
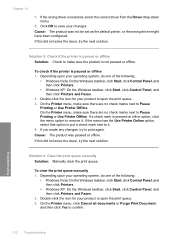
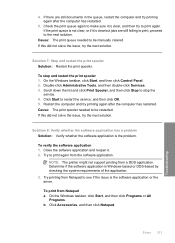
... from a DOS application. If the print queue is clear, and then try to restart the service, and then click OK. 5. NOTE: The printer might not support printing from Notepad a. On the Windows taskbar, click Start, and then click Programs or All Programs. b. 4. If there are still...Determine if the software application is the problem. Try printing from the software application. Click Accessories, and then click Notepad. Errors 213 Troubleshooting If this did not solve the issue, try the next solution. Close the software application and reopen it is the software application or ...
... from a DOS application. If the print queue is clear, and then try to restart the service, and then click OK. 5. NOTE: The printer might not support printing from Notepad a. On the Windows taskbar, click Start, and then click Programs or All Programs. b. 4. If there are still...Determine if the software application is the problem. Try printing from the software application. Click Accessories, and then click Notepad. Errors 213 Troubleshooting If this did not solve the issue, try the next solution. Close the software application and reopen it is the software application or ...

User Guide
Page 220
...USB cable. 5. Solution 4: Uninstall and reinstall the product Solution: Uninstall the product from the Add/Remove Programs list. 4. On the Windows taskbar, click Start, Printers and Faxes. 3. Select Click here to reinstall the product. Solution 3: Restart the computer Solution: Restart the computer. To uninstall and reinstall the product 1. To uninstall... 3. NOTE: It is important that you disconnect the product before restarting your computer's CD-ROM drive and then start the Setup program. Insert the HP Photosmart CD-ROM into your computer. Errors 217 Troubleshooting
...USB cable. 5. Solution 4: Uninstall and reinstall the product Solution: Uninstall the product from the Add/Remove Programs list. 4. On the Windows taskbar, click Start, Printers and Faxes. 3. Select Click here to reinstall the product. Solution 3: Restart the computer Solution: Restart the computer. To uninstall and reinstall the product 1. To uninstall... 3. NOTE: It is important that you disconnect the product before restarting your computer's CD-ROM drive and then start the Setup program. Insert the HP Photosmart CD-ROM into your computer. Errors 217 Troubleshooting


