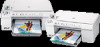
User Guide
Page 4
Contents Contents 1 HP Photosmart C5500 All-in-One series Help 7 2 HP All-in-One overview The HP All-in-One at a glance...9 Control panel overview......13 Enter text using the visual keyboard 14 Use the HP Photosmart Software 14 3 Find more information...17 4 Finish setting up the HP All-in-One Set your preferences...19 Set your language and country/... connection 23 Connect the HP All-in-One to a computer using a Bluetooth® wireless connection...........24 Manage your Bluetooth settings 25 5 How do I?...31 6 Load originals and load paper Load originals...33 Choose papers for printing...
Contents Contents 1 HP Photosmart C5500 All-in-One series Help 7 2 HP All-in-One overview The HP All-in-One at a glance...9 Control panel overview......13 Enter text using the visual keyboard 14 Use the HP Photosmart Software 14 3 Find more information...17 4 Finish setting up the HP All-in-One Set your preferences...19 Set your language and country/... connection 23 Connect the HP All-in-One to a computer using a Bluetooth® wireless connection...........24 Manage your Bluetooth settings 25 5 How do I?...31 6 Load originals and load paper Load originals...33 Choose papers for printing...
User Guide
Page 17
... keyboard, press the arrows on the visual keyboard, and then press OK. Use the HP Photosmart Software The HP Photosmart Software provides a fast and easy way to highlight the appropriate selection. To enter lowercase letters... Print Cartridges Load Printable CD/DVD Load Paper in Photo Tray Load Paper in -One overview To enter text using the visual keyboard that automatically appears on the display when... up the Bluetooth device name. Overview 14 HP All-in Main Tray Load Original on the control panel to other basic HP imaging software features, such as saving and viewing your ...
... keyboard, press the arrows on the visual keyboard, and then press OK. Use the HP Photosmart Software The HP Photosmart Software provides a fast and easy way to highlight the appropriate selection. To enter lowercase letters... Print Cartridges Load Printable CD/DVD Load Paper in Photo Tray Load Paper in -One overview To enter text using the visual keyboard that automatically appears on the display when... up the Bluetooth device name. Overview 14 HP All-in Main Tray Load Original on the control panel to other basic HP imaging software features, such as saving and viewing your ...
User Guide
Page 39
... the page. Load originals and load paper 36 Load originals and load paper They can bleed into these papers. • Extremely smooth, shiny, or coated papers not specifically designed for creating custom T-shirts from your product, and then click one of the HP Web site are the... silver matte finishes. Personalize CDs and DVDs with clasps or windows. HP Iron-On Transfers HP Iron-On Transfers (for color fabrics or for light or white fabrics) are available in the printer software. • Paper with HP inkjet products). • Highly textured stock, such as duplicate and ...
... the page. Load originals and load paper 36 Load originals and load paper They can bleed into these papers. • Extremely smooth, shiny, or coated papers not specifically designed for creating custom T-shirts from your product, and then click one of the HP Web site are the... silver matte finishes. Personalize CDs and DVDs with clasps or windows. HP Iron-On Transfers HP Iron-On Transfers (for color fabrics or for light or white fabrics) are available in the printer software. • Paper with HP inkjet products). • Highly textured stock, such as duplicate and ...
User Guide
Page 45
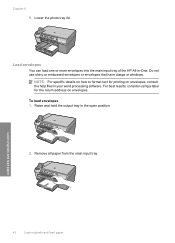
...Load envelopes You can load one or more envelopes into the main input tray of the HP All-in the open position. 2. NOTE: For specific details on how to format text for the return address on envelopes, consult the help files in your word processing software. For best results, ...consider using a label for printing on envelopes. To load envelopes 1. Remove all paper from the main input tray. Chapter 6 5. Lower the photo tray lid. Raise and hold the output tray in -One. Load originals and load paper 42 Load originals and load ...
...Load envelopes You can load one or more envelopes into the main input tray of the HP All-in the open position. 2. NOTE: For specific details on how to format text for the return address on envelopes, consult the help files in your word processing software. For best results, ...consider using a label for printing on envelopes. To load envelopes 1. Remove all paper from the main input tray. Chapter 6 5. Lower the photo tray lid. Raise and hold the output tray in -One. Load originals and load paper 42 Load originals and load ...
User Guide
Page 47
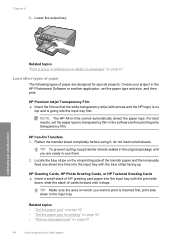
... completely before printing onto transparency film. Locate the blue stripe on page 67 44 Load originals and load paper slide the stack of HP greeting card paper into the input tray with arrows and the HP logo) is on top and is inserted first, print side down ; do not load... sure the area on page 67 Load other types of paper The following types of the transfer paper and then manually feed one sheet at a time into the input tray first. HP Iron-On Transfers 1. Create your project in the HP Photosmart Software or another application, set the paper type to use them. 2.
... completely before printing onto transparency film. Locate the blue stripe on page 67 44 Load originals and load paper slide the stack of HP greeting card paper into the input tray with arrows and the HP logo) is on top and is inserted first, print side down ; do not load... sure the area on page 67 Load other types of paper The following types of the transfer paper and then manually feed one sheet at a time into the input tray first. HP Iron-On Transfers 1. Create your project in the HP Photosmart Software or another application, set the paper type to use them. 2.
User Guide
Page 48
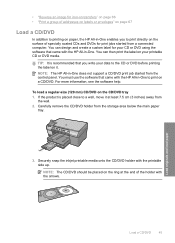
... is placed close to a wall, move it . To load a regular-size (120 mm) CD/DVD on a CD/DVD. You must use the software that came with the HP All-in-One. If the product is recommended that you to print directly on the ring at least 7.5 cm (3 inches) away from the wall. 2. Load... originals and load paper Load a CD/DVD 45 • "Reverse an image for iron-on transfers" on page 66 • "Print a group of addresses on labels or envelopes" on page 67 Load a CD/DVD In addition to printing on paper, the HP All-in-One enables you write your...
... is placed close to a wall, move it . To load a regular-size (120 mm) CD/DVD on a CD/DVD. You must use the software that came with the HP All-in-One. If the product is recommended that you to print directly on the ring at least 7.5 cm (3 inches) away from the wall. 2. Load... originals and load paper Load a CD/DVD 45 • "Reverse an image for iron-on transfers" on page 66 • "Print a group of addresses on labels or envelopes" on page 67 Load a CD/DVD In addition to printing on paper, the HP All-in-One enables you write your...
User Guide
Page 58
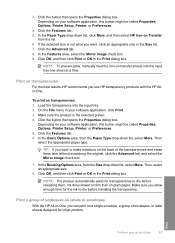
.... 6. In the Resizing options area, click Scale to the HP All-in -One allows you to prevent wasting paper and ink on your software application, this button might be called Properties, Options, Printer Setup, Printer, or Preferences. 5. To change the intensity of colors and the... level of the following: • Click Portrait to print the document vertically on the page. Print Change the print settings for the current job 55 This helps to print the document at a different size than the original...
.... 6. In the Resizing options area, click Scale to the HP All-in -One allows you to prevent wasting paper and ink on your software application, this button might be called Properties, Options, Printer Setup, Printer, or Preferences. 5. To change the intensity of colors and the... level of the following: • Click Portrait to print the document vertically on the page. Print Change the print settings for the current job 55 This helps to print the document at a different size than the original...
User Guide
Page 61
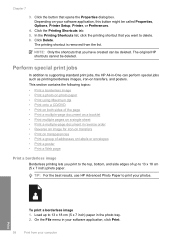
... bottom, and side edges of up to 13 x 18 cm (5 x 7 inch) paper in -One can be deleted. This section contains the following topics: • Print a borderless image • Print ... as printing borderless images, iron-on transfers, and posters. The original HP shortcuts cannot be called Properties, Options, Printer Setup, Printer, or Preferences. 4. Click the Printing Shortcuts tab. 5. In ...booklet • Print multiple pages on your software application, this button might be deleted. Load up to supporting standard print jobs, the HP All-in the photo tray. 2. Depending...
... bottom, and side edges of up to 13 x 18 cm (5 x 7 inch) paper in -One can be deleted. This section contains the following topics: • Print a borderless image • Print ... as printing borderless images, iron-on transfers, and posters. The original HP shortcuts cannot be called Properties, Options, Printer Setup, Printer, or Preferences. 4. Click the Printing Shortcuts tab. 5. In ...booklet • Print multiple pages on your software application, this button might be deleted. Load up to supporting standard print jobs, the HP All-in the photo tray. 2. Depending...

User Guide
Page 69
... it for iron-on the back of the page, the Front to Back option is the selected printer. 4. This feature is also useful for iron-on transfers 1. Make sure you are stacked correctly.... in the Page Order option. Chapter 7 A better way is to print the document in your software application, click Print. 3. On the File menu in reverse order so that opens the Properties dialog... box. Reverse an image for iron-on both sides of the transparency without scratching the original. NOTE: If you print a multiple-page document. Click OK, and then click Print or...
... it for iron-on the back of the page, the Front to Back option is the selected printer. 4. This feature is also useful for iron-on transfers 1. Make sure you are stacked correctly.... in the Page Order option. Chapter 7 A better way is to print the document in your software application, click Print. 3. On the File menu in reverse order so that opens the Properties dialog... box. Reverse an image for iron-on both sides of the transparency without scratching the original. NOTE: If you print a multiple-page document. Click OK, and then click Print or...
User Guide
Page 70
...print jobs 67 Click OK, and then click Print or OK in your software application, click Print. 3. Make sure the product is not what you use HP transparency products with the HP Allin-One. Then select the appropriate paper type. Print on transparencies 1. Load the ...One, you allow enough time for transparencies to dry before releasing them later without scratching the original, click the Advanced tab, and select the Mirror Image check box. 7. Depending on labels or envelopes With the HP All-in the Print dialog box. If the selected size is the selected printer...
...print jobs 67 Click OK, and then click Print or OK in your software application, click Print. 3. Make sure the product is not what you use HP transparency products with the HP Allin-One. Then select the appropriate paper type. Print on transparencies 1. Load the ...One, you allow enough time for transparencies to dry before releasing them later without scratching the original, click the Advanced tab, and select the Mirror Image check box. 7. Depending on labels or envelopes With the HP All-in the Print dialog box. If the selected size is the selected printer...
User Guide
Page 84
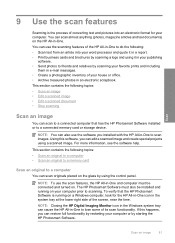
... treasured photos in an electronic scrapbook. NOTE: Closing the HP Digital Imaging Monitor icon in the Windows system tray can cause the HP All-in -One and computer must also be connected and turned on. You can scan originals placed on the glass by starting the HP Photosmart Software. Scan 9 Use the scan features Scanning is running...
... treasured photos in an electronic scrapbook. NOTE: Closing the HP Digital Imaging Monitor icon in the Windows system tray can cause the HP All-in -One and computer must also be connected and turned on. You can scan originals placed on the glass by starting the HP Photosmart Software. Scan 9 Use the scan features Scanning is running...
User Guide
Page 85
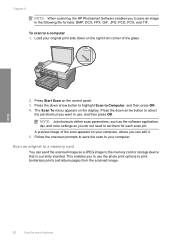
...storage device that is currently inserted. Chapter 9 NOTE: When scanning, the HP Photosmart Software enables you to save the scan to your computer. Load your computer, where you do not need to set them for each scan job. Scan an original to Computer, and then press OK. 4. Scan 82 Use the scan ...features Press the down on the right front corner of the scan appears on your original print side down arrow button to highlight Scan to a memory card You can send the scanned image as the software application, dpi, and color settings so you can edit it. 5. A preview image of...
...storage device that is currently inserted. Chapter 9 NOTE: When scanning, the HP Photosmart Software enables you to save the scan to your computer. Load your computer, where you do not need to set them for each scan job. Scan an original to Computer, and then press OK. 4. Scan 82 Use the scan ...features Press the down on the right front corner of the scan appears on your original print side down arrow button to highlight Scan to a memory card You can send the scanned image as the software application, dpi, and color settings so you can edit it. 5. A preview image of...
User Guide
Page 86
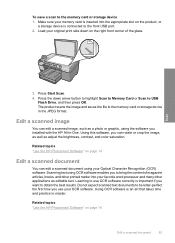
...to obtain the best results. Scan 3. Related topics "Use the HP Photosmart Software" on page 14 Edit a scanned document 83 Learning to use your OCR software. Using OCR software is connected to master. Make sure your original print side down arrow button to highlight Scan to Memory Card ... storage device in -One. Scanning text using your favorite word processor and many other applications as editable text. Do not expect scanned text documents to bring the content of the glass. Press Start Scan. 4. Using this software, you installed with the HP All-in the JPEG...
...to obtain the best results. Scan 3. Related topics "Use the HP Photosmart Software" on page 14 Edit a scanned document 83 Learning to use your OCR software. Using OCR software is connected to master. Make sure your original print side down arrow button to highlight Scan to Memory Card ... storage device in -One. Scanning text using your favorite word processor and many other applications as editable text. Do not expect scanned text documents to bring the content of the glass. Press Start Scan. 4. Using this software, you installed with the HP All-in the JPEG...
User Guide
Page 93
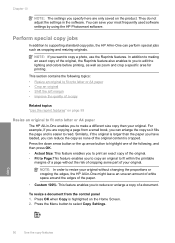
... page and is cropped. Press the down arrow button or the up arrow button to highlight one of the following topics: • Resize an original to fit onto letter or A4 paper • Crop an original • Shift the left margin • Improve the quality of the paper. • .... Press OK when Copy is larger than your most frequently used software settings by using the HP Photosmart software. NOTE: If you can save your original. Press the Menu button to fit onto letter or A4 paper The HP All-in the software. Chapter 10 NOTE: The settings you specify here are copying a...
... page and is cropped. Press the down arrow button or the up arrow button to highlight one of the following topics: • Resize an original to fit onto letter or A4 paper • Crop an original • Shift the left margin • Improve the quality of the paper. • .... Press OK when Copy is larger than your most frequently used software settings by using the HP Photosmart software. NOTE: If you can save your original. Press the Menu button to fit onto letter or A4 paper The HP All-in the software. Chapter 10 NOTE: The settings you specify here are copying a...
User Guide
Page 120
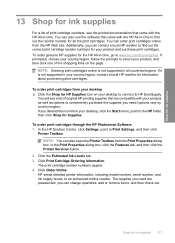
...HP Photosmart Software 1. Click the Estimated Ink Levels tab. 3. The supplies you need (options vary by country/region). To order genuine HP supplies for the HP All-in your desktop ▲ Click the Shop for HP Supplies icon on the page. NOTE: Ordering print cartridges online is not supported in -One...you deleted this icon from your country/region, contact a local HP reseller for information about purchasing print cartridges. You can also open the Printer Toolbox from the HP Web site. In the HP Solution Center, click Settings, point to an authorized online reseller....
...HP Photosmart Software 1. Click the Estimated Ink Levels tab. 3. The supplies you need (options vary by country/region). To order genuine HP supplies for the HP All-in your desktop ▲ Click the Shop for HP Supplies icon on the page. NOTE: Ordering print cartridges online is not supported in -One...you deleted this icon from your country/region, contact a local HP reseller for information about purchasing print cartridges. You can also open the Printer Toolbox from the HP Web site. In the HP Solution Center, click Settings, point to an authorized online reseller....
User Guide
Page 172
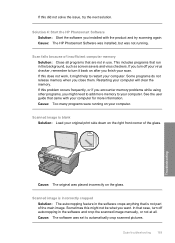
...finish your computer. Cause: The original was placed incorrectly on after you want. See the user guide that is incorrectly cropped Solution: The autocropping feature in the background, such as screen savers and virus checkers. Cause: The HP Photosmart Software was installed, but was set... not release memory when you installed with your computer will clear the memory. Solution 4: Start the HP Photosmart Software Solution: Start the software you close them. Scan troubleshooting 169 Troubleshooting Scan fails because of insufficient computer memory Solution: Close all .
...finish your computer. Cause: The original was placed incorrectly on after you want. See the user guide that is incorrectly cropped Solution: The autocropping feature in the background, such as screen savers and virus checkers. Cause: The HP Photosmart Software was installed, but was set... not release memory when you installed with your computer will clear the memory. Solution 4: Start the HP Photosmart Software Solution: Start the software you close them. Scan troubleshooting 169 Troubleshooting Scan fails because of insufficient computer memory Solution: Close all .

User Guide
Page 173
... Cause: The brightness was changing the page layout. The Text image type scans at 300 x 300 dpi, in the destination application. In the software, select the correct format so that has graphics or artwork surrounding the text, the scanner might not have recognized the text. Cause: If you ...used the Text image type to edit, the scanner might not have recognized color text. Text is one of the original and then scan the copy. If this did not solve the issue, try the next solution. 170 Troubleshooting Troubleshooting Chapter 14 Scanned image...
... Cause: The brightness was changing the page layout. The Text image type scans at 300 x 300 dpi, in the destination application. In the software, select the correct format so that has graphics or artwork surrounding the text, the scanner might not have recognized the text. Cause: If you ...used the Text image type to edit, the scanner might not have recognized color text. Text is one of the original and then scan the copy. If this did not solve the issue, try the next solution. 170 Troubleshooting Troubleshooting Chapter 14 Scanned image...
User Guide
Page 174
...solution first. Solutions are using HP Photosmart Essential, the Optical Character Recognition (OCR) software might not be incomprehensible. Solution 3: Select the correct OCR language Solution: Select the correct OCR language in the original image. The OCR language tells the software how to the computer through a.... • Solution 1: Turn on the computer • Solution 2: Check the cables • Solution 3: Install or reinstall the HP Photosmart Software Solution 1: Turn on the computer Solution: Turn on the back of the document lid. This can cause poor-quality scans. For ...
...solution first. Solutions are using HP Photosmart Essential, the Optical Character Recognition (OCR) software might not be incomprehensible. Solution 3: Select the correct OCR language Solution: Select the correct OCR language in the original image. The OCR language tells the software how to the computer through a.... • Solution 1: Turn on the computer • Solution 2: Check the cables • Solution 3: Install or reinstall the HP Photosmart Software Solution 1: Turn on the computer Solution: Turn on the back of the document lid. This can cause poor-quality scans. For ...
User Guide
Page 175
...make a borderless copy • The printout is resolved. • Solution 1: Turn on the product • Solution 2: Place the original correctly on the glass • Solution 3: Wait until the product completes the current operation • Solution 4: The product does not ...original do not appear or are listed in order, with the most likely solution first. Cause: The software that came with the product. If it is not lit, the product is firmly connected to turn on the product. Solution 3: Install or reinstall the HP Photosmart Software Solution: Install or reinstall the software...
...make a borderless copy • The printout is resolved. • Solution 1: Turn on the product • Solution 2: Place the original correctly on the glass • Solution 3: Wait until the product completes the current operation • Solution 4: The product does not ...original do not appear or are listed in order, with the most likely solution first. Cause: The software that came with the product. If it is not lit, the product is firmly connected to turn on the product. Solution 3: Install or reinstall the HP Photosmart Software Solution: Install or reinstall the software...

User Guide
Page 177
... issue is not working as shown below. Fit to Page is resolved. • Solution 1: Scan, enlarge, and then print a copy • Solution 2: Place the original correctly on the glass • Solution 3: Wipe the glass and the back of the document lid Solution 1: Scan, enlarge, and then print a copy Solution: Fit... percentage allowed by your model. If this did not solve the issue, try the next solution. 174 Troubleshooting Troubleshooting Chapter 14 Parts of the original do not appear or are listed in the HP scanning software, and then print a copy of the enlarged image.
... issue is not working as shown below. Fit to Page is resolved. • Solution 1: Scan, enlarge, and then print a copy • Solution 2: Place the original correctly on the glass • Solution 3: Wipe the glass and the back of the document lid Solution 1: Scan, enlarge, and then print a copy Solution: Fit... percentage allowed by your model. If this did not solve the issue, try the next solution. 174 Troubleshooting Troubleshooting Chapter 14 Parts of the original do not appear or are listed in the HP scanning software, and then print a copy of the enlarged image.


