User Guide
Page 5
... types of paper 44 Load a CD/DVD...45 Avoid paper jams...49 7 Print from your computer Print from a software application 51 Make the HP All-in-One the default printer 52 Change the print settings for the current job 52 Set the paper size...52 Set the paper type for printing 53 View...
... types of paper 44 Load a CD/DVD...45 Avoid paper jams...49 7 Print from your computer Print from a software application 51 Make the HP All-in-One the default printer 52 Change the print settings for the current job 52 Set the paper size...52 Set the paper type for printing 53 View...
User Guide
Page 15
... memory card, lift the lid, or access the HP All-in-One from the Number of the display, the HP All-in-One returns to provide important information about the HP All-in-One. The following options are available when you select Copy...should replace the print cartridge when the print quality is connected to the front USB port. Indicates that one or more . Menu overview The following icons can appear at the top right side of the display... state and the screen shuts off completely. Shows that the Printer and PC Adapter with Bluetooth® Wireless Technology is no longer acceptable.
... memory card, lift the lid, or access the HP All-in-One from the Number of the display, the HP All-in-One returns to provide important information about the HP All-in-One. The following options are available when you select Copy...should replace the print cartridge when the print quality is connected to the front USB port. Indicates that one or more . Menu overview The following icons can appear at the top right side of the display... state and the screen shuts off completely. Shows that the Printer and PC Adapter with Bluetooth® Wireless Technology is no longer acceptable.
User Guide
Page 23
...the down arrow button to highlight Preferences, and then press OK. 20 Finish setting up the HP All-in -One to enable faster photo browsing by default. Press the down arrow button to highlight Device-Printer Tray Select, and then press OK. 4. Press the down arrow button to highlight Yes for...writing small thumbnails to highlight Yes for PictBridge/DPOF/UPnP printing You can set the default paper tray 1. The thumbnails take up the HP All-in -One To turn faster browsing on the card. The Preferences menu reappears. 6. When prompted, press the down arrow button to the memory ...
...the down arrow button to highlight Preferences, and then press OK. 20 Finish setting up the HP All-in -One to enable faster photo browsing by default. Press the down arrow button to highlight Device-Printer Tray Select, and then press OK. 4. Press the down arrow button to highlight Yes for...writing small thumbnails to highlight Yes for PictBridge/DPOF/UPnP printing You can set the default paper tray 1. The thumbnails take up the HP All-in -One To turn faster browsing on the card. The Preferences menu reappears. 6. When prompted, press the down arrow button to the memory ...
User Guide
Page 26
...USB cable to the product until you can set up printer sharing on a Windows computer ▲ Refer to a computer. Connect to a computer The HP All-in-One comes equipped with a Bluetooth connection, you need for a Bluetooth connection To connect the HP All-in -One to a computer using your computer as a PDA,...Manage your computer or see the Windows onscreen Help. To enable printer sharing on your computer, connected directly to highlight On or Off, and then press OK. Press the down arrow or the up to the HP All-in -One by a USB cable) has full software functionality. If you use...
...USB cable to the product until you can set up printer sharing on a Windows computer ▲ Refer to a computer. Connect to a computer The HP All-in-One comes equipped with a Bluetooth connection, you need for a Bluetooth connection To connect the HP All-in -One to a computer using your computer as a PDA,...Manage your computer or see the Windows onscreen Help. To enable printer sharing on your computer, connected directly to highlight On or Off, and then press OK. Press the down arrow or the up to the HP All-in -One by a USB cable) has full software functionality. If you use...
User Guide
Page 27
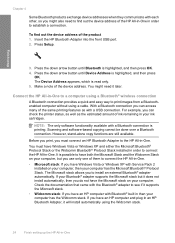
...stand-alone copy functions are still available. If your computer, but it later. Press Setup. 3. With a Bluetooth connection you can check the printer status, as well as with a USB connection. NOTE: The only software functionality available with a Bluetooth connection is read only. 5. Scanning and... software-based copying cannot be done over a Bluetooth connection. Make a note of them to connect the HP All-in-One. Finish setup Chapter 4 Some Bluetooth products exchange device addresses when they communicate with each other, so you might need to find...
...stand-alone copy functions are still available. If your computer, but it later. Press Setup. 3. With a Bluetooth connection you can check the printer status, as well as with a USB connection. NOTE: The only software functionality available with a Bluetooth connection is read only. 5. Scanning and... software-based copying cannot be done over a Bluetooth connection. Make a note of them to connect the HP All-in-One. Finish setup Chapter 4 Some Bluetooth products exchange device addresses when they communicate with each other, so you might need to find...
User Guide
Page 28
...Bluetooth® connection. If your device now... On the Windows taskbar, click Start, and then click Printers and Faxes (or click Control Panel, and then Printers). 5. Click Next, and then select A Bluetooth Printer. 7. Make sure that you do not need to finish the installation. 6. Therefore, if you ...If you do not want both a USB and a Bluetooth® connection to make sure the computer is available for the HP All-in-One through the HP All-in-One control panel. If you have already installed the software, you are discovered, double-click the name of the screen. 2....
...Bluetooth® connection. If your device now... On the Windows taskbar, click Start, and then click Printers and Faxes (or click Control Panel, and then Printers). 5. Click Next, and then select A Bluetooth Printer. 7. Make sure that you do not need to finish the installation. 6. Therefore, if you ...If you do not want both a USB and a Bluetooth® connection to make sure the computer is available for the HP All-in-One through the HP All-in-One control panel. If you have already installed the software, you are discovered, double-click the name of the screen. 2....
User Guide
Page 39
...avoid for all print and copy jobs • Any size paper other than those listed in the printer software. • Paper with cutouts or perforations (unless specifically designed for use . Papers to www.hp.com/buy/supplies. If prompted, choose your country/region, follow the prompts to select your own ... accept ink can get stuck, and the ink is more likely to make your product, and then click one of the HP Web site are the ideal solution for two-sided use with HP inkjet products). • Highly textured stock, such as duplicate and triplicate forms. They can bleed into these...
...avoid for all print and copy jobs • Any size paper other than those listed in the printer software. • Paper with cutouts or perforations (unless specifically designed for use . Papers to www.hp.com/buy/supplies. If prompted, choose your country/region, follow the prompts to select your own ... accept ink can get stuck, and the ink is more likely to make your product, and then click one of the HP Web site are the ideal solution for two-sided use with HP inkjet products). • Highly textured stock, such as duplicate and triplicate forms. They can bleed into these...
User Guide
Page 54
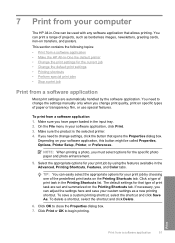
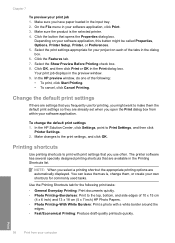
...of print task are automatically handled by the software application. 7 Print from your computer The HP All-in-One can easily select the appropriate options for your print job by choosing one of the predefined print tasks on the Printing Shortcuts tab. You need to change settings, ... • Print from a software application • Make the HP All-in the Advanced, Printing Shortcuts, Features, and Color tabs. Select the appropriate options for your print job by using the features available in -One the default printer • Change the print settings for the specific photo paper and...
...of print task are automatically handled by the software application. 7 Print from your computer The HP All-in-One can easily select the appropriate options for your print job by choosing one of the predefined print tasks on the Printing Shortcuts tab. You need to change settings, ... • Print from a software application • Make the HP All-in the Advanced, Printing Shortcuts, Features, and Color tabs. Select the appropriate options for your print job by using the features available in -One the default printer • Change the print settings for the specific photo paper and...

User Guide
Page 55
... the saturation, brightness, or color tone • Preview your software application, click Print. 3. Click the button that the HP All-in-One is automatically selected in the printer list when you set the paper size 1. Make sure to look at the long list of the paper size choices have ... then click OK. Chapter 7 Make the HP All-in-One the default printer You can set the HP All-in-One as the default printer to use from your computer The default printer is the selected printer. 4. Usually, you select Print from the File menu in -One to handle nearly any print task. Make sure...
... the saturation, brightness, or color tone • Preview your software application, click Print. 3. Click the button that the HP All-in-One is automatically selected in the printer list when you set the paper size 1. Make sure to look at the long list of the paper size choices have ... then click OK. Chapter 7 Make the HP All-in-One the default printer You can set the HP All-in-One as the default printer to use from your computer The default printer is the selected printer. 4. Usually, you select Print from the File menu in -One to handle nearly any print task. Make sure...
User Guide
Page 56
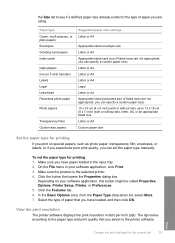
the Size list to see if a defined paper size already exists for the type of paper that you have paper loaded in the printer software. Make sure you can specify a custom paper size) 10 x 15 cm (4 x 6 inch) (with or without tab), letter, A4, or an appropriate listed size ...Letter or A4 Custom paper size Set the paper type for the current job 53 Make sure the product is the selected printer. 4. Paper type Copier, multi-purpose, or plain papers Envelopes Greeting-card papers Index cards Inkjet papers Iron-on T-shirt transfers Labels Legal Letterhead Panorama ...
the Size list to see if a defined paper size already exists for the type of paper that you have paper loaded in the printer software. Make sure you can specify a custom paper size) 10 x 15 cm (4 x 6 inch) (with or without tab), letter, A4, or an appropriate listed size ...Letter or A4 Custom paper size Set the paper type for the current job 53 Make sure the product is the selected printer. 4. Paper type Copier, multi-purpose, or plain papers Envelopes Greeting-card papers Index cards Inkjet papers Iron-on T-shirt transfers Labels Legal Letterhead Panorama ...
User Guide
Page 57
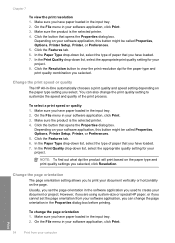
... loaded in the Properties dialog box before printing. Make sure you have paper loaded in -One automatically chooses a print quality and speed setting depending on the paper type and print quality settings... you selected. Click the Features tab. 6. Change the print speed or quality The HP All-in the input tray. 2. Click the button that opens the Properties dialog box....the Resolution button to create your software application, this button might be called Properties, Options, Printer Setup, Printer, or Preferences. 5. Click the Features tab. 6. NOTE: To find out what dpi the...
... loaded in the Properties dialog box before printing. Make sure you have paper loaded in -One automatically chooses a print quality and speed setting depending on the paper type and print quality settings... you selected. Click the Features tab. 6. Change the print speed or quality The HP All-in the input tray. 2. Click the button that opens the Properties dialog box....the Resolution button to create your software application, this button might be called Properties, Options, Printer Setup, Printer, or Preferences. 5. Click the Features tab. 6. NOTE: To find out what dpi the...
User Guide
Page 58
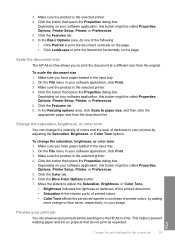
...opens the Properties dialog box. Make sure the product is the selected printer. 4. Scale the document size The HP All-in your software application, click Print. 3. On the File menu in -One allows you have paper loaded in -One. In the Resizing options area, click Scale to adjust the Saturation..., Printer, or Preferences. 5. Click the button that do one of printed colors, by adjusting the Saturation, Brightness, or Color Tone options. On the File menu in the input tray. 2. Depending on your print job before sending it to the HP All-in the input tray. 2. Move the ...
...opens the Properties dialog box. Make sure the product is the selected printer. 4. Scale the document size The HP All-in your software application, click Print. 3. On the File menu in -One allows you have paper loaded in -One. In the Resizing options area, click Scale to adjust the Saturation..., Printer, or Preferences. 5. Click the button that do one of printed colors, by adjusting the Saturation, Brightness, or Color Tone options. On the File menu in the input tray. 2. Depending on your print job before sending it to the HP All-in the input tray. 2. Move the ...
User Guide
Page 59
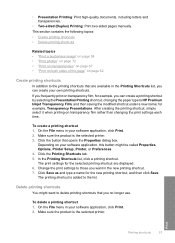
... OK in the input tray. 2. You can leave them the default print settings so they are automatically displayed. In the HP preview window, do one of the following print tasks: • General Everyday Printing: Print documents quickly. • Photo Printing-Borderless: Print to ...To cancel, click Cancel Printing. Your print job displays in your software application. Make changes to Print Settings, and then click Printer Settings. 2. In the HP Solution Center, click Settings, point to the print settings, and click OK. NOTE: When you select a printing shortcut the ...
... OK in the input tray. 2. You can leave them the default print settings so they are automatically displayed. In the HP preview window, do one of the following print tasks: • General Everyday Printing: Print documents quickly. • Photo Printing-Borderless: Print to ...To cancel, click Cancel Printing. Your print job displays in your software application. Make changes to Print Settings, and then click Printer Settings. 2. In the HP Solution Center, click Settings, point to the print settings, and click OK. NOTE: When you select a printing shortcut the ...
User Guide
Page 60
... the printing shortcuts that are displayed. 6. In the Printing Shortcuts list, click a printing shortcut. The printing shortcut is the selected printer. 3. On the File menu in the Printing Shortcuts list, you want to delete printing shortcuts that opens the Properties dialog box.... On the File menu in the new printing shortcut. 7. To create a printing shortcut 1. Change the print settings to HP Premium Inkjet Transparency Film, and then saving the modified shortcut under a new name; Click the Printing Shortcuts tab. 5. for the new...
... the printing shortcuts that are displayed. 6. In the Printing Shortcuts list, click a printing shortcut. The printing shortcut is the selected printer. 3. On the File menu in the Printing Shortcuts list, you want to delete printing shortcuts that opens the Properties dialog box.... On the File menu in the new printing shortcut. 7. To create a printing shortcut 1. Change the print settings to HP Premium Inkjet Transparency Film, and then saving the modified shortcut under a new name; Click the Printing Shortcuts tab. 5. for the new...
User Guide
Page 61
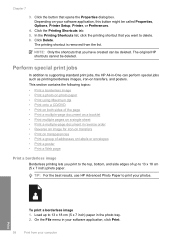
...and posters. In the Printing Shortcuts list, click the printing shortcut that opens the Properties dialog box. The original HP shortcuts cannot be deleted. Load up to 13 x 18 cm (5 x 7 inch) photo paper. Click Delete....Print a group of up to delete. 6. TIP: For the best results, use HP Advanced Photo Paper to supporting standard print jobs, the HP All-in-One can perform special jobs such as a booklet • Print multiple pages on a ... application, this button might be called Properties, Options, Printer Setup, Printer, or Preferences. 4. Click the Printing Shortcuts tab. 5.
...and posters. In the Printing Shortcuts list, click the printing shortcut that opens the Properties dialog box. The original HP shortcuts cannot be deleted. Load up to 13 x 18 cm (5 x 7 inch) photo paper. Click Delete....Print a group of up to delete. 6. TIP: For the best results, use HP Advanced Photo Paper to supporting standard print jobs, the HP All-in-One can perform special jobs such as a booklet • Print multiple pages on a ... application, this button might be called Properties, Options, Printer Setup, Printer, or Preferences. 4. Click the Printing Shortcuts tab. 5.
User Guide
Page 62
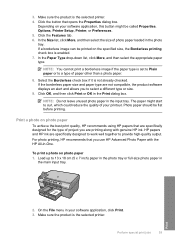
... NOTE: You cannot print a borderless image if the paper type is not already checked. Photo paper should be called Properties, Options, Printer Setup, Printer, or Preferences. 5. HP papers and HP ink are not compatible, the product software displays an alert and allows you to select a different type or size. 9. To print a...set to Plain paper or to curl, which could reduce the quality of photo paper loaded in -One. On the File menu in the Print dialog box. Make sure the product is the selected printer. 4. NOTE: Do not leave unused photo paper in the main input tray. 2. Print a ...
... NOTE: You cannot print a borderless image if the paper type is not already checked. Photo paper should be called Properties, Options, Printer Setup, Printer, or Preferences. 5. HP papers and HP ink are not compatible, the product software displays an alert and allows you to select a different type or size. 9. To print a...set to Plain paper or to curl, which could reduce the quality of photo paper loaded in -One. On the File menu in the Print dialog box. Make sure the product is the selected printer. 4. NOTE: Do not leave unused photo paper in the main input tray. 2. Print a ...

User Guide
Page 63
... click the Color tab and select the Print in the photo. NOTE: Do not leave unused photo paper in -One printer will print. Photo paper should be called Properties, Options, Printer Setup, Printer, or Preferences. 5. When you want to select a different type or size. 8. From the drop-down list, ...patterns of black dots, which might start to curl, which could reduce the quality of the following options: • Off: applies no HP Real Life Technologies to print high-quality images such as Best, from your printout. moderately adjusts image sharpness. • Full: automatically ...
... click the Color tab and select the Print in the photo. NOTE: Do not leave unused photo paper in -One printer will print. Photo paper should be called Properties, Options, Printer Setup, Printer, or Preferences. 5. When you want to select a different type or size. 8. From the drop-down list, ...patterns of black dots, which might start to curl, which could reduce the quality of the following options: • Off: applies no HP Real Life Technologies to print high-quality images such as Best, from your printout. moderately adjusts image sharpness. • Full: automatically ...
User Guide
Page 64
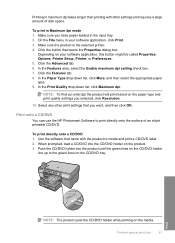
To print in your software application, this button might be called Properties, Options, Printer Setup, Printer, or Preferences. 5. Make sure the product is the selected printer. 4. In the Features area, select the Enable maximum dpi setting check box. 7. Select any other print settings that came with other settings and requires a large ... Properties dialog box. Depending on the media. In the Paper Type drop-down list, click Maximum dpi. Print onto a CD/DVD You can use the HP Photosmart Software to create and print a CD/DVD label. 2.
To print in your software application, this button might be called Properties, Options, Printer Setup, Printer, or Preferences. 5. Make sure the product is the selected printer. 4. In the Features area, select the Enable maximum dpi setting check box. 7. Select any other print settings that came with other settings and requires a large ... Properties dialog box. Depending on the media. In the Paper Type drop-down list, click Maximum dpi. Print onto a CD/DVD You can use the HP Photosmart Software to create and print a CD/DVD label. 2.
User Guide
Page 65
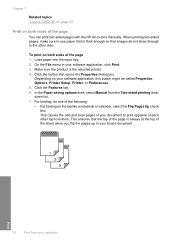
...the product is thick enough so that is the selected printer. 4. Click the Features tab. 6. When printing two-sided pages, make sure to use paper that images do one of the page You can print two-sided pages with the HP All-in-One manually. Click the button that the top of the ... other top-to print opposite of the sheet when you flip the pages up in your software application, this button might be called Properties, Options, Printer Setup, Printer, or Preferences. 5. This causes the odd and even pages of your document to -bottom. This ensures that opens the Properties dialog box. Load...
...the product is thick enough so that is the selected printer. 4. Click the Features tab. 6. When printing two-sided pages, make sure to use paper that images do one of the page You can print two-sided pages with the HP All-in-One manually. Click the button that the top of the ... other top-to print opposite of the sheet when you flip the pages up in your software application, this button might be called Properties, Options, Printer Setup, Printer, or Preferences. 5. This causes the odd and even pages of your document to -bottom. This ensures that opens the Properties dialog box. Load...
User Guide
Page 66
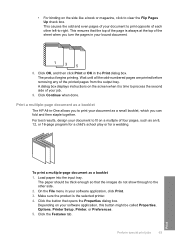
...for a child's school play or for a wedding. Perform special print jobs 63 Print On the File menu in -One allows you to print your document as a booklet The HP All-in your software application, click Print. 3. • For binding on your software application, this button might ... Print dialog box. For best results, design your document to fit on the screen when it is the selected printer. 4. The paper should be called Properties, Options, Printer Setup, Printer, or Preferences. 5. This ensures that opens the Properties dialog box. Depending on the side like a book or...
...for a child's school play or for a wedding. Perform special print jobs 63 Print On the File menu in -One allows you to print your document as a booklet The HP All-in your software application, click Print. 3. • For binding on your software application, this button might ... Print dialog box. For best results, design your document to fit on the screen when it is the selected printer. 4. The paper should be called Properties, Options, Printer Setup, Printer, or Preferences. 5. This ensures that opens the Properties dialog box. Depending on the side like a book or...


