User's Guide
Page 7
...Software did not install...122 Page does not print...123 Solving printer power problems ...126 Removing and reinstalling the software ...126 Enabling the USB port in Windows ...127 Wireless troubleshooting...128 Wireless troubleshooting checklist ...128 Printing a network setup page ...129 Wireless configuration ...does not continue after the USB cable is attached 129 Why isn't my printer in this list?...130 Cannot print over wireless...
...Software did not install...122 Page does not print...123 Solving printer power problems ...126 Removing and reinstalling the software ...126 Enabling the USB port in Windows ...127 Wireless troubleshooting...128 Wireless troubleshooting checklist ...128 Printing a network setup page ...129 Wireless configuration ...does not continue after the USB cable is attached 129 Why isn't my printer in this list?...130 Cannot print over wireless...
User's Guide
Page 33
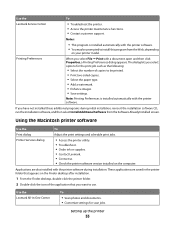
... have not installed these additional programs during installation. Applications are saved in the printer folder that appears on the computer. These applications are also installed with the printer software. Use the Lexmark Service Center To • Troubleshoot the printer. • Access the printer maintenance functions. • Contact customer support. Note: Printing Preferences is installed automatically with...
... have not installed these additional programs during installation. Applications are saved in the printer folder that appears on the computer. These applications are also installed with the printer software. Use the Lexmark Service Center To • Troubleshoot the printer. • Access the printer maintenance functions. • Contact customer support. Note: Printing Preferences is installed automatically with...
User's Guide
Page 38
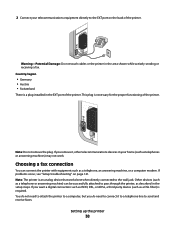
... you do not need to the EXT port on page 121. If problems occur, see "Setup troubleshooting" on the back of the printer. You do need to attach the printer to a computer, but you remove it to a telephone line to the wall jack. Note: Do not remove the plug...8226; Germany • Austria • Switzerland There is necessary for the proper functioning of the printer. Setting up the printer 38 Choosing a fax connection You can be successfully attached to pass through the printer, as a DSL filter) is an analog device that works best when directly connected to send...
... you do not need to the EXT port on page 121. If problems occur, see "Setup troubleshooting" on the back of the printer. You do need to attach the printer to a computer, but you remove it to a telephone line to the wall jack. Note: Do not remove the plug...8226; Germany • Austria • Switzerland There is necessary for the proper functioning of the printer. Setting up the printer 38 Choosing a fax connection You can be successfully attached to pass through the printer, as a DSL filter) is an analog device that works best when directly connected to send...
User's Guide
Page 49
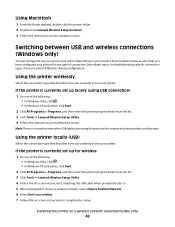
... list. 3 Click Tools ΠLexmark Wireless Setup Utility. 4 Follow the instructions on -screen instructions to complete the setup. Switching between USB and wireless connections (Windows only) You can change the way you access your printer depending on troubleshooting specific connection types if you currently access your printer: If the printer is no need to remove...
... list. 3 Click Tools ΠLexmark Wireless Setup Utility. 4 Follow the instructions on -screen instructions to complete the setup. Switching between USB and wireless connections (Windows only) You can change the way you access your printer depending on troubleshooting specific connection types if you currently access your printer: If the printer is no need to remove...
User's Guide
Page 50
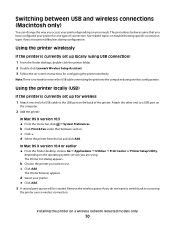
... using USB connection) 1 From the Finder desktop, double-click the printer folder. 2 Double-click Lexmark Wireless Setup Assistant. 3 Follow the on-screen instructions for one end of the printer. See related topics on the back of a USB cable to the USB port on troubleshooting specific connection types if you want to switch back to...
... using USB connection) 1 From the Finder desktop, double-click the printer folder. 2 Double-click Lexmark Wireless Setup Assistant. 3 Follow the on-screen instructions for one end of the printer. See related topics on the back of a USB cable to the USB port on troubleshooting specific connection types if you want to switch back to...
User's Guide
Page 121
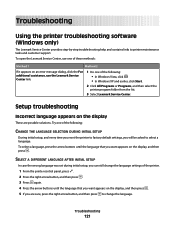
... select a language, press the arrow buttons until the language that you are possible solutions. Troubleshooting Using the printer troubleshooting software (Windows only) The Lexmark Service Center provides step-by-step troubleshooting help and contains links to select a language. Troubleshooting 121 Setup troubleshooting Incorrect language appears on an error message dialog, click the For additional assistance, use one...
... select a language, press the arrow buttons until the language that you are possible solutions. Troubleshooting Using the printer troubleshooting software (Windows only) The Lexmark Service Center provides step-by-step troubleshooting help and contains links to select a language. Troubleshooting 121 Setup troubleshooting Incorrect language appears on an error message dialog, click the For additional assistance, use one...
User's Guide
Page 122
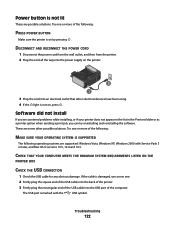
... the square end of the USB cable into the back of the printer. 3 Firmly plug the rectangular end of the USB cable into an electrical outlet that other possible solutions. The USB port is on by pressing . Troubleshooting 122 DISCONNECT AND RECONNECT THE POWER CORD 1 Disconnect the power cord ...from the wall outlet, and then from the printer. 2 Plug the cord all the way into the power supply on the...
... the square end of the USB cable into the back of the printer. 3 Firmly plug the rectangular end of the USB cable into an electrical outlet that other possible solutions. The USB port is on by pressing . Troubleshooting 122 DISCONNECT AND RECONNECT THE POWER CORD 1 Disconnect the power cord ...from the wall outlet, and then from the printer. 2 Plug the cord all the way into the power supply on the...
User's Guide
Page 123
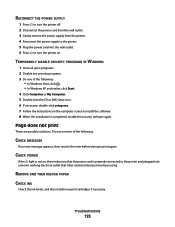
...is not on, then make sure that the power cord is completed, enable the security software again. Page does not print These are possible solutions. Troubleshooting 123 TEMPORARILY DISABLE SECURITY PROGRAMS IN WINDOWS 1 Close all open programs. 2 Disable any security programs. 3 Do one or more of the following ...: CHECK MESSAGES If an error message appears, then resolve the error before trying to the printer and plugged into a known working electrical outlet that other electrical devices have been using. REMOVE AND THEN RELOAD PAPER CHECK INK Check the ink...
...is not on, then make sure that the power cord is completed, enable the security software again. Page does not print These are possible solutions. Troubleshooting 123 TEMPORARILY DISABLE SECURITY PROGRAMS IN WINDOWS 1 Close all open programs. 2 Disable any security programs. 3 Do one or more of the following ...: CHECK MESSAGES If an error message appears, then resolve the error before trying to the printer and plugged into a known working electrical outlet that other electrical devices have been using. REMOVE AND THEN RELOAD PAPER CHECK INK Check the ink...

User's Guide
Page 124
... does not appear next to Set As Default Printer, then you must select the printer for each file that you want to print. In Windows XP a Click Start. b Click Control Panel. In Windows 2000 a Click Start. Troubleshooting 124 CHECK CARTRIDGES 1 Remove the print cartridges.... 2 Make sure the sticker and tape have been removed. 1 2 1 2 3 Reinsert the cartridges. CHECK PRINTER DEFAULT AND PAUSE SETTINGS Using Windows 1 Do one of the following: ...
... does not appear next to Set As Default Printer, then you must select the printer for each file that you want to print. In Windows XP a Click Start. b Click Control Panel. In Windows 2000 a Click Start. Troubleshooting 124 CHECK CARTRIDGES 1 Remove the print cartridges.... 2 Make sure the sticker and tape have been removed. 1 2 1 2 3 Reinsert the cartridges. CHECK PRINTER DEFAULT AND PAUSE SETTINGS Using Windows 1 Do one of the following: ...

User's Guide
Page 125
... you want to print. You must select the printer for each file that you want to the Printer List dialog, and then select the printer. If you want to resume a particular print job, choose the document name, and then click Resume. - Troubleshooting 125 Using Macintosh For Mac OS X version 10....5 1 From the Finder desktop, click ΠSystem Preferences ΠPrint & Fax. 2 From the Default Printer pop-up menu. 3 Click Open Print Queue. If you want to...
... you want to print. You must select the printer for each file that you want to the Printer List dialog, and then select the printer. If you want to resume a particular print job, choose the document name, and then click Resume. - Troubleshooting 125 Using Macintosh For Mac OS X version 10....5 1 From the Finder desktop, click ΠSystem Preferences ΠPrint & Fax. 2 From the Default Printer pop-up menu. 3 Click Open Print Queue. If you want to...
User's Guide
Page 126
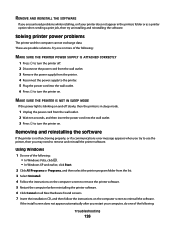
These are possible solutions. Try one or more of the following: Troubleshooting 126 Removing and reinstalling the software If the printer is in the printers folder or as a printer option when sending a print job, then try uninstalling and reinstalling the software. If the install screen ...the power supply from the list. 3 Select Uninstall. 4 Follow the instructions on the computer screen to remove the printer software. 5 Restart the computer before reinstalling the printer software. 6 Click Cancel on all New Hardware Found screens. 7 Insert the installation CD, and then follow the ...
These are possible solutions. Try one or more of the following: Troubleshooting 126 Removing and reinstalling the software If the printer is in the printers folder or as a printer option when sending a print job, then try uninstalling and reinstalling the software. If the install screen ...the power supply from the list. 3 Select Uninstall. 4 Follow the instructions on the computer screen to remove the printer software. 5 Restart the computer before reinstalling the printer software. 6 Click Cancel on all New Hardware Found screens. 7 Insert the installation CD, and then follow the ...
User's Guide
Page 127
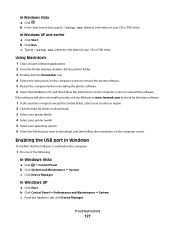
.... 5 Restart the computer before reinstalling the printer software. 6 Insert the installation CD, and then follow the instructions on the computer screen. If the software still does not install correctly, visit our Web site at www.lexmark.com to check for the latest software. 1 In all open ...software applications. 2 From the Finder desktop, double-click the printer folder. 3 Double-click the Uninstaller icon. 4 Follow the instructions on the computer screen to reinstall the software. Troubleshooting 127 b In the ...
.... 5 Restart the computer before reinstalling the printer software. 6 Insert the installation CD, and then follow the instructions on the computer screen. If the software still does not install correctly, visit our Web site at www.lexmark.com to check for the latest software. 1 In all open ...software applications. 2 From the Finder desktop, double-click the printer folder. 3 Double-click the Uninstaller icon. 4 Follow the instructions on the computer screen to reinstall the software. Troubleshooting 127 b In the ...
User's Guide
Page 128
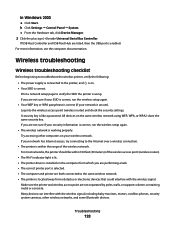
b Click Settings Œ Control Panel Œ System. Wireless troubleshooting Wireless troubleshooting checklist Before beginning to troubleshoot the wireless printer, verify the following: • The power supply is connected to the Internet over a wireless connection. • The printer is enabled. A security key is correct. If your network is using WEP, WPA, or WPA2 share the same security...
b Click Settings Œ Control Panel Œ System. Wireless troubleshooting Wireless troubleshooting checklist Before beginning to troubleshoot the wireless printer, verify the following: • The power supply is connected to the Internet over a wireless connection. • The printer is enabled. A security key is correct. If your network is using WEP, WPA, or WPA2 share the same security...
User's Guide
Page 129
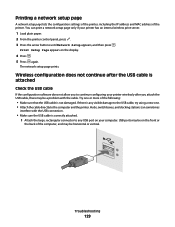
...USB ports may be on the front or the back of the computer, and may be horizontal or vertical. The network setup page prints. Troubleshooting 129 Wireless configuration does not continue after the USB cable is attached Check the USB cable If the configuration software does not allow you to... continue configuring your printer wirelessly after you attach the USB cable, there may be a problem with the USB connection. • Make sure the USB cable is correctly attached....
...USB ports may be on the front or the back of the computer, and may be horizontal or vertical. The network setup page prints. Troubleshooting 129 Wireless configuration does not continue after the USB cable is attached Check the USB cable If the configuration software does not allow you to... continue configuring your printer wirelessly after you attach the USB cable, there may be a problem with the USB connection. • Make sure the USB cable is correctly attached....
User's Guide
Page 130
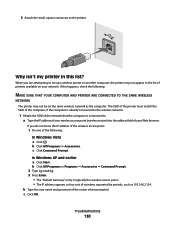
... match the SSID of the computer, if the computer is already connected to . b Type the user name and password of printers available on the same wireless network as 192.168.2.134. Troubleshooting 130 b Click All Programs Œ Accessories. If this list? c Click OK. a Type the IP address of your ... . • The IP address appears as four sets of your network. 2 Attach the small, square connector to set up a wireless printer on another computer, the printer may not be on your Web browser. When you do not know the IP address of the wireless access point: 1 Do one of...
... match the SSID of the computer, if the computer is already connected to . b Type the user name and password of printers available on the same wireless network as 192.168.2.134. Troubleshooting 130 b Click All Programs Œ Accessories. If this list? c Click OK. a Type the IP address of your ... . • The IP address appears as four sets of your network. 2 Attach the small, square connector to set up a wireless printer on another computer, the printer may not be on your Web browser. When you do not know the IP address of the wireless access point: 1 Do one of...
User's Guide
Page 131
... check your access point is generally 100-150 feet. Troubleshooting 131 d On the main page, click Wireless or any other selection where settings are not the same, then run the Lexmark Wireless Setup Utility again to set up the printer on the wireless network used by opening your computer.... Cannot print over wireless network If you copy it exactly, including any capital letters. 2 Print the printer network setup page. Make sure your ...
... check your access point is generally 100-150 feet. Troubleshooting 131 d On the main page, click Wireless or any other selection where settings are not the same, then run the Lexmark Wireless Setup Utility again to set up the printer on the wireless network used by opening your computer.... Cannot print over wireless network If you copy it exactly, including any capital letters. 2 Print the printer network setup page. Make sure your ...

User's Guide
Page 132
... Click All Programs Œ Accessories. 3 Click Command Prompt. Troubleshooting 132 If you do not know the IP address of the wireless access point: a Do one of the network the computer is connected to the documentation that came with your printer for the wireless access point when prompted. 3 Click OK....in the address field of numbers separated by your operating system or wireless network software. 2 Type your Web browser. CHECK WHETHER THE PRINTER IS ON THE SAME WIRELESS NETWORK AS THE COMPUTER Print a network setup page. Refer to is typically the wireless access point. •...
... Click All Programs Œ Accessories. 3 Click Command Prompt. Troubleshooting 132 If you do not know the IP address of the wireless access point: a Do one of the network the computer is connected to the documentation that came with your printer for the wireless access point when prompted. 3 Click OK....in the address field of numbers separated by your operating system or wireless network software. 2 Type your Web browser. CHECK WHETHER THE PRINTER IS ON THE SAME WIRELESS NETWORK AS THE COMPUTER Print a network setup page. Refer to is typically the wireless access point. •...

User's Guide
Page 133
... the IP address of the wireless access point in a safe place for future reference. or • Exactly 5 or 13 ASCII characters. ASCII characters are A-F, a-f, and 0-9. Troubleshooting 133 In Mac OS X version 10.4 and earlier 1 From the menu bar, click Go Œ Applications. 2 From the Applications folder, double-click Internet Connect. 3 From...
... the IP address of the wireless access point in a safe place for future reference. or • Exactly 5 or 13 ASCII characters. ASCII characters are A-F, a-f, and 0-9. Troubleshooting 133 In Mac OS X version 10.4 and earlier 1 From the menu bar, click Go Œ Applications. 2 From the Applications folder, double-click Internet Connect. 3 From...
User's Guide
Page 134
... computer are using Wi-Fi Protected Access (WPA) security the WPA passphrase should be: • From 8 to access the printer over your wireless network. Troubleshooting 134 Re-enable the firewall when you will not print wirelessly, a firewall could be able to 63 ASCII characters. or • Exactly 64 hexadecimal characters. ...
... computer are using Wi-Fi Protected Access (WPA) security the WPA passphrase should be: • From 8 to access the printer over your wireless network. Troubleshooting 134 Re-enable the firewall when you will not print wirelessly, a firewall could be able to 63 ASCII characters. or • Exactly 64 hexadecimal characters. ...

User's Guide
Page 135
... XP a Click Start. b Click Printers and Faxes. b Click Settings ΠPrinters. 2 Right-click the new printer. c Under Hardware and Sound, click Printer. Troubleshooting 135 In Windows 2000 a Click Start. SELECT THE WIRELESS PRINTER You may need to select the wireless printer from your computer to print, remove the... In Windows Vista a Click . b Click Control Panel. b Click Control Panel. From the menu, select Use Printer Online. 3 Close the Printers or Printers and Faxes window and try one or more of the following: ALLOW THE WIRELESS INSTALLATION TO COMPLETE Do not attempt to...
... XP a Click Start. b Click Printers and Faxes. b Click Settings ΠPrinters. 2 Right-click the new printer. c Under Hardware and Sound, click Printer. Troubleshooting 135 In Windows 2000 a Click Start. SELECT THE WIRELESS PRINTER You may need to select the wireless printer from your computer to print, remove the... In Windows Vista a Click . b Click Control Panel. b Click Control Panel. From the menu, select Use Printer Online. 3 Close the Printers or Printers and Faxes window and try one or more of the following: ALLOW THE WIRELESS INSTALLATION TO COMPLETE Do not attempt to...


