User's Guide
Page 6
... to fax settings...110 Maintaining the printer 111 Maintaining print cartridges...111 Installing print cartridges...111 Removing a used print cartridge ...112 Refilling print cartridges...113 Using genuine Lexmark print cartridges...113 Aligning print cartridges ...114 Cleaning the print cartridge nozzles...114 Checking ink levels...115 Wiping the print cartridge nozzles and contacts ...116 Preserving the print cartridges ...117 Cleaning the scanner glass...
... to fax settings...110 Maintaining the printer 111 Maintaining print cartridges...111 Installing print cartridges...111 Removing a used print cartridge ...112 Refilling print cartridges...113 Using genuine Lexmark print cartridges...113 Aligning print cartridges ...114 Cleaning the print cartridge nozzles...114 Checking ink levels...115 Wiping the print cartridge nozzles and contacts ...116 Preserving the print cartridges ...117 Cleaning the scanner glass...
User's Guide
Page 27
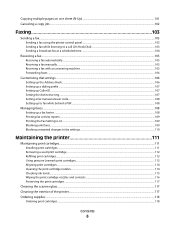
Menus List Setup menu Photo menu Maintenance Note: The Photo menu is enabled only when you insert a memory • Ink Levels device into the printer. • Clean Cartridges • Align Cartridges • Print Test Page Device Setup Easy Photo • Print • Paper Size • Photo Size •... All • Print Date Range • Scan Sheet Network Setup (appears only if the printer has an Save Photos internal wireless print server) • Computer (appears only if the printer is connected directly to • Print Setup Page • Wi-Fi Protected Setup •...
Menus List Setup menu Photo menu Maintenance Note: The Photo menu is enabled only when you insert a memory • Ink Levels device into the printer. • Clean Cartridges • Align Cartridges • Print Test Page Device Setup Easy Photo • Print • Paper Size • Photo Size •... All • Print Date Range • Scan Sheet Network Setup (appears only if the printer has an Save Photos internal wireless print server) • Computer (appears only if the printer is connected directly to • Print Setup Page • Wi-Fi Protected Setup •...
User's Guide
Page 34
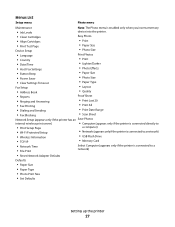
Lexmark Wireless Setup Assistant Set up the printer 34 Setting up the printer on the desktop computer may not come with cartridge installation. • Print a test page. • Print an alignment page. • Clean the print cartridge nozzles. • Order ink or supplies. • Register the printer. ... laptop port connection overrides the rear USB port connection. Lexmark Printer Utility • Get help with these applications, depending on the features of the printer that you have not yet installed the printer software on the desktop computer. 2 Connect a USB cable...
Lexmark Wireless Setup Assistant Set up the printer 34 Setting up the printer on the desktop computer may not come with cartridge installation. • Print a test page. • Print an alignment page. • Clean the print cartridge nozzles. • Order ink or supplies. • Register the printer. ... laptop port connection overrides the rear USB port connection. Lexmark Printer Utility • Get help with these applications, depending on the features of the printer that you have not yet installed the printer software on the desktop computer. 2 Connect a USB cable...
User's Guide
Page 113
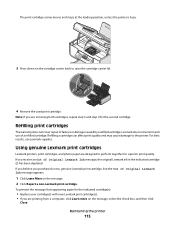
... repair of a refilled cartridge. Maintaining the printer 113 Using genuine Lexmark print cartridges Lexmark printers, print cartridges, and photo paper are removing both cartridges, repeat step 3 and step 4 for the indicated cartridge(s): • Replace your cartridge(s) with new Lexmark print cartridge(s). • If you purchased a new, genuine Lexmark print cartridge, but the Out of Original Lexmark Ink message, the original Lexmark ink in the indicated cartridge (s) has been depleted...
... repair of a refilled cartridge. Maintaining the printer 113 Using genuine Lexmark print cartridges Lexmark printers, print cartridges, and photo paper are removing both cartridges, repeat step 3 and step 4 for the indicated cartridge(s): • Replace your cartridge(s) with new Lexmark print cartridge(s). • If you purchased a new, genuine Lexmark print cartridge, but the Out of Original Lexmark Ink message, the original Lexmark ink in the indicated cartridge (s) has been depleted...
User's Guide
Page 114
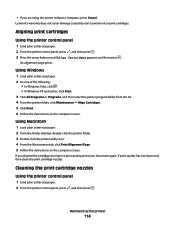
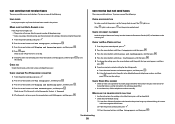
...In Windows XP and earlier, click Start. 3 Click All Programs or Programs, and then select the printer program folder from the list. 4 From the printer folder, click Maintenance ΠAlign Cartridges. 5 Click Print. 6 Follow the instructions on the computer screen. Using Macintosh 1 Load plain ...If you are using the printer without a computer, press Cancel. Cleaning the print cartridge nozzles Using the printer control panel 1 Load plain Letter-size paper. 2 From the printer control panel, press , and then press . Lexmark's warranty does not cover damage caused by non-Lexmark ink or print...
...In Windows XP and earlier, click Start. 3 Click All Programs or Programs, and then select the printer program folder from the list. 4 From the printer folder, click Maintenance ΠAlign Cartridges. 5 Click Print. 6 Follow the instructions on the computer screen. Using Macintosh 1 Load plain ...If you are using the printer without a computer, press Cancel. Cleaning the print cartridge nozzles Using the printer control panel 1 Load plain Letter-size paper. 2 From the printer control panel, press , and then press . Lexmark's warranty does not cover damage caused by non-Lexmark ink or print...
User's Guide
Page 115
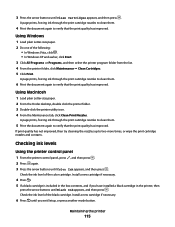
...Start. 3 Click All Programs or Programs, and then select the printer program folder from the list. 4 From the printer folder, click Maintenance ΠClean Cartridges. 5 Click Print. Install a new cartridge if necessary. 6 Press until Black Ink appears, and then press . Using Windows 1 Load plain Letter-size...Letter-size paper. 2 From the Finder desktop, double click the printer folder. 3 Double-click the printer utility icon. 4 From the Maintenance tab, click Clean Print Nozzles. A page prints, forcing ink through the print cartridge nozzles to clean them. 5 Print the document again to two ...
...Start. 3 Click All Programs or Programs, and then select the printer program folder from the list. 4 From the printer folder, click Maintenance ΠClean Cartridges. 5 Click Print. Install a new cartridge if necessary. 6 Press until Black Ink appears, and then press . Using Windows 1 Load plain Letter-size...Letter-size paper. 2 From the Finder desktop, double click the printer folder. 3 Double-click the printer utility icon. 4 From the Maintenance tab, click Clean Print Nozzles. A page prints, forcing ink through the print cartridge nozzles to clean them. 5 Print the document again to two ...
User's Guide
Page 116
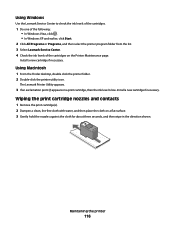
..., and then place the cloth on the Printer Maintenance page. Using Macintosh 1 From the Finder desktop, double click the printer folder. 2 Double-click the printer utility icon. Using Windows Use the Lexmark Service Center to check the ink levels of the cartridges. 1 Do one of the following: &#...In Windows XP and earlier, click Start. 2 Click All Programs or Programs, and then select the printer program folder from the list. 3 Select Lexmark Service Center. 4 Check the ink levels of the cartridges on a flat surface. 3 Gently hold the nozzles against the cloth for about three seconds, and...
..., and then place the cloth on the Printer Maintenance page. Using Macintosh 1 From the Finder desktop, double click the printer folder. 2 Double-click the printer utility icon. Using Windows Use the Lexmark Service Center to check the ink levels of the cartridges. 1 Do one of the following: &#...In Windows XP and earlier, click Start. 2 Click All Programs or Programs, and then select the printer program folder from the list. 3 Select Lexmark Service Center. 4 Check the ink levels of the cartridges on a flat surface. 3 Gently hold the nozzles against the cloth for about three seconds, and...
User's Guide
Page 117
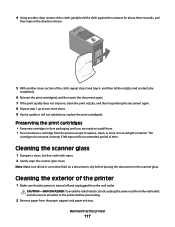
...container. Cleaning the exterior of the printer 1 Make sure that the printer is still not satisfactory, replace the print cartridge(s). CAUTION-SHOCK HAZARD: To avoid the risk of time. Maintaining the printer 117 The cartridges do not print correctly if left ...cartridges in the direction shown. 5 With another clean section of the cloth, gently hold the cloth against the contacts for an extended period of electric shock, unplug the power cord from the wall outlet and disconnect all ink or corrective fluid on a document is dry before proceeding. 2 Remove paper from the printer...
...container. Cleaning the exterior of the printer 1 Make sure that the printer is still not satisfactory, replace the print cartridge(s). CAUTION-SHOCK HAZARD: To avoid the risk of time. Maintaining the printer 117 The cartridges do not print correctly if left ...cartridges in the direction shown. 5 With another clean section of the cloth, gently hold the cloth against the contacts for an extended period of electric shock, unplug the power cord from the wall outlet and disconnect all ink or corrective fluid on a document is dry before proceeding. 2 Remove paper from the printer...
User's Guide
Page 118
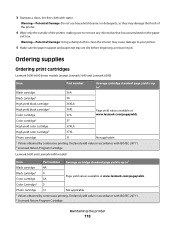
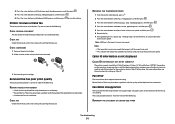
.... 2 Licensed Return Program Cartridge Lexmark 5690 and Lexmark 6690 models Item Part number Average cartridge standard page yield is up to1 Black cartridge 4A Black cartridge2 4 Color cartridge 5A Page yield values available at www.lexmark.com/pageyields. Warning-Potential Damage: Using a damp cloth to clean the interior may damage the finish of the printer. 4 Wipe only the...
.... 2 Licensed Return Program Cartridge Lexmark 5690 and Lexmark 6690 models Item Part number Average cartridge standard page yield is up to1 Black cartridge 4A Black cartridge2 4 Color cartridge 5A Page yield values available at www.lexmark.com/pageyields. Warning-Potential Damage: Using a damp cloth to clean the interior may damage the finish of the printer. 4 Wipe only the...
User's Guide
Page 123
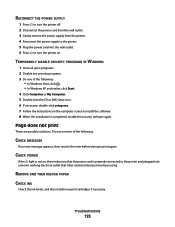
... completed, enable the security software again. REMOVE AND THEN RELOAD PAPER CHECK INK Check the ink levels, and then install new print cartridges if necessary. Page does not print These are possible solutions. RECONNECT THE POWER SUPPLY 1 Press to turn the printer off. 2 Disconnect the power cord from the wall outlet. 3 Gently remove the...
... completed, enable the security software again. REMOVE AND THEN RELOAD PAPER CHECK INK Check the ink levels, and then install new print cartridges if necessary. Page does not print These are possible solutions. RECONNECT THE POWER SUPPLY 1 Press to turn the printer off. 2 Disconnect the power cord from the wall outlet. 3 Gently remove the...
User's Guide
Page 146
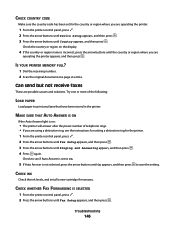
... answer after the preset number of the following: LOAD PAPER Load paper to print any faxes that have been stored in the printer. CHECK INK Check the ink levels, and install a new cartridge if necessary. Try one page at a time. CHECK COUNTRY CODE Make sure the country code has been set to On. 5 If...
... answer after the preset number of the following: LOAD PAPER Load paper to print any faxes that have been stored in the printer. CHECK INK Check the ink levels, and install a new cartridge if necessary. Try one page at a time. CHECK COUNTRY CODE Make sure the country code has been set to On. 5 If...
User's Guide
Page 148
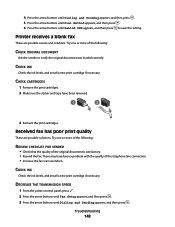
... the ink levels, and install a new print cartridge if necessary. Troubleshooting 148 Received fax has poor print quality These are possible causes and solutions. DECREASE THE TRANSMISSION SPEED 1 From the printer control panel, press . 2 Press the arrow buttons until Fax Setup appears, and then ... one or more of the original document is satisfactory. • Resend the fax. Printer receives a blank fax These are possible solutions. CHECK INK Check the ink levels, and install a new print cartridge if necessary. 4 Press the arrow buttons until Dialing and Sending appears, and then ...
... the ink levels, and install a new print cartridge if necessary. Troubleshooting 148 Received fax has poor print quality These are possible causes and solutions. DECREASE THE TRANSMISSION SPEED 1 From the printer control panel, press . 2 Press the arrow buttons until Fax Setup appears, and then ... one or more of the original document is satisfactory. • Resend the fax. Printer receives a blank fax These are possible solutions. CHECK INK Check the ink levels, and install a new print cartridge if necessary. 4 Press the arrow buttons until Dialing and Sending appears, and then ...
User's Guide
Page 164
... breach of those provisions to the following : replacement of the Software Program or reimbursement of any Software Program installed on Lexmark that the patented print cartridge(s) shipped with this single use license/agreement; The term "Software Program" includes machine-readable instructions, audio/visual content (... you do not accept the terms of ink will replace the Software Program should it be returned only to the extent Lexmark is able, Lexmark hereby limits its suppliers, governs your use of the price paid for use in the cartridge when replacement is ninety (90) days ...
... breach of those provisions to the following : replacement of the Software Program or reimbursement of any Software Program installed on Lexmark that the patented print cartridge(s) shipped with this single use license/agreement; The term "Software Program" includes machine-readable instructions, audio/visual content (... you do not accept the terms of ink will replace the Software Program should it be returned only to the extent Lexmark is able, Lexmark hereby limits its suppliers, governs your use of the price paid for use in the cartridge when replacement is ninety (90) days ...
User's Guide
Page 168
... 117 removing 112 using genuine Lexmark 113 wiping 116 changing default settings 28 Power Saver timeout 28 temporary settings 28 changing wireless settings after installation (Mac) 48 Index 168 changing wireless settings after installation (Windows) 48 checking ink levels 115 cleaning exterior of the printer 117 cleaning print cartridge nozzles 114 Club Internet 47...
... 117 removing 112 using genuine Lexmark 113 wiping 116 changing default settings 28 Power Saver timeout 28 temporary settings 28 changing wireless settings after installation (Mac) 48 Index 168 changing wireless settings after installation (Windows) 48 checking ink levels 115 cleaning exterior of the printer 117 cleaning print cartridge nozzles 114 Club Internet 47...
User's Guide
Page 169
... index cards loading 66 information needed for setting up printer on wireless network 45 information, finding 10 infrastructure network 59 ink levels, checking 115 inserting flash drives 86 memory cards 85 installation cable 58, 59 installing network printer 64 print cartridges 111 printer software 30, 126 installing printer on wireless network (Macintosh) 45 on wireless network...
... index cards loading 66 information needed for setting up printer on wireless network 45 information, finding 10 infrastructure network 59 ink levels, checking 115 inserting flash drives 86 memory cards 85 installation cable 58, 59 installing network printer 64 print cartridges 111 printer software 30, 126 installing printer on wireless network (Macintosh) 45 on wireless network...
Fax Guide
Page 30
... SURE THAT AUTO ANSWER IS ON If the Auto Answer light is on the scanner glass. CHECK INK Check the ink levels, and install a new cartridge if necessary. CHECK DOCUMENT PLACEMENT Load the original document faceup into the Automatic Document Feeder (ADF) or... facedown on . Check to see the instructions for setting a distinctive ring for faxing, check to save the setting. CHECK THE DIAL PREFIX SETTING 1 From the printer...
... SURE THAT AUTO ANSWER IS ON If the Auto Answer light is on the scanner glass. CHECK INK Check the ink levels, and install a new cartridge if necessary. CHECK DOCUMENT PLACEMENT Load the original document faceup into the Automatic Document Feeder (ADF) or... facedown on . Check to see the instructions for setting a distinctive ring for faxing, check to save the setting. CHECK THE DIAL PREFIX SETTING 1 From the printer...
Fax Guide
Page 31
... your fax to verify the original document was loaded correctly. CHECK INK Check the ink levels, and install a new print cartridge if necessary. Note: 2400 bps is not displayed CALLER ID PATTERN MAY NOT BE SET CORRECTLY The printer supports two distinct Caller ID patterns: Pattern 1 (FSK) and ...Pattern 2 (DTMF). Resend the fax. These are possible solutions. CHECK INK Check the ink levels, and install a new print cartridge if necessary. Received fax has poor print quality...
... your fax to verify the original document was loaded correctly. CHECK INK Check the ink levels, and install a new print cartridge if necessary. Note: 2400 bps is not displayed CALLER ID PATTERN MAY NOT BE SET CORRECTLY The printer supports two distinct Caller ID patterns: Pattern 1 (FSK) and ...Pattern 2 (DTMF). Resend the fax. These are possible solutions. CHECK INK Check the ink levels, and install a new print cartridge if necessary. Received fax has poor print quality...


