Quick Reference
Page 5
...you can be able to a wireless network, setting up to : Applications > select your printer folder 2 Double‑click User's Guide. To return an ink cartridge, go to www.lexmark.com/recycle, and then follow the instructions to request a postage‑paid bag. • Recycle the product packaging. ...• Recycle your old printer instead of the paper manually or automatically (depending on adding your printer to reduce...
...you can be able to a wireless network, setting up to : Applications > select your printer folder 2 Double‑click User's Guide. To return an ink cartridge, go to www.lexmark.com/recycle, and then follow the instructions to request a postage‑paid bag. • Recycle the product packaging. ...• Recycle your old printer instead of the paper manually or automatically (depending on adding your printer to reduce...
Quick Reference
Page 20
...Click Install, and then follow the instructions on the computer screen. If the installation dialog does not appear after a minute, then launch the CD manually: a Click , or click Start and then click Run. If the installation dialog screen does not appear after a minute, then click the CD...you installed the printer software on the computer screen. You may have chosen to the Lexmark Web site at http://support.lexmark.com. 20 Installing the printer software Note: If you do. For Windows users 1 Close all open applications. 2 Insert the installation software CD. Using the printer ...
...Click Install, and then follow the instructions on the computer screen. If the installation dialog does not appear after a minute, then launch the CD manually: a Click , or click Start and then click Run. If the installation dialog screen does not appear after a minute, then click the CD...you installed the printer software on the computer screen. You may have chosen to the Lexmark Web site at http://support.lexmark.com. 20 Installing the printer software Note: If you do. For Windows users 1 Close all open applications. 2 Insert the installation software CD. Using the printer ...

Quick Reference
Page 38
Step 3: Set your fax name and fax number Your user information includes your name or your company name, your fax ...up on your telephone number, and then save the setting. Step 4: Set the printer to receive faxes automatically or manually If the printer is your telephone number, unless you have multiple telephone numbers on the greater number of rings that...contact or a fax group. To set Auto Answer to Step 6. If you set the printer to receive faxes automatically or manually: 1 From the printer control panel, navigate to Auto Answer: > Fax Setup > Ringing and Answering > Auto Answer ...
Step 3: Set your fax name and fax number Your user information includes your name or your company name, your fax ...up on your telephone number, and then save the setting. Step 4: Set the printer to receive faxes automatically or manually If the printer is your telephone number, unless you have multiple telephone numbers on the greater number of rings that...contact or a fax group. To set Auto Answer to Step 6. If you set the printer to receive faxes automatically or manually: 1 From the printer control panel, navigate to Auto Answer: > Fax Setup > Ringing and Answering > Auto Answer ...
Quick Reference
Page 40
..., Options, or Setup. 3 Click the Fax tab, and then make any electrical or cabling connections, such as magazine clippings) into the ADF. For Macintosh users 1 With a document open , click File > Print. 2 Make sure the appropriate printer is selected. 4 Enter the recipient fax number or numbers in the... Number. Touch Accept every time you want to be faxed is available only in select printer models. Tips: • You can enter fax numbers manually or by using the scanner glass, close the scanner cover, if possible, to import a contact. Place these items on the list, then choose...
..., Options, or Setup. 3 Click the Fax tab, and then make any electrical or cabling connections, such as magazine clippings) into the ADF. For Macintosh users 1 With a document open , click File > Print. 2 Make sure the appropriate printer is selected. 4 Enter the recipient fax number or numbers in the... Number. Touch Accept every time you want to be faxed is available only in select printer models. Tips: • You can enter fax numbers manually or by using the scanner glass, close the scanner cover, if possible, to import a contact. Place these items on the list, then choose...

Quick Reference
Page 42
... 3 Double-click the software installer package, and then follow the instructions on a wireless network, make sure that your system support person. For Macintosh users 1 Close all open applications. 2 Insert the installation software CD. Wi‑Fi Protected Setup (WPS) is a simple and secure configuration that allows... connection when prompted to select a connection type. If the installation dialog does not appear after a minute, then launch the CD manually: a Click , or click Start and then click Run. Note: Select Wireless connection when prompted to select a connection type.
... 3 Double-click the software installer package, and then follow the instructions on a wireless network, make sure that your system support person. For Macintosh users 1 Close all open applications. 2 Insert the installation software CD. Wi‑Fi Protected Setup (WPS) is a simple and secure configuration that allows... connection when prompted to select a connection type. If the installation dialog does not appear after a minute, then launch the CD manually: a Click , or click Start and then click Run. Note: Select Wireless connection when prompted to select a connection type.

Quick Reference
Page 43
If nothing happens after 30 seconds, then do one of your access point, see the User's Guide. If your access point. For more information, see the documentation that came with the access point or contact your access point (wireless router) is ... to : > Network Setup > Wireless Networking > Wi‑Fi Protected Setup > PIN Method 2 Follow the instructions on the printer display. Configuring Wi‑Fi Protected Setup manually Note: Make sure your system support person.
If nothing happens after 30 seconds, then do one of your access point, see the User's Guide. If your access point. For more information, see the documentation that came with the access point or contact your access point (wireless router) is ... to : > Network Setup > Wireless Networking > Wi‑Fi Protected Setup > PIN Method 2 Follow the instructions on the printer display. Configuring Wi‑Fi Protected Setup manually Note: Make sure your system support person.

Quick Reference
Page 45
... page 47 45 Installation screen did not install If you encountered problems while installing, or if your problem Visit our Web site at http://support.lexmark.com to confirm this checklist to solve most printer problems: • Make sure the power cord is plugged into the printer and into a .... • Turn the printer off the printer. Before you troubleshoot" checklist does not solve the problem, then try the following: LAUNCH THE PRINTER CD MANUALLY For Windows users 1 Click , or click Start and then click Run. 2 In the Start Search or Run box, type D:\setup.exe, where D is not in the...
... page 47 45 Installation screen did not install If you encountered problems while installing, or if your problem Visit our Web site at http://support.lexmark.com to confirm this checklist to solve most printer problems: • Make sure the power cord is plugged into the printer and into a .... • Turn the printer off the printer. Before you troubleshoot" checklist does not solve the problem, then try the following: LAUNCH THE PRINTER CD MANUALLY For Windows users 1 Click , or click Start and then click Run. 2 In the Start Search or Run box, type D:\setup.exe, where D is not in the...
Quick Reference
Page 49
... not be a specific number that you press before you can configure the fax settings in the Network Getting Started Guide or the comprehensive User's Guide available on the installation software CD. However, if the printer memory is full, then the printer may need a digital line ..., a DSL filter, a VoIP adapter, or a cable modem) before you know. Resolve the error to : > Fax Setup > Ringing and Answering > Manual Answer Code 2 Copy the manual answer code that converts digital signals into analog signals. MAKE SURE THE PRINTER IS CONNECTED TO A TELEPHONE LINE You need to connect the...
... not be a specific number that you press before you can configure the fax settings in the Network Getting Started Guide or the comprehensive User's Guide available on the installation software CD. However, if the printer memory is full, then the printer may need a digital line ..., a DSL filter, a VoIP adapter, or a cable modem) before you know. Resolve the error to : > Fax Setup > Ringing and Answering > Manual Answer Code 2 Copy the manual answer code that converts digital signals into analog signals. MAKE SURE THE PRINTER IS CONNECTED TO A TELEPHONE LINE You need to connect the...
Quick Reference
Page 53
... BIDIRECTIONAL COMMUNICATION IS ENABLED Note: This solution applies to print again. If you select the right printer port. 8 Click OK, and then try to Windows users only. 1 Click , or click Start and then click Run. 2 In the Start Search or Run box, type control printers. 3 Press Enter, or click ...‑click the printer, and then select Properties or Printer properties from the menu. 5 Click the Ports tab. 6 Click the box next to the manual that it is a USB port, then scroll through the list and select the port with your wireless router, is working and is operating correctly, then...
... BIDIRECTIONAL COMMUNICATION IS ENABLED Note: This solution applies to print again. If you select the right printer port. 8 Click OK, and then try to Windows users only. 1 Click , or click Start and then click Run. 2 In the Start Search or Run box, type control printers. 3 Press Enter, or click ...‑click the printer, and then select Properties or Printer properties from the menu. 5 Click the Ports tab. 6 Click the box next to the manual that it is a USB port, then scroll through the list and select the port with your wireless router, is working and is operating correctly, then...
User's Guide
Page 7
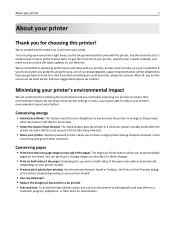
... be able to make sure you print on one sheet. We're committed to delivering performance and value with the printer, and then skim the User's Guide to learn how to share a single printer among multiple computers, thus conserving energy and other resources. After all, you 're satisfied. ... paper • Print more than one page image on one side of a sheet of paper. • Print on both sides of the paper manually or automatically (depending on one side of documents to reduce their environmental impact. You can scan documents or photographs and save . We've worked hard...
... be able to make sure you print on one sheet. We're committed to delivering performance and value with the printer, and then skim the User's Guide to learn how to share a single printer among multiple computers, thus conserving energy and other resources. After all, you 're satisfied. ... paper • Print more than one page image on one side of a sheet of paper. • Print on both sides of the paper manually or automatically (depending on one side of documents to reduce their environmental impact. You can scan documents or photographs and save . We've worked hard...
User's Guide
Page 27
... need to : SUPPORT & DOWNLOADS > select your printer > select your CD or DVD drive. Using the Internet 1 Go to the Lexmark Web site at http://support.lexmark.com. 2 Navigate to reinstall the software, then uninstall the current software first. Using the printer software 27 3 Double‑click Uninstaller....the printer software on the computer screen. If the installation dialog does not appear after a minute, then launch the CD manually: a Click , or click Start and then click Run. For Windows users 1 Close all open software programs. 2 Insert the installation software CD.
... need to : SUPPORT & DOWNLOADS > select your printer > select your CD or DVD drive. Using the Internet 1 Go to the Lexmark Web site at http://support.lexmark.com. 2 Navigate to reinstall the software, then uninstall the current software first. Using the printer software 27 3 Double‑click Uninstaller....the printer software on the computer screen. If the installation dialog does not appear after a minute, then launch the CD manually: a Click , or click Start and then click Run. For Windows users 1 Close all open software programs. 2 Insert the installation software CD.
User's Guide
Page 50
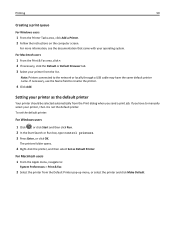
...list. Setting your printer, then it is not the default printer. For Macintosh users 1 From the Print & Fax area, click +. 2 If necessary, click ... system. If you send a print job. To set the default printer: For Windows users 1 Click , or click Start and then click Run. 2 In the Start Search... menu, or select the printer and click Make Default. For Macintosh users 1 From the Apple menu, navigate to: System Preferences > Print...have the same default printer name. Printing 50 Creating a print queue For Windows users 1 From the Printer Tasks area, click Add a Printer. 2 Follow the ...
...list. Setting your printer, then it is not the default printer. For Macintosh users 1 From the Print & Fax area, click +. 2 If necessary, click ... system. If you send a print job. To set the default printer: For Windows users 1 Click , or click Start and then click Run. 2 In the Start Search... menu, or select the printer and click Make Default. For Macintosh users 1 From the Apple menu, navigate to: System Preferences > Print...have the same default printer name. Printing 50 Creating a print queue For Windows users 1 From the Printer Tasks area, click Add a Printer. 2 Follow the ...

User's Guide
Page 62
... format that came with the OCR software, ABBYY FineReader. • If the OCR software is missing, then insert the installation software CD. For Macintosh users 1 Load the original document faceup into the ADF or facedown on the scanner glass. 2 Click or Start. 3 Click All Programs or Programs, and...for this to edit it from the list. 4 Navigate to use. Note: For information on finding the list of devices, check the documentation that can manually select all of the packages listed. 3 From the list of applications when you want to : Printer Home > select your printer > Scan > Document...
... format that came with the OCR software, ABBYY FineReader. • If the OCR software is missing, then insert the installation software CD. For Macintosh users 1 Load the original document faceup into the ADF or facedown on the scanner glass. 2 Click or Start. 3 Click All Programs or Programs, and...for this to edit it from the list. 4 Navigate to use. Note: For information on finding the list of devices, check the documentation that can manually select all of the packages listed. 3 From the list of applications when you want to : Printer Home > select your printer > Scan > Document...

User's Guide
Page 84
... list using the Address Book in the printer control panel or the phone book in the fax software. f If you want to add a contact manually or import a contact: • Address Book-Import a contact from the Address Book. • New Entry-Add a new contact. Creating a contact ...list using the fax software For Windows users 1 Click or Start. 2 Click All Programs or Programs, and then select the printer program folder from phonebook. 5 From the Phonebook field, choose a phone...
... list using the Address Book in the printer control panel or the phone book in the fax software. f If you want to add a contact manually or import a contact: • Address Book-Import a contact from the Address Book. • New Entry-Add a new contact. Creating a contact ...list using the fax software For Windows users 1 Click or Start. 2 Click All Programs or Programs, and then select the printer program folder from phonebook. 5 From the Phonebook field, choose a phone...

User's Guide
Page 87
... in the printer. The line is working telephone, DSL, or VoIP line. Receiving faxes automatically 1 Make sure that Auto Answer is on the. For Macintosh users 1 With a document open, choose File > Print. 2 From the Printer pop‑up on : From the home screen, navigate to: > Fax Setup... receiving faxes: • Make sure that the ringer volume is detected, the printer automatically receives the incoming fax. You can enter fax numbers manually or by using the Phone Book feature. 5 If necessary, enter a prefix in the "Fax number(s)" field. Receiving faxes Tips for your ...
... in the printer. The line is working telephone, DSL, or VoIP line. Receiving faxes automatically 1 Make sure that Auto Answer is on the. For Macintosh users 1 With a document open, choose File > Print. 2 From the Printer pop‑up on : From the home screen, navigate to: > Fax Setup... receiving faxes: • Make sure that the ringer volume is detected, the printer automatically receives the incoming fax. You can enter fax numbers manually or by using the Phone Book feature. 5 If necessary, enter a prefix in the "Fax number(s)" field. Receiving faxes Tips for your ...
User's Guide
Page 88
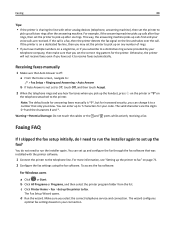
... calls are the digits 0-9 and the characters # and *. If the printer is not set the printer to run the installer again. Receiving faxes manually 1 Make sure that you have set up the printer to receive faxes automatically. You do I skipped the fax setup initially, do not need to...with other analog devices (telephone, answering machine), then set up calls two rings after six rings. Note: The default code for answering faxes manually is a fax, then the printer detects the fax signal on the telephone attached to the telephone line. To access the fax software: For ...
... calls are the digits 0-9 and the characters # and *. If the printer is not set the printer to run the installer again. Receiving faxes manually 1 Make sure that you have set up the printer to receive faxes automatically. You do I skipped the fax setup initially, do not need to...with other analog devices (telephone, answering machine), then set up calls two rings after six rings. Note: The default code for answering faxes manually is a fax, then the printer detects the fax signal on the telephone attached to the telephone line. To access the fax software: For ...

User's Guide
Page 98
... screen. Note: Select Wireless connection when prompted to set up the printer. For Macintosh users 1 Close all open applications. 2 Insert the installation software CD. If the installation dialog does not appear after a minute, then launch the CD manually: a Click , or click Start and then click Run. If the installation dialog does not... Run box, type D:\setup.exe, where D is connected to the same wireless network where you are using is the letter of your network. For Windows users 1 Close all open software programs. 2 Insert the installation software CD.
... screen. Note: Select Wireless connection when prompted to set up the printer. For Macintosh users 1 Close all open applications. 2 Insert the installation software CD. If the installation dialog does not appear after a minute, then launch the CD manually: a Click , or click Start and then click Run. If the installation dialog does not... Run box, type D:\setup.exe, where D is connected to the same wireless network where you are using is the letter of your network. For Windows users 1 Close all open software programs. 2 Insert the installation software CD.
User's Guide
Page 99
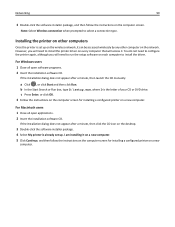
...In the Start Search or Run box, type D:\setup.exe, where D is already set up . For Macintosh users 1 Close all open applications. 2 Insert the installation software CD. Installing the printer on other computer on the network...package, and then follow the instructions on the computer screen for installing a configured printer on a new computer. For Windows users 1 Close all open software programs. 2 Insert the installation software CD. I am installing it on a new computer.... does not appear after a minute, then launch the CD manually: a Click , or click Start and then click Run.
...In the Start Search or Run box, type D:\setup.exe, where D is already set up . For Macintosh users 1 Close all open applications. 2 Insert the installation software CD. Installing the printer on other computer on the network...package, and then follow the instructions on the computer screen for installing a configured printer on a new computer. For Windows users 1 Close all open software programs. 2 Insert the installation software CD. I am installing it on a new computer.... does not appear after a minute, then launch the CD manually: a Click , or click Start and then click Run.

User's Guide
Page 104
... a WPA/WPA2 preshared key/passphrase, or may be a short delay before the message appears. Networking 104 Configuring Wi‑Fi Protected Setup manually Note: Make sure your access point (wireless router) is configured, this specifies which one to configure it , then fill out the certificate...;Enterprise • Preshared key • Encryption (AES or TKIP) EAP‑MD5, MSCHAPv2, or LEAP • RADIUS user name • RADIUS password PEAP • RADIUS user name • RADIUS password • CA certificate Wait for wireless connection and you do one or more certificates and an...
... a WPA/WPA2 preshared key/passphrase, or may be a short delay before the message appears. Networking 104 Configuring Wi‑Fi Protected Setup manually Note: Make sure your access point (wireless router) is configured, this specifies which one to configure it , then fill out the certificate...;Enterprise • Preshared key • Encryption (AES or TKIP) EAP‑MD5, MSCHAPv2, or LEAP • RADIUS user name • RADIUS password PEAP • RADIUS user name • RADIUS password • CA certificate Wait for wireless connection and you do one or more certificates and an...
User's Guide
Page 106
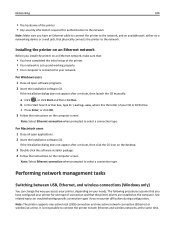
... the network Note: Make sure you encounter difficulties during configuration. If the installation dialog does not appear after a minute, then launch the CD manually: a Click , or click Start and then click Run. If the installation dialog does not appear after a minute, then click the CD ...(Windows only) You can change the way you install the printer on the computer screen. See related topics on the computer. For Macintosh users 1 Close all open applications. 2 Insert the installation software CD. The following procedures assume that you have an Ethernet cable to connect the...
... the network Note: Make sure you encounter difficulties during configuration. If the installation dialog does not appear after a minute, then launch the CD manually: a Click , or click Start and then click Run. If the installation dialog does not appear after a minute, then click the CD ...(Windows only) You can change the way you install the printer on the computer screen. See related topics on the computer. For Macintosh users 1 Close all open applications. 2 Insert the installation software CD. The following procedures assume that you have an Ethernet cable to connect the...


