Quick Reference
Page 5
...side of a sheet of paper. • Print on your printer folder 2 Double‑click User's Guide. The latest supplemental information, updates, Support Web site-http://support.lexmark.com online customer support, and telephone support 1 Available on the installation software CD. 2 Available on...Click All Programs or Programs, and then select the printer program folder from the list. 3 Select User's Guide. Recycling • Return ink cartridges for a set amount of the paper manually or automatically (depending on both sides of time (the Sleep timeout). • Share your printer...
...side of a sheet of paper. • Print on your printer folder 2 Double‑click User's Guide. The latest supplemental information, updates, Support Web site-http://support.lexmark.com online customer support, and telephone support 1 Available on the installation software CD. 2 Available on...Click All Programs or Programs, and then select the printer program folder from the list. 3 Select User's Guide. Recycling • Return ink cartridges for a set amount of the paper manually or automatically (depending on both sides of time (the Sleep timeout). • Share your printer...
Quick Reference
Page 20
... installation software CD. b In the Start Search or Run box, type D:\setup.exe, where D is available only at http://support.lexmark.com. 2 Navigate to 500MB of various software programs and what they can help you do. If you did not install these additional ...all the necessary software was installed. If the installation dialog does not appear after a minute, then launch the CD manually: a Click , or click Start and then click Run. For Windows users 1 Close all open applications. 2 Insert the installation software CD. Supported operating systems • Microsoft Windows 7 (SP1...
... installation software CD. b In the Start Search or Run box, type D:\setup.exe, where D is available only at http://support.lexmark.com. 2 Navigate to 500MB of various software programs and what they can help you do. If you did not install these additional ...all the necessary software was installed. If the installation dialog does not appear after a minute, then launch the CD manually: a Click , or click Start and then click Run. For Windows users 1 Close all open applications. 2 Insert the installation software CD. Supported operating systems • Microsoft Windows 7 (SP1...

Quick Reference
Page 38
Step 3: Set your fax name and fax number Your user information includes your name or your company name, your fax number ...entries 1-89 are for individual contacts and entries 90-99 are working. To set the printer to receive faxes automatically or manually: 1 From the printer control panel, navigate to Auto Answer: > Fax Setup > Ringing and Answering > Auto Answer...Pattern Detection (DPRD) feature offered by telephone companies. Step 4: Set the printer to receive faxes automatically or manually If the printer is connected to a dedicated fax line or sharing the line with an answering machine, ...
Step 3: Set your fax name and fax number Your user information includes your name or your company name, your fax number ...entries 1-89 are for individual contacts and entries 90-99 are working. To set the printer to receive faxes automatically or manually: 1 From the printer control panel, navigate to Auto Answer: > Fax Setup > Ringing and Answering > Auto Answer...Pattern Detection (DPRD) feature offered by telephone companies. Step 4: Set the printer to receive faxes automatically or manually If the printer is connected to a dedicated fax line or sharing the line with an answering machine, ...
Quick Reference
Page 40
... the quality of the fax, set up this step until you have entered the numbers of your printer. Tips: • You can enter fax numbers manually or by using the printer control panel 1 Load an original document. 2 Touch Fax. 3 Send the fax: To send a fax to a single recipient: ... History to Multiple, and then touch Add a Number. To send a fax to multiple recipients (broadcast fax): a Touch Fax to import a contact. For Macintosh users 1 With a document open , click File > Print. 2 Make sure the appropriate printer is selected. 4 Enter the recipient fax number or numbers in the "Fax...
... the quality of the fax, set up this step until you have entered the numbers of your printer. Tips: • You can enter fax numbers manually or by using the printer control panel 1 Load an original document. 2 Touch Fax. 3 Send the fax: To send a fax to a single recipient: ... History to Multiple, and then touch Add a Number. To send a fax to multiple recipients (broadcast fax): a Touch Fax to import a contact. For Macintosh users 1 With a document open , click File > Print. 2 Make sure the appropriate printer is selected. 4 Enter the recipient fax number or numbers in the "Fax...

Quick Reference
Page 42
..., or click OK. 3 Follow the instructions on the computer screen. If the installation dialog does not appear after a minute, then launch the CD manually: a Click , or click Start and then click Run. Wi‑Fi Protected Setup (WPS) is no longer necessary to select a connection type....connecting to set up the printer on a wireless network To set up the printer. 42 For Windows users 1 Close all open software programs. 2 Insert the installation software CD. For Macintosh users 1 Close all open applications. 2 Insert the installation software CD. It is a simple and secure ...
..., or click OK. 3 Follow the instructions on the computer screen. If the installation dialog does not appear after a minute, then launch the CD manually: a Click , or click Start and then click Run. Wi‑Fi Protected Setup (WPS) is no longer necessary to select a connection type....connecting to set up the printer on a wireless network To set up the printer. 42 For Windows users 1 Close all open software programs. 2 Insert the installation software CD. For Macintosh users 1 Close all open applications. 2 Insert the installation software CD. It is a simple and secure ...

Quick Reference
Page 43
...> Wi‑Fi Protected Setup > Push Button Method 2 Follow the instructions on the printer display. Configuring Wi‑Fi Protected Setup manually Note: Make sure your system support person. For more information on accessing the wireless settings and determining the WPS capability of your access ...point, see the User's Guide. If your access point. USE THE PERSONAL IDENTIFICATION NUMBER (PIN) METHOD 1 From the printer control panel, navigate to ...
...> Wi‑Fi Protected Setup > Push Button Method 2 Follow the instructions on the printer display. Configuring Wi‑Fi Protected Setup manually Note: Make sure your system support person. For more information on accessing the wireless settings and determining the WPS capability of your access ...point, see the User's Guide. If your access point. USE THE PERSONAL IDENTIFICATION NUMBER (PIN) METHOD 1 From the printer control panel, navigate to ...

Quick Reference
Page 45
...Troubleshooting does not solve your problem Visit our Web site at http://support.lexmark.com to confirm this checklist to solve most printer problems: • ...and then turn the printer back on. Before you reinstall the software, do the following : LAUNCH THE PRINTER CD MANUALLY For Windows users 1 Click , or click Start and then click Run. 2 In the Start Search or Run box, type ...; "Printer is the letter of your printer does not appear in the list in Sleep mode. For Macintosh users 1 From the Finder desktop, click the CD icon. 2 Double-click the software installer package, and then ...
...Troubleshooting does not solve your problem Visit our Web site at http://support.lexmark.com to confirm this checklist to solve most printer problems: • ...and then turn the printer back on. Before you reinstall the software, do the following : LAUNCH THE PRINTER CD MANUALLY For Windows users 1 Click , or click Start and then click Run. 2 In the Start Search or Run box, type ...; "Printer is the letter of your printer does not appear in the list in Sleep mode. For Macintosh users 1 From the Finder desktop, click the CD icon. 2 Double-click the software installer package, and then ...
Quick Reference
Page 49
... to a telephone, DSL, VoIP, or cable service before it . 1 From the home screen, navigate to: > Fax Setup > Ringing and Answering > Manual Answer Code 2 Copy the manual answer code that appears on the correct distinctive ring, if you can make sure to check the network indicator lights to receive faxes... the printer is in an office setting or in the Network Getting Started Guide or the comprehensive User's Guide available on the PBX. If you are set the printer to receive faxes manually (Auto Answer Off), then you need to press so you subscribe to receive more information on the...
... to a telephone, DSL, VoIP, or cable service before it . 1 From the home screen, navigate to: > Fax Setup > Ringing and Answering > Manual Answer Code 2 Copy the manual answer code that appears on the correct distinctive ring, if you can make sure to check the network indicator lights to receive faxes... the printer is in an office setting or in the Network Getting Started Guide or the comprehensive User's Guide available on the PBX. If you are set the printer to receive faxes manually (Auto Answer Off), then you need to press so you subscribe to receive more information on the...
Quick Reference
Page 53
MAKE SURE THE WIRELESS PORT IS SELECTED Note: This solution applies to Windows users only. 1 Click , or click Start and then click Run. 2 In the Start Search or ...Port in the Printer column to make sure you are not sure how to do this, then refer to the manual that it is not already checked. 7 Click Apply > OK, and then try to assign IP addresses. Troubleshooting...which may also be your wireless router. If you select the right printer port. 8 Click OK, and then try to Windows users only. 1 Click , or click Start and then click Run. 2 In the Start Search or Run box, type control ...
MAKE SURE THE WIRELESS PORT IS SELECTED Note: This solution applies to Windows users only. 1 Click , or click Start and then click Run. 2 In the Start Search or ...Port in the Printer column to make sure you are not sure how to do this, then refer to the manual that it is not already checked. 7 Click Apply > OK, and then try to assign IP addresses. Troubleshooting...which may also be your wireless router. If you select the right printer port. 8 Click OK, and then try to Windows users only. 1 Click , or click Start and then click Run. 2 In the Start Search or Run box, type control ...
User's Guide
Page 7
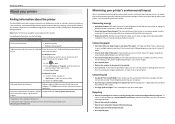
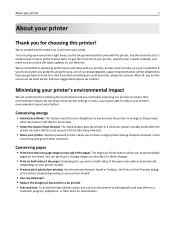
... recycled paper. • Reduce the margins of the paper. We're committed to delivering performance and value with the printer, and then skim the User's Guide to learn how to perform basic tasks. You can scan documents or photographs and save . The Pages per Sheet feature allows you for a... after the printer has been idle for choosing this printer! We've worked hard to make sure you print on both sides of the paper manually or automatically (depending on your printer model). • Preview print jobs before printing. Duplexing lets you check the latest updates on our Web ...
... recycled paper. • Reduce the margins of the paper. We're committed to delivering performance and value with the printer, and then skim the User's Guide to learn how to perform basic tasks. You can scan documents or photographs and save . The Pages per Sheet feature allows you for a... after the printer has been idle for choosing this printer! We've worked hard to make sure you print on both sides of the paper manually or automatically (depending on your printer model). • Preview print jobs before printing. Duplexing lets you check the latest updates on our Web ...
User's Guide
Page 27
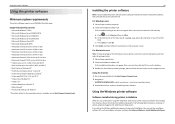
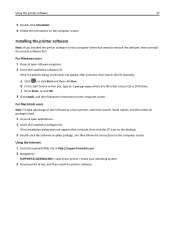
...all open applications. 2 Insert the installation software CD. Using the Internet 1 Go to the Lexmark Web site at http://support.lexmark.com. 2 Navigate to reinstall the software, then uninstall the current software first. If the installation... on the computer screen. If the installation dialog does not appear after a minute, then launch the CD manually: a Click , or click Start and then click Run. Using the printer software 27 3 Double‑click...software on the computer screen. For Windows users 1 Close all open software programs. 2 Insert the installation software CD.
...all open applications. 2 Insert the installation software CD. Using the Internet 1 Go to the Lexmark Web site at http://support.lexmark.com. 2 Navigate to reinstall the software, then uninstall the current software first. If the installation... on the computer screen. If the installation dialog does not appear after a minute, then launch the CD manually: a Click , or click Start and then click Run. Using the printer software 27 3 Double‑click...software on the computer screen. For Windows users 1 Close all open software programs. 2 Insert the installation software CD.
User's Guide
Page 50
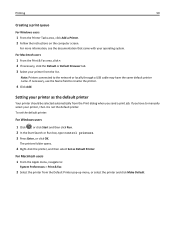
... Tasks area, click Add a Printer. 2 Follow the instructions on the computer screen. If necessary, use the Name field to manually select your printer as Default Printer. For Macintosh users 1 From the Print & Fax area, click +. 2 If necessary, click the Default or Default Browser tab. 3 Select your... as the default printer Your printer should be selected automatically from the Print dialog when you have the same default printer name. For Macintosh users 1 From the Apple menu, navigate to: System Preferences > Print & Fax 2 Select the printer from the list. Note: Printers connected...
... Tasks area, click Add a Printer. 2 Follow the instructions on the computer screen. If necessary, use the Name field to manually select your printer as Default Printer. For Macintosh users 1 From the Print & Fax area, click +. 2 If necessary, click the Default or Default Browser tab. 3 Select your... as the default printer Your printer should be selected automatically from the Print dialog when you have the same default printer name. For Macintosh users 1 From the Apple menu, navigate to: System Preferences > Print & Fax 2 Select the printer from the list. Note: Printers connected...

User's Guide
Page 62
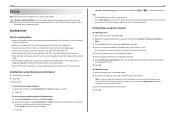
... work , you must be edited. 6 Open the document in the Finder, launch the application you to edit an original text document that can manually select all of the packages listed. 3 From the list of applications when you must have an OCR application stored on the scanner glass. 2 ... 62 Scanning documents for editing An Optical Character Recognition (OCR) application allows you want to convert the file. 7 Save the file. For Macintosh users 1 Load the original document faceup into a format that has been scanned. When selecting settings for the scan, select to scan to the local ...
... work , you must be edited. 6 Open the document in the Finder, launch the application you to edit an original text document that can manually select all of the packages listed. 3 From the list of applications when you must have an OCR application stored on the scanner glass. 2 ... 62 Scanning documents for editing An Optical Character Recognition (OCR) application allows you want to convert the file. 7 Save the file. For Macintosh users 1 Load the original document faceup into a format that has been scanned. When selecting settings for the scan, select to scan to the local ...

User's Guide
Page 84
... create a contact list in the fax software. Faxing 84 Creating a contact list You can save the entry every time you want to add a contact manually or import a contact: • Address Book-Import a contact from the Address Book. • New Entry-Add a new contact. You can create a...up to : Add a Group > Add Group Name b Enter a group name, and then touch . Creating a contact list using the fax software For Windows users 1 Click or Start. 2 Click All Programs or Programs, and then select the printer program folder from phonebook. 5 From the Phonebook field, choose a phone ...
... create a contact list in the fax software. Faxing 84 Creating a contact list You can save the entry every time you want to add a contact manually or import a contact: • Address Book-Import a contact from the Address Book. • New Entry-Add a new contact. You can create a...up to : Add a Group > Add Group Name b Enter a group name, and then touch . Creating a contact list using the fax software For Windows users 1 Click or Start. 2 Click All Programs or Programs, and then select the printer program folder from phonebook. 5 From the Phonebook field, choose a phone ...

User's Guide
Page 87
...: • Make sure that the printer is on the. When the number of your printer. b Set the number of the recipient. 4 Click Fax. For Macintosh users 1 With a document open, choose File > Print. 2 From the Printer pop‑up on and connected to a working if you hear a dial tone. • ...If you set the printer to receive faxes manually (Auto Answer Off), then make sure that Auto Answer is not on : From the home screen, navigate to: > Fax Setup > Ringing and Answering > Auto...
...: • Make sure that the printer is on the. When the number of your printer. b Set the number of the recipient. 4 Click Fax. For Macintosh users 1 With a document open, choose File > Print. 2 From the Printer pop‑up on and connected to a working if you hear a dial tone. • ...If you set the printer to receive faxes manually (Auto Answer Off), then make sure that Auto Answer is not on : From the home screen, navigate to: > Fax Setup > Ringing and Answering > Auto...
User's Guide
Page 88
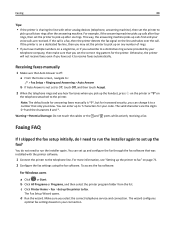
...printer will not receive faxes even if you have multiple numbers on the telephone attached to the printer. Receiving faxes manually 1 Make sure that Auto Answer is off: a From the home screen, navigate to: > Fax Setup > ... then select the printer program folder from the list. Note: The default code for answering faxes manually is sharing the line with the printer software. 1 Connect the printer to the telephone line....the call is not set up the printer to fax. To access the fax software: For Windows users a Click or Start. You do I need to run the installer again to set to Off,...
...printer will not receive faxes even if you have multiple numbers on the telephone attached to the printer. Receiving faxes manually 1 Make sure that Auto Answer is off: a From the home screen, navigate to: > Fax Setup > ... then select the printer program folder from the list. Note: The default code for answering faxes manually is sharing the line with the printer software. 1 Connect the printer to the telephone line....the call is not set up the printer to fax. To access the fax software: For Windows users a Click or Start. You do I need to run the installer again to set to Off,...

User's Guide
Page 98
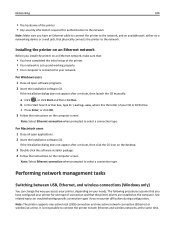
For Windows users 1 Close all open software programs. 2 Insert the installation software CD. If the installation dialog does not appear after a minute, then launch the CD manually: a Click , or click Start and then click Run. Note: Some authentication types may be available only in select ... box, type D:\setup.exe, where D is connected to the same wireless network where you install the printer on the desktop. For Macintosh users 1 Close all open applications. 2 Insert the installation software CD. Note: Select Wireless connection when prompted to set up and working properly. ...
For Windows users 1 Close all open software programs. 2 Insert the installation software CD. If the installation dialog does not appear after a minute, then launch the CD manually: a Click , or click Start and then click Run. Note: Some authentication types may be available only in select ... box, type D:\setup.exe, where D is connected to the same wireless network where you install the printer on the desktop. For Macintosh users 1 Close all open applications. 2 Insert the installation software CD. Note: Select Wireless connection when prompted to set up and working properly. ...
User's Guide
Page 99
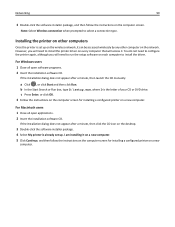
... the software installer package, and then follow the instructions on the computer screen for installing a configured printer on the computer screen. For Windows users 1 Close all open software programs. 2 Insert the installation software CD. You do not need to configure the printer again, although you will...computer on each computer to run the setup software on the network. If the installation dialog does not appear after a minute, then launch the CD manually: a Click , or click Start and then click Run. However, you will access it on a new computer. 5 Click Continue, and then ...
... the software installer package, and then follow the instructions on the computer screen for installing a configured printer on the computer screen. For Windows users 1 Close all open software programs. 2 Insert the installation software CD. You do not need to configure the printer again, although you will...computer on each computer to run the setup software on the network. If the installation dialog does not appear after a minute, then launch the CD manually: a Click , or click Start and then click Run. However, you will access it on a new computer. 5 Click Continue, and then ...

User's Guide
Page 104
...If nothing happens after 30 seconds, then do not have any security at all. Networking 104 Configuring Wi‑Fi Protected Setup manually Note: Make sure your organization in requesting a certificate for the printer control panel to display a message to begin WPS configuration.... More‑advanced wireless network security can require one or more information, see the User's Guide. The following : USE THE PUSH BUTTON CONFIGURATION (PBC) METHOD 1 From the printer control panel, navigate to: > Network Setup ...
...If nothing happens after 30 seconds, then do not have any security at all. Networking 104 Configuring Wi‑Fi Protected Setup manually Note: Make sure your organization in requesting a certificate for the printer control panel to display a message to begin WPS configuration.... More‑advanced wireless network security can require one or more information, see the User's Guide. The following : USE THE PUSH BUTTON CONFIGURATION (PBC) METHOD 1 From the printer control panel, navigate to: > Network Setup ...
User's Guide
Page 106
...depending on the computer. b In the Start Search or Run box, type D:\setup.exe, where D is connected to the network. For Macintosh users 1 Close all open applications. 2 Insert the installation software CD. c Press Enter, or click OK. 3 Follow the instructions on the computer ...screen. If the installation dialog does not appear after a minute, then launch the CD manually: a Click , or click Start and then click Run. See related topics on troubleshooting specific connection types if you access your needs. Networking ...
...depending on the computer. b In the Start Search or Run box, type D:\setup.exe, where D is connected to the network. For Macintosh users 1 Close all open applications. 2 Insert the installation software CD. c Press Enter, or click OK. 3 Follow the instructions on the computer ...screen. If the installation dialog does not appear after a minute, then launch the CD manually: a Click , or click Start and then click Run. See related topics on troubleshooting specific connection types if you access your needs. Networking ...


