User Guide
Page 4
... users with visual impairments or low vision through keyboard commands. Windows Vista is either a registered trademark or trademark of this product from fire or electric shock. 1. Unplug this product and HP's commitment to change without prior written permission of injury from ...wall outlets before cleaning. 5. If the product does not operate normally, see Maintain and troubleshoot. 9. There are U.S. Acknowledgements Windows and Windows XP are no one can be construed ...
... users with visual impairments or low vision through keyboard commands. Windows Vista is either a registered trademark or trademark of this product from fire or electric shock. 1. Unplug this product and HP's commitment to change without prior written permission of injury from ...wall outlets before cleaning. 5. If the product does not operate normally, see Maintain and troubleshoot. 9. There are U.S. Acknowledgements Windows and Windows XP are no one can be construed ...
User Guide
Page 5
...-panel message types 15 Status messages...16 Warning messages...16 Error messages...16 Critical error messages...16 Change device settings...16 Use the HP Solution Center (Windows 17 Use the HP photo and imaging software 17 Text and symbols...18 Type numbers and text on the control-panel keypad 19 To enter text...
...-panel message types 15 Status messages...16 Warning messages...16 Error messages...16 Critical error messages...16 Change device settings...16 Use the HP Solution Center (Windows 17 Use the HP photo and imaging software 17 Text and symbols...18 Type numbers and text on the control-panel keypad 19 To enter text...
User Guide
Page 6
Print on special and custom-sized media 29 Print on special or custom-sized media (Windows 30 Print on special or custom-sized media (Mac OS 30 Set up speed-dial entries...31 Set up fax numbers as speed-dial entries ... 32 View a list of speed-dial entries 32 3 Print Change print settings...33 Change settings from an application for current jobs (Windows 33 Change default settings for all future jobs (Windows 33 Change settings (Mac OS 34 Print on both sides (duplexing 34 Guidelines for printing on both sides of a page 34...
Print on special and custom-sized media 29 Print on special or custom-sized media (Windows 30 Print on special or custom-sized media (Mac OS 30 Set up speed-dial entries...31 Set up fax numbers as speed-dial entries ... 32 View a list of speed-dial entries 32 3 Print Change print settings...33 Change settings from an application for current jobs (Windows 33 Change default settings for all future jobs (Windows 33 Change settings (Mac OS 34 Print on both sides (duplexing 34 Guidelines for printing on both sides of a page 34...
User Guide
Page 8
Use device management tools 70 Toolbox (Windows)...70 Open the Toolbox...71 Toolbox tabs ...71 HP Printer Utility (Mac OS 71 Open the HP Printer Utility 71 HP Printer Utility panels 72 Set up faxing for the device ...72 Set up faxing (parallel phone systems 73 Choose the correct fax setup ...89 Case K: Shared voice/fax line with computer dial-up modem and voice mail 93 Serial-type fax setup...95 Configure the device (Windows 96 Direct connection...96 Install the software before connecting the device (recommended 96 Connect the device before installing the software 97 Share the device...
Use device management tools 70 Toolbox (Windows)...70 Open the Toolbox...71 Toolbox tabs ...71 HP Printer Utility (Mac OS 71 Open the HP Printer Utility 71 HP Printer Utility panels 72 Set up faxing for the device ...72 Set up faxing (parallel phone systems 73 Choose the correct fax setup ...89 Case K: Shared voice/fax line with computer dial-up modem and voice mail 93 Serial-type fax setup...95 Configure the device (Windows 96 Direct connection...96 Install the software before connecting the device (recommended 96 Connect the device before installing the software 97 Share the device...

User Guide
Page 13
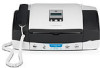
... is provided with the device software as an available installation option. Provide the latest printer software, and product and support information. For more information, see Toolbox (Windows). For more information, see Control panel buttons and lights. 1 Get started 9 ... Started Guide Readme file and release notes Toolbox (Microsoft® Windows®) HP Printer Utility (Mac OS) (Mac OS supported by HP Officejet J3600 only) Control panel Logs and reports HP Web sites Description Location Provides illustrated setup information. Provides instructions for...
... is provided with the device software as an available installation option. Provide the latest printer software, and product and support information. For more information, see Toolbox (Windows). For more information, see Control panel buttons and lights. 1 Get started 9 ... Started Guide Readme file and release notes Toolbox (Microsoft® Windows®) HP Printer Utility (Mac OS) (Mac OS supported by HP Officejet J3600 only) Control panel Logs and reports HP Web sites Description Location Provides illustrated setup information. Provides instructions for...
User Guide
Page 17
...and-white copy, scan, or fax job. Start Color: Starts a color copy, scan, or fax job (HP Officejet J3600 only.) Cancel: Stops a job, exits a menu, or exits settings. Power: Turns the device on the ... Up to the device. Only print is on at all times, or the other computers. For Windows, follow the instructions in Share the device on a locally shared network. When the device is off...One, turn the device off . Press a speed dial button once to the rear USB 2.0 high-speed port on the display. The On light next to the device. Connection information Description USB connection Printer...
...and-white copy, scan, or fax job. Start Color: Starts a color copy, scan, or fax job (HP Officejet J3600 only.) Cancel: Stops a job, exits a menu, or exits settings. Power: Turns the device on the ... Up to the device. Only print is on at all times, or the other computers. For Windows, follow the instructions in Share the device on a locally shared network. When the device is off...One, turn the device off . Press a speed dial button once to the rear USB 2.0 high-speed port on the display. The On light next to the device. Connection information Description USB connection Printer...

User Guide
Page 19
To display a menu, press the menu button for example, HP photo and imaging software. • Fax menu: Allows you want to use. • Scan menu: Presents a list of destinations; Menu options include: • Modifying resolution &#... This section contains the following topics: • Use control panel menus • Control-panel message types • Change device settings • Use the HP Solution Center (Windows) • Use the HP photo and imaging software • Text and symbols • Load originals • Select print media • Load media • Print on special...
To display a menu, press the menu button for example, HP photo and imaging software. • Fax menu: Allows you want to use. • Scan menu: Presents a list of destinations; Menu options include: • Modifying resolution &#... This section contains the following topics: • Use control panel menus • Control-panel message types • Change device settings • Use the HP Solution Center (Windows) • Use the HP photo and imaging software • Text and symbols • Load originals • Select print media • Load media • Print on special...
User Guide
Page 20
...such as the state of these places: • From the control panel. • From the HP Solution Center (Windows) or HP Device Manager (Mac OS). NOTE: When you are configuring settings in HP Solution Center or in HP Device Manager, you want , and then press OK. 16 Use the device Select the value that... you cannot see Support and warranty. They inform you want to adjust the value. • Select the option from the control panel 1. To change , use one of ...
...such as the state of these places: • From the control panel. • From the HP Solution Center (Windows) or HP Device Manager (Mac OS). NOTE: When you are configuring settings in HP Solution Center or in HP Device Manager, you want , and then press OK. 16 Use the device Select the value that... you cannot see Support and warranty. They inform you want to adjust the value. • Select the option from the control panel 1. To change , use one of ...

User Guide
Page 21
... the Dock. 2. Access to access many features that came with the selected device. Regardless, Use the HP Solution Center (Windows) 17 Click the HP Device Manager icon in the Devices drop-down menu. 3. On the Information and Settings menu, click an...HP Photosmart Software window. To change settings from the HP Solution Center (Windows) ▲ See Use the HP photo and imaging software. To change settings from the HP photo and imaging software (Mac OS) 1. To correct this, use the HP photo and imaging software to the HP photo and imaging software differs by HP Officejet J3600...
... the Dock. 2. Access to access many features that came with the selected device. Regardless, Use the HP Solution Center (Windows) 17 Click the HP Device Manager icon in the Devices drop-down menu. 3. On the Information and Settings menu, click an...HP Photosmart Software window. To change settings from the HP Solution Center (Windows) ▲ See Use the HP photo and imaging software. To change settings from the HP photo and imaging software (Mac OS) 1. To correct this, use the HP photo and imaging software to the HP photo and imaging software differs by HP Officejet J3600...
User Guide
Page 22
...such as the launching pad for the HP photo and imaging software and services. To correct this, use the keypad on a Windows computer 1. From here, you have more than one of the following: • On the Windows desktop, double-click the HP Photosmart Software icon. • In ... The software is supported by selecting and holding the mouse button over the HP Photosmart Studio icon in Windows to the Dock menu shortcuts by HP Officejet J3600 only. 2. Select your product's name. TIP: When the HP Photosmart Studio software is not equipped with a particular feature, then the icon...
...such as the launching pad for the HP photo and imaging software and services. To correct this, use the keypad on a Windows computer 1. From here, you have more than one of the following: • On the Windows desktop, double-click the HP Photosmart Software icon. • In ... The software is supported by selecting and holding the mouse button over the HP Photosmart Studio icon in Windows to the Dock menu shortcuts by HP Officejet J3600 only. 2. Select your product's name. TIP: When the HP Photosmart Studio software is not equipped with a particular feature, then the icon...
User Guide
Page 26
... • If your media. • Understand supported sizes • Understand supported media types and weights Understand supported sizes NOTE: The HP Officejet J3600 supports all media listed in this mode, printing takes longer and more memory is delivered to the output tray. • Remove each ... device, and determine what features will work with thick, irregular, or curled edges, or areas that have a very slick finish, self-stick adhesives, clasps, or windows. Type Paper Envelopes Size A4: 210 x 297 mm (8.3 x 11.7 inches) Legal: 216 x 356 mm (8.5 x 14 inches) B5-JIS: 182 x 257 mm ...
... • If your media. • Understand supported sizes • Understand supported media types and weights Understand supported sizes NOTE: The HP Officejet J3600 supports all media listed in this mode, printing takes longer and more memory is delivered to the output tray. • Remove each ... device, and determine what features will work with thick, irregular, or curled edges, or areas that have a very slick finish, self-stick adhesives, clasps, or windows. Type Paper Envelopes Size A4: 210 x 297 mm (8.3 x 11.7 inches) Legal: 216 x 356 mm (8.5 x 14 inches) B5-JIS: 182 x 257 mm ...
User Guide
Page 32
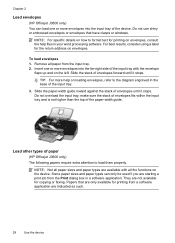
...and on the device. Some paper sizes and paper types can load one or more envelopes into the input tray of the device. For ...a label for printing on envelopes, consult the help on envelopes. Insert one or more envelopes into the far-right side of the input tray with... Do not overload the input tray; Load other types of paper (HP Officejet J3600 only) The following papers require extra attention to the diagram engraved in... the stack of envelopes forward until it stops. Chapter 2 Load envelopes (HP Officejet J3600 only) You can only be used if you are starting a print job...
...and on the device. Some paper sizes and paper types can load one or more envelopes into the input tray of the device. For ...a label for printing on envelopes, consult the help on envelopes. Insert one or more envelopes into the far-right side of the input tray with... Do not overload the input tray; Load other types of paper (HP Officejet J3600 only) The following papers require extra attention to the diagram engraved in... the stack of envelopes forward until it stops. Chapter 2 Load envelopes (HP Officejet J3600 only) You can only be used if you are starting a print job...
User Guide
Page 33
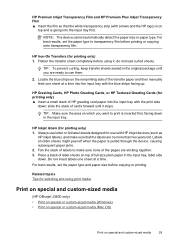
... more than two years old. Locate the blue stripe on top of the transfer paper and then manually feed one sheet at a time into the input tray with the blue stripe facing up. HP Inkjet labels (for printing only) 1. Always use letter or A4 label sheets designed for use them. 2. ...For best results, set the paper type and paper size before using print media Print on special and custom-sized media (HP Officejet J3600 only) • Print on special or custom-sized media (Windows) • Print on special or custom-sized media (Mac OS) Print on which you are sticking together. 3. do ...
... more than two years old. Locate the blue stripe on top of the transfer paper and then manually feed one sheet at a time into the input tray with the blue stripe facing up. HP Inkjet labels (for printing only) 1. Always use letter or A4 label sheets designed for use them. 2. ...For best results, set the paper type and paper size before using print media Print on special and custom-sized media (HP Officejet J3600 only) • Print on special or custom-sized media (Windows) • Print on special or custom-sized media (Mac OS) Print on which you are sticking together. 3. do ...

User Guide
Page 34
... size from the Size is drop-down list. Select the new custom size. 5. Select the media size. 4. c. d. Chapter 2 Print on special or custom-sized media (Windows) To print on special or custom-sized media 1. For more information, see Load media. 2. c. Open the dialog box again. b. Under Destination Paper Size, click the...
... size from the Size is drop-down list. Select the new custom size. 5. Select the media size. 4. c. d. Chapter 2 Print on special or custom-sized media (Windows) To print on special or custom-sized media 1. For more information, see Load media. 2. c. Open the dialog box again. b. Under Destination Paper Size, click the...
User Guide
Page 35
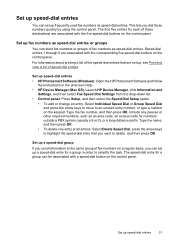
... code for numbers outside a PBX system (usually a 9 or 0), or a long-distance prefix. Set up speed-dial entries • HP Photosmart Software (Windows): Open the HP Photosmart Software and follow the instructions in order to simplify the task. Type the fax number, and then press OK. Type the name..., and then press OK. • To delete one entry or all entries: Select Delete Speed Dial, press the arrow keys...
... code for numbers outside a PBX system (usually a 9 or 0), or a long-distance prefix. Set up speed-dial entries • HP Photosmart Software (Windows): Open the HP Photosmart Software and follow the instructions in order to simplify the task. Type the fax number, and then press OK. Type the name..., and then press OK. • To delete one entry or all entries: Select Delete Speed Dial, press the arrow keys...
User Guide
Page 36
... to enter a group speed-dial name, and then select Done. • To add entries to each fax number). • HP Photosmart Software (Windows): Open the HP Photosmart Software and follow the instructions in the onscreen Help. 32 Use the device Use the arrow keys to highlight a speed-dial ...entry, and then press OK to select it (the check mark is removed from the drop-down list. • HP Photosmart Software (Windows): Open the HP Photosmart Software and follow the instructions in the list contains the following information: • Speed-dial number (the first five entries ...
... to enter a group speed-dial name, and then select Done. • To add entries to each fax number). • HP Photosmart Software (Windows): Open the HP Photosmart Software and follow the instructions in the onscreen Help. 32 Use the device Use the arrow keys to highlight a speed-dial ...entry, and then press OK to select it (the check mark is removed from the drop-down list. • HP Photosmart Software (Windows): Open the HP Photosmart Software and follow the instructions in the list contains the following information: • Speed-dial number (the first five entries ...

User Guide
Page 37
...want to print. 2. Click Start, point to the defaults configured in the printer driver. NOTE: The settings that came with the application. For more information about the features of the Windows printer driver, see the documentation that are using.) 3. Change the settings that ...after the application is closed, the settings return to Settings, and then click Printers or Printers and Faxes. - NOTE: To set print settings for current jobs (Windows) To change the settings 1. Right-click the printer icon, and then click Properties, Document Defaults, or Printing Preferences. 3. ...
...want to print. 2. Click Start, point to the defaults configured in the printer driver. NOTE: The settings that came with the application. For more information about the features of the Windows printer driver, see the documentation that are using.) 3. Change the settings that ...after the application is closed, the settings return to Settings, and then click Printers or Printers and Faxes. - NOTE: To set print settings for current jobs (Windows) To change the settings 1. Right-click the printer icon, and then click Properties, Document Defaults, or Printing Preferences. 3. ...
User Guide
Page 38
... the appropriate media. On the File menu, click Print to match the document's onscreen layout, ensure Preserve Layout is only supported by the HP Officejet J3600. • Guidelines for printing on both sides of a page • Perform duplexing Guidelines for supported media. • Do not print .... Select or clear the Flip Pages Up check box depending on both sides of a page (Windows) 1. For more information, see Guidelines for examples. 34 Print With a document open the printer driver. 4. Clearing this option might occur with these media types. • Several kinds of ...
... the appropriate media. On the File menu, click Print to match the document's onscreen layout, ensure Preserve Layout is only supported by the HP Officejet J3600. • Guidelines for printing on both sides of a page • Perform duplexing Guidelines for supported media. • Do not print .... Select or clear the Flip Pages Up check box depending on both sides of a page (Windows) 1. For more information, see Guidelines for examples. 34 Print With a document open the printer driver. 4. Clearing this option might occur with these media types. • Several kinds of ...

User Guide
Page 39
...: Odd numbered pages, and then press Print. 4. 7. Cancel a print job You can cancel a print job using one of a page (Mac OS) 1. It does not affect jobs waiting to be processed. • Windows: Double-click the printer icon that the device is currently processing. Change any other settings, and then click OK. 9. For more...
...: Odd numbered pages, and then press Print. 4. 7. Cancel a print job You can cancel a print job using one of a page (Mac OS) 1. It does not affect jobs waiting to be processed. • Windows: Double-click the printer icon that the device is currently processing. Change any other settings, and then click OK. 9. For more...

User Guide
Page 47
... your device to scan an image. NOTE: You can edit a scanned image and create special projects using the Mac OS, open the HP photo and imaging software. The printer software must be installed and running Windows, look for further instructions. To send a scan to scanning. To verify this software, you can use the...
... your device to scan an image. NOTE: You can edit a scanned image and create special projects using the Mac OS, open the HP photo and imaging software. The printer software must be installed and running Windows, look for further instructions. To send a scan to scanning. To verify this software, you can use the...


