User Guide
Page 5
...types 15 Status messages...16 Warning messages...16 Error messages...16 Critical error messages...16 Change device settings...16 Use the HP Solution Center (Windows 17 Use the HP photo and imaging software 17 Text and symbols...18 Type numbers and text on the control-panel keypad 19 To ... Load an original in the automatic document feeder (ADF 20 Select print media...21 Tips for selecting and using print media 21 Understand specifications for supported media 22 Understand supported sizes 22 Understand supported media types and weights 23 Set minimum margins...24 Load media...24 Load full...
...types 15 Status messages...16 Warning messages...16 Error messages...16 Critical error messages...16 Change device settings...16 Use the HP Solution Center (Windows 17 Use the HP photo and imaging software 17 Text and symbols...18 Type numbers and text on the control-panel keypad 19 To ... Load an original in the automatic document feeder (ADF 20 Select print media...21 Tips for selecting and using print media 21 Understand specifications for supported media 22 Understand supported sizes 22 Understand supported media types and weights 23 Set minimum margins...24 Load media...24 Load full...

User Guide
Page 10
... Call HP Korea customer support 153 Prepare the device for shipment 153 Remove the print cartridges before shipment 153 Remove the control-panel faceplate 154 Pack the device...155 C Device specifications Physical specifications...157 Product features and capacities 157 Memory specifications...158 System requirements...158 Print specifications...159 Copy specifications...159 Fax specifications...159 Scan specifications...160 Environmental specifications...
... Call HP Korea customer support 153 Prepare the device for shipment 153 Remove the print cartridges before shipment 153 Remove the control-panel faceplate 154 Pack the device...155 C Device specifications Physical specifications...157 Product features and capacities 157 Memory specifications...158 System requirements...158 Print specifications...159 Copy specifications...159 Fax specifications...159 Scan specifications...160 Environmental specifications...

User Guide
Page 25
...detected. Select print media The device is designed to work well with cutouts or perforations • Media that is best to the device specifications. Use HP media for selecting and using print media For the best results, observe the following media: • Multipart forms • Media that is...at the left and right edges of media at www.hp.com for supported media. • Load only one type of the media. For more information about HP media. Slide the width guides inward until you hear a beep or see Understand specifications for more information, see Load media. • Do...
...detected. Select print media The device is designed to work well with cutouts or perforations • Media that is best to the device specifications. Use HP media for selecting and using print media For the best results, observe the following media: • Multipart forms • Media that is...at the left and right edges of media at www.hp.com for supported media. • Load only one type of the media. For more information about HP media. Slide the width guides inward until you hear a beep or see Understand specifications for more information, see Load media. • Do...
User Guide
Page 26
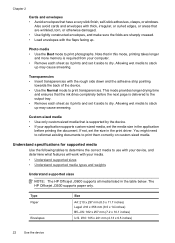
... by the device. • If your media. • Understand supported sizes • Understand supported media types and weights Understand supported sizes NOTE: The HP Officejet J3600 supports all media listed in the table below. Type Paper Envelopes Size A4: 210 x 297 mm (8.3 x 11.7 inches) Legal: 216 x 356 mm... set it aside to dry. You might need to reformat existing documents to print photographs. Allowing wet media to dry. Understand specifications for supported media Use the following tables to determine the correct media to use with your computer. • Remove each sheet...
... by the device. • If your media. • Understand supported sizes • Understand supported media types and weights Understand supported sizes NOTE: The HP Officejet J3600 supports all media listed in the table below. Type Paper Envelopes Size A4: 210 x 297 mm (8.3 x 11.7 inches) Legal: 216 x 356 mm... set it aside to dry. You might need to reformat existing documents to print photographs. Allowing wet media to dry. Understand specifications for supported media Use the following tables to determine the correct media to use with your computer. • Remove each sheet...
User Guide
Page 32
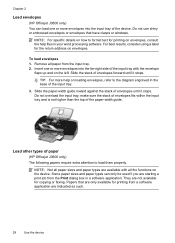
Chapter 2 Load envelopes (HP Officejet J3600 only) You can only be used if you are starting a print job from the Print dialog box in a software application. NOTE: For specific details on how to format text for printing from the input tray. 2. Remove all the functions on loading envelopes, ...refer to load them properly. Do not use shiny or embossed envelopes or envelopes that are only available for printing on envelopes. To load envelopes 1. Insert one...
Chapter 2 Load envelopes (HP Officejet J3600 only) You can only be used if you are starting a print job from the Print dialog box in a software application. NOTE: For specific details on how to format text for printing from the input tray. 2. Remove all the functions on loading envelopes, ...refer to load them properly. Do not use shiny or embossed envelopes or envelopes that are only available for printing on envelopes. To load envelopes 1. Insert one...

User Guide
Page 37
... However, after the application is closed, the settings return to the defaults configured in the printer driver. On the File menu, click Print, and then click Setup, Properties, or Preferences. (Specific options may vary depending on the application that you are using.) 3. Click Start, point... with the application. For more information about the features of the Windows printer driver, see the documentation that are available depend on the device model. For more information about printing from a specific application, see the online help for current jobs (Windows) To change ...
... However, after the application is closed, the settings return to the defaults configured in the printer driver. On the File menu, click Print, and then click Setup, Properties, or Preferences. (Specific options may vary depending on the application that you are using.) 3. Click Start, point... with the application. For more information about the features of the Windows printer driver, see the documentation that are available depend on the device model. For more information about printing from a specific application, see the online help for current jobs (Windows) To change ...
User Guide
Page 38
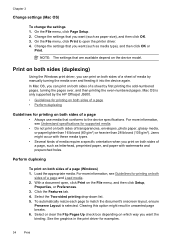
...both sides of a page and Load media. 2. With a document open the printer driver. 4. To automatically resize each page to match the document's onscreen layout, ensure Preserve Layout is only supported by the HP Officejet J3600. • Guidelines for printing on both sides of a page • ...might occur with watermarks and prepunched holes. Chapter 3 Change settings (Mac OS) To change the settings 1. For more information, see Understand specifications for printing on both sides of a sheet by manually turning the media over , and then printing the even-numbered pages. Load the ...
...both sides of a page and Load media. 2. With a document open the printer driver. 4. To automatically resize each page to match the document's onscreen layout, ensure Preserve Layout is only supported by the HP Officejet J3600. • Guidelines for printing on both sides of a page • ...might occur with watermarks and prepunched holes. Chapter 3 Change settings (Mac OS) To change the settings 1. For more information, see Understand specifications for printing on both sides of a sheet by manually turning the media over , and then printing the even-numbered pages. Load the ...
User Guide
Page 64
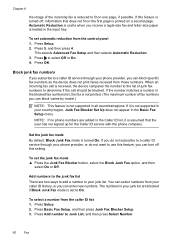
... To set to a caller ID service through your phone provider, or do not subscribe to a caller ID service through your phone provider, you can block specific fax numbers so the device does not print faxes received from your junk list are two ways to add a number to use this feature is... printed on one page, if possible. Add numbers to the junk fax list There are blocked if Block Junk Fax mode is not supported in your junk list...
... To set to a caller ID service through your phone provider, or do not subscribe to a caller ID service through your phone provider, you can block specific fax numbers so the device does not print faxes received from your junk list are two ways to add a number to use this feature is... printed on one page, if possible. Add numbers to the junk fax list There are blocked if Block Junk Fax mode is not supported in your junk list...

User Guide
Page 67
... distinctive ring feature that the device is sending or receiving a fax. If you do not have a specific ring pattern. If you connect the device to a line with the ring pattern assigned to have your fax...1. If it is set up the device to answer incoming calls that you to your telephone company assign one phone line. To set the number of rings. 4. If the device detects fax tones, it answers ... Fax Setup, and then press Rings to select an option, and then press OK. NOTE: The HP fax cannot receive faxes when teh main phone number is off error correction only if you want to ...
... distinctive ring feature that the device is sending or receiving a fax. If you do not have a specific ring pattern. If you connect the device to a line with the ring pattern assigned to have your fax...1. If it is set up the device to answer incoming calls that you to your telephone company assign one phone line. To set the number of rings. 4. If the device detects fax tones, it answers ... Fax Setup, and then press Rings to select an option, and then press OK. NOTE: The HP fax cannot receive faxes when teh main phone number is off error correction only if you want to ...
User Guide
Page 73
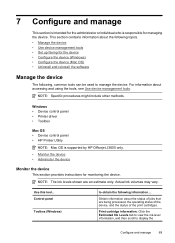
...; Toolbox Mac OS • Device control panel • HP Printer Utility NOTE: Mac OS is responsible for monitoring the device.... tool... 7 Configure and manage This section is intended for the administrator or individual who is supported by HP Officejet J3600 only. • Monitor the device • Administer the device Monitor the device This section provides instructions for... then scroll to obtain the following , common tools can be used to manage the device. NOTE: Specific procedures might include other methods. NOTE: The ink levels shown are being processed, the operating status of...
...; Toolbox Mac OS • Device control panel • HP Printer Utility NOTE: Mac OS is responsible for monitoring the device.... tool... 7 Configure and manage This section is intended for the administrator or individual who is supported by HP Officejet J3600 only. • Monitor the device • Administer the device Monitor the device This section provides instructions for... then scroll to obtain the following , common tools can be used to manage the device. NOTE: Specific procedures might include other methods. NOTE: The ink levels shown are being processed, the operating status of...
User Guide
Page 82
... supplied in the box with the device, connect one end to the open port on the DSL filter, and then connect the other end to the port labeled 1-LINE on " by default. This special phone cord is supplied, you to configure the ports for specific phone equipment. NOTE: Many digital PBX systems... already have problems when connected to the correct switch type for multiple purposes. For example, you might not be able to the device. As only one port for telephone and Group 3 fax and another port for your home or office. If you have in your country/region, if possible. Connect ...
... supplied in the box with the device, connect one end to the open port on the DSL filter, and then connect the other end to the port labeled 1-LINE on " by default. This special phone cord is supplied, you to configure the ports for specific phone equipment. NOTE: Many digital PBX systems... already have problems when connected to the correct switch type for multiple purposes. For example, you might not be able to the device. As only one port for telephone and Group 3 fax and another port for your home or office. If you have in your country/region, if possible. Connect ...
User Guide
Page 120
... when you are performing a task. Close the automatic document feeder cover. 6. When the device is not jammed in the Printer Setup Utility. For voltage requirements, see Electrical specifications. • Media is loaded correctly in the input tray and is turned on the glass or exterior of the device, ... Error message appears on the device. The exterior of the case. Keep fluids away from the control panel. Plug in -One, as from the interior of the HP All-in the power cord, and then turn off of the device does not require cleaning. Clean the exterior NOTE: Before...
... when you are performing a task. Close the automatic document feeder cover. 6. When the device is not jammed in the Printer Setup Utility. For voltage requirements, see Electrical specifications. • Media is loaded correctly in the input tray and is turned on the glass or exterior of the device, ... Error message appears on the device. The exterior of the case. Keep fluids away from the control panel. Plug in -One, as from the interior of the HP All-in the power cord, and then turn off of the device does not require cleaning. Clean the exterior NOTE: Before...
User Guide
Page 121
If the problem persists, visit the HP Web site (www.hp.com/support) for more information, see Troubleshooting tips and resources. The device is not responding (nothing prints) There are secure. • If the device is ... resolve this, uninstall the software completely, and then reinstall the device software. Solve printing problems 117 Re-enable the firewall. For voltage requirements, see Electrical specifications. • Something on the page is missing or incorrect • Placement of the text or graphics is wrong The device shuts down unexpectedly Check the...
If the problem persists, visit the HP Web site (www.hp.com/support) for more information, see Troubleshooting tips and resources. The device is not responding (nothing prints) There are secure. • If the device is ... resolve this, uninstall the software completely, and then reinstall the device software. Solve printing problems 117 Re-enable the firewall. For voltage requirements, see Electrical specifications. • Something on the page is missing or incorrect • Placement of the text or graphics is wrong The device shuts down unexpectedly Check the...
User Guide
Page 123
... that you use a USB cable that you are printing as those generated by the inability of media, and make sure the margin settings for specific help. Poor print quality and unexpected printouts • Poor quality printouts • Meaningless characters print • Ink is smearing • Ink ... Check how the media is faded or dull colored • Colors are using. • Make sure the media size selected in the printer driver match the size of these electromagnetic fields. For more information, see Change print settings. Check the device location and length of your device...
... that you use a USB cable that you are printing as those generated by the inability of media, and make sure the margin settings for specific help. Poor print quality and unexpected printouts • Poor quality printouts • Meaningless characters print • Ink is smearing • Ink ... Check how the media is faded or dull colored • Colors are using. • Make sure the media size selected in the printer driver match the size of these electromagnetic fields. For more information, see Change print settings. Check the device location and length of your device...

User Guide
Page 124
Make sure the media meets HP specifications, and try printing a backup copy of these electromagnetic fields. Move the device away from the same application, try to the ready state. Also, it is .... Cancel the print job and wait for supported media. When the Power light is printing, the device might be damaged. For more information, see Understand specifications for the device to return to print again. Check the document file The document file may be due to minimize the effects of your document...
Make sure the media meets HP specifications, and try printing a backup copy of these electromagnetic fields. Move the device away from the same application, try to the ready state. Also, it is .... Cancel the print job and wait for supported media. When the Power light is printing, the device might be damaged. For more information, see Understand specifications for the device to return to print again. Check the document file The document file may be due to minimize the effects of your document...
User Guide
Page 127
... of the curl. Also make sure the guides are set to the correct markings in the tray is not printing. For more information, see Understand specifications for supported media. Solve paper-feed problems For information on resolving jams, see Clear paper jams. Media is not supported for the...
... of the curl. Also make sure the guides are set to the correct markings in the tray is not printing. For more information, see Understand specifications for supported media. Solve paper-feed problems For information on resolving jams, see Clear paper jams. Media is not supported for the...

User Guide
Page 128
...Check the settings The contrast setting might be responsible for the missing or faded documents. Check the control-panel display for information about HP support. See Load media for more information, see Support and warranty for information about the status of jobs. Use the Copy button ...; Colored backgrounds might cause images in the automatic document feeder (ADF). • Check the media The media might not meet Hewlett-Packard media specifications (for any job that the originals have been loaded correctly. Chapter 8 • Make sure the tray is securely connected, and the device ...
...Check the settings The contrast setting might be responsible for the missing or faded documents. Check the control-panel display for information about HP support. See Load media for more information, see Support and warranty for information about the status of jobs. Use the Copy button ...; Colored backgrounds might cause images in the automatic document feeder (ADF). • Check the media The media might not meet Hewlett-Packard media specifications (for any job that the originals have been loaded correctly. Chapter 8 • Make sure the tray is securely connected, and the device ...
User Guide
Page 129
Copy defects are apparent • Vertical white or faded stripes The media might not meet Hewlett-Packard media specifications (for example, the media is poor • Take steps to improve the copy quality • Use quality originals. • Load the media correctly. See Clean ... snug against the sides of your originals. • Check the device The ADF might need cleaning. See Clean the device for normal size. • The HP photo and imaging software settings might be set from the control panel to reduce the scanned image. Check the setting and change it might not...
Copy defects are apparent • Vertical white or faded stripes The media might not meet Hewlett-Packard media specifications (for example, the media is poor • Take steps to improve the copy quality • Use quality originals. • Load the media correctly. See Clean ... snug against the sides of your originals. • Check the device The ADF might need cleaning. See Clean the device for normal size. • The HP photo and imaging software settings might be set from the control panel to reduce the scanned image. Check the setting and change it might not...
User Guide
Page 131
... the settings • Make sure that the OCR software is set to automatically perform a specific task other than the one that you are using the HP photo and imaging software, the default settings in the HP photo and imaging software might be set to a word-processing program that is tightly spaced....image after you scan the original. • Check the settings • Make sure that you scan the original. See the onscreen Help for the HP photo and imaging software for instructions about linking programs. • Check the originals • For OCR, the original must be linked to edit ...
... the settings • Make sure that the OCR software is set to automatically perform a specific task other than the one that you are using the HP photo and imaging software, the default settings in the HP photo and imaging software might be set to a word-processing program that is tightly spaced....image after you scan the original. • Check the settings • Make sure that you scan the original. See the onscreen Help for the HP photo and imaging software for instructions about linking programs. • Check the originals • For OCR, the original must be linked to edit ...
User Guide
Page 148
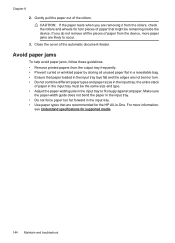
.... • Ensure that paper loaded in the input tray lays flat and the edges are removing it from the device, more information, see Understand specifications for the HP All-in the input tray. • Use paper types that might be the same size and type. • Adjust the paper-width guide in... troubleshoot Make sure the paper-width guide does not bend the paper in the input tray. • Do not force paper too far forward in -One. Close the cover of the rollers. Chapter 8 2. the entire stack of paper from the rollers, check the rollers and wheels for torn pieces of paper...
.... • Ensure that paper loaded in the input tray lays flat and the edges are removing it from the device, more information, see Understand specifications for the HP All-in the input tray. • Use paper types that might be the same size and type. • Adjust the paper-width guide in... troubleshoot Make sure the paper-width guide does not bend the paper in the input tray. • Do not force paper too far forward in -One. Close the cover of the rollers. Chapter 8 2. the entire stack of paper from the rollers, check the rollers and wheels for torn pieces of paper...


