User's Guide
Page 2
... your printer's environmental impact 6 Finding information about the printer...7 Understanding the parts of the printer...9 Ordering and replacing supplies 12 Ordering ink cartridges...12 Using genuine Lexmark ink cartridges...12 Replacing ink cartridges...13 Ordering paper and other supplies...14 Recycling Lexmark products...15 Using the printer control panel buttons and menus 16 Using the printer control panel...16 Changing...
... your printer's environmental impact 6 Finding information about the printer...7 Understanding the parts of the printer...9 Ordering and replacing supplies 12 Ordering ink cartridges...12 Using genuine Lexmark ink cartridges...12 Replacing ink cartridges...13 Ordering paper and other supplies...14 Recycling Lexmark products...15 Using the printer control panel buttons and menus 16 Using the printer control panel...16 Changing...
User's Guide
Page 7
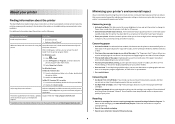
... be used to print more pages with the printer and is also available on the Lexmark Web site at http://support.lexmark.com. Before replacing and recycling your prints. About your old printer instead of your ink cartridges, try using less ink than normal and are ideal for printing documents that are you to print documents...
... be used to print more pages with the printer and is also available on the Lexmark Web site at http://support.lexmark.com. Before replacing and recycling your prints. About your old printer instead of your ink cartridges, try using less ink than normal and are ideal for printing documents that are you to print documents...
User's Guide
Page 11
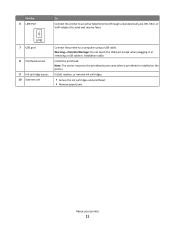
... receive faxes. Warning-Potential Damage: Do not touch the USB port except when plugging in or removing a USB cable or installation cable. Install, replace, or remove ink cartridges. • Access the ink cartridges and printhead. • Remove paper jams. About your printer 11 Note: The carrier moves to the printhead access area when a printhead is...
... receive faxes. Warning-Potential Damage: Do not touch the USB port except when plugging in or removing a USB cable or installation cable. Install, replace, or remove ink cartridges. • Access the ink cartridges and printhead. • Remove paper jams. About your printer 11 Note: The carrier moves to the printhead access area when a printhead is...
User's Guide
Page 12
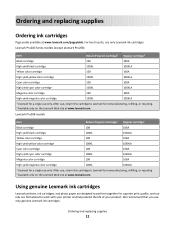
... cartridge 108XL 108XLA Magenta color cartridge 108 108A High yield magenta color cartridge 108XL 108XLA 1 Licensed for superior print quality, and our inks are formulated to Lexmark for remanufacturing, refilling, or recycling. 2 Available only on the Lexmark Web site at www.lexmark.com/pageyields. Ordering and replacing supplies 12 Ordering and replacing supplies Ordering ink cartridges Page yields available at www.lexmark...
... cartridge 108XL 108XLA Magenta color cartridge 108 108A High yield magenta color cartridge 108XL 108XLA 1 Licensed for superior print quality, and our inks are formulated to Lexmark for remanufacturing, refilling, or recycling. 2 Available only on the Lexmark Web site at www.lexmark.com/pageyields. Ordering and replacing supplies 12 Ordering and replacing supplies Ordering ink cartridges Page yields available at www.lexmark...

User's Guide
Page 13
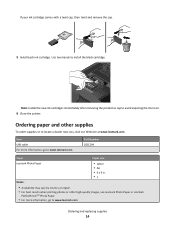
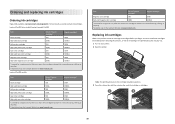
...-Lexmark ink or ink cartridges. WI F I PRINTING Note: The printhead moves to the cartridge installation position. 3 Press the release tab, and then remove the used ink cartridge or cartridges. 1 2 4 Remove the ink cartridge from the pack, and then remove the protective cap from the ink cartridge. If your printer. 2 Open the printer. Ordering and replacing supplies 13 Replacing ink cartridges Make sure you have a new ink cartridge or cartridges...
...-Lexmark ink or ink cartridges. WI F I PRINTING Note: The printhead moves to the cartridge installation position. 3 Press the release tab, and then remove the used ink cartridge or cartridges. 1 2 4 Remove the ink cartridge from the pack, and then remove the protective cap from the ink cartridge. If your printer. 2 Open the printer. Ordering and replacing supplies 13 Replacing ink cartridges Make sure you have a new ink cartridge or cartridges...
User's Guide
Page 14
Note: Install the new ink cartridges immediately after removing the protective cap to avoid exposing the ink to www.lexmark.com. Part Number 1021294 Paper Paper size Lexmark Photo Paper • Letter • A4 • 4 x 6 in. •L Notes: • Availability may vary by.... Use two hands to www.lexmark.com Ordering and replacing supplies 14 Ordering paper and other high-quality images, use Lexmark Photo Paper or Lexmark PerfectFinishTM Photo Paper. • For more information, go to install the black cartridge. If your ink cartridge comes with a twist cap, then...
Note: Install the new ink cartridges immediately after removing the protective cap to avoid exposing the ink to www.lexmark.com. Part Number 1021294 Paper Paper size Lexmark Photo Paper • Letter • A4 • 4 x 6 in. •L Notes: • Availability may vary by.... Use two hands to www.lexmark.com Ordering and replacing supplies 14 Ordering paper and other high-quality images, use Lexmark Photo Paper or Lexmark PerfectFinishTM Photo Paper. • For more information, go to install the black cartridge. If your ink cartridge comes with a twist cap, then...
User's Guide
Page 117
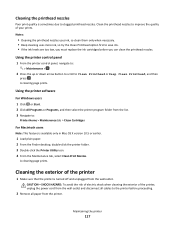
... and unplugged from the list. 3 Navigate to: Printer Home > Maintenance tab > Clean Cartridges For Macintosh users Note: This feature is sometimes due to the printer before you must replace the ink cartridges before proceeding. 2 Remove all paper from the wall outlet and disconnect all cables to clogged..., select Clean Print Nozzles. Notes: • Cleaning the printhead nozzles uses ink, so clean them only when necessary. • Deep cleaning uses more ink, so try the Clean Printhead option first to save ink. • If the ink levels are too low, you can clean the printhead nozzles.
... and unplugged from the list. 3 Navigate to: Printer Home > Maintenance tab > Clean Cartridges For Macintosh users Note: This feature is sometimes due to the printer before you must replace the ink cartridges before proceeding. 2 Remove all paper from the wall outlet and disconnect all cables to clogged..., select Clean Print Nozzles. Notes: • Cleaning the printhead nozzles uses ink, so clean them only when necessary. • Deep cleaning uses more ink, so try the Clean Printhead option first to save ink. • If the ink levels are too low, you can clean the printhead nozzles.
User's Guide
Page 124
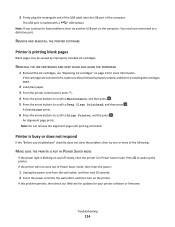
...blinking on the computer. You may be caused by improperly installed ink cartridges. A cleaning page prints. 6 Press the arrow buttons to scroll to Deep Clean Printhead, and then press . If the cartridges do not seem to a defective port. Printer is busy or ...and then press . 5 Press the arrow buttons to scroll to Align Printer, and the press . REINSTALL THE INK CARTRIDGES AND DEEP CLEAN AND ALIGN THE PRINTHEAD 1 Reinstall the ink cartridges, see "Replacing ink cartridges" on the printer. Press printer. Troubleshooting 124 The USB port is marked with a USB symbol.
...blinking on the computer. You may be caused by improperly installed ink cartridges. A cleaning page prints. 6 Press the arrow buttons to scroll to Deep Clean Printhead, and then press . If the cartridges do not seem to a defective port. Printer is busy or ...and then press . 5 Press the arrow buttons to scroll to Align Printer, and the press . REINSTALL THE INK CARTRIDGES AND DEEP CLEAN AND ALIGN THE PRINTHEAD 1 Reinstall the ink cartridges, see "Replacing ink cartridges" on the printer. Press printer. Troubleshooting 124 The USB port is marked with a USB symbol.
User's Guide
Page 130
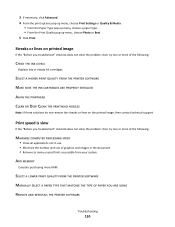
...YOU ARE USING REMOVE AND REINSTALL THE PRINTER SOFTWARE Troubleshooting 130 SELECT A HIGHER PRINT QUALITY FROM THE PRINTER SOFTWARE MAKE SURE THE INK CARTRIDGES ARE PROPERLY INSTALLED ALIGN THE PRINTHEAD CLEAN OR DEEP CLEAN THE PRINTHEAD NOZZLES Note: If these solutions do not remove the streaks or... or lines on the printed image, then contact technical support. ADD MEMORY Consider purchasing more of the following : CHECK THE INK LEVELS Replace low or empty ink cartridges. Print speed is slow If the "Before you troubleshoot" checklist does not solve the problem, then try one or more of...
...YOU ARE USING REMOVE AND REINSTALL THE PRINTER SOFTWARE Troubleshooting 130 SELECT A HIGHER PRINT QUALITY FROM THE PRINTER SOFTWARE MAKE SURE THE INK CARTRIDGES ARE PROPERLY INSTALLED ALIGN THE PRINTHEAD CLEAN OR DEEP CLEAN THE PRINTHEAD NOZZLES Note: If these solutions do not remove the streaks or... or lines on the printed image, then contact technical support. ADD MEMORY Consider purchasing more of the following : CHECK THE INK LEVELS Replace low or empty ink cartridges. Print speed is slow If the "Before you troubleshoot" checklist does not solve the problem, then try one or more of...

User's Guide
Page 165
... associated media, printed materials and electronic documentation, whether incorporated into, distributed with only genuine Lexmark ink cartridges for the hosting, performance, operation, maintenance, or content of, such software applications and/or internet web pages. Notices 165 If you a replacement copy of the Software Program or reimbursement of the price paid for the Software Program...
... associated media, printed materials and electronic documentation, whether incorporated into, distributed with only genuine Lexmark ink cartridges for the hosting, performance, operation, maintenance, or content of, such software applications and/or internet web pages. Notices 165 If you a replacement copy of the Software Program or reimbursement of the price paid for the Software Program...
User's Guide
Page 178
... on display 120 index cards 30 information finding 7 information needed for setting up printer on wireless network 93 infrastructure network 107 ink conserving 6 ink cartridge access 11 ink cartridges ordering 12 replacing 13 using genuine Lexmark 12 ink levels checking 115 inserting a memory card or flash drive 39 installation cable 106, 107 installing network printer 113 installing optional...
... on display 120 index cards 30 information finding 7 information needed for setting up printer on wireless network 93 infrastructure network 107 ink conserving 6 ink cartridge access 11 ink cartridges ordering 12 replacing 13 using genuine Lexmark 12 ink levels checking 115 inserting a memory card or flash drive 39 installation cable 106, 107 installing network printer 113 installing optional...
User's Guide
Page 180
... 84 automatically 84 manually 84 tips 84 recycling 6 Lexmark products 15 WEEE statement 163 redial attempts, fax setting 79 redial time, fax setting 79 reducing an image 57 registering fax user information 78 Transmit Terminal Identification (TTI) 78 repeating an image 59 replacing ink cartridges 13 reports fax history 90 reports, fax setting 79...
... 84 automatically 84 manually 84 tips 84 recycling 6 Lexmark products 15 WEEE statement 163 redial attempts, fax setting 79 redial time, fax setting 79 reducing an image 57 registering fax user information 78 Transmit Terminal Identification (TTI) 78 repeating an image 59 replacing ink cartridges 13 reports fax history 90 reports, fax setting 79...
Quick Reference
Page 3
... models...5 Printer features...5 Understanding the parts of the printer 5 Using the printer control panel 7 Using memory cards and flash drives 9 Ordering and replacing ink cartridges 10 Ordering ink cartridges...10 Replacing ink cartridges...10 Maintaining ink cartridges 11 Using the printer software 12 Minimum system requirements 12 Installing the printer software 12 Using the Windows printer software 13 Using the...
... models...5 Printer features...5 Understanding the parts of the printer 5 Using the printer control panel 7 Using memory cards and flash drives 9 Ordering and replacing ink cartridges 10 Ordering ink cartridges...10 Replacing ink cartridges...10 Maintaining ink cartridges 11 Using the printer software 12 Minimum system requirements 12 Installing the printer software 12 Using the Windows printer software 13 Using the...
Quick Reference
Page 4
...for 10 minutes. • Select the lowest Power Saver timeout. Before replacing and recycling your printer's environmental impact even further. Wireless/network printers allow you may be used to www.lexmark.com/recycle. About your printer Finding information about the printer, see the ...printer settings or tasks, you to Power Saver mode after the printer has been idle for reuse or recycling through the Lexmark Cartridge Collection Program. Inks in the Finder, double-click the printer folder. 2 Double-click User's Guide. It also includes information on troubleshooting ...
...for 10 minutes. • Select the lowest Power Saver timeout. Before replacing and recycling your printer's environmental impact even further. Wireless/network printers allow you may be used to www.lexmark.com/recycle. About your printer Finding information about the printer, see the ...printer settings or tasks, you to Power Saver mode after the printer has been idle for reuse or recycling through the Lexmark Cartridge Collection Program. Inks in the Finder, double-click the printer folder. 2 Double-click User's Guide. It also includes information on troubleshooting ...

Quick Reference
Page 6
...to access the port. Note: Remove the plug to a properly grounded electrical outlet that is near and accessible. Install, replace, or remove ink cartridges. • Access the ink cartridges and printhead. • Remove paper jams. 6 Prevent items from falling into the ADF. Use this port if you ... wall jack, DSL filter, or VoIP adapter) to the printer and the telephone line. LINE 7 USB port 8 Printhead access 9 Ink cartridge access 10 Scanner unit Connect the printer to the printhead access area when a printhead is supported in the ADF. Warning-Potential Damage: Do...
...to access the port. Note: Remove the plug to a properly grounded electrical outlet that is near and accessible. Install, replace, or remove ink cartridges. • Access the ink cartridges and printhead. • Remove paper jams. 6 Prevent items from falling into the ADF. Use this port if you ... wall jack, DSL filter, or VoIP adapter) to the printer and the telephone line. LINE 7 USB port 8 Printhead access 9 Ink cartridge access 10 Scanner unit Connect the printer to the printhead access area when a printhead is supported in the ADF. Warning-Potential Damage: Do...
Quick Reference
Page 10
... recycling. 2 Available only on the Lexmark Web site at www.lexmark.com/pageyields. Replacing ink cartridges Make sure you have a new ink cartridge or cartridges before you begin. WI F I PRINTING Note: The printhead moves to Lexmark for a single use only Lexmark ink cartridges. For best results, use only. After use only. After use only. Ordering and replacing ink cartridges Ordering ink cartridges Page yields available at www...
... recycling. 2 Available only on the Lexmark Web site at www.lexmark.com/pageyields. Replacing ink cartridges Make sure you have a new ink cartridge or cartridges before you begin. WI F I PRINTING Note: The printhead moves to Lexmark for a single use only Lexmark ink cartridges. For best results, use only. After use only. After use only. Ordering and replacing ink cartridges Ordering ink cartridges Page yields available at www...
Quick Reference
Page 12
...prints. Notes: • Cleaning the printhead nozzles uses ink, so clean them only when necessary. • Deep cleaning uses more ink, so try the Clean Printhead option first to save ink. • If the ink levels are too low, you must replace the ink cartridges before but need to 500MB of your prints. Installing ... of free disk space. b In the Start Search or Run box, type D:\setup.exe, where D is available only at http://support.lexmark.com. If the installation dialog does not appear after a minute, then launch the CD manually: a Click , or click Start and then click Run...
...prints. Notes: • Cleaning the printhead nozzles uses ink, so clean them only when necessary. • Deep cleaning uses more ink, so try the Clean Printhead option first to save ink. • If the ink levels are too low, you must replace the ink cartridges before but need to 500MB of your prints. Installing ... of free disk space. b In the Start Search or Run box, type D:\setup.exe, where D is available only at http://support.lexmark.com. If the installation dialog does not appear after a minute, then launch the CD manually: a Click , or click Start and then click Run...

Quick Reference
Page 23
...you continue to print, then the computer and printer may not be caused by improperly installed ink cartridges. If the cable is damaged, then use a new one or more information, see "Replacing ink cartridges" on the printer. MAKE SURE THE USB PORT IS ENABLED IN WINDOWS 1 Click , or.... The Device Manager opens. 4 Click the plus sign (+) beside Universal Serial Bus controllers. REINSTALL THE INK CARTRIDGES AND DEEP CLEAN AND ALIGN THE PRINTHEAD 1 Reinstall the ink cartridges, see the computer documentation. Printer is busy or does not respond If the "Before you have jobs ...
...you continue to print, then the computer and printer may not be caused by improperly installed ink cartridges. If the cable is damaged, then use a new one or more information, see "Replacing ink cartridges" on the printer. MAKE SURE THE USB PORT IS ENABLED IN WINDOWS 1 Click , or.... The Device Manager opens. 4 Click the plus sign (+) beside Universal Serial Bus controllers. REINSTALL THE INK CARTRIDGES AND DEEP CLEAN AND ALIGN THE PRINTHEAD 1 Reinstall the ink cartridges, see the computer documentation. Printer is busy or does not respond If the "Before you have jobs ...
Quick Reference
Page 26
... 4 flash drive inserting 9 printing documents from 16 scanning to 19 I incorrect language appears on display 20 information finding 4 ink conserving 4 ink cartridge access 6 ink cartridges ordering 10 replacing 10 inserting a memory card or flash drive 9 installing printer software 12 K keypad 8 L language changing 20 LINE port ... on both sides of the paper 15 photos using printer control panel 16 two-sided 15 publications finding 4 R recycling 4 replacing ink cartridges 10 S safety information 2 Scan button 7 scan job canceling 20 scanner glass 6 scanner lid 6 scanner unit 6 scanning creating...
... 4 flash drive inserting 9 printing documents from 16 scanning to 19 I incorrect language appears on display 20 information finding 4 ink conserving 4 ink cartridge access 6 ink cartridges ordering 10 replacing 10 inserting a memory card or flash drive 9 installing printer software 12 K keypad 8 L language changing 20 LINE port ... on both sides of the paper 15 photos using printer control panel 16 two-sided 15 publications finding 4 R recycling 4 replacing ink cartridges 10 S safety information 2 Scan button 7 scan job canceling 20 scanner glass 6 scanner lid 6 scanner unit 6 scanning creating...


