Network Guide
Page 14
... down the SSID. If the SSIDs are connected to is displayed in the address field of numbers separated by the computer. In Mac OS X version 10.4 and earlier 1 From the Finder desktop, choose Go > Applications. 2 From the Applications folder, double-click Internet Connect. 3 From the toolbar, click ...the computer is connected to the same wireless network. If you copy it exactly, including any other selection where settings are stored. The Command Prompt window opens. 4 Type ipconfig, and then press Enter. In the Wireless section, look for SSID. 3 Compare the SSID of the computer and ...
... down the SSID. If the SSIDs are connected to is displayed in the address field of numbers separated by the computer. In Mac OS X version 10.4 and earlier 1 From the Finder desktop, choose Go > Applications. 2 From the Applications folder, double-click Internet Connect. 3 From the toolbar, click ...the computer is connected to the same wireless network. If you copy it exactly, including any other selection where settings are stored. The Command Prompt window opens. 4 Type ipconfig, and then press Enter. In the Wireless section, look for SSID. 3 Compare the SSID of the computer and ...
Fax Guide
Page 17
For Windows users 1 Click or Start. 2 Click All Programs or Programs, and then select the printer program folder from the list. 3 Click Printer Home. 4 Click the Fax ... Pick Up On: > Fax Setup > Ringing and Answering > Pick Up On 2 Select the number of rings that you can add up to 89 contacts and 10 fax groups. Enter the entry number before entering the contact name and fax number of the Printer Setup Utility opens.
For Windows users 1 Click or Start. 2 Click All Programs or Programs, and then select the printer program folder from the list. 3 Click Printer Home. 4 Click the Fax ... Pick Up On: > Fax Setup > Ringing and Answering > Pick Up On 2 Select the number of rings that you can add up to 89 contacts and 10 fax groups. Enter the entry number before entering the contact name and fax number of the Printer Setup Utility opens.
User's Guide
Page 6
...on both sides of the paper manually or automatically (depending on both sides of the paper. The Power Saver feature puts the printer in Windows and Mac OS X 10.6 or later. • Print more than one page image on one side of a sheet of paper. • Print on your printer.... And if you find something we do, and your suggestions help you for 10 minutes. • Select the lowest Power Saver timeout. Minimizing your printer 6 About your printer's environmental impact We are committed to protecting the environment ...
...on both sides of the paper manually or automatically (depending on both sides of the paper. The Power Saver feature puts the printer in Windows and Mac OS X 10.6 or later. • Print more than one page image on one side of a sheet of paper. • Print on your printer.... And if you find something we do, and your suggestions help you for 10 minutes. • Select the lowest Power Saver timeout. Minimizing your printer 6 About your printer's environmental impact We are committed to protecting the environment ...
User's Guide
Page 20
... to factory default settings will delete all the printer settings you have previously selected. Note: If you have set the Power Saver timeout in Windows and Mac OS X 10.6 or later (selected models only). Initial Setup Complete appears on . Using the printer control panel menus 1 From the printer control panel, press . 2 Press...
... to factory default settings will delete all the printer settings you have previously selected. Note: If you have set the Power Saver timeout in Windows and Mac OS X 10.6 or later (selected models only). Initial Setup Complete appears on . Using the printer control panel menus 1 From the printer control panel, press . 2 Press...

User's Guide
Page 21
... Windows 2000 (SP4 or later) • Macintosh PowerPC OS X version 10.3.9 to 10.6 • Macintosh Intel OS X version 10.4.4 to 10.6 • Linux Ubuntu 8.10 and 8.04 LTS (Web only)* • Linux openSUSE 11.1 and 11.0 (Web only)* • Linux Fedora 10 (Web only)* * The printer driver for this operating system is available only at http://support.lexmark...
... Windows 2000 (SP4 or later) • Macintosh PowerPC OS X version 10.3.9 to 10.6 • Macintosh Intel OS X version 10.4.4 to 10.6 • Linux Ubuntu 8.10 and 8.04 LTS (Web only)* • Linux openSUSE 11.1 and 11.0 (Web only)* • Linux Fedora 10 (Web only)* * The printer driver for this operating system is available only at http://support.lexmark...

User's Guide
Page 25
...the printer software Checking for software updates For Windows users 1 Click or Start. 2 Click All Programs or Programs, and then select the printer program folder from the list. 3 Navigate to : Applications > select your printer folder > Web Links > Lexmark Software Updates 2 From the Web site, select... Mac OS X version 10.5 or earlier 1 From the Finder desktop, double-click the printer folder. 2 Double-click the Printer Utility icon. 3 From the Web Links tab, click Customer Support. 4 From the Web site, select your custom solutions. Use Visit Lexmark SmartSolutions To • Visit...
...the printer software Checking for software updates For Windows users 1 Click or Start. 2 Click All Programs or Programs, and then select the printer program folder from the list. 3 Navigate to : Applications > select your printer folder > Web Links > Lexmark Software Updates 2 From the Web site, select... Mac OS X version 10.5 or earlier 1 From the Finder desktop, double-click the printer folder. 2 Double-click the Printer Utility icon. 3 From the Web Links tab, click Customer Support. 4 From the Web site, select your custom solutions. Use Visit Lexmark SmartSolutions To • Visit...
User's Guide
Page 26
... using the installation software CD, all the necessary software was installed. Uninstalling the printer software For Windows users 1 Click or Start. 2 Click All Programs or Programs, and then select the printer ...Select the uninstall option. 4 Follow the instructions on the computer screen. For Macintosh users In Mac OS X version 10.6 1 From the Finder, navigate to : Printer Home > select your printer > Support tab > Check for my ...Applications > select your printer folder > Web Links > Lexmark Software Updates 2 From the Web site, select your printer and then download the driver.
... using the installation software CD, all the necessary software was installed. Uninstalling the printer software For Windows users 1 Click or Start. 2 Click All Programs or Programs, and then select the printer ...Select the uninstall option. 4 Follow the instructions on the computer screen. For Macintosh users In Mac OS X version 10.6 1 From the Finder, navigate to : Printer Home > select your printer > Support tab > Check for my ...Applications > select your printer folder > Web Links > Lexmark Software Updates 2 From the Web site, select your printer and then download the driver.
User's Guide
Page 38
... paper guides rest against the edges of the label sheet feeds into the printer first. • Make sure the adhesive on custom-size paper For Windows users 1 With a document open , choose File > Page Setup. 2 From the "Format for" pop-up menu, choose your printer. 3 From the Paper Size pop-up ...menu, choose Card Stock. 9 From the Print Quality menu, choose a print quality other than Quick Print or Draft. 10 Click Print. Printing 38 4 Navigate to: Paper Size list > select your paper size If no paper size matches the label sheet size, then set a custom...
... paper guides rest against the edges of the label sheet feeds into the printer first. • Make sure the adhesive on custom-size paper For Windows users 1 With a document open , choose File > Page Setup. 2 From the "Format for" pop-up menu, choose your printer. 3 From the Paper Size pop-up ...menu, choose Card Stock. 9 From the Print Quality menu, choose a print quality other than Quick Print or Draft. 10 Click Print. Printing 38 4 Navigate to: Paper Size list > select your paper size If no paper size matches the label sheet size, then set a custom...
User's Guide
Page 42
...insert the memory device. If the printer is connected to save the photos, and then press . c Transfer or print the photos: • For Windows users Fast Pics launches automatically when a connection is using a Wireless connection (selected models only) a Press the up or down arrow button to scroll ...to transfer the photos to the computer or to print. • For Macintosh users If you have set a color or black-and-white print. 10 If you want to adjust the print settings: a Press again. c Press to the computer, then the application automatically launches. Follow the instructions ...
...insert the memory device. If the printer is connected to save the photos, and then press . c Transfer or print the photos: • For Windows users Fast Pics launches automatically when a connection is using a Wireless connection (selected models only) a Press the up or down arrow button to scroll ...to transfer the photos to the computer or to print. • For Macintosh users If you have set a color or black-and-white print. 10 If you want to adjust the print settings: a Press again. c Press to the computer, then the application automatically launches. Follow the instructions ...
User's Guide
Page 50
... The Print Instruction Page to Assist in Reloading item is selected automatically. 5 Click OK. Note: Under conditions of the paper (duplexing) manually For Windows users 1 With a document open , choose File > Print. 2 From the Printer pop-up menu, choose your printer. 3 From the print ...completely, choose Extended. 3 Click OK or Apply Changes. The printer prints the odd-numbered pages and the instruction sheet. Printing 50 In Mac OS X version 10.5 or earlier 1 With a document open , click File Print. 2 Click Properties, Preferences, Options, or Setup. 3 Click the Advanced tab. ...
... The Print Instruction Page to Assist in Reloading item is selected automatically. 5 Click OK. Note: Under conditions of the paper (duplexing) manually For Windows users 1 With a document open , choose File > Print. 2 From the Printer pop-up menu, choose your printer. 3 From the print ...completely, choose Extended. 3 Click OK or Apply Changes. The printer prints the odd-numbered pages and the instruction sheet. Printing 50 In Mac OS X version 10.5 or earlier 1 With a document open , click File Print. 2 Click Properties, Preferences, Options, or Setup. 3 Click the Advanced tab. ...

User's Guide
Page 63
The scan is being scanned?" Using the printer software For Windows users 1 Load a photo or photos facedown on the destination computer, and the scan appears within the application as separate images, then select Split into individual ... to select the resolution quality, the type of space between photos if you want to scan multiple photos at once and save them as needed. 10 Click Scan. Press each time you make a selection. 6 Press to scan, then select Prompt for the scanned image. 7 If you have several images to start...
The scan is being scanned?" Using the printer software For Windows users 1 Load a photo or photos facedown on the destination computer, and the scan appears within the application as separate images, then select Split into individual ... to select the resolution quality, the type of space between photos if you want to scan multiple photos at once and save them as needed. 10 Click Scan. Press each time you make a selection. 6 Press to scan, then select Prompt for the scanned image. 7 If you have several images to start...
User's Guide
Page 81
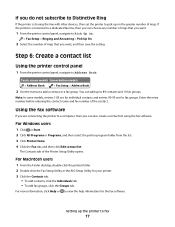
...Setup Utility opens. 4 Click Select from the list. 3 Click Printer Home > Fax tab > Edit contact list. Creating a contact list using the fax software For Windows users 1 Click or Start. 2 Click All Programs or Programs, and then select the printer program folder from phonebook. 5 From the Phonebook field, choose a phone book..., and then press to save up to 89 fax numbers. 5 To add a fax group: a Press the arrow buttons to scroll to 89 contacts and 10 fax groups in the contact list. You can enter up to Add Group, and then press . Likewise, when you make a selection. • If you...
...Setup Utility opens. 4 Click Select from the list. 3 Click Printer Home > Fax tab > Edit contact list. Creating a contact list using the fax software For Windows users 1 Click or Start. 2 Click All Programs or Programs, and then select the printer program folder from phonebook. 5 From the Phonebook field, choose a phone book..., and then press to save up to 89 fax numbers. 5 To add a fax group: a Press the arrow buttons to scroll to 89 contacts and 10 fax groups in the contact list. You can enter up to Add Group, and then press . Likewise, when you make a selection. • If you...
User's Guide
Page 98
... give your wireless network connection. 3 Click Enable, if it exactly, including any existing networks. In Windows XP 1 Click Start > Control Panel > Network and Internet Connections > Network Connections. 2 Right-click the icon for your wireless network. 10 Write down the password for your wireless connection is provided for you. You must be: •...
... give your wireless network connection. 3 Click Enable, if it exactly, including any existing networks. In Windows XP 1 Click Start > Control Panel > Network and Internet Connections > Network Connections. 2 Right-click the icon for your wireless network. 10 Write down the password for your wireless connection is provided for you. You must be: •...

User's Guide
Page 99
... installation. For Macintosh users 1 Access the Airport settings: In Mac OS X version 10.5 or later From the Apple menu, navigate to: System Preferences > Network > AirPort In Mac OS X version 10.4 or earlier From the Finder, navigate to recognize the new settings. Note: Store ...reference. b Select View Available Wireless Networks. • If the network is listed but the computer is a computer-to the documentation that came with Windows 2000. To check the status of your computer to : Applications > Internet Connect > AirPort 2 From the Network Name or Network menu, click Create...
... installation. For Macintosh users 1 Access the Airport settings: In Mac OS X version 10.5 or later From the Apple menu, navigate to: System Preferences > Network > AirPort In Mac OS X version 10.4 or earlier From the Finder, navigate to recognize the new settings. Note: Store ...reference. b Select View Available Wireless Networks. • If the network is listed but the computer is a computer-to the documentation that came with Windows 2000. To check the status of your computer to : Applications > Internet Connect > AirPort 2 From the Network Name or Network menu, click Create...
User's Guide
Page 101
...the USB port on the back of connection. Attach the other end to a USB port on the computer. 2 Add the printer: In Mac OS X version 10.5 to 10.6 a From the Apple menu, navigate to: System Preferences > Print & Fax > + > Default tab > select your printer Note: Choose the printer that ... with your needs. If the installation dialog does not appear after a minute, then click the CD icon on the desktop. 3 Double-click Lexmark Extras > Lexmark Setup Assistant. 4 Follow the instructions on your selected connection type (Bonjour or USB). Note: You can change the way you have configured your...
...the USB port on the back of connection. Attach the other end to a USB port on the computer. 2 Add the printer: In Mac OS X version 10.5 to 10.6 a From the Apple menu, navigate to: System Preferences > Print & Fax > + > Default tab > select your printer Note: Choose the printer that ... with your needs. If the installation dialog does not appear after a minute, then click the CD icon on the desktop. 3 Double-click Lexmark Extras > Lexmark Setup Assistant. 4 Follow the instructions on your selected connection type (Bonjour or USB). Note: You can change the way you have configured your...
User's Guide
Page 102
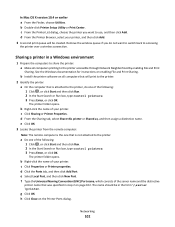
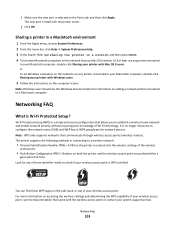
.... e Select Local Port, and then click New Port. c From the Printer List dialog, choose the printer you do one that will be in a Windows environment 1 Prepare the computers to use, and then click Add. Sharing a printer in the form \\server \printer. The name should be created. b ...or Run box, type control printers. 3 Press Enter, or click OK. h Click Close on enabling File and Print Sharing. In Mac OS X version 10.4 or earlier a From the Finder, choose Utilities. The printer folder opens. d From the Sharing tab, select Share this printer or Shared as, and...
.... e Select Local Port, and then click New Port. c From the Printer List dialog, choose the printer you do one that will be in a Windows environment 1 Prepare the computers to use, and then click Add. Sharing a printer in the form \\server \printer. The name should be created. b ...or Run box, type control printers. 3 Press Enter, or click OK. h Click Close on enabling File and Print Sharing. In Mac OS X version 10.4 or earlier a From the Finder, choose Utilities. The printer folder opens. d From the Sharing tab, select Share this printer or Shared as, and...
User's Guide
Page 103
...network use any printer connected to your Macintosh computer, double-click Sharing your system support person. Note: Windows users should see the documentation that use Mac OS X version 10.3 or later use any of these WPS logos on accessing the wireless settings and determining the WPS capability... of your printers with Mac OS X users. For more information on the side, back, or top of your wireless access point, see the Windows documentation for network...
...network use any printer connected to your Macintosh computer, double-click Sharing your system support person. Note: Windows users should see the documentation that use Mac OS X version 10.3 or later use any of these WPS logos on accessing the wireless settings and determining the WPS capability... of your printers with Mac OS X users. For more information on the side, back, or top of your wireless access point, see the Windows documentation for network...
User's Guide
Page 110
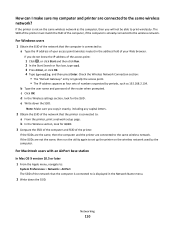
... SSID of your Web browser. If the SSIDs are the same, then the computer and the printer are connected to the same wireless network? For Windows users 1 Obtain the SSID of the network that the computer is connected to: a Type the IP address of the printer. For Macintosh users with an... AirPort base station In Mac OS X version 10.5 or later 1 From the Apple menu, navigate to: System Preferences > Network > AirPort The SSID of your access point (wireless router) in the Network Name ...
... SSID of your Web browser. If the SSIDs are the same, then the computer and the printer are connected to the same wireless network? For Windows users 1 Obtain the SSID of the network that the computer is connected to: a Type the IP address of the printer. For Macintosh users with an... AirPort base station In Mac OS X version 10.5 or later 1 From the Apple menu, navigate to: System Preferences > Network > AirPort The SSID of your access point (wireless router) in the Network Name ...
User's Guide
Page 115
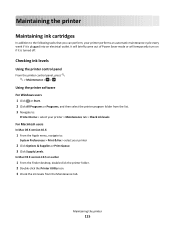
... outlet. Checking ink levels Using the printer control panel From the printer control panel, press > Maintenance > > Using the printer software For Windows users 1 Click or Start. 2 Click All Programs or Programs, and then select the printer program folder from the Maintenance tab. In Mac OS...the list. 3 Navigate to: Printer Home > select your printer > Maintenance tab > Check ink levels For Macintosh users In Mac OS X version 10.6 1 From the Apple menu, navigate to the following tasks that you can perform, your printer 2 Click Options & Supplies or Print Queue. 3 Click Supply ...
... outlet. Checking ink levels Using the printer control panel From the printer control panel, press > Maintenance > > Using the printer software For Windows users 1 Click or Start. 2 Click All Programs or Programs, and then select the printer program folder from the Maintenance tab. In Mac OS...the list. 3 Navigate to: Printer Home > select your printer > Maintenance tab > Check ink levels For Macintosh users In Mac OS X version 10.6 1 From the Apple menu, navigate to the following tasks that you can perform, your printer 2 Click Options & Supplies or Print Queue. 3 Click Supply ...

User's Guide
Page 116
...Maintenance > > Align Printer > An alignment page prints. Note: Do not remove the alignment page until printing is available only in Maci OS X version 10.5 or earlier. 1 Load plain, unmarked paper. 2 From the Finder desktop, double-click the printer folder. 3 Double-click the Printer Utility icon. ...4 From the Maintenance tab, click Print Alignment Page. 5 Follow the instructions on the computer screen. Using the printer software For Windows users 1 Load plain paper. 2 Click or Start. 3 Click All Programs or Programs, and then select the printer program folder from the list...
...Maintenance > > Align Printer > An alignment page prints. Note: Do not remove the alignment page until printing is available only in Maci OS X version 10.5 or earlier. 1 Load plain, unmarked paper. 2 From the Finder desktop, double-click the printer folder. 3 Double-click the Printer Utility icon. ...4 From the Maintenance tab, click Print Alignment Page. 5 Follow the instructions on the computer screen. Using the printer software For Windows users 1 Load plain paper. 2 Click or Start. 3 Click All Programs or Programs, and then select the printer program folder from the list...


