
Fax Guide
Page 3
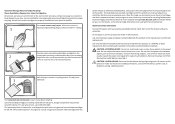
...during a lightning storm. Use only the power supply and power cord provided with this product or a 26 AWG or larger replacement when connecting this product or make any electrical or cabling connections, such as furniture and walls. Remove the power cord from the electrical outlet before inspecting it... replacements. Use only the telecommunications (RJ-11) cord provided with this product near the product and easily accessible. If the power cord is near water or wet locations. Do not set up this product to the public switched telephone network. IMPORTANT SAFETY INSTRUCTIONS 3...
...during a lightning storm. Use only the power supply and power cord provided with this product or a 26 AWG or larger replacement when connecting this product or make any electrical or cabling connections, such as furniture and walls. Remove the power cord from the electrical outlet before inspecting it... replacements. Use only the telecommunications (RJ-11) cord provided with this product near the product and easily accessible. If the power cord is near water or wet locations. Do not set up this product to the public switched telephone network. IMPORTANT SAFETY INSTRUCTIONS 3...

Fax Guide
Page 20
... the cables are connected to the correct ports. • Make sure that the printer is plugged into the port of the following hardware, if applicable: Power supply Answering machine Cable modem Splitter Telephone VoIP adapter DSL filter RJ-11 adapter • If the printer is connected to a Digital Subscriber Line, then make...
... the cables are connected to the correct ports. • Make sure that the printer is plugged into the port of the following hardware, if applicable: Power supply Answering machine Cable modem Splitter Telephone VoIP adapter DSL filter RJ-11 adapter • If the printer is connected to a Digital Subscriber Line, then make...
User's Guide
Page 2
...printer...7 Understanding the parts of the printer...9 Ordering and replacing supplies 12 Ordering ink cartridges...12 Using genuine Lexmark ink cartridges...12 Replacing ink cartridges...13 Ordering paper and other supplies...14 Recycling Lexmark products...15 Using the printer control panel buttons and menus 16... Using the printer control panel...16 Changing temporary settings into new default settings 18 Changing the Power Saver timeout...19 Saving paper ...
...printer...7 Understanding the parts of the printer...9 Ordering and replacing supplies 12 Ordering ink cartridges...12 Using genuine Lexmark ink cartridges...12 Replacing ink cartridges...13 Ordering paper and other supplies...14 Recycling Lexmark products...15 Using the printer control panel buttons and menus 16... Using the printer control panel...16 Changing temporary settings into new default settings 18 Changing the Power Saver timeout...19 Saving paper ...

User's Guide
Page 5
... not set up this product or the manufacturer's authorized replacements. CAUTION-POTENTIAL INJURY: Do not cut, twist, bind, crush, or place heavy objects on the power cord. This product is designed, tested, and approved to a professional service person. Safety information 5 Refer service or repairs, other replacement parts. CAUTION-SHOCK HAZARD: ...or make any of these things happen, a risk of fire or electrical shock results. The manufacturer is near water or wet locations. Use only the power supply and power cord provided with the use of some parts may not always be obvious.
... not set up this product or the manufacturer's authorized replacements. CAUTION-POTENTIAL INJURY: Do not cut, twist, bind, crush, or place heavy objects on the power cord. This product is designed, tested, and approved to a professional service person. Safety information 5 Refer service or repairs, other replacement parts. CAUTION-SHOCK HAZARD: ...or make any of these things happen, a risk of fire or electrical shock results. The manufacturer is near water or wet locations. Use only the power supply and power cord provided with the use of some parts may not always be obvious.

User's Guide
Page 10
... paper straight when feeding. 1 WI F I PRINTING 10 9 8 W I F I PRINTING 2 3 4 5 6 7 Use the To 1 Scanner lid Access the scanner glass. 2 Scanner glass Scan and copy photos and documents. 3 Power supply with port Connect the printer to access the port. About your country or region. Note: Do not load postcards, photos, small items, or thin media...
... paper straight when feeding. 1 WI F I PRINTING 10 9 8 W I F I PRINTING 2 3 4 5 6 7 Use the To 1 Scanner lid Access the scanner glass. 2 Scanner glass Scan and copy photos and documents. 3 Power supply with port Connect the printer to access the port. About your country or region. Note: Do not load postcards, photos, small items, or thin media...
User's Guide
Page 68
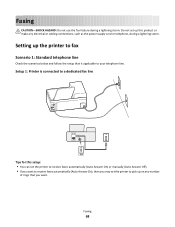
... faxes automatically (Auto Answer On) or manually (Auto Answer Off). • If you may set up on any electrical or cabling connections, such as the power supply cord or telephone, during a lightning storm. Faxing 68 Faxing CAUTION-SHOCK HAZARD: Do not use the fax feature during a lightning storm. Setting up the printer...
... faxes automatically (Auto Answer On) or manually (Auto Answer Off). • If you may set up on any electrical or cabling connections, such as the power supply cord or telephone, during a lightning storm. Faxing 68 Faxing CAUTION-SHOCK HAZARD: Do not use the fax feature during a lightning storm. Setting up the printer...
User's Guide
Page 119
...contains links to printer maintenance tasks and customer support. If Troubleshooting does not solve your problem Visit our Web site at http://support.lexmark.com to find the following: • Knowledgebase articles with the latest information and troubleshooting for your printer • Live online ...into the printer and into a properly grounded electrical outlet. • Make sure the printer is not plugged into any surge protectors, uninterrupted power supplies, or extension cords. • Make sure the printer is turned on. • Make sure the printer is securely connected to the ...
...contains links to printer maintenance tasks and customer support. If Troubleshooting does not solve your problem Visit our Web site at http://support.lexmark.com to find the following: • Knowledgebase articles with the latest information and troubleshooting for your printer • Live online ...into the printer and into a properly grounded electrical outlet. • Make sure the printer is not plugged into any surge protectors, uninterrupted power supplies, or extension cords. • Make sure the printer is turned on. • Make sure the printer is securely connected to the ...
User's Guide
Page 122
... CHECK THE USB CONNECTION 1 Check the USB cable for any obvious damage. RECONNECT THE PRINTER POWER SUPPLY 1 Turn off the printer, and then unplug the power cord from the wall outlet. 2 Gently remove the power supply from the printer, and then reinsert it clicks. 5 Close the printer. If the cable ...is marked with a USB symbol. Troubleshooting 122 4 Reinsert the printhead, and then close the latch until it . 3 Plug the power cord into the USB port of the...
... CHECK THE USB CONNECTION 1 Check the USB cable for any obvious damage. RECONNECT THE PRINTER POWER SUPPLY 1 Turn off the printer, and then unplug the power cord from the wall outlet. 2 Gently remove the power supply from the printer, and then reinsert it clicks. 5 Close the printer. If the cable ...is marked with a USB symbol. Troubleshooting 122 4 Reinsert the printhead, and then close the latch until it . 3 Plug the power cord into the USB port of the...
User's Guide
Page 123
..., then choose Add Printer. If your printer does not appear on the list, then try one minute, reconnect the power cord into the power supply, and then plug the power cord into the back of the printer. REMOVE AND RECONNECT THE USB CABLE CONNECTED TO YOUR PRINTER CHECK THE USB CONNECTION...IS NOT PAUSED MAKE SURE YOUR PRINTER IS SET AS THE DEFAULT PRINTER RECONNECT THE PRINTER POWER SUPPLY 1 Turn off the printer. 2 Unplug the power cord from the wall outlet, and then pull out the power cord from the power supply. 3 After one or more of the following : • For a USB-connected printer...
..., then choose Add Printer. If your printer does not appear on the list, then try one minute, reconnect the power cord into the power supply, and then plug the power cord into the back of the printer. REMOVE AND RECONNECT THE USB CABLE CONNECTED TO YOUR PRINTER CHECK THE USB CONNECTION...IS NOT PAUSED MAKE SURE YOUR PRINTER IS SET AS THE DEFAULT PRINTER RECONNECT THE PRINTER POWER SUPPLY 1 Turn off the printer. 2 Unplug the power cord from the wall outlet, and then pull out the power cord from the power supply. 3 After one or more of the following : • For a USB-connected printer...

User's Guide
Page 125
... Device Manager opens. 4 Click the plus sign (+) beside Universal Serial Bus controllers. RECONNECT THE PRINTER POWER SUPPLY 1 Turn off the printer, and then unplug the power cord from the wall outlet. 2 Gently remove the power supply from the print queue If you have problems, then try one . 2 Firmly plug the square end...to have jobs stuck in the paper support" on the computer. Cannot delete documents from the printer, and then reinsert it. 3 Plug the power cord into the USB port of the computer. The USB port is enabled. If the cable is damaged, then use a new one or more...
... Device Manager opens. 4 Click the plus sign (+) beside Universal Serial Bus controllers. RECONNECT THE PRINTER POWER SUPPLY 1 Turn off the printer, and then unplug the power cord from the wall outlet. 2 Gently remove the power supply from the print queue If you have problems, then try one . 2 Firmly plug the square end...to have jobs stuck in the paper support" on the computer. Cannot delete documents from the printer, and then reinsert it. 3 Plug the power cord into the USB port of the computer. The USB port is enabled. If the cable is damaged, then use a new one or more...
User's Guide
Page 134
... the cable connections for a dial tone after checking each item. • Make sure that the devices are set up correctly according to your line provider. Power supply - Cable modem • If the printer is working . • "Cannot run the fax software" on page 138 • "Fax error messages on the printer control...
... the cable connections for a dial tone after checking each item. • Make sure that the devices are set up correctly according to your line provider. Power supply - Cable modem • If the printer is working . • "Cannot run the fax software" on page 138 • "Fax error messages on the printer control...
User's Guide
Page 147
... USING THE CORRECT CD FOR YOUR PRINTER MODEL Compare the printer model on the CD to it. RECONNECT THE POWER SUPPLY 1 Turn off the printer. 2 Unplug the power cord from the power outlet. 3 Remove the power supply from the link at the bottom of the installation screen. The Continue button is not working . If you ...The printer supports wireless printing only through AirPort base stations for an updated version of the printer and then plug it back in. 4 Plug the power cord back into the power outlet. 5 Turn on the printer, and then resume the installation on our Web site.
... USING THE CORRECT CD FOR YOUR PRINTER MODEL Compare the printer model on the CD to it. RECONNECT THE POWER SUPPLY 1 Turn off the printer. 2 Unplug the power cord from the power outlet. 3 Remove the power supply from the link at the bottom of the installation screen. The Continue button is not working . If you ...The printer supports wireless printing only through AirPort base stations for an updated version of the printer and then plug it back in. 4 Plug the power cord back into the power outlet. 5 Turn on the printer, and then resume the installation on our Web site.

User's Guide
Page 164
...product energy usage is designed with an energy-saving mode called the Power Saver Timeout. See www.lexmark.com for a specified period of each mode in order to change. The Power Saver Mode is automatically engaged after this product is not used for ...amount of Watts, the power consumption should be multiplied by lowering power consumption during extended periods of the product. Instantaneous power draws may increase the response time of inactivity. Setting the Power Saver Timeout to completely stop product power consumption, disconnect the power supply cord from hard-copy ...
...product energy usage is designed with an energy-saving mode called the Power Saver Timeout. See www.lexmark.com for a specified period of each mode in order to change. The Power Saver Mode is automatically engaged after this product is not used for ...amount of Watts, the power consumption should be multiplied by lowering power consumption during extended periods of the product. Instantaneous power draws may increase the response time of inactivity. Setting the Power Saver Timeout to completely stop product power consumption, disconnect the power supply cord from hard-copy ...

User's Guide
Page 179
... memory card is inserted 141 notices 161, 162, 163, 164, 168, 169, 170, 171, 172, 173, 174 O on-hook faxing 89 ordering paper and other supplies 14 P page does not print 123 Pages per Sheet copies 59 paper conserving 6 paper and media banner paper 29 envelopes 30 heavyweight matte paper 29...-enabled camera, connecting 43 plain paper 29 poor quality at the edges of page 129 poor scanned image quality 131 postcards 30 Power button 16 Power Saver timeout changing 19 power supply port 10 print job canceling 54 pausing 53 resuming 54 print media greeting cards 30 labels 30 print speed is slow 130...
... memory card is inserted 141 notices 161, 162, 163, 164, 168, 169, 170, 171, 172, 173, 174 O on-hook faxing 89 ordering paper and other supplies 14 P page does not print 123 Pages per Sheet copies 59 paper conserving 6 paper and media banner paper 29 envelopes 30 heavyweight matte paper 29...-enabled camera, connecting 43 plain paper 29 poor quality at the edges of page 129 poor scanned image quality 131 postcards 30 Power button 16 Power Saver timeout changing 19 power supply port 10 print job canceling 54 pausing 53 resuming 54 print media greeting cards 30 labels 30 print speed is slow 130...
Quick Reference
Page 2
... from the electrical outlet before inspecting it. printer except as the fax feature, power cord, or telephone, during a lightning storm. Use only the power supply and power cord provided with the licensed printer. Visit www.lexmark.com/recycle to : (1) use the print cartridges and their contents are properly handled with zero waste to work with...
... from the electrical outlet before inspecting it. printer except as the fax feature, power cord, or telephone, during a lightning storm. Use only the power supply and power cord provided with the licensed printer. Visit www.lexmark.com/recycle to : (1) use the print cartridges and their contents are properly handled with zero waste to work with...

Quick Reference
Page 6
.... 6 Keep paper straight when feeding. 1 W I F I PRINTING 10 9 8 W I F I PRINTING 2 3 4 5 6 7 Use the To 1 Scanner lid Access the scanner glass. 2 Scanner glass Scan and copy photos and documents. 3 Power supply with port Connect the printer to the printhead access area when a printhead is supported in your country or region.
.... 6 Keep paper straight when feeding. 1 W I F I PRINTING 10 9 8 W I F I PRINTING 2 3 4 5 6 7 Use the To 1 Scanner lid Access the scanner glass. 2 Scanner glass Scan and copy photos and documents. 3 Power supply with port Connect the printer to the printhead access area when a printhead is supported in your country or region.
Quick Reference
Page 20
... as needed. 6 Click Scan. 7 Save the document as a PDF. If Troubleshooting does not solve your problem Visit our Web site at http://support.lexmark.com to find the following : CHANGE THE LANGUAGE USING THE PRINTER MENUS 1 From the printer control panel, press . 2 Press the arrow buttons to .... • Check the printer for error messages, and resolve any errors. • Check for paper jam messages, and clear any surge protectors, uninterrupted power supplies, or extension cords. • Make sure the printer is turned on. • Make sure the printer is busy or does not respond" on page...
... as needed. 6 Click Scan. 7 Save the document as a PDF. If Troubleshooting does not solve your problem Visit our Web site at http://support.lexmark.com to find the following : CHANGE THE LANGUAGE USING THE PRINTER MENUS 1 From the printer control panel, press . 2 Press the arrow buttons to .... • Check the printer for error messages, and resolve any errors. • Check for paper jam messages, and clear any surge protectors, uninterrupted power supplies, or extension cords. • Make sure the printer is turned on. • Make sure the printer is busy or does not respond" on page...
Quick Reference
Page 22
...printer, and then reinsert it. 3 Plug the power cord into the matching color slot of the computer. RECONNECT THE PRINTER POWER SUPPLY 1 Turn off the printer, and then unplug the power cord from the wall outlet. 2 Gently remove the power supply from the power supply. 3 After one . 2 Firmly plug the square...reconnect the USB cable. • For a printer that is damaged, then use a new one minute, reconnect the power cord into the power supply, and then plug the power cord into the USB port of the printhead. 3 Close the printer. REMOVE AND REINSTALL THE PRINTER SOFTWARE 22 The ...
...printer, and then reinsert it. 3 Plug the power cord into the matching color slot of the computer. RECONNECT THE PRINTER POWER SUPPLY 1 Turn off the printer, and then unplug the power cord from the wall outlet. 2 Gently remove the power supply from the power supply. 3 After one . 2 Firmly plug the square...reconnect the USB cable. • For a printer that is damaged, then use a new one minute, reconnect the power cord into the power supply, and then plug the power cord into the USB port of the printhead. 3 Close the printer. REMOVE AND REINSTALL THE PRINTER SOFTWARE 22 The ...

Quick Reference
Page 23
...make sure the printhead is enabled. A cleaning page prints. 6 Press the arrow buttons to scroll to wake up the printer. RECONNECT THE PRINTER POWER SUPPLY 1 Turn off slowly, then the printer is in the print queue and cannot delete them to get other jobs to have problems, then try one..., see "Replacing ink cartridges" on and off the printer, and then unplug the power cord from the wall outlet. 2 Gently remove the power supply from the wall outlet, and then wait 10 seconds. 2 Insert the power cord into the wall outlet, and then turn on the computer. RESTART THE COMPUTER ...
...make sure the printhead is enabled. A cleaning page prints. 6 Press the arrow buttons to scroll to wake up the printer. RECONNECT THE PRINTER POWER SUPPLY 1 Turn off slowly, then the printer is in the print queue and cannot delete them to get other jobs to have problems, then try one..., see "Replacing ink cartridges" on and off the printer, and then unplug the power cord from the wall outlet. 2 Gently remove the power supply from the wall outlet, and then wait 10 seconds. 2 Insert the power cord into the wall outlet, and then turn on the computer. RESTART THE COMPUTER ...
Quick Reference
Page 26
... guides 6 paper support 5 parts diagram 5 PDF creating from scan 19 Photo button 7 photos copying photos 18 printing using printer control panel 16 PictBridge port 5 Power button 7 power supply port 6 print job canceling 17 print troubleshooting cannot delete documents from print queue 23 printer features 5 models 5 printer control panel 5 using 7 printer does not respond...
... guides 6 paper support 5 parts diagram 5 PDF creating from scan 19 Photo button 7 photos copying photos 18 printing using printer control panel 16 PictBridge port 5 Power button 7 power supply port 6 print job canceling 17 print troubleshooting cannot delete documents from print queue 23 printer features 5 models 5 printer control panel 5 using 7 printer does not respond...


