Network Guide
Page 14
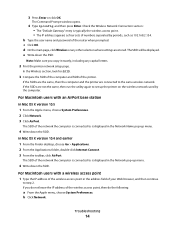
The Command Prompt window opens. 4 Type ipconfig, and then press Enter. In the Wireless section... pop-up menu. 4 Write down the SSID. For Macintosh users with an AirPort base station In Mac OS X version 10.5 1 From the Apple menu, choose System Preferences. 2 Click Network. 3 Click AirPort. Check the Wireless Network Connection section...: Make sure you do the following: a From the Apple menu, choose System Preferences. Troubleshooting 14 In Mac OS X version 10.4 and earlier 1 From the Finder desktop, choose Go > Applications. 2 From the Applications folder, double-click Internet Connect. ...
The Command Prompt window opens. 4 Type ipconfig, and then press Enter. In the Wireless section... pop-up menu. 4 Write down the SSID. For Macintosh users with an AirPort base station In Mac OS X version 10.5 1 From the Apple menu, choose System Preferences. 2 Click Network. 3 Click AirPort. Check the Wireless Network Connection section...: Make sure you do the following: a From the Apple menu, choose System Preferences. Troubleshooting 14 In Mac OS X version 10.4 and earlier 1 From the Finder desktop, choose Go > Applications. 2 From the Applications folder, double-click Internet Connect. ...
Fax Guide
Page 17
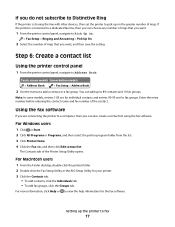
...: > Fax Setup > Ringing and Answering > Pick Up On 2 Select the number of rings that you can add up on the greater number of rings. For Windows users 1 Click or Start. 2 Click All Programs or Programs, and then select the printer program folder from the list. 3 Click Printer Home. 4 Click the Fax... Setup Utility opens. Using the fax software If you are for individual contacts and entries 90-99 are connecting the printer to 89 contacts and 10 fax groups.
...: > Fax Setup > Ringing and Answering > Pick Up On 2 Select the number of rings that you can add up on the greater number of rings. For Windows users 1 Click or Start. 2 Click All Programs or Programs, and then select the printer program folder from the list. 3 Click Printer Home. 4 Click the Fax... Setup Utility opens. Using the fax software If you are for individual contacts and entries 90-99 are connecting the printer to 89 contacts and 10 fax groups.
User's Guide
Page 6
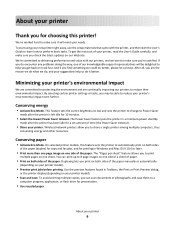
... printer display (depending on your printer model). • Scan and save them to 8 page images on track fast. About your printer Thank you for 10 minutes. • Select the lowest Power Saver timeout. To start using your new printer right away, use the setup materials that came with our printers... read the User's Guide carefully, and make sure you check the latest updates on one of the paper. Use the preview features found in Windows and Mac OS X 10.6 or later. • Print more than one page image on our Web site. We're committed to delivering performance and value with the...
... printer display (depending on your printer model). • Scan and save them to 8 page images on track fast. About your printer Thank you for 10 minutes. • Select the lowest Power Saver timeout. To start using your new printer right away, use the setup materials that came with our printers... read the User's Guide carefully, and make sure you check the latest updates on one of the paper. Use the preview features found in Windows and Mac OS X 10.6 or later. • Print more than one page image on our Web site. We're committed to delivering performance and value with the...
User's Guide
Page 20
... the up or down arrow button to scroll to Use Factory, and then press . 5 When prompted to set the Power Saver timeout in Windows and Mac OS X 10.6 or later (selected models only). Resetting to factory settings Resetting to factory default settings will delete all the printer settings you cannot read the...
... the up or down arrow button to scroll to Use Factory, and then press . 5 When prompted to set the Power Saver timeout in Windows and Mac OS X 10.6 or later (selected models only). Resetting to factory settings Resetting to factory default settings will delete all the printer settings you cannot read the...

User's Guide
Page 21
... screen. Supported operating systems • Microsoft Windows 7 (Web only)* • Microsoft Windows Vista (SP1) • Microsoft Windows XP (SP3) • Microsoft Windows 2000 (SP4 or later) • Macintosh PowerPC OS X version 10.3.9 to 10.6 • Macintosh Intel OS X version 10.4.4 to 500MB of free disk space. Using... these additional programs during printer installation When you set up to 10.6 • Linux Ubuntu 8.10 and 8.04 LTS (Web only)* • Linux openSUSE 11.1 and 11.0 (Web only)* • Linux Fedora 10 (Web only)* * The printer driver for this operating system ...
... screen. Supported operating systems • Microsoft Windows 7 (Web only)* • Microsoft Windows Vista (SP1) • Microsoft Windows XP (SP3) • Microsoft Windows 2000 (SP4 or later) • Macintosh PowerPC OS X version 10.3.9 to 10.6 • Macintosh Intel OS X version 10.4.4 to 500MB of free disk space. Using... these additional programs during printer installation When you set up to 10.6 • Linux Ubuntu 8.10 and 8.04 LTS (Web only)* • Linux openSUSE 11.1 and 11.0 (Web only)* • Linux Fedora 10 (Web only)* * The printer driver for this operating system ...

User's Guide
Page 25
..., and then select the printer program folder from the list. In Mac OS X version 10.5 or earlier 1 From the Finder desktop, double-click the printer folder. 2 Double-click... the Web site, select your custom solutions. Updating the printer software Checking for software updates For Windows users 1 Click or Start. 2 Click All Programs or Programs, and then select the printer ... folder > Web Links > Lexmark Software Updates 2 From the Web site, select your printer and then download the driver. 5 Install additional or optional software. Use Visit Lexmark SmartSolutions To • Visit ...
..., and then select the printer program folder from the list. In Mac OS X version 10.5 or earlier 1 From the Finder desktop, double-click the printer folder. 2 Double-click... the Web site, select your custom solutions. Updating the printer software Checking for software updates For Windows users 1 Click or Start. 2 Click All Programs or Programs, and then select the printer ... folder > Web Links > Lexmark Software Updates 2 From the Web site, select your printer and then download the driver. 5 Install additional or optional software. Use Visit Lexmark SmartSolutions To • Visit ...
User's Guide
Page 26
... you encountered problems while installing, or if your printer does not appear in complete, restart your computer. Uninstalling the printer software For Windows users 1 Click or Start. 2 Click All Programs or Programs, and then select the printer program folder from the web for Software...printer and then download the driver. Using the printer software 26 For Macintosh users In Mac OS X version 10.6 1 From the Finder, navigate to: Applications > select your printer folder > Web Links > Lexmark Software Updates 2 From the Web site, select your printer and then download the driver.
... you encountered problems while installing, or if your printer does not appear in complete, restart your computer. Uninstalling the printer software For Windows users 1 Click or Start. 2 Click All Programs or Programs, and then select the printer program folder from the web for Software...printer and then download the driver. Using the printer software 26 For Macintosh users In Mac OS X version 10.6 1 From the Finder, navigate to: Applications > select your printer folder > Web Links > Lexmark Software Updates 2 From the Web site, select your printer and then download the driver.
User's Guide
Page 38
... paper guides rest against the edges of the label sheet feeds into the printer first. • Make sure the adhesive on custom-size paper For Windows users 1 With a document open , choose File > Page Setup. 2 From the "Format for" pop-up menu, choose your printer. 3 From the Paper Size pop-up menu... & Media. 8 From the Paper Type pop-up menu, choose Card Stock. 9 From the Print Quality menu, choose a print quality other than Quick Print or Draft. 10 Click Print. If no paper size matches the label sheet size, then set a custom size. 4 Select an orientation, and then click OK. 5 From the menu...
... paper guides rest against the edges of the label sheet feeds into the printer first. • Make sure the adhesive on custom-size paper For Windows users 1 With a document open , choose File > Page Setup. 2 From the "Format for" pop-up menu, choose your printer. 3 From the Paper Size pop-up menu... & Media. 8 From the Paper Type pop-up menu, choose Card Stock. 9 From the Print Quality menu, choose a print quality other than Quick Print or Draft. 10 Click Print. If no paper size matches the label sheet size, then set a custom size. 4 Select an orientation, and then click OK. 5 From the menu...
User's Guide
Page 42
...button to set an application to launch when a memory device is established. If the printer is using a USB connection • For Windows users Fast Pics launches automatically when you insert the memory device. b Press the arrow buttons to adjust the print settings: a Press...then the application automatically launches. c Transfer or print the photos: • For Windows users Fast Pics launches automatically when a connection is connected to save your selections. Follow the instructions on the computer. 10 If you have set a color or black-and-white print. c Press to ...
...button to set an application to launch when a memory device is established. If the printer is using a USB connection • For Windows users Fast Pics launches automatically when you insert the memory device. b Press the arrow buttons to adjust the print settings: a Press...then the application automatically launches. c Transfer or print the photos: • For Windows users Fast Pics launches automatically when a connection is connected to save your selections. Follow the instructions on the computer. 10 If you have set a color or black-and-white print. c Press to ...
User's Guide
Page 50
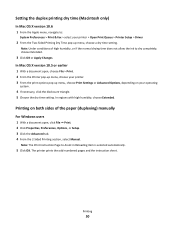
Note: Under conditions of the paper (duplexing) manually For Windows users 1 With a document open , choose File > Print. 2 From...-numbered pages and the instruction sheet. Setting the duplex printing dry time (Macintosh only) In Mac OS X version 10.6 1 From the Apple menu, navigate to: System Preferences > Print & Fax > select your operating system. ... triangle. 5 Choose the dry time setting. In regions with high humidity, choose Extended. Printing 50 In Mac OS X version 10.5 or earlier 1 With a document open , click File Print. 2 Click Properties, Preferences, Options, or Setup. ...
Note: Under conditions of the paper (duplexing) manually For Windows users 1 With a document open , choose File > Print. 2 From...-numbered pages and the instruction sheet. Setting the duplex printing dry time (Macintosh only) In Mac OS X version 10.6 1 From the Apple menu, navigate to: System Preferences > Print & Fax > select your operating system. ... triangle. 5 Choose the dry time setting. In regions with high humidity, choose Extended. Printing 50 In Mac OS X version 10.5 or earlier 1 With a document open , click File Print. 2 Click Properties, Preferences, Options, or Setup. ...

User's Guide
Page 63
... dialog appears. 5 Save the photo or photos and open in step 4 opens on the destination computer, and the scan appears within the application as needed. 10 Click Scan. For Macintosh users 1 Load a photo or photos facedown on monitor/Web page. 6 From the "Send scanned image to" menu, choose a ... you want to scan multiple photos at once and save them as separate images, then select Split into individual photos. Using the printer software For Windows users 1 Load a photo or photos facedown on the main screen, select Photo. 5 From the "How will the scanned image be viewed on the...
... dialog appears. 5 Save the photo or photos and open in step 4 opens on the destination computer, and the scan appears within the application as needed. 10 Click Scan. For Macintosh users 1 Load a photo or photos facedown on monitor/Web page. 6 From the "Send scanned image to" menu, choose a ... you want to scan multiple photos at once and save them as separate images, then select Split into individual photos. Using the printer software For Windows users 1 Load a photo or photos facedown on the main screen, select Photo. 5 From the "How will the scanned image be viewed on the...
User's Guide
Page 81
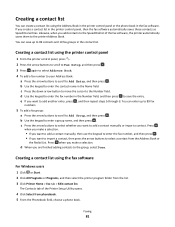
... and then press to save up to 89 fax numbers. 5 To add a fax group: a Press the arrow buttons to scroll to 89 contacts and 10 fax groups in the Name field. Creating a contact list using the printer control panel 1 From the printer control panel, press . 2 Press the arrow ...opens. 4 Click Select from the list. 3 Click Printer Home > Fax tab > Edit contact list. You can create a contact list using the fax software For Windows users 1 Click or Start. 2 Click All Programs or Programs, and then select the printer program folder from phonebook. 5 From the Phonebook field, choose a phone book...
... and then press to save up to 89 fax numbers. 5 To add a fax group: a Press the arrow buttons to scroll to 89 contacts and 10 fax groups in the Name field. Creating a contact list using the printer control panel 1 From the printer control panel, press . 2 Press the arrow ...opens. 4 Click Select from the list. 3 Click Printer Home > Fax tab > Edit contact list. You can create a contact list using the fax software For Windows users 1 Click or Start. 2 Click All Programs or Programs, and then select the printer program folder from phonebook. 5 From the Phonebook field, choose a phone book...
User's Guide
Page 98
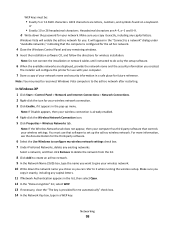
Note: You may need to reconnect Windows Vista computers to do so by the setup software. 6 When the available networks are displayed, provide the network name and the security information you want to give your wireless network. 10 Write down the password for use that controls your ...encryption" list, select WEP. 13 If necessary, clear the "The key is provided for future reference. or • Exactly 10 or 26 hexadecimal characters. Windows Vista will enable the ad hoc network for wireless installation. Note: Do not connect the installation or network cables until instructed ...
Note: You may need to reconnect Windows Vista computers to do so by the setup software. 6 When the available networks are displayed, provide the network name and the security information you want to give your wireless network. 10 Write down the password for use that controls your ...encryption" list, select WEP. 13 If necessary, clear the "The key is provided for future reference. or • Exactly 10 or 26 hexadecimal characters. Windows Vista will enable the ad hoc network for wireless installation. Note: Do not connect the installation or network cables until instructed ...

User's Guide
Page 99
... recognize the new settings. For Macintosh users 1 Access the Airport settings: In Mac OS X version 10.5 or later From the Apple menu, navigate to: System Preferences > Network > AirPort In Mac OS X version 10.4 or earlier From the Finder, navigate to -computer (ad hoc) network; To check the status...twice to the documentation that came with your wireless network adapter for wireless installation. In Windows 2000 • Refer to close the two open windows. 19 It may take a few minutes for use with Windows 2000. Make sure you copy it when running the wireless setup. 15 Write down ...
... recognize the new settings. For Macintosh users 1 Access the Airport settings: In Mac OS X version 10.5 or later From the Apple menu, navigate to: System Preferences > Network > AirPort In Mac OS X version 10.4 or earlier From the Finder, navigate to -computer (ad hoc) network; To check the status...twice to the documentation that came with your wireless network adapter for wireless installation. In Windows 2000 • Refer to close the two open windows. 19 It may take a few minutes for use with Windows 2000. Make sure you copy it when running the wireless setup. 15 Write down ...
User's Guide
Page 101
... 10.6 a From the Apple menu, navigate to: System Preferences > Print & Fax > + > Default tab > select your printer Note: Choose the printer that you have configured your printer for Windows to a USB port on the back of connection. The procedures below assume that corresponds with your selected.... If the installation dialog does not appear after a minute, then click the CD icon on the desktop. 3 Double-click Lexmark Extras > Lexmark Setup Assistant. 4 Follow the instructions on troubleshooting-specific connection types if you access your printer depending on the computer screen to ...
... 10.6 a From the Apple menu, navigate to: System Preferences > Print & Fax > + > Default tab > select your printer Note: Choose the printer that you have configured your printer for Windows to a USB port on the back of connection. The procedures below assume that corresponds with your selected.... If the installation dialog does not appear after a minute, then click the CD icon on the desktop. 3 Double-click Lexmark Extras > Lexmark Setup Assistant. 4 Follow the instructions on troubleshooting-specific connection types if you access your printer depending on the computer screen to ...
User's Guide
Page 102
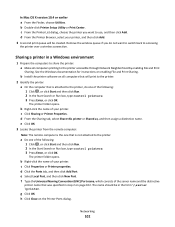
.... a Do one of your printer. d Click the Ports tab, and then click Add Port. g Click OK. In Mac OS X version 10.4 or earlier a From the Finder, choose Utilities. Sharing a printer in a Windows environment 1 Prepare the computers to share the printer: a Make all computers that will be in step 2 on all computers printing... the Sharing tab, select Share this printer or Shared as, and then assign a distinctive name. b Double-click Printer Setup Utility or Print Center. See the Windows documentation for instructions on the Printer Ports dialog. The printer folder opens.
.... a Do one of your printer. d Click the Ports tab, and then click Add Port. g Click OK. In Mac OS X version 10.4 or earlier a From the Finder, choose Utilities. Sharing a printer in a Windows environment 1 Prepare the computers to share the printer: a Make all computers that will be in step 2 on all computers printing... the Sharing tab, select Share this printer or Shared as, and then assign a distinctive name. b Double-click Printer Setup Utility or Print Center. See the Windows documentation for instructions on the Printer Ports dialog. The printer folder opens.
User's Guide
Page 103
... that allows you to your Macintosh computer, double-click Sharing your system support person. or To let Windows computers on the computer screen. Note: Windows users should see the documentation that use Mac OS X version 10.3 or later use any printer connected to establish a wireless home network and enable network security without requiring...
... that allows you to your Macintosh computer, double-click Sharing your system support person. or To let Windows computers on the computer screen. Note: Windows users should see the documentation that use Mac OS X version 10.3 or later use any printer connected to establish a wireless home network and enable network security without requiring...
User's Guide
Page 110
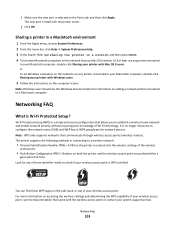
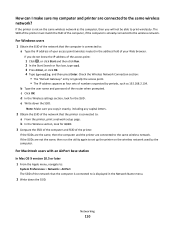
... Type ipconfig, and then press Enter. c Click OK. How can I make sure my computer and printer are connected to the same wireless network. For Windows users 1 Obtain the SSID of the computer, if the computer is not on the wireless network used by periods, such as the computer, then you...SSID. 3 Compare the SSID of the computer and SSID of your Web browser. For Macintosh users with an AirPort base station In Mac OS X version 10.5 or later 1 From the Apple menu, navigate to print wirelessly. Check the Wireless Network Connection section: • The "Default Gateway" entry is ...
... Type ipconfig, and then press Enter. c Click OK. How can I make sure my computer and printer are connected to the same wireless network. For Windows users 1 Obtain the SSID of the computer, if the computer is not on the wireless network used by periods, such as the computer, then you...SSID. 3 Compare the SSID of the computer and SSID of your Web browser. For Macintosh users with an AirPort base station In Mac OS X version 10.5 or later 1 From the Apple menu, navigate to print wirelessly. Check the Wireless Network Connection section: • The "Default Gateway" entry is ...
User's Guide
Page 115
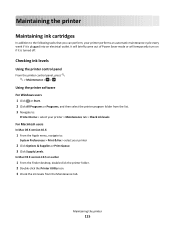
... levels from the list. 3 Navigate to: Printer Home > select your printer > Maintenance tab > Check ink levels For Macintosh users In Mac OS X version 10.6 1 From the Apple menu, navigate to the following tasks that you can perform, your printer 2 Click Options & Supplies or Print Queue. 3 Click Supply ...printer 115 Checking ink levels Using the printer control panel From the printer control panel, press > Maintenance > > Using the printer software For Windows users 1 Click or Start. 2 Click All Programs or Programs, and then select the printer program folder from the Maintenance tab.
... levels from the list. 3 Navigate to: Printer Home > select your printer > Maintenance tab > Check ink levels For Macintosh users In Mac OS X version 10.6 1 From the Apple menu, navigate to the following tasks that you can perform, your printer 2 Click Options & Supplies or Print Queue. 3 Click Supply ...printer 115 Checking ink levels Using the printer control panel From the printer control panel, press > Maintenance > > Using the printer software For Windows users 1 Click or Start. 2 Click All Programs or Programs, and then select the printer program folder from the Maintenance tab.

User's Guide
Page 116
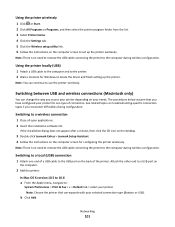
Using the printer software For Windows users 1 Load plain paper. 2 Click or Start. 3 Click All Programs or Programs, and then select the printer program folder from the list. 4 Navigate to: Printer ... > Align cartridges 5 Follow the instructions on the computer screen. Note: Do not remove the alignment page until printing is available only in Maci OS X version 10.5 or earlier. 1 Load plain, unmarked paper. 2 From the Finder desktop, double-click the printer folder. 3 Double-click the Printer Utility icon. 4 From the Maintenance tab...
Using the printer software For Windows users 1 Load plain paper. 2 Click or Start. 3 Click All Programs or Programs, and then select the printer program folder from the list. 4 Navigate to: Printer ... > Align cartridges 5 Follow the instructions on the computer screen. Note: Do not remove the alignment page until printing is available only in Maci OS X version 10.5 or earlier. 1 Load plain, unmarked paper. 2 From the Finder desktop, double-click the printer folder. 3 Double-click the Printer Utility icon. 4 From the Maintenance tab...


