
Getting Started Guide
Page 5
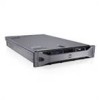
Getting Started With Your System 3 Installing the Rails and System in a Rack Assemble the rails and install the system in the rack following procedure, review the safety instructions that came with your system and identify each item. Unpacking the System Unpack your system. Installation and Configuration WARNING: Before performing the following the safety instructions and the rack installation instructions provided with the system.
Getting Started With Your System 3 Installing the Rails and System in a Rack Assemble the rails and install the system in the rack following procedure, review the safety instructions that came with your system and identify each item. Unpacking the System Unpack your system. Installation and Configuration WARNING: Before performing the following the safety instructions and the rack installation instructions provided with the system.

Hardware Owner's Manual
Page 84
... with the back of the drive carrier and open the handle. Figure 3-5. Removing a Hard Drive From a Hard-Drive Carrier Remove the screws from the slide rails on the hard-drive carrier and separate the hard drive from the carrier. c Close the handle to lock the drive in place. 4 If applicable, install...
... with the back of the drive carrier and open the handle. Figure 3-5. Removing a Hard Drive From a Hard-Drive Carrier Remove the screws from the slide rails on the hard-drive carrier and separate the hard drive from the carrier. c Close the handle to lock the drive in place. 4 If applicable, install...

Hardware Owner's Manual
Page 108
... the system, including any attached peripherals, and disconnect the system from the tray. Read and follow the safety instructions that is not authorized by Dell is not covered by squeezing the blue release tabs at the back of the tray and pushing the tray out of the system. 4 Using ...a Phillips screwdriver, disassemble the blank tray: • For 2.5-inch hard-drive systems, remove the slide rails from the tray. • For 3.5-inch hard-drive systems, remove the blank from its electrical outlet. 2 Open the system. Damage due to the tape ...
... the system, including any attached peripherals, and disconnect the system from the tray. Read and follow the safety instructions that is not authorized by Dell is not covered by squeezing the blue release tabs at the back of the tray and pushing the tray out of the system. 4 Using ...a Phillips screwdriver, disassemble the blank tray: • For 2.5-inch hard-drive systems, remove the slide rails from the tray. • For 3.5-inch hard-drive systems, remove the blank from its electrical outlet. 2 Open the system. Damage due to the tape ...

Hardware Owner's Manual
Page 109
... installing a SCSI tape backup unit, install the SCSI controller expansion card in HDD Chassis Only) 2 3 1 4 1 drive blank 3 tray 2 screws (4) 4 tape backup unit 6 Install the slide rails or tray on the back of the expansion-card slots. See "Installing an Expansion Card." 9 Connect the power cable to the power connector on the...
... installing a SCSI tape backup unit, install the SCSI controller expansion card in HDD Chassis Only) 2 3 1 4 1 drive blank 3 tray 2 screws (4) 4 tape backup unit 6 Install the slide rails or tray on the back of the expansion-card slots. See "Installing an Expansion Card." 9 Connect the power cable to the power connector on the...

Hardware Owner's Manual
Page 110
... board. See "Cable Routing." 14 Close the system. If replacing the tape backup unit, follow the safety instructions that is not authorized by Dell is not covered by your product documentation, or as authorized in "Installing the Tape Backup Unit." 110 Installing System Components a For a SCSI ... by a certified service technician. Damage due to the SCSI controller expansion card. See Figure 3-19. 5 Using a Phillips screwdriver, remove the slide rails or the tray from the tape backup unit. 6 For a SCSI tape backup unit, disconnect the power and signal cables from the back of the...
... board. See "Cable Routing." 14 Close the system. If replacing the tape backup unit, follow the safety instructions that is not authorized by Dell is not covered by your product documentation, or as authorized in "Installing the Tape Backup Unit." 110 Installing System Components a For a SCSI ... by a certified service technician. Damage due to the SCSI controller expansion card. See Figure 3-19. 5 Using a Phillips screwdriver, remove the slide rails or the tray from the tape backup unit. 6 For a SCSI tape backup unit, disconnect the power and signal cables from the back of the...


