
Hardware Owner's Manual
Page 5
... Opening and Closing the System 79 Opening the System 79 Closing the System 79 Hard Drives 80 Mixed SAS/SATA Hard-Drive Configurations . . . 81 Removing a Hard-Drive Blank 81 Installing a Hard-Drive Blank 82 Removing a Hot-Swap Hard Drive 82 Installing a Hot-Swap Hard Drive 83 Removing a Hard Drive From a Hard-Drive Carrier 84 Installing a Hard Drive Into a Hard-Drive Carrier 84 Power Supplies 86 Removing a Power Supply 86 Replacing a Power Supply 87 Removing...
... Opening and Closing the System 79 Opening the System 79 Closing the System 79 Hard Drives 80 Mixed SAS/SATA Hard-Drive Configurations . . . 81 Removing a Hard-Drive Blank 81 Installing a Hard-Drive Blank 82 Removing a Hot-Swap Hard Drive 82 Installing a Hot-Swap Hard Drive 83 Removing a Hard Drive From a Hard-Drive Carrier 84 Installing a Hard Drive Into a Hard-Drive Carrier 84 Power Supplies 86 Removing a Power Supply 86 Replacing a Power Supply 87 Removing...

Hardware Owner's Manual
Page 81
... the right side, and slide the blank out until it is free of the system and connect to support hot-swap drive removal and insertion. Hard drives are installed at the front of the drive bay. When you format a hard drive, allow enough time for the formatting to ensure that the host adapter is being formatted. The remaining...
... the right side, and slide the blank out until it is free of the system and connect to support hot-swap drive removal and insertion. Hard drives are installed at the front of the drive bay. When you format a hard drive, allow enough time for the formatting to ensure that the host adapter is being formatted. The remaining...

Hardware Owner's Manual
Page 82
... provided with the drive bay and insert the blank into place. Wait until the release lever clicks into the drive bay until the hard-drive indicators on the drive carrier signal that your SAS RAID controller documentation for removal. See your operating system supports hot-swap drive removal and installation. Removing a Hot-Swap Hard Drive CAUTION: Ensure that the drive can be removed...
... provided with the drive bay and insert the blank into place. Wait until the release lever clicks into the drive bay until the hard-drive indicators on the drive carrier signal that your SAS RAID controller documentation for removal. See your operating system supports hot-swap drive removal and installation. Removing a Hot-Swap Hard Drive CAUTION: Ensure that the drive can be removed...
Hardware Owner's Manual
Page 83
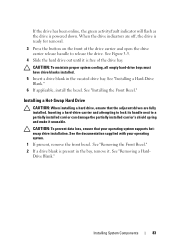
... and make it unusable. See Figure 3-5. 4 Slide the hard drive out until it . See "Removing the Front Bezel." 2 If a drive blank is powered down. See "Installing the Front Bezel." See the documentation supplied with your operating system supports hotswap drive installation. Drive Blank." Installing a Hot-Swap Hard Drive CAUTION: When installing a hard drive, ensure that your operating system. 1 If present, remove...
... and make it unusable. See Figure 3-5. 4 Slide the hard drive out until it . See "Removing the Front Bezel." 2 If a drive blank is powered down. See "Installing the Front Bezel." See the documentation supplied with your operating system supports hotswap drive installation. Drive Blank." Installing a Hot-Swap Hard Drive CAUTION: When installing a hard drive, ensure that your operating system. 1 If present, remove...

Hardware Owner's Manual
Page 84
... open the handle. Installing a Hot-Swap Hard Drive 1 2 1 release button 2 hard drive carrier handle 3 Install the hot-swap hard drive. a Press the button on the hard-drive carrier and separate the hard drive from the slide rails on the front of the drive at the back. c Close the handle to lock the drive in place. 4 If applicable, install the bezel. Removing a Hard Drive From a Hard-Drive Carrier Remove the screws...
... open the handle. Installing a Hot-Swap Hard Drive 1 2 1 release button 2 hard drive carrier handle 3 Install the hot-swap hard drive. a Press the button on the hard-drive carrier and separate the hard drive from the slide rails on the front of the drive at the back. c Close the handle to lock the drive in place. 4 If applicable, install the bezel. Removing a Hard Drive From a Hard-Drive Carrier Remove the screws...

Hardware Owner's Manual
Page 146
... safety instructions that is not authorized by Dell is not covered by your product documentation, or as authorized in the same locations. 4 Remove all hard drives. See "Opening the System." CAUTION: You must remove the SAS drives from the system before removal to servicing ... surface. 146 Installing System Components You should only perform troubleshooting and simple repairs as directed by a certified service technician. See "Removing a Hot-Swap Hard Drive." 5 Disconnect the power cable from the end of the SAS backplane. 6 Disconnect the SAS data cables from the backplane. 7 Remove...
... safety instructions that is not authorized by Dell is not covered by your product documentation, or as authorized in the same locations. 4 Remove all hard drives. See "Opening the System." CAUTION: You must remove the SAS drives from the system before removal to servicing ... surface. 146 Installing System Components You should only perform troubleshooting and simple repairs as directed by a certified service technician. See "Removing a Hot-Swap Hard Drive." 5 Disconnect the power cable from the end of the SAS backplane. 6 Disconnect the SAS data cables from the backplane. 7 Remove...

Hardware Owner's Manual
Page 149
... you can replace them in the center of the system board, and then slide the system board assembly toward the front end of each hard drive and temporarily label them before removing the backplane. c Pull the blue latch toward the back of the board. b Grasp the system board... of the system, being careful to remove it from the chassis. See "Removing the SAS Backplane." See "Removing a Hot-Swap Hard Drive." See Figure 3-36. CAUTION: You must remove the SAS drives from the SAS backplane. e Lift the board out of the system and slide the backplane upward. d When the backplane...
... you can replace them in the center of the system board, and then slide the system board assembly toward the front end of each hard drive and temporarily label them before removing the backplane. c Pull the blue latch toward the back of the board. b Grasp the system board... of the system, being careful to remove it from the chassis. See "Removing the SAS Backplane." See "Removing a Hot-Swap Hard Drive." See Figure 3-36. CAUTION: You must remove the SAS drives from the SAS backplane. e Lift the board out of the system and slide the backplane upward. d When the backplane...

Hardware Owner's Manual
Page 167
... enter the System Setup program, and verify that the controller is enabled. Troubleshooting a Storage Controller . See "Removing a Hot-Swap Hard Drive." See "Using Dell™ PowerEdge™ Diagnostics." 2 Enter the System Setup program and ensure that the required device drivers for the RAID array. d ... corrections, and restart the system. b Ensure that the hard drive(s) have been configured correctly for your controller card are installed and are configured correctly. c Take the hard drive offline and then reseat the hard drive. See "Using the System Setup Program and UEFI Boot ...
... enter the System Setup program, and verify that the controller is enabled. Troubleshooting a Storage Controller . See "Removing a Hot-Swap Hard Drive." See "Using Dell™ PowerEdge™ Diagnostics." 2 Enter the System Setup program and ensure that the required device drivers for the RAID array. d ... corrections, and restart the system. b Ensure that the hard drive(s) have been configured correctly for your controller card are installed and are configured correctly. c Take the hard drive offline and then reseat the hard drive. See "Using the System Setup Program and UEFI Boot ...

Hardware Owner's Manual
Page 193
...Gigabyte(s); 1024 megabytes or 1,073,741,824 bytes. However, when referring to hard-drive capacity, the term is usually rounded to insert or install a device, typically a hard drive or an internal cooling fan, into the host system while the system is powered... exchange. A signal that provides remote management capabilities, crashed system recovery, and power control functions for Dell PowerEdge systems. IP - Small blocks on and running. Gram(s). G - host adapter - hot-swap - I /O activity can share the same IRQ assignment, but you cannot operate both devices simultaneously....
...Gigabyte(s); 1024 megabytes or 1,073,741,824 bytes. However, when referring to hard-drive capacity, the term is usually rounded to insert or install a device, typically a hard drive or an internal cooling fan, into the host system while the system is powered... exchange. A signal that provides remote management capabilities, crashed system recovery, and power control functions for Dell PowerEdge systems. IP - Small blocks on and running. Gram(s). G - host adapter - hot-swap - I /O activity can share the same IRQ assignment, but you cannot operate both devices simultaneously....
Hardware Owner's Manual
Page 203
...memory key, 91 troubleshooting, 163 Index 203 integrated storage controller See storage controller. drive carrier, 84 installing, 83 mixed configurations, 81 removing, 82 troubleshooting, 166 heat sink, 138 hot-swap cooling fans, 100 hard drives, 80 power supplies, 86 I iDRAC Configuration Utility, 73 iDRAC6 Enterprise card installing... drive, 104 PCIe expansion cards, 120 power supply blank, 88 processor, 140 RAID battery, 116-117 riser 2 into expansion-card bracket, 128 SAS backplane board, 147 SD card, 90 storage controller, 112 tape backup unit, 107 VFlash SD card, 96 Integrated Dell ...
...memory key, 91 troubleshooting, 163 Index 203 integrated storage controller See storage controller. drive carrier, 84 installing, 83 mixed configurations, 81 removing, 82 troubleshooting, 166 heat sink, 138 hot-swap cooling fans, 100 hard drives, 80 power supplies, 86 I iDRAC Configuration Utility, 73 iDRAC6 Enterprise card installing... drive, 104 PCIe expansion cards, 120 power supply blank, 88 processor, 140 RAID battery, 116-117 riser 2 into expansion-card bracket, 128 SAS backplane board, 147 SD card, 90 storage controller, 112 tape backup unit, 107 VFlash SD card, 96 Integrated Dell ...


