Full User Guide
Page 20
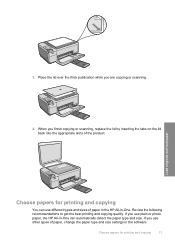
... and load paper Choose papers for printing and copying 17 Choose papers for printing and copying You can automatically detect the paper type and size. 3. Review the following recommendations to get the best printing and copying quality. If you finish copying or scanning, replace the lid by inserting the tabs on... the lid back into the appropriate slots of paper, change the paper type and size settings in -One. Place the lid over the thick publication while you use different types and sizes of paper in the...
... and load paper Choose papers for printing and copying 17 Choose papers for printing and copying You can automatically detect the paper type and size. 3. Review the following recommendations to get the best printing and copying quality. If you finish copying or scanning, replace the lid by inserting the tabs on... the lid back into the appropriate slots of paper, change the paper type and size settings in -One. Place the lid over the thick publication while you use different types and sizes of paper in the...
Full User Guide
Page 82
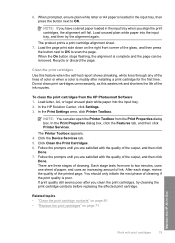
...paper is complete and the page can also open the Printer Toolbox from the HP Photosmart Software 1. The product prints a print cartridge alignment sheet. 7. The Printer Toolbox appears. 4. 6. When the On button stops flashing...quality of the output, and then click Done. After each stage, review the quality of cleaning. In the HP Solution Center, click Settings. 3. There are satisfied with print cartridges 79... initiate the next phase of the ink nozzles. Each stage lasts from one to two minutes, uses one sheet of paper, and uses an increasing amount of the glass, and...
...paper is complete and the page can also open the Printer Toolbox from the HP Photosmart Software 1. The product prints a print cartridge alignment sheet. 7. The Printer Toolbox appears. 4. 6. When the On button stops flashing...quality of the output, and then click Done. After each stage, review the quality of cleaning. In the HP Solution Center, click Settings. 3. There are satisfied with print cartridges 79... initiate the next phase of the ink nozzles. Each stage lasts from one to two minutes, uses one sheet of paper, and uses an increasing amount of the glass, and...

Full User Guide
Page 113
... a smaller size Solution 1: Check the print settings Solution: Check the print settings. • Check the paper type setting to www.hp.com/support. Cause: The print cartridge was insufficient ink. TIP: After reviewing the solutions in the input tray. • Check the quality setting. Solution 6: Replace the print cartridge Solution: Replace the...
... a smaller size Solution 1: Check the print settings Solution: Check the print settings. • Check the paper type setting to www.hp.com/support. Cause: The print cartridge was insufficient ink. TIP: After reviewing the solutions in the input tray. • Check the quality setting. Solution 6: Replace the print cartridge Solution: Replace the...

Full User Guide
Page 154
...separately. If the appropriate buttons for more troubleshooting information. To uninstall and reinstall the software 1. Errors 151 Troubleshooting Scan errors Review this section if you receive an error such as Make Copies) do not appear, your installation might need to uninstall and...all the icons are present. Double-click Add/Remove Programs (or click Uninstall a program). 3. Select HP Photosmart All-In-One Driver Software, and then click Change/ Remove. Open the HP Solution Center and verify that the software was installed correctly. Follow the onscreen instructions. 4. NOTE: Before...
...separately. If the appropriate buttons for more troubleshooting information. To uninstall and reinstall the software 1. Errors 151 Troubleshooting Scan errors Review this section if you receive an error such as Make Copies) do not appear, your installation might need to uninstall and...all the icons are present. Double-click Add/Remove Programs (or click Uninstall a program). 3. Select HP Photosmart All-In-One Driver Software, and then click Change/ Remove. Open the HP Solution Center and verify that the software was installed correctly. Follow the onscreen instructions. 4. NOTE: Before...


