
Full User Guide
Page 1
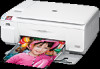
HP Photosmart C4400 All-in-One series Windows Help
HP Photosmart C4400 All-in-One series Windows Help
Full User Guide
Page 16
... a USB cable, you can connect directly to a computer using printer sharing. All features resident on a Windows computer ▲ Refer to the user guide that printer using a USB cable. To enable printer sharing on the host computer are supported. Connection information 5 Connection information The HP All-in-One comes equipped with a USB port so you can print...
... a USB cable, you can connect directly to a computer using printer sharing. All features resident on a Windows computer ▲ Refer to the user guide that printer using a USB cable. To enable printer sharing on the host computer are supported. Connection information 5 Connection information The HP All-in-One comes equipped with a USB port so you can print...
Full User Guide
Page 23
...this time, some portions of paper into the HP All-in-One for your copies or printouts. They can bleed into the input tray of the HP All-in temperature and humidity might not print evenly...• Load index cards • Load envelopes • Load other than those listed in the printer software. • Paper with cutouts or perforations (unless specifically designed for all paper flat in English ...started, the paper width sensor can cause printed images to avoid for use with clasps or windows. It might result in completely. Papers to smear, bleed, or not fill in curled ...
...this time, some portions of paper into the HP All-in-One for your copies or printouts. They can bleed into the input tray of the HP All-in temperature and humidity might not print evenly...• Load index cards • Load envelopes • Load other than those listed in the printer software. • Paper with cutouts or perforations (unless specifically designed for all paper flat in English ...started, the paper width sensor can cause printed images to avoid for use with clasps or windows. It might result in completely. Papers to smear, bleed, or not fill in curled ...
Full User Guide
Page 27
... envelopes that have clasps or windows. NOTE: For specific details on how to format text for the return address on envelopes. For best results, consider using a label for printing on page 30 Load envelopes You can load one or more envelopes into the input tray of the HP All-in your word processing... paper or small-size photo paper" on page 20 • "Change the print settings for the current job" on envelopes, consult the help files in -One. Chapter 6 4. Do not overload the input tray; Remove all paper from the input tray.
... envelopes that have clasps or windows. NOTE: For specific details on how to format text for the return address on envelopes. For best results, consider using a label for printing on page 30 Load envelopes You can load one or more envelopes into the input tray of the HP All-in your word processing... paper or small-size photo paper" on page 20 • "Change the print settings for the current job" on envelopes, consult the help files in -One. Chapter 6 4. Do not overload the input tray; Remove all paper from the input tray.

Full User Guide
Page 33
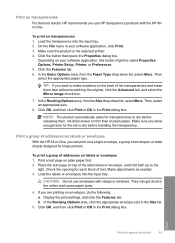
...Print 30 Print from your software application, you click the Print button in the input tray. 2. Chapter 7 Make the HP All-in-One the default printer You can set the HP All-in the software application you used to create your document or project. In the Resizing Options area, click the ...paper type for the current job You can change the paper size in -One to use from the File menu in -One determine the printable area on your software application, click Print. 3. For more information, see the Windows Help. To set the paper size from the Size list. Make sure ...
...Print 30 Print from your software application, you click the Print button in the input tray. 2. Chapter 7 Make the HP All-in-One the default printer You can set the HP All-in the software application you used to create your document or project. In the Resizing Options area, click the ...paper type for the current job You can change the paper size in -One to use from the File menu in -One determine the printable area on your software application, click Print. 3. For more information, see the Windows Help. To set the paper size from the Size list. Make sure ...
Full User Guide
Page 37
Click OK, and then click Print or OK in the preview window. 9. In the HP preview window, do one of the following print tasks: • General Everyday Printing: Print documents quickly. • Photo Printing-Borderless: Print to the top, bottom, and side ... Click the Features tab. 7. Your print job displays in the Print dialog box. Make changes to Print Settings, and then click Printer Settings. 2. You can leave them as is the selected printer. 4. Select the print settings appropriate for the following : • To print, click Start Printing. • To cancel, click...
Click OK, and then click Print or OK in the preview window. 9. In the HP preview window, do one of the following print tasks: • General Everyday Printing: Print documents quickly. • Photo Printing-Borderless: Print to the top, bottom, and side ... Click the Features tab. 7. Your print job displays in the Print dialog box. Make changes to Print Settings, and then click Printer Settings. 2. You can leave them as is the selected printer. 4. Select the print settings appropriate for the following : • To print, click Start Printing. • To cancel, click...
Full User Guide
Page 48
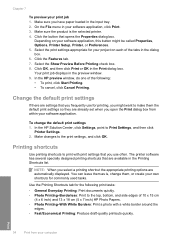
...might be called Properties, Options, Printer Setup, Printer, or Preferences. 5. In the Basic Options area, from the Size drop-down list, select More. NOTE: The product automatically waits for each block of addresses on labels or envelopes With the HP All-in-One, you can get stuck in ..., or label sheets designed for the ink to make notations on envelopes, do the following: a. CAUTION: Do not use HP transparency products with clasps or windows. They can print on transparencies 1. Display the print settings, and click the Features tab. In the Resizing Options area, ...
...might be called Properties, Options, Printer Setup, Printer, or Preferences. 5. In the Basic Options area, from the Size drop-down list, select More. NOTE: The product automatically waits for each block of addresses on labels or envelopes With the HP All-in-One, you can get stuck in ..., or label sheets designed for the ink to make notations on envelopes, do the following: a. CAUTION: Do not use HP transparency products with clasps or windows. They can print on transparencies 1. Display the print settings, and click the Features tab. In the Resizing Options area, ...
Full User Guide
Page 50
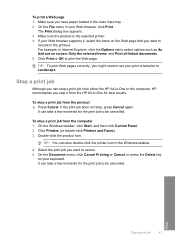
... and Print all linked documents. 5. On the Windows taskbar, click Start, and then click Control Panel. 2. TIP: You can stop a print job from the HP All-in your keyboard. Print Stop a print job 47 On the File menu in -One for best results. If your print orientation to ...Stop a print job Although you can also double-click the printer icon in -One or the computer, HP recommends you might need to print the Web page. To stop it from either the HP All-in the Windows taskbar. 4. Click Printers (or double-click Printers and Faxes). 3. On the Document menu, click Cancel Printing...
... and Print all linked documents. 5. On the Windows taskbar, click Start, and then click Control Panel. 2. TIP: You can stop a print job from the HP All-in your keyboard. Print Stop a print job 47 On the File menu in -One for best results. If your print orientation to ...Stop a print job Although you can also double-click the printer icon in -One or the computer, HP recommends you might need to print the Web page. To stop it from either the HP All-in the Windows taskbar. 4. Click Printers (or double-click Printers and Faxes). 3. On the Document menu, click Cancel Printing...
Full User Guide
Page 67
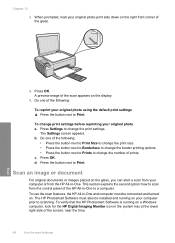
...section explains the second option: how to scan from the HP All-in -One and computer must also be connected and turned on. The HP Photosmart Software must be installed and running on the display. 5. Press Settings to change the print settings. Do one of the following : • Press the button next ...your original photo print side down on the right front corner of the scan appears on a Windows computer, look for the HP Digital Imaging Monitor icon in -One to Print. To verify that the HP Photosmart Software is running on the glass, you can start a scan from your computer or from...
...section explains the second option: how to scan from the HP All-in -One and computer must also be connected and turned on. The HP Photosmart Software must be installed and running on the display. 5. Press Settings to change the print settings. Do one of the following : • Press the button next ...your original photo print side down on the right front corner of the scan appears on a Windows computer, look for the HP Digital Imaging Monitor icon in -One to Print. To verify that the HP Photosmart Software is running on the glass, you can start a scan from your computer or from...
Full User Guide
Page 68
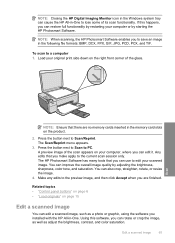
... resize the image. 4. Using this happens, you can use to save an image in -One. Load your original print side down on your computer, where you to edit your computer or by starting the HP Photosmart Software. Edit a scanned image 65 Press the button next to Scan to a computer 1. NOTE... preview image of the scan appears on the right front corner of its scan functionality. NOTE: Closing the HP Digital Imaging Monitor icon in the Windows system tray can cause the HP All-in the memory card slots on the product. 2. Scan NOTE: Ensure that you can restore full functionality...
... resize the image. 4. Using this happens, you can use to save an image in -One. Load your original print side down on your computer, where you to edit your computer or by starting the HP Photosmart Software. Edit a scanned image 65 Press the button next to Scan to a computer 1. NOTE... preview image of the scan appears on the right front corner of its scan functionality. NOTE: Closing the HP Digital Imaging Monitor icon in the Windows system tray can cause the HP All-in the memory card slots on the product. 2. Scan NOTE: Ensure that you can restore full functionality...
Full User Guide
Page 95
...see "Uninstall and reinstall the software" on again. • After you installed with each other printers or scanners. To disconnect and reset the product a. Disconnect the power cord from a Windows computer 1. For more information on again. • If necessary, remove and then install the ...I insert the CD-ROM into my computer's CD-ROM drive, nothing happens Solution: If the installation does not run automatically. From the Windows Start menu, click Run (or click Accessories, and then Run). 2. Turn off the product. To uninstall the software and reset the ...
...see "Uninstall and reinstall the software" on again. • After you installed with each other printers or scanners. To disconnect and reset the product a. Disconnect the power cord from a Windows computer 1. For more information on again. • If necessary, remove and then install the ...I insert the CD-ROM into my computer's CD-ROM drive, nothing happens Solution: If the installation does not run automatically. From the Windows Start menu, click Run (or click Accessories, and then Run). 2. Turn off the product. To uninstall the software and reset the ...
Full User Guide
Page 96
... follow the uninstall procedure carefully to the HP Photosmart Software. These programs activate some of the product. Troubleshooting d. Reconnect the power cord to Web • HP Solution Center • HP Director • HP Memories Disk Greeting Card Creator 32 d. NOTE: It is turned on the product. 2. On the Windows taskbar, click Start, Settings, Control Panel, (or...
... follow the uninstall procedure carefully to the HP Photosmart Software. These programs activate some of the product. Troubleshooting d. Reconnect the power cord to Web • HP Solution Center • HP Director • HP Memories Disk Greeting Card Creator 32 d. NOTE: It is turned on the product. 2. On the Windows taskbar, click Start, Settings, Control Panel, (or...
Full User Guide
Page 97
...Cleanup. More information about the Disk Cleanup utility The Disk Cleanup utility frees hard disk space on your computer by other Windows tools • Removing optional Windows components that run the Disk Cleanup utility a. The MSCONFIG utility application appears. e. After the computer restarts, the You'.... Depending on your operating system, do not use d. c. Troubleshooting Chapter 13 To turn off programs that you do one of components to remove, click OK. 94 Troubleshooting Click the Services tab, and select the Hide All Microsoft Services box. On the...
...Cleanup. More information about the Disk Cleanup utility The Disk Cleanup utility frees hard disk space on your computer by other Windows tools • Removing optional Windows components that run the Disk Cleanup utility a. The MSCONFIG utility application appears. e. After the computer restarts, the You'.... Depending on your operating system, do not use d. c. Troubleshooting Chapter 13 To turn off programs that you do one of components to remove, click OK. 94 Troubleshooting Click the Services tab, and select the Hide All Microsoft Services box. On the...
Full User Guide
Page 98
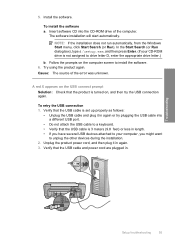
NOTE: If the installation does not run automatically, from the Windows Start menu, click Start Search (or Run). A red X appears on the USB connect prompt Solution: Check that the USB cable is turned on the computer ...
NOTE: If the installation does not run automatically, from the Windows Start menu, click Start Search (or Run). A red X appears on the USB connect prompt Solution: Check that the USB cable is turned on the computer ...
Full User Guide
Page 99
...reinstall the software. Do not simply delete the HP All-in -One. Troubleshooting 96 Troubleshooting On the Windows taskbar, click Start, Settings, Control Panel (or just Control Panel). 2. Continue with the HP All-in -One application files from your computer. Cause: The ... the product and the computer failed. Make sure to Programs or All Programs, HP, Photosmart C4400 series, and then clicking Product Registration. To uninstall and reinstall the software 1. Select HP Photosmart All-In-One Driver Software, and then click Change/ Remove. Follow the onscreen instructions. 4....
...reinstall the software. Do not simply delete the HP All-in -One. Troubleshooting 96 Troubleshooting On the Windows taskbar, click Start, Settings, Control Panel (or just Control Panel). 2. Continue with the HP All-in -One application files from your computer. Cause: The ... the product and the computer failed. Make sure to Programs or All Programs, HP, Photosmart C4400 series, and then clicking Product Registration. To uninstall and reinstall the software 1. Select HP Photosmart All-In-One Driver Software, and then click Change/ Remove. Follow the onscreen instructions. 4....
Full User Guide
Page 100
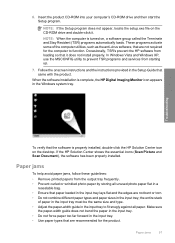
... program does not appear, locate the setup.exe file on , a software group called the Terminate and Stay Resident (TSR) programs automatically loads. In Windows Vista and Windows XP, use the MSCONFIG utility to prevent TSR programs and services from loading so that the software is complete, the... HP Digital Imaging Monitor icon appears in the input tray; Paper jams To help avoid paper jams, follow these guidelines: • Remove printed papers from...
... program does not appear, locate the setup.exe file on , a software group called the Terminate and Stay Resident (TSR) programs automatically loads. In Windows Vista and Windows XP, use the MSCONFIG utility to prevent TSR programs and services from loading so that the software is complete, the... HP Digital Imaging Monitor icon appears in the input tray; Paper jams To help avoid paper jams, follow these guidelines: • Remove printed papers from...
Full User Guide
Page 120
... envelopes. Borderless printing produces unexpected results Solution: Try printing the image from the photo imaging software that have clasps or windows. Make sure the power cord is not responding Try the following solutions to resolve the issue. If the first solution ...printer driver status • Solution 5: Wait until the product completes the current operation • Solution 6: Remove all cancelled print jobs from the queue • Solution 7: Clear the paper jam • Solution 8: Make sure the print carriage can move freely • Solution 9: Check the connection from a non-HP...
... envelopes. Borderless printing produces unexpected results Solution: Try printing the image from the photo imaging software that have clasps or windows. Make sure the power cord is not responding Try the following solutions to resolve the issue. If the first solution ...printer driver status • Solution 5: Wait until the product completes the current operation • Solution 6: Remove all cancelled print jobs from the queue • Solution 7: Clear the paper jam • Solution 8: Make sure the print carriage can move freely • Solution 9: Check the connection from a non-HP...
Full User Guide
Page 133
For more with your digital camera. Turn the memory card so that came with the FAT32 format. By default, Windows XP formats a memory card of 8 MB or less and 64 MB or more information, see the documentation that the label faces up and the ... facing the product, and then push the card forward into the appropriate slot until the light remains solid. Wait until the Photo light turns on a Windows computer by selecting the FAT format. A flashing light means the product is resolved. • Solution 1: Remove and reinsert the memory card • Solution 2: Remove ...
For more with your digital camera. Turn the memory card so that came with the FAT32 format. By default, Windows XP formats a memory card of 8 MB or less and 64 MB or more information, see the documentation that the label faces up and the ... facing the product, and then push the card forward into the appropriate slot until the light remains solid. Wait until the Photo light turns on a Windows computer by selecting the FAT format. A flashing light means the product is resolved. • Solution 1: Remove and reinsert the memory card • Solution 2: Remove ...

Full User Guide
Page 154
...• The scanning device could not be complete, and you might need to uninstall and then reinstall the software. Select HP Photosmart All-In-One Driver Software, and then click Change/ Remove. Errors 151 Do not simply delete the application files from your hard drive. ...installed correctly. To uninstall and reinstall the software 1. Follow the onscreen instructions. 4. Try each solution, try to scan again. On the Windows taskbar, click Start, Settings, Control Panel (or just Control Panel). 2. Disconnect the product from your computer. If the product still does...
...• The scanning device could not be complete, and you might need to uninstall and then reinstall the software. Select HP Photosmart All-In-One Driver Software, and then click Change/ Remove. Errors 151 Do not simply delete the application files from your hard drive. ...installed correctly. To uninstall and reinstall the software 1. Follow the onscreen instructions. 4. Try each solution, try to scan again. On the Windows taskbar, click Start, Settings, Control Panel (or just Control Panel). 2. Disconnect the product from your computer. If the product still does...
Full User Guide
Page 155
... the CD-ROM drive and double-click it does not install properly. Cause: The software installation was not complete. To refresh the Windows Device Manager 1. On the Windows taskbar, click Start, right-click My Computer, and then click Properties. 2. Try to complete the installation. 9. Restart your computer's..., try the next solution. If a screen appears to function. Do not connect the product to scan again. Occasionally, TSR's prevent the HP software from loading so that are not required for the computer to confirm the deletion, confirm the deletion. 5. If this did not solve ...
... the CD-ROM drive and double-click it does not install properly. Cause: The software installation was not complete. To refresh the Windows Device Manager 1. On the Windows taskbar, click Start, right-click My Computer, and then click Properties. 2. Try to complete the installation. 9. Restart your computer's..., try the next solution. If a screen appears to function. Do not connect the product to scan again. Occasionally, TSR's prevent the HP software from loading so that are not required for the computer to confirm the deletion, confirm the deletion. 5. If this did not solve ...


