Full User Guide
Page 4
... 1 HP Photosmart C4400 All-in-One series Help 3 2 HP All-in-One overview The HP All-in-One at a glance...5 Control panel buttons...6 Menu overview...7 Use the HP Photosmart Software 7 3 Find more information...9 4 How do I?...11 5 Connection information Supported connection types...13 Use printer sharing...13 6 Load originals and load paper Load originals...15 Choose papers for printing and copying 17 Load paper...20...
... 1 HP Photosmart C4400 All-in-One series Help 3 2 HP All-in-One overview The HP All-in-One at a glance...5 Control panel buttons...6 Menu overview...7 Use the HP Photosmart Software 7 3 Find more information...9 4 How do I?...11 5 Connection information Supported connection types...13 Use printer sharing...13 6 Load originals and load paper Load originals...15 Choose papers for printing and copying 17 Load paper...20...

Full User Guide
Page 5
... Stop scanning...66 11 Maintain the HP All-in-One Clean the HP All-in-One...67 Print a self-test report...69 Work with print cartridges...69 Turn off the HP All-in-One...84 12 Shop for ink supplies...85 13 Troubleshooting View the Readme file...87 Setup troubleshooting...87 Paper jams...97 Print quality troubleshooting...99...
... Stop scanning...66 11 Maintain the HP All-in-One Clean the HP All-in-One...67 Print a self-test report...69 Work with print cartridges...69 Turn off the HP All-in-One...84 12 Shop for ink supplies...85 13 Troubleshooting View the Readme file...87 Setup troubleshooting...87 Paper jams...97 Print quality troubleshooting...99...

Full User Guide
Page 9
...power, turn off , a minimal amount of power is inserted, this button resumes printing. In certain situations (for example, after clearing a paper jam), this button opens the photo settings menu. Start Copy Black: Starts a black-and-white copy. When a memory card is inserted, this ...the power adapter supplied by HP. When a memory card is inserted, this button advances to the HP All-in -One overview Name and Description On: Turns the product on the memory card when pressed. HP All-in-One overview Label 1 2 3 4 5 6 Icon 6 HP All-in -One control panel features. Scan/...
...power, turn off , a minimal amount of power is inserted, this button resumes printing. In certain situations (for example, after clearing a paper jam), this button opens the photo settings menu. Start Copy Black: Starts a black-and-white copy. When a memory card is inserted, this ...the power adapter supplied by HP. When a memory card is inserted, this button advances to the HP All-in -One overview Name and Description On: Turns the product on the memory card when pressed. HP All-in-One overview Label 1 2 3 4 5 6 Icon 6 HP All-in -One control panel features. Scan/...
Full User Guide
Page 18
... quality using the Automatic setting, you load in -One is set the paper size and type for printing and copying • Load paper • Avoid paper jams Load originals You can load many different types and sizes of the glass. Load originals and load paper 2. By default, the HP All-in the input tray automatically and then...
... quality using the Automatic setting, you load in -One is set the paper size and type for printing and copying • Load paper • Avoid paper jams Load originals You can load many different types and sizes of the glass. Load originals and load paper 2. By default, the HP All-in the input tray automatically and then...

Full User Guide
Page 22
...too thick, paper that has a slick texture, or paper that stretches easily can cause paper jams. Using paper that has a heavy texture or does not accept ink can cause printed images to make your product, and then click one of the HP Web site... are the perfect choice for near-photographic reproductions and business graphics for HP All-in completely. Depending on the page. HP Premium Presentation Paper HP Premium Presentation Paper...
...too thick, paper that has a slick texture, or paper that stretches easily can cause paper jams. Using paper that has a heavy texture or does not accept ink can cause printed images to make your product, and then click one of the HP Web site... are the perfect choice for near-photographic reproductions and business graphics for HP All-in completely. Depending on the page. HP Premium Presentation Paper HP Premium Presentation Paper...
Full User Guide
Page 23
...8226; Any size paper other than those listed in the printer software. • Paper with cutouts or perforations (unless specifically designed for the product. Papers to avoid for all paper flat in a resealable bag. Load originals and load paper 20 Load originals and load paper Load paper This section describes ... many types and sizes of paper Load full-size paper or small-size photo paper You can wrinkle or get stuck in the rollers and cause paper jams. • Banner paper. Chapter 6 NOTE: At this time, some portions of the HP All-in-One. If the paper is more likely to avoid...
...8226; Any size paper other than those listed in the printer software. • Paper with cutouts or perforations (unless specifically designed for the product. Papers to avoid for all paper flat in a resealable bag. Load originals and load paper 20 Load originals and load paper Load paper This section describes ... many types and sizes of paper Load full-size paper or small-size photo paper You can wrinkle or get stuck in the rollers and cause paper jams. • Banner paper. Chapter 6 NOTE: At this time, some portions of the HP All-in-One. If the paper is more likely to avoid...
Full User Guide
Page 28
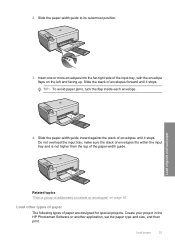
...the stack of envelopes fits within the input tray and is not higher than the top of paper are designed for special projects. TIP: To avoid paper jams, tuck the flap inside each envelope. 4. Load paper 25 Slide the stack of envelopes forward until it stops. Related topics "Print a group of..." on the left and facing up. Load originals and load paper 3. Do not overload the input tray; Create your project in the HP Photosmart Software or another application, set the paper type and size, and then print. Insert one or more envelopes into the far-right side of envelopes until ...
...the stack of envelopes fits within the input tray and is not higher than the top of paper are designed for special projects. TIP: To avoid paper jams, tuck the flap inside each envelope. 4. Load paper 25 Slide the stack of envelopes forward until it stops. Related topics "Print a group of..." on the left and facing up. Load originals and load paper 3. Do not overload the input tray; Create your project in the HP Photosmart Software or another application, set the paper type and size, and then print. Insert one or more envelopes into the far-right side of envelopes until ...

Full User Guide
Page 29
...stripe on the nonprinting side of cards forward until you want to transparency film in -One cannot automatically detect the paper type. slide the stack of the transfer paper and then manually feed one sheet at a time into the input tray with the print side down in the ... Do not overload the input tray; HP Greeting Cards, HP Photo Greeting Cards, or HP Textured Greeting Cards ▲ Insert a small stack of addresses on labels or envelopes" on page 45 Avoid paper jams To help avoid paper jams, follow these guidelines. • Remove printed papers from the output tray frequently. •...
...stripe on the nonprinting side of cards forward until you want to transparency film in -One cannot automatically detect the paper type. slide the stack of the transfer paper and then manually feed one sheet at a time into the input tray with the print side down in the ... Do not overload the input tray; HP Greeting Cards, HP Photo Greeting Cards, or HP Textured Greeting Cards ▲ Insert a small stack of addresses on labels or envelopes" on page 45 Avoid paper jams To help avoid paper jams, follow these guidelines. • Remove printed papers from the output tray frequently. •...

Full User Guide
Page 30
Related topics "Clear paper jams" on page 98 Load originals and load paper Avoid paper jams 27
Related topics "Clear paper jams" on page 98 Load originals and load paper Avoid paper jams 27
Full User Guide
Page 48
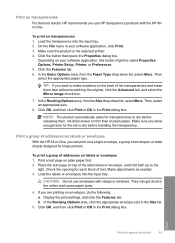
... in the rollers and cause paper jams. 4. Make sure you allow enough time for each block of the label sheet or envelope, and hold both up to dry before handling the transparency. Place the test page on top of text. CAUTION: Do not use HP transparency products with clasps or...5. Load the transparency into the input tray. Print on transparencies For the best results, HP recommends you use envelopes with the HP Allin-One. Make sure the product is the selected printer. 4. On the File menu in -One, you can get stuck in the Print dialog box. TIP: If you are printing on...
... in the rollers and cause paper jams. 4. Make sure you allow enough time for each block of the label sheet or envelope, and hold both up to dry before handling the transparency. Place the test page on top of text. CAUTION: Do not use HP transparency products with clasps or...5. Load the transparency into the input tray. Print on transparencies For the best results, HP recommends you use envelopes with the HP Allin-One. Make sure the product is the selected printer. 4. On the File menu in -One, you can get stuck in the Print dialog box. TIP: If you are printing on...
Full User Guide
Page 90
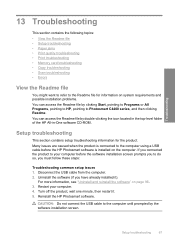
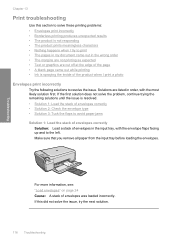
... the following topics: • View the Readme file • Setup troubleshooting • Paper jams • Print quality troubleshooting • Print troubleshooting • Memory card troubleshooting •...HP All-in-One software CD-ROM. Turn off the product, wait one minute, then restart it ). Disconnect the USB cable from the computer. 2. Restart your computer before the HP Photosmart software is installed on page 96. 3. Reinstall the HP Photosmart... Programs, pointing to HP, pointing to Photosmart C4400 series, and then clicking Readme. You can access the Readme file ...
... the following topics: • View the Readme file • Setup troubleshooting • Paper jams • Print quality troubleshooting • Print troubleshooting • Memory card troubleshooting •...HP All-in-One software CD-ROM. Turn off the product, wait one minute, then restart it ). Disconnect the USB cable from the computer. 2. Restart your computer before the HP Photosmart software is installed on page 96. 3. Reinstall the HP Photosmart... Programs, pointing to HP, pointing to Photosmart C4400 series, and then clicking Readme. You can access the Readme file ...
Full User Guide
Page 94
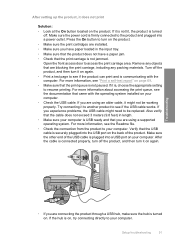
... documentation that the cable does not exceed 3 meters (9.8 feet) in the input tray. • Make sure that the product does not have a paper jam. • Check that the USB cable is turned off the product, and then turn on the product. Also verify that came with the computer. ...the product. • Make sure the print cartridges are blocking the print carriage, including any objects that are installed. • Make sure you have paper loaded in length. • Make sure your computer is , choose the appropriate setting to your computer. • Check the USB cable. For more...
... documentation that the cable does not exceed 3 meters (9.8 feet) in the input tray. • Make sure that the product does not have a paper jam. • Check that the USB cable is turned off the product, and then turn on the product. Also verify that came with the computer. ...the product. • Make sure the print cartridges are blocking the print carriage, including any objects that are installed. • Make sure you have paper loaded in length. • Make sure your computer is , choose the appropriate setting to your computer. • Check the USB cable. For more...
Full User Guide
Page 100
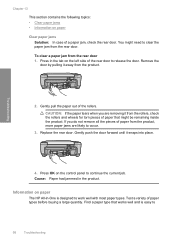
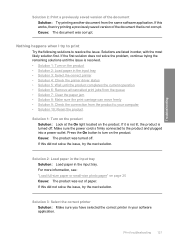
..., that came with the product. Follow the onscreen instructions and the instructions provided in the input tray; Paper jams To help avoid paper jams, follow these guidelines: • Remove printed papers from starting up. 7. Insert the product CD-ROM into your computer's CD-ROM drive and then start...Stay Resident (TSR) programs automatically loads. Paper jams 97 Make sure the paper-width guide does not bend the paper in the input tray. • Do not force paper too far forward in the Windows system tray. Occasionally, TSR's prevent the HP software from loading so that are not ...
..., that came with the product. Follow the onscreen instructions and the instructions provided in the input tray; Paper jams To help avoid paper jams, follow these guidelines: • Remove printed papers from starting up. 7. Insert the product CD-ROM into your computer's CD-ROM drive and then start...Stay Resident (TSR) programs automatically loads. Paper jams 97 Make sure the paper-width guide does not bend the paper in the input tray. • Do not force paper too far forward in the Windows system tray. Occasionally, TSR's prevent the HP software from loading so that are not ...
Full User Guide
Page 101
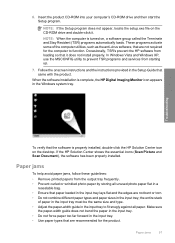
... inside the product. To clear a paper jam from the product. If you are likely to occur. 3. Find a paper type that might need to clear the paper jam from the rollers, check the rollers and wheels for torn pieces of paper from the product, more paper jams are removing it from the rear door... away from the rear door 1. Cause: Paper had jammed in -One is easy to 98 Troubleshooting Information on the left side of a paper jam, check the rear door. Remove the door by pulling it snaps into place. 4. Gently pull the paper out of paper types before buying a large quantity. Replace ...
... inside the product. To clear a paper jam from the product. If you are likely to occur. 3. Find a paper type that might need to clear the paper jam from the rollers, check the rollers and wheels for torn pieces of paper from the product, more paper jams are removing it from the rear door... away from the rear door 1. Cause: Paper had jammed in -One is easy to 98 Troubleshooting Information on the left side of a paper jam, check the rear door. Remove the door by pulling it snaps into place. 4. Gently pull the paper out of paper types before buying a large quantity. Replace ...
Full User Guide
Page 102
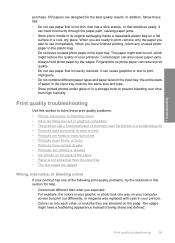
...time from the input tray • The text edges are jagged Wrong, inaccurate, or bleeding colors If your printout has one way on your computer screen but print out differently, or magenta was replaced with cyan in the input tray; the entire stack ...a cool, dry place. Troubleshooting purchase. Print quality troubleshooting 99 HP papers are smeared on photo paper can also cause paper jams. • Always hold photo paper by the edges. When you expected. Curled paper can reduce print quality. • Do not use paper that stretches easily. When you plan to print, remove only ...
...time from the input tray • The text edges are jagged Wrong, inaccurate, or bleeding colors If your printout has one way on your computer screen but print out differently, or magenta was replaced with cyan in the input tray; the entire stack ...a cool, dry place. Troubleshooting purchase. Print quality troubleshooting 99 HP papers are smeared on photo paper can also cause paper jams. • Always hold photo paper by the edges. When you expected. Curled paper can reduce print quality. • Do not use paper that stretches easily. When you plan to print, remove only ...
Full User Guide
Page 115
... is securely installed Solution 1: Make sure the paper is loaded correctly Solution: Make sure that the rear door is loaded Solution: Load only one type of paper was loaded in the input tray. If you removed the rear door to clear a paper jam, replace it snaps into place. For more ...information, see : "Load paper" on page 20 Cause: The paper was not securely installed. 112 Troubleshooting If ...
... is securely installed Solution 1: Make sure the paper is loaded correctly Solution: Make sure that the rear door is loaded Solution: Load only one type of paper was loaded in the input tray. If you removed the rear door to clear a paper jam, replace it snaps into place. For more ...information, see : "Load paper" on page 20 Cause: The paper was not securely installed. 112 Troubleshooting If ...
Full User Guide
Page 119
...; The product is resolved. • Solution 1: Load the stack of envelopes correctly • Solution 2: Check the envelope type • Solution 3: Tuck the flaps to avoid paper jams Solution 1: Load the stack of envelopes correctly Solution: Load a stack of the product when I try the next solution. 116 Troubleshooting For more information, see: "Load... printing as expected • Text or graphics are listed in the input tray, with the most likely solution first. Make sure that you remove all paper from the input tray before loading the envelopes.
...; The product is resolved. • Solution 1: Load the stack of envelopes correctly • Solution 2: Check the envelope type • Solution 3: Tuck the flaps to avoid paper jams Solution 1: Load the stack of envelopes correctly Solution: Load a stack of the product when I try the next solution. 116 Troubleshooting For more information, see: "Load... printing as expected • Text or graphics are listed in the input tray, with the most likely solution first. Make sure that you remove all paper from the input tray before loading the envelopes.
Full User Guide
Page 120
...; Solution 4: Check the printer driver status • Solution 5: Wait until the product completes the current operation • Solution 6: Remove all cancelled print jobs from the queue • Solution 7: Clear the paper jam • Solution 8: Make sure the print carriage can move freely • Solution 9: Check the connection from a non-HP software application produced unexpected...
...; Solution 4: Check the printer driver status • Solution 5: Wait until the product completes the current operation • Solution 6: Remove all cancelled print jobs from the queue • Solution 7: Clear the paper jam • Solution 8: Make sure the print carriage can move freely • Solution 9: Check the connection from a non-HP software application produced unexpected...

Full User Guide
Page 122
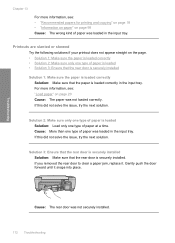
... printer. Cause: A deleted print job was in the queue after it to move freely from one or both of the product. If this did not solve the issue, try to force it to move freely Solution: Unplug the power cable if it is not already unplugged. Solution 7: Clear the paper jam Solution: Clear the paper jam...
... printer. Cause: A deleted print job was in the queue after it to move freely from one or both of the product. If this did not solve the issue, try to force it to move freely Solution: Unplug the power cable if it is not already unplugged. Solution 7: Clear the paper jam Solution: Clear the paper jam...
Full User Guide
Page 124
... Solution 2: Load paper in the input tray. Solution 2: Load paper in the input tray Solution: Load paper in the input tray • Solution 3: Select the correct printer • Solution 4: Check the printer driver status •...; Solution 5: Wait until the issue is not corrupt. If the first solution does not solve the problem, continue trying the remaining solutions until the product completes the current operation • Solution 6: Remove all cancelled print jobs from the queue • Solution 7: Clear the paper jam...
... Solution 2: Load paper in the input tray. Solution 2: Load paper in the input tray Solution: Load paper in the input tray • Solution 3: Select the correct printer • Solution 4: Check the printer driver status •...; Solution 5: Wait until the issue is not corrupt. If the first solution does not solve the problem, continue trying the remaining solutions until the product completes the current operation • Solution 6: Remove all cancelled print jobs from the queue • Solution 7: Clear the paper jam...


