User's Guide
Page 7
......123 Solving printer power problems ...126 Removing and reinstalling the software ...126 Enabling the USB port in Windows ...127 Wireless troubleshooting...128 Wireless troubleshooting checklist ...128 Printing a network setup page ...129 Wireless configuration does not continue after the USB cable is attached 129 Why...printer lost when connected to Virtual Private Network (VPN 144 Resetting the internal wireless print server to factory default settings 144 Fax troubleshooting...144 Cannot send or receive a fax...144 Can send but not receive faxes...146 Can receive but not send faxes...147...
......123 Solving printer power problems ...126 Removing and reinstalling the software ...126 Enabling the USB port in Windows ...127 Wireless troubleshooting...128 Wireless troubleshooting checklist ...128 Printing a network setup page ...129 Wireless configuration does not continue after the USB cable is attached 129 Why...printer lost when connected to Virtual Private Network (VPN 144 Resetting the internal wireless print server to factory default settings 144 Fax troubleshooting...144 Cannot send or receive a fax...144 Can send but not receive faxes...146 Can receive but not send faxes...147...
User's Guide
Page 33
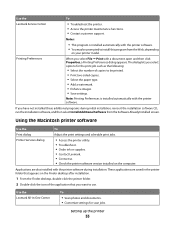
...dialog To Adjust the print settings and schedule print jobs. • Access the printer utility. • Troubleshoot. • Order ink or supplies. • Contact Lexmark. • Contact us. • Check the printer software version installed on your printer model. Printing ... Printing Preferences dialog appears. The dialog lets you select File Œ Print with the printer software. Use the Lexmark Service Center To • Troubleshoot the printer. • Access the printer maintenance functions. • Contact customer support. Note: Printing Preferences is ...
...dialog To Adjust the print settings and schedule print jobs. • Access the printer utility. • Troubleshoot. • Order ink or supplies. • Contact Lexmark. • Contact us. • Check the printer software version installed on your printer model. Printing ... Printing Preferences dialog appears. The dialog lets you select File Œ Print with the printer software. Use the Lexmark Service Center To • Troubleshoot the printer. • Access the printer maintenance functions. • Contact customer support. Note: Printing Preferences is ...
User's Guide
Page 38
If problems occur, see "Setup troubleshooting" on the back of the printer. Note: Do not remove the plug. Note: The printer is necessary for the proper functioning of the printer. If ...
If problems occur, see "Setup troubleshooting" on the back of the printer. Note: Do not remove the plug. Note: The printer is necessary for the proper functioning of the printer. If ...
User's Guide
Page 49
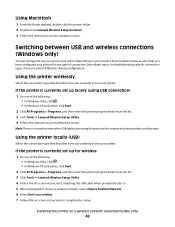
...the connection type that describes how you currently access your needs. Installing the printer on the computer screen. See related topics on troubleshooting specific connection types if you access your printer depending on the Welcome screen. Using the printer wirelessly Select the connection type that... (using USB connection) 1 Do one of connection. Using Macintosh 1 From the Finder desktop, double-click the printer folder. 2 Double-click Lexmark Wireless Setup Assistant. 3 Follow the instructions on a wireless network (selected models only) 49 Note: There is no need to remove the USB...
...the connection type that describes how you currently access your needs. Installing the printer on the computer screen. See related topics on troubleshooting specific connection types if you access your printer depending on the Welcome screen. Using the printer wirelessly Select the connection type that... (using USB connection) 1 Do one of connection. Using Macintosh 1 From the Finder desktop, double-click the printer folder. 2 Double-click Lexmark Wireless Setup Assistant. 3 Follow the instructions on a wireless network (selected models only) 49 Note: There is no need to remove the USB...
User's Guide
Page 50
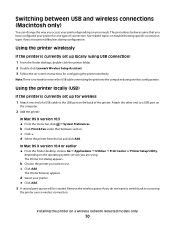
.... d Select the printer from the list and click Add. c Click Add. See related topics on troubleshooting specific connection types if you are using USB connection) 1 From the Finder desktop, double-click the printer folder. 2 Double-click Lexmark Wireless Setup Assistant. 3 Follow the on a wireless network (selected models only) 50 Note: There is...
.... d Select the printer from the list and click Add. c Click Add. See related topics on troubleshooting specific connection types if you are using USB connection) 1 From the Finder desktop, double-click the printer folder. 2 Double-click Lexmark Wireless Setup Assistant. 3 Follow the on a wireless network (selected models only) 50 Note: There is...
User's Guide
Page 121
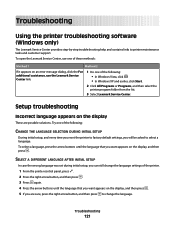
...Start. 2 Click All Programs or Programs, and then select the printer program folder from the list. 3 Select Lexmark Service Center. Setup troubleshooting Incorrect language appears on the display These are sure, press the right arrow button, and then press to printer ...maintenance tasks and customer support. Troubleshooting 121 Troubleshooting Using the printer troubleshooting software (Windows only) The Lexmark Service Center provides step-by-step troubleshooting help and contains links to change the language settings of the printer. 1 ...
...Start. 2 Click All Programs or Programs, and then select the printer program folder from the list. 3 Select Lexmark Service Center. Setup troubleshooting Incorrect language appears on the display These are sure, press the right arrow button, and then press to printer ...maintenance tasks and customer support. Troubleshooting 121 Troubleshooting Using the printer troubleshooting software (Windows only) The Lexmark Service Center provides step-by-step troubleshooting help and contains links to change the language settings of the printer. 1 ...
User's Guide
Page 122
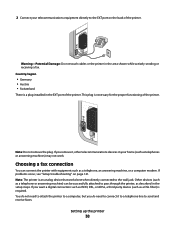
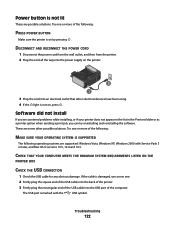
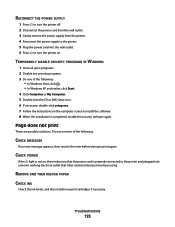
... the power supply on the printer. 2 1 3 Plug the cord into the USB port of the USB cable into an electrical outlet that other possible solutions. Troubleshooting 122 These are some other electrical devices have been using. 4 If the light is on , press . Try one or more of the following: MAKE SURE...
... the power supply on the printer. 2 1 3 Plug the cord into the USB port of the USB cable into an electrical outlet that other possible solutions. Troubleshooting 122 These are some other electrical devices have been using. 4 If the light is on , press . Try one or more of the following: MAKE SURE...
User's Guide
Page 123
... error before trying to print again. REMOVE AND THEN RELOAD PAPER CHECK INK Check the ink levels, and then install new print cartridges if necessary. Troubleshooting 123 Try one of the following : • In Windows Vista, click . • In Windows XP and earlier, click Start. 4 Click Computer or My Computer. 5 Double...
... error before trying to print again. REMOVE AND THEN RELOAD PAPER CHECK INK Check the ink levels, and then install new print cartridges if necessary. Troubleshooting 123 Try one of the following : • In Windows Vista, click . • In Windows XP and earlier, click Start. 4 Click Computer or My Computer. 5 Double...

User's Guide
Page 124
... a check mark does not appear next to Set As Default Printer, then you must select the printer for each file that you want to print. Troubleshooting 124 In Windows 2000 a Click Start. CHECK PRINTER DEFAULT AND PAUSE SETTINGS Using Windows 1 Do one of the following: In Windows Vista a Click...
... a check mark does not appear next to Set As Default Printer, then you must select the printer for each file that you want to print. Troubleshooting 124 In Windows 2000 a Click Start. CHECK PRINTER DEFAULT AND PAUSE SETTINGS Using Windows 1 Do one of the following: In Windows Vista a Click...

User's Guide
Page 125
... the power cord from the wall outlet. 3 Remove the power supply from the Default Printer pop-up menu, check if the printer is on hold : - Troubleshooting 125 If the print job is not the default printer. The print queue dialog appears. • Make sure that the print job is not the...
... the power cord from the wall outlet. 3 Remove the power supply from the Default Printer pop-up menu, check if the printer is on hold : - Troubleshooting 125 If the print job is not the default printer. The print queue dialog appears. • Make sure that the print job is not the...
User's Guide
Page 126
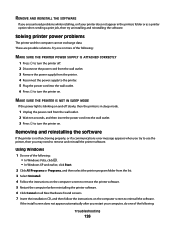
... the wall outlet. 6 Press to reinstall the software. Solving printer power problems The printer and the computer cannot exchange data. Try one of the following : Troubleshooting 126 Using Windows 1 Do one of the following : • In Windows Vista, click . • In Windows XP and earlier, click Start. 2 Click All Programs or...
... the wall outlet. 6 Press to reinstall the software. Solving printer power problems The printer and the computer cannot exchange data. Try one of the following : Troubleshooting 126 Using Windows 1 Do one of the following : • In Windows Vista, click . • In Windows XP and earlier, click Start. 2 Click All Programs or...
User's Guide
Page 127
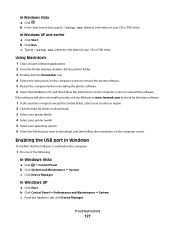
... Search box, type D:\setup.exe, where D is the letter of your CD or DVD drive. b Click System and Maintenance ΠSystem. b Click Run. Troubleshooting 127 c Type D:\setup.exe, where D is enabled on the computer screen to remove the printer software. 5 Restart the computer before reinstalling the printer software. 6 ...ΠPerformance and Maintenance ΠSystem. c Click Device Manager. If the software still does not install correctly, visit our Web site at www.lexmark.com to download, and then follow the instructions on the computer: 1 Do one of your CD or DVD drive.
... Search box, type D:\setup.exe, where D is the letter of your CD or DVD drive. b Click System and Maintenance ΠSystem. b Click Run. Troubleshooting 127 c Type D:\setup.exe, where D is enabled on the computer screen to remove the printer software. 5 Restart the computer before reinstalling the printer software. 6 ...ΠPerformance and Maintenance ΠSystem. c Click Device Manager. If the software still does not install correctly, visit our Web site at www.lexmark.com to download, and then follow the instructions on the computer: 1 Do one of your CD or DVD drive.
User's Guide
Page 128
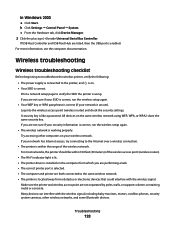
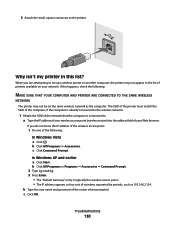
..., WPA, or WPA2 share the same security key. b Click Settings Œ Control Panel Œ System. Wireless troubleshooting Wireless troubleshooting checklist Before beginning to troubleshoot the wireless printer, verify the following: • The power supply is connected to the Internet over a wireless connection.... properly. c From the Hardware tab, click Device Manager. 2 Click the plus sign (+) beside Universal Serial Bus Controller. Troubleshooting 128 Log into the wireless access point (wireless router) and check the security settings. For more information, see the computer ...
..., WPA, or WPA2 share the same security key. b Click Settings Œ Control Panel Œ System. Wireless troubleshooting Wireless troubleshooting checklist Before beginning to troubleshoot the wireless printer, verify the following: • The power supply is connected to the Internet over a wireless connection.... properly. c From the Hardware tab, click Device Manager. 2 Click the plus sign (+) beside Universal Serial Bus Controller. Troubleshooting 128 Log into the wireless access point (wireless router) and check the security settings. For more information, see the computer ...
User's Guide
Page 129
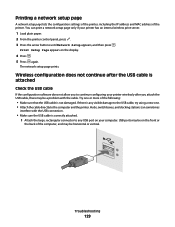
... an internal wireless print server. 1 Load plain paper. 2 From the printer control panel, press . 3 Press the arrow buttons until Network Setup appears, and then press . Troubleshooting 129 USB ports may be on the display. 4 Press . 5 Press again. Printing a network setup page A network setup page lists the configuration settings of the printer...
... an internal wireless print server. 1 Load plain paper. 2 From the printer control panel, press . 3 Press the arrow buttons until Network Setup appears, and then press . Troubleshooting 129 USB ports may be on the display. 4 Press . 5 Press again. Printing a network setup page A network setup page lists the configuration settings of the printer...
User's Guide
Page 130
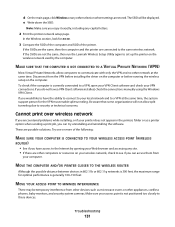
... network. 1 Obtain the SSID of the network that the computer is typically the wireless access point . • The IP address appears as 192.168.2.134. Troubleshooting 130 2 Attach the small, square connector to set up a wireless printer on your Web browser. The SSID of the printer must match the SSID of...
... network. 1 Obtain the SSID of the network that the computer is typically the wireless access point . • The IP address appears as 192.168.2.134. Troubleshooting 130 2 Attach the small, square connector to set up a wireless printer on your Web browser. The SSID of the printer must match the SSID of...
User's Guide
Page 131
... the VPN before installing the driver on the computer or before running the wireless setup on the wireless network used by opening your VPN connections. Troubleshooting 131 e Write down the SSID. In the Wireless section, look for optimal performance is not positioned too closely to a VPN, open your ... selection where settings are stored. If the SSIDs are the same, then the computer and the printer are not the same, then run the Lexmark Wireless Setup Utility again to see if you can access them from other devices such as a printer option when sending a print job, you...
... the VPN before installing the driver on the computer or before running the wireless setup on the wireless network used by opening your VPN connections. Troubleshooting 131 e Write down the SSID. In the Wireless section, look for optimal performance is not positioned too closely to a VPN, open your ... selection where settings are stored. If the SSIDs are the same, then the computer and the printer are not the same, then run the Lexmark Wireless Setup Utility again to see if you can access them from other devices such as a printer option when sending a print job, you...

User's Guide
Page 132
... in the Network Name pop-up menu. 4 Write down the SSID. c Press Enter. • The "Default Gateway" entry is using matches the wireless network SSID. Troubleshooting 132 If you copy the network information down the SSID, security type, and the WEP key/WPA passphrase (if shown). Using Macintosh with the numbers...
... in the Network Name pop-up menu. 4 Write down the SSID. c Press Enter. • The "Default Gateway" entry is using matches the wireless network SSID. Troubleshooting 132 If you copy the network information down the SSID, security type, and the WEP key/WPA passphrase (if shown). Using Macintosh with the numbers...

User's Guide
Page 133
..., including any capital letters. • Store the SSID and the WEP key or WPA passphrase in a WEP key are A-F, a-f, and 0-9. c Click AirPort. d Click TCP/IP. Troubleshooting 133 d Click Advanced. The "Router" entry is displayed in the address field of the wireless access point, then do the following: In Mac OS X version...
..., including any capital letters. • Store the SSID and the WEP key or WPA passphrase in a WEP key are A-F, a-f, and 0-9. c Click AirPort. d Click TCP/IP. Troubleshooting 133 d Click Advanced. The "Router" entry is displayed in the address field of the wireless access point, then do the following: In Mac OS X version...
User's Guide
Page 134
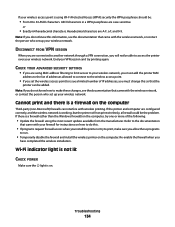
... there is on the computer, try one or more of the following: • Update the firewall using the most recent update available from the manufacturer. Troubleshooting 134 Re-enable the firewall when you install the printer or try printing again. DISCONNECT FROM VPN SESSION When you are connected to another network...
... there is on the computer, try one or more of the following: • Update the firewall using the most recent update available from the manufacturer. Troubleshooting 134 Re-enable the firewall when you install the printer or try printing again. DISCONNECT FROM VPN SESSION When you are connected to another network...

User's Guide
Page 135
... WIRELESS INSTALLATION TO COMPLETE Do not attempt to use the printer wirelessly. 1 Do one of the following : In Windows Vista a Click . b Click Printers and Faxes. Troubleshooting 135 In Windows 2000 a Click Start. b Click Settings ΠPrinters. 2 Right-click the new printer. b Click Control Panel. ENABLE THE PRINTER Confirm that the printer...
... WIRELESS INSTALLATION TO COMPLETE Do not attempt to use the printer wirelessly. 1 Do one of the following : In Windows Vista a Click . b Click Printers and Faxes. Troubleshooting 135 In Windows 2000 a Click Start. b Click Settings ΠPrinters. 2 Right-click the new printer. b Click Control Panel. ENABLE THE PRINTER Confirm that the printer...


