User's Guide
Page 3
... Using the printer menus ...26 Saving settings...28 Using the printer software...30 Installing printer software ...30 Installing the optional XPS driver (Windows Vista users only 31 Using the Windows printer software...32 Using the Macintosh printer software...33 Switching between the rear USB port and the Quick Connect laptop port (selected...
... Using the printer menus ...26 Saving settings...28 Using the printer software...30 Installing printer software ...30 Installing the optional XPS driver (Windows Vista users only 31 Using the Windows printer software...32 Using the Macintosh printer software...33 Switching between the rear USB port and the Quick Connect laptop port (selected...
User's Guide
Page 4
Assigning a static IP address...48 Changing wireless settings after installation...48 Switching between USB and wireless connections (Windows only 49 Switching between USB and wireless connections (Macintosh only 50 Advanced wireless setup...51 Creating an ad hoc wireless network ...51 Adding a printer to ...
Assigning a static IP address...48 Changing wireless settings after installation...48 Switching between USB and wireless connections (Windows only 49 Switching between USB and wireless connections (Macintosh only 50 Advanced wireless setup...51 Creating an ad hoc wireless network ...51 Adding a printer to ...
User's Guide
Page 7
...install...122 Page does not print...123 Solving printer power problems ...126 Removing and reinstalling the software ...126 Enabling the USB port in Windows ...127 Wireless troubleshooting...128 Wireless troubleshooting checklist ...128 Printing a network setup page ...129 Wireless configuration does not continue after the USB ... is not lit...134 Wi-Fi indicator light is green but the printer does not print (Windows only 135 Wi-Fi indicator light is blinking orange during installation (Windows only 137 Wi-Fi indicator light is blinking orange during installation (Macintosh only 140 Wi-Fi ...
...install...122 Page does not print...123 Solving printer power problems ...126 Removing and reinstalling the software ...126 Enabling the USB port in Windows ...127 Wireless troubleshooting...128 Wireless troubleshooting checklist ...128 Printing a network setup page ...129 Wireless configuration does not continue after the USB ... is not lit...134 Wi-Fi indicator light is green but the printer does not print (Windows only 135 Wi-Fi indicator light is blinking orange during installation (Windows only 137 Wi-Fi indicator light is blinking orange during installation (Macintosh only 140 Wi-Fi ...

User's Guide
Page 10
...these publications. The correct menu bar does not appear if the application is the active application. Windows Help Additional instructions for using the printer software on a Windows operating system. Additional instructions for using the printer software on the menu bar to view context-sensitive...Printed Networking Guide / Fax Guide Additional setup instructions. Click to view the main page of the following: • In Windows Vista, click . • In Windows XP and earlier, click Start. 2 Click All Programs or Programs, and then select the printer program folder from the ...
...these publications. The correct menu bar does not appear if the application is the active application. Windows Help Additional instructions for using the printer software on a Windows operating system. Additional instructions for using the printer software on the menu bar to view context-sensitive...Printed Networking Guide / Fax Guide Additional setup instructions. Click to view the main page of the following: • In Windows Vista, click . • In Windows XP and earlier, click Start. 2 Click All Programs or Programs, and then select the printer program folder from the ...
User's Guide
Page 30
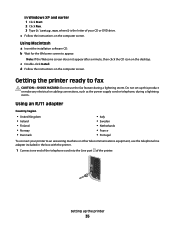
.... c Type D:\setup.exe, where D is left idle. Changing the Power Saver timeout You can customize the Power Saver timeout of the following: In Windows Vista a Click . If the Welcome screen does not appear after a minute, click the CD icon on the desktop. 3 Double-click Install. 4 ...Follow the instructions on the Welcome screen to set up the printer 30 In Windows XP and earlier a Click Start. Using Macintosh 1 Close all open software applications. 2 Insert the installation software CD. The Power Saver timeout is ...
.... c Type D:\setup.exe, where D is left idle. Changing the Power Saver timeout You can customize the Power Saver timeout of the following: In Windows Vista a Click . If the Welcome screen does not appear after a minute, click the CD icon on the desktop. 3 Double-click Install. 4 ...Follow the instructions on the Welcome screen to set up the printer 30 In Windows XP and earlier a Click Start. Using Macintosh 1 Close all open software applications. 2 Insert the installation software CD. The Power Saver timeout is ...
User's Guide
Page 31
.... d Click OK. 7 Click Next on your computer: a Click Computer, and then double-click (C:). Using the World Wide Web 1 Go to the Lexmark Web site at www.lexmark.com. 2 From the home page, navigate through the menu selection, and then click Drivers & Downloads. 3 Choose the printer and the printer driver for...For more information on the XPS driver, see the XPS readme file on the computer screen. The XPS driver files are available only for Windows Vista users. To use of the advanced XPS color and graphics features that are extracted and copied to download the driver and install the ...
.... d Click OK. 7 Click Next on your computer: a Click Computer, and then double-click (C:). Using the World Wide Web 1 Go to the Lexmark Web site at www.lexmark.com. 2 From the home page, navigate through the menu selection, and then click Drivers & Downloads. 3 Choose the printer and the printer driver for...For more information on the XPS driver, see the XPS readme file on the computer screen. The XPS driver files are available only for Windows Vista users. To use of the advanced XPS color and graphics features that are extracted and copied to download the driver and install the ...
User's Guide
Page 32
...and produce text that you purchased. Manage, edit, transfer, and print photos and documents. Use the Lexmark Fax Setup Utility to PDF format. • Create posters and photo greeting cards from Windows. You may not come with a word-processing program. • Set up the wireless printer on... the features of the printer. Note: This program is installed automatically with the printer software if you choose not to install the Lexmark Productivity Studio. •...
...and produce text that you purchased. Manage, edit, transfer, and print photos and documents. Use the Lexmark Fax Setup Utility to PDF format. • Create posters and photo greeting cards from Windows. You may not come with a word-processing program. • Set up the wireless printer on... the features of the printer. Note: This program is installed automatically with the printer software if you choose not to install the Lexmark Productivity Studio. •...
User's Guide
Page 34
...laptop port connection overrides the rear USB port connection. If the Welcome screen does not appear after a minute, do one of the following: In Windows Vista 1 Click . 2 In the Start Search box, type D:\setup.exe, where D is being accessed by the printer. 3 If you have...alignment page. • Clean the print cartridge nozzles. • Order ink or supplies. • Register the printer. • Contact customer support. Lexmark Network Card Reader • View the contents of the printer that you decide to connect a laptop computer to the computer over a network. Warning-Potential ...
...laptop port connection overrides the rear USB port connection. If the Welcome screen does not appear after a minute, do one of the following: In Windows Vista 1 Click . 2 In the Start Search box, type D:\setup.exe, where D is being accessed by the printer. 3 If you have...alignment page. • Clean the print cartridge nozzles. • Order ink or supplies. • Register the printer. • Contact customer support. Lexmark Network Card Reader • View the contents of the printer that you decide to connect a laptop computer to the computer over a network. Warning-Potential ...
User's Guide
Page 35
... the Welcome screen does not appear after a minute, then click the CD icon on the computer screen. d Follow the instructions on the computer screen. In Windows XP and earlier 1 Click Start. 2 Click Run. 3 Type D:\setup.exe, where D is the letter of the printer.
... the Welcome screen does not appear after a minute, then click the CD icon on the computer screen. d Follow the instructions on the computer screen. In Windows XP and earlier 1 Click Start. 2 Click Run. 3 Type D:\setup.exe, where D is the letter of the printer.
User's Guide
Page 46
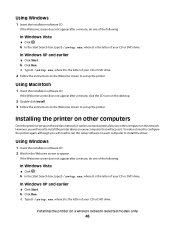
...do one of your CD or DVD drive. b In the Start Search box, type D:\setup.exe, where D is the letter of the following : In Windows Vista a Click . b Click Run. Using Macintosh 1 Insert the installation software CD. However, you will access it can be accessed wirelessly by any other... set up the printer. Installing the printer on the Welcome screen to appear. Installing the printer on other computer on the wireless network, it . In Windows XP and earlier a Click Start. b Click Run. c Type D:\setup.exe, where D is set up on the network. b In the Start Search ...
...do one of your CD or DVD drive. b In the Start Search box, type D:\setup.exe, where D is the letter of the following : In Windows Vista a Click . b Click Run. Using Macintosh 1 Insert the installation software CD. However, you will access it can be accessed wirelessly by any other... set up the printer. Installing the printer on the Welcome screen to appear. Installing the printer on other computer on the wireless network, it . In Windows XP and earlier a Click Start. b Click Run. c Type D:\setup.exe, where D is set up on the network. b In the Start Search ...

User's Guide
Page 48
... not automatically assigned an IP address, the installation software will prompt you want to use from the list. 3 Click Tools ΠLexmark Wireless Setup Utility. Installing the printer on most wireless networks. Note: After pressing the associate/register button, you have already changed the ...to your wireless network 1 Set up your printer using the installation cable as the configured network, the security key, or other settings: Using Windows 1 Do one of automatically assigning DHCP addresses on your network. Note: If the cable is not already connected, you want . b ...
... not automatically assigned an IP address, the installation software will prompt you want to use from the list. 3 Click Tools ΠLexmark Wireless Setup Utility. Installing the printer on most wireless networks. Note: After pressing the associate/register button, you have already changed the ...to your wireless network 1 Set up your printer using the installation cable as the configured network, the security key, or other settings: Using Windows 1 Do one of automatically assigning DHCP addresses on your network. Note: If the cable is not already connected, you want . b ...
User's Guide
Page 49
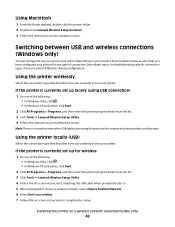
..., click . • In Windows XP and earlier, click Start. 2 Click All Programs or Programs, and then select the printer program folder from the list. 3 Click Tools Œ Lexmark Wireless Setup Utility. 4 Follow the instructions on the Welcome screen. See related topics on a wireless...the Finder desktop, double-click the printer folder. 2 Double-click Lexmark Wireless Setup Assistant. 3 Follow the instructions on -screen instructions to the computer during configuration. Switching between USB and wireless connections (Windows only) You can change the way you currently access your printer: ...
..., click . • In Windows XP and earlier, click Start. 2 Click All Programs or Programs, and then select the printer program folder from the list. 3 Click Tools Œ Lexmark Wireless Setup Utility. 4 Follow the instructions on the Welcome screen. See related topics on a wireless...the Finder desktop, double-click the printer folder. 2 Double-click Lexmark Wireless Setup Assistant. 3 Follow the instructions on -screen instructions to the computer during configuration. Switching between USB and wireless connections (Windows only) You can change the way you currently access your printer: ...
User's Guide
Page 51
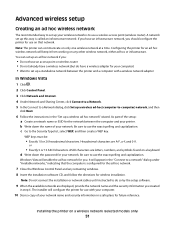
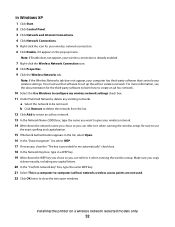
...network set up a standalone network between the computer and your wireless network is configured for the ad hoc network. 7 Close the Windows Control Panel and any other wireless network, either ad hoc or infrastructure. Configuring the printer for an ad hoc wireless network will ...exact spelling and capitalization. ASCII characters are letters, numbers, and symbols found on that the computer is to use with a wireless network adapter In Windows Vista 1 Click . 2 Click Control Panel. 3 Click Network and Internet. 4 Under Network and Sharing Center, click Connect to a Network....
...network set up a standalone network between the computer and your wireless network is configured for the ad hoc network. 7 Close the Windows Control Panel and any other wireless network, either ad hoc or infrastructure. Configuring the printer for an ad hoc wireless network will ...exact spelling and capitalization. ASCII characters are letters, numbers, and symbols found on that the computer is to use with a wireless network adapter In Windows Vista 1 Click . 2 Click Control Panel. 3 Click Network and Internet. 4 Under Network and Sharing Center, click Connect to a Network....
User's Guide
Page 52
... documentation for the third-party software to learn how to create an ad hoc network. 10 Select the Use Windows to it when running the wireless setup. a Select the network to close the two open windows. wireless access points are not used. 22 Click OK twice to be removed. In... Windows XP 1 Click Start. 2 Click Control Panel. 3 Click Network and Internet Connections. 4 Click Network Connections. 5 Right-click the icon for ...
... documentation for the third-party software to learn how to create an ad hoc network. 10 Select the Use Windows to it when running the wireless setup. a Select the network to close the two open windows. wireless access points are not used. 22 Click OK twice to be removed. In... Windows XP 1 Click Start. 2 Click Control Panel. 3 Click Network and Internet Connections. 4 Click Network Connections. 5 Right-click the icon for ...
User's Guide
Page 53
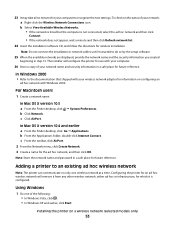
... printer for an ad hoc wireless network will configure the printer for use with Windows 2000. Installing the printer on the status of the following: • In Windows Vista, click . • In Windows XP and earlier, click Start. Note: Do not connect the installation or network... the computer is configured. In Mac OS X version 10.5 a From the Finder desktop, click b Click Network. In Windows 2000 • Refer to recognize the new settings. Using Windows 1 Do one wireless network at a time. To check on a wireless network (selected models only) 53 Adding a printer...
... printer for an ad hoc wireless network will configure the printer for use with Windows 2000. Installing the printer on the status of the following: • In Windows Vista, click . • In Windows XP and earlier, click Start. Note: Do not connect the installation or network... the computer is configured. In Mac OS X version 10.5 a From the Finder desktop, click b Click Network. In Windows 2000 • Refer to recognize the new settings. Using Windows 1 Do one wireless network at a time. To check on a wireless network (selected models only) 53 Adding a printer...
User's Guide
Page 54
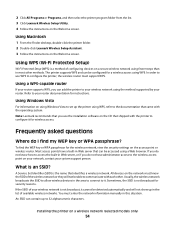
.... The printer supports WPS and can be configured for the wireless network, view the security settings on the Welcome screen. Using Windows Vista For information on the network must enter the network information manually in the list of the wireless network or they will not... access to communicate with the operating system. 2 Click All Programs or Programs, and then select the printer program folder from the list. 3 Click Lexmark Wireless Setup Utility. 4 Follow the instructions on a wireless network (selected models only) 54 Using WPS (Wi-Fi Protected Setup) Wi-Fi Protected ...
.... The printer supports WPS and can be configured for the wireless network, view the security settings on the Welcome screen. Using Windows Vista For information on the network must enter the network information manually in the list of the wireless network or they will not... access to communicate with the operating system. 2 Click All Programs or Programs, and then select the printer program folder from the list. 3 Click Lexmark Wireless Setup Utility. 4 Follow the instructions on a wireless network (selected models only) 54 Using WPS (Wi-Fi Protected Setup) Wi-Fi Protected ...
User's Guide
Page 63
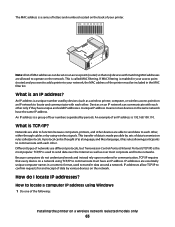
... the following: Installing the printer on the network. How do not understand words and instead rely upon numbers for and receipt of data by using Windows 1 Do one of MAC addresses can communicate with each other . An example of your printer. TCP/IP is 192.168.100.110. How to transfer...
... the following: Installing the printer on the network. How do not understand words and instead rely upon numbers for and receipt of data by using Windows 1 Do one of MAC addresses can communicate with each other . An example of your printer. TCP/IP is 192.168.100.110. How to transfer...
User's Guide
Page 64
..., such as 192.168.0.100. Only one key is set up menu, select AirPort. Installing the printer on the network at a time, however. In Windows XP and earlier a Click Start. c Click Command Prompt. The IP address appears as four sets of a key is a key index? An IP address... viewing the printer network setup page. All devices on a computer, the computer sends all print jobs across the network to as its key index. In Windows Vista a Click . For Mac OS X version 10.5 a Click AirPort. What is referred to the printer using DHCP. b Click All Programs ΠAccessories. ...
..., such as 192.168.0.100. Only one key is set up menu, select AirPort. Installing the printer on the network at a time, however. In Windows XP and earlier a Click Start. c Click Command Prompt. The IP address appears as four sets of a key is a key index? An IP address... viewing the printer network setup page. All devices on a computer, the computer sends all print jobs across the network to as its key index. In Windows Vista a Click . For Mac OS X version 10.5 a Click AirPort. What is referred to the printer using DHCP. b Click All Programs ΠAccessories. ...
User's Guide
Page 74
..., the type of paper to create a printer-friendly version of any printer software dialogs. Printing Web pages If you chose to install the Lexmark Toolbar software for your Web browser, then you can use it to be used , and how the pages should print. e Click OK ...or Print. Printing 74 d Click Print. d Click OK to print: Using Windows a With a document open in a Windows program , click File ΠPrint. Using Macintosh a With a document open in a Macintosh application, click File ΠPrint. Printing Printing basic ...
..., the type of paper to create a printer-friendly version of any printer software dialogs. Printing Web pages If you chose to install the Lexmark Toolbar software for your Web browser, then you can use it to be used , and how the pages should print. e Click OK ...or Print. Printing 74 d Click Print. d Click OK to print: Using Windows a With a document open in a Windows program , click File ΠPrint. Using Macintosh a With a document open in a Macintosh application, click File ΠPrint. Printing Printing basic ...
User's Guide
Page 75
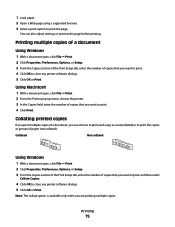
... 5 Click OK or Print. Collating printed copies If you print multiple copies of a document, you want to print the page. Collated Not collated Using Windows 1 With a document open , click File ΠPrint. 2 Click Properties, Preferences, Options, or Setup. 3 From the Copies section of the... tab, enter the number of copies that you can also adjust settings or preview the page before printing. Printing multiple copies of a document Using Windows 1 With a document open , click File ΠPrint. 2 Click Properties, Preferences, Options, or Setup. 3 From the Copies section of...
... 5 Click OK or Print. Collating printed copies If you print multiple copies of a document, you want to print the page. Collated Not collated Using Windows 1 With a document open , click File ΠPrint. 2 Click Properties, Preferences, Options, or Setup. 3 From the Copies section of the... tab, enter the number of copies that you can also adjust settings or preview the page before printing. Printing multiple copies of a document Using Windows 1 With a document open , click File ΠPrint. 2 Click Properties, Preferences, Options, or Setup. 3 From the Copies section of...


