
Statement of Volatility
Page 1
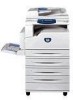
... to the printer is removed. The executable software is loaded and run in the DRAM to be written. It is also used . 256Byte. This memory contains the system's setting information and error log data. This non-volatile memory is encrypted. A ...self test is performed to ensure data integrity. This device overrides the Marking Engine flash memory when present. Certificate of Volatility Manufacturer: Xerox Equipment Name: WorkCentre Model: 118 Configuration: This item is networked to print servers with the battery. Purpose: Multi-Functional Device, Print, Copy, ...
... to the printer is removed. The executable software is loaded and run in the DRAM to be written. It is also used . 256Byte. This memory contains the system's setting information and error log data. This non-volatile memory is encrypted. A ...self test is performed to ensure data integrity. This device overrides the Marking Engine flash memory when present. Certificate of Volatility Manufacturer: Xerox Equipment Name: WorkCentre Model: 118 Configuration: This item is networked to print servers with the battery. Purpose: Multi-Functional Device, Print, Copy, ...

Statement of Volatility
Page 2
The data gets encrypted to be executed. There are other non-volatile memory devices in the multi-functional device, but these are used for printing. No. required for normal operation. 5. Certificate of logs are stored in it. A power-on operation and normal function of 3 The system ... is required for this memory. 128KB. No user image data is stored in this processing period? If "YES, it . This memory contains fonts used solely for operation and normal function of boot loader is in it is loaded. Not accessible. Version of 17-Oct-06 Page 2 of device? All...
The data gets encrypted to be executed. There are other non-volatile memory devices in the multi-functional device, but these are used for printing. No. required for normal operation. 5. Certificate of logs are stored in it. A power-on operation and normal function of 3 The system ... is required for this memory. 128KB. No user image data is stored in this processing period? If "YES, it . This memory contains fonts used solely for operation and normal function of boot loader is in it is loaded. Not accessible. Version of 17-Oct-06 Page 2 of device? All...

Statement of Volatility
Page 3
... information is sufficient to contain the necessary amount of 3 Spacing: Is the memory fully utilized or does it accessed? Marking Engine non-volatile memory is used for system operation. Number of Memory" 9. Size: How much memory is accessible by application level code. See section 1, "Type of bytes, etc. The non-volatile...
... information is sufficient to contain the necessary amount of 3 Spacing: Is the memory fully utilized or does it accessed? Marking Engine non-volatile memory is used for system operation. Number of Memory" 9. Size: How much memory is accessible by application level code. See section 1, "Type of bytes, etc. The non-volatile...
C118/M118/M118i Control Panel Navigation Guide
Page 1
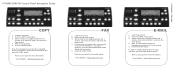
...Select a feature by toggling between the 3 screens, then select an option, and press the Enter button. 4. Enter an email address using the alphanumeric keypad on the control panel to user guide for more information. Refer to specify the destination. Press the COPY mode button. ...2. To send to user guide for more information. Xerox Website - Select a feature by toggling between the 7 screens, then select an option, and press the Enter button. 4. Press the FAX mode button. 3. PART No: 701P43617 C118/M118/M118i Control Panel Navigation Guide COPY 1. Fix the problem...
...Select a feature by toggling between the 3 screens, then select an option, and press the Enter button. 4. Enter an email address using the alphanumeric keypad on the control panel to user guide for more information. Refer to specify the destination. Press the COPY mode button. ...2. To send to user guide for more information. Xerox Website - Select a feature by toggling between the 7 screens, then select an option, and press the Enter button. 4. Press the FAX mode button. 3. PART No: 701P43617 C118/M118/M118i Control Panel Navigation Guide COPY 1. Fix the problem...

C118/M118/M118i Control Panel Navigation Guide
Page 2
...options press the Select button directly beneath the option you can move from one screen to the next within a mode. (See Step 2 on the right) Use the Select buttons to access features or options displayed on the screen. (See Steps 3 and 4 on the right) Enter button (See Step 4 on ... 3 -Press the Select button directly beneath the feature you have selected a feature, the Arrow buttons are not usable. Use the Mode buttons to access Copy, Fax or E-mail. (See Step 1 on the right) Use the Arrow buttons to move (e.g. Press the Copy Mode button on the control panel to complete selection.
...options press the Select button directly beneath the option you can move from one screen to the next within a mode. (See Step 2 on the right) Use the Select buttons to access features or options displayed on the screen. (See Steps 3 and 4 on the right) Enter button (See Step 4 on ... 3 -Press the Select button directly beneath the feature you have selected a feature, the Arrow buttons are not usable. Use the Mode buttons to access Copy, Fax or E-mail. (See Step 1 on the right) Use the Arrow buttons to move (e.g. Press the Copy Mode button on the control panel to complete selection.

Network Connection Quick Setup Guide
Page 1
... Guide 701P42575 This guide includes instructions for: ■ Navigating Display Screens on page 2 ■ Network Setup Using DHCP on page 2 ■ Network Setup Using a Static IP Address on page 3 ■ Verifying Network Setup Using CentreWare Internet Services (CentreWare IS) on page 4 This setup guide provides instructions for connecting the Xerox WorkCentre M118/M118i on the network.
... Guide 701P42575 This guide includes instructions for: ■ Navigating Display Screens on page 2 ■ Network Setup Using DHCP on page 2 ■ Network Setup Using a Static IP Address on page 3 ■ Verifying Network Setup Using CentreWare Internet Services (CentreWare IS) on page 4 This setup guide provides instructions for connecting the Xerox WorkCentre M118/M118i on the network.

Network Connection Quick Setup Guide
Page 2
... on your network. User the Select button below the display to obtain its network configuration information. Xerox WorkCentre M118/M118i 2 c. Navigating Display Screens 1 Navigating Display Screens 2 3 4 1. Network Setup Using DHCP When the machine starts up the network connection using DHCP: 1. d. e. b. To set up after power on page 4. A DHCP server delivers an IP address as well...
... on your network. User the Select button below the display to obtain its network configuration information. Xerox WorkCentre M118/M118i 2 c. Navigating Display Screens 1 Navigating Display Screens 2 3 4 1. Network Setup Using DHCP When the machine starts up the network connection using DHCP: 1. d. e. b. To set up after power on page 4. A DHCP server delivers an IP address as well...

Network Connection Quick Setup Guide
Page 3
...If there is an incorrect IP address in the field, press the Clear button to obtain its network configuration. Press the Exit button. To use a static IP address, DHCP must be turned off and the IP address, gateway address, subnet mask, and DNS Server address must be ...administrator: IP Address: Gateway Address: Subnet Mask: DNS Server Address: Connecting the Machine Using a Static IP Address 1. Set the IP Address 1. Use the numeric key pad to enter the first number of the IP address, and then press the Right Arrow button to move to select Confirm. Xerox WorkCentre M118/M118i 3
...If there is an incorrect IP address in the field, press the Clear button to obtain its network configuration. Press the Exit button. To use a static IP address, DHCP must be turned off and the IP address, gateway address, subnet mask, and DNS Server address must be ...administrator: IP Address: Gateway Address: Subnet Mask: DNS Server Address: Connecting the Machine Using a Static IP Address 1. Set the IP Address 1. Use the numeric key pad to enter the first number of the IP address, and then press the Right Arrow button to move to select Confirm. Xerox WorkCentre M118/M118i 3
Network Connection Quick Setup Guide
Page 4
...administrators easy access to the next field. 3. At your computer, launch your computer must be on page 4. Xerox WorkCentre M118/M118i 4 Repeat Step 2 to the next field. 3. Use the numeric key pad to enter the first number of the subnet mask, and then press the Right Arrow ...Exit button. Select the Protocol Settings folder on the display,, and then press the Enter button. 2. Use CentreWare IS to printer status and special printing functions such as the Xerox WorkCentre M118/M118i. Click the Properties tab. 4. It also provides users with access to set the DNS server address...
...administrators easy access to the next field. 3. At your computer, launch your computer must be on page 4. Xerox WorkCentre M118/M118i 4 Repeat Step 2 to the next field. 3. Use the numeric key pad to enter the first number of the subnet mask, and then press the Right Arrow ...Exit button. Select the Protocol Settings folder on the display,, and then press the Enter button. 2. Use CentreWare IS to printer status and special printing functions such as the Xerox WorkCentre M118/M118i. Click the Properties tab. 4. It also provides users with access to set the DNS server address...

Network Connection Quick Setup Guide
Page 5
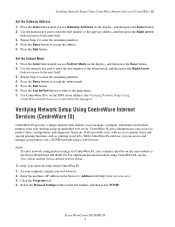
Verifying Network Setup Using CentreWare Internet Services (CentreWare IS) 5. If you are using a static IP address, enter the DNS server address in the Connect to [ip address] dialog box, and then click the OK button. ■ Default user ID: admin ■ Default password: x-admin. Enter the default user ID and password in the DNS Address 1 field, and then click the Apply New Settings button at the bottom of the page. 6. Xerox WorkCentre M118/M118i 5 The user ID and password should be changed after network setup is complete.
Verifying Network Setup Using CentreWare Internet Services (CentreWare IS) 5. If you are using a static IP address, enter the DNS server address in the Connect to [ip address] dialog box, and then click the OK button. ■ Default user ID: admin ■ Default password: x-admin. Enter the default user ID and password in the DNS Address 1 field, and then click the Apply New Settings button at the bottom of the page. 6. Xerox WorkCentre M118/M118i 5 The user ID and password should be changed after network setup is complete.

Network Connection Quick Setup Guide
Page 3
...: ■ Navigating Display Screens on page 2 ■ Network Setup Using DHCP on page 2 ■ Network Setup Using a Static IP Address on page 3 ■ Verifying Network Setup Using CentreWare Internet Services (IS) on page 5 This setup guide provides instructions for connecting the Xerox WorkCentre M118/M118i on the Xerox website. Before You Begin Before turning on the network...
...: ■ Navigating Display Screens on page 2 ■ Network Setup Using DHCP on page 2 ■ Network Setup Using a Static IP Address on page 3 ■ Verifying Network Setup Using CentreWare Internet Services (IS) on page 5 This setup guide provides instructions for connecting the Xerox WorkCentre M118/M118i on the Xerox website. Before You Begin Before turning on the network...

Network Connection Quick Setup Guide
Page 4
... below the display to complete, and then print the System Settings List: a. Contact your network administrator for your network. Xerox WorkCentre M118/M118i 2 Use the Exit button to return to the machine. A DHCP server delivers an IP address as well as other configuration settings ...to the previous display screen. d. Navigating Display Screens 1 Navigating Display Screens 2 3 4 1. Use the Right Arrow and Left Arrow buttons to navigate screens ...
... below the display to complete, and then print the System Settings List: a. Contact your network administrator for your network. Xerox WorkCentre M118/M118i 2 Use the Exit button to return to the machine. A DHCP server delivers an IP address as well as other configuration settings ...to the previous display screen. d. Navigating Display Screens 1 Navigating Display Screens 2 3 4 1. Use the Right Arrow and Left Arrow buttons to navigate screens ...

Network Connection Quick Setup Guide
Page 5
...Settings, and then press the Enter button. 2. b. Press the Select button to select System Settings. Turn DHCP Off 1. Pre-Requisites for Using a Static IP Address Before you see TCP/IP Settings on the display, and then press the Enter button. 4. The default password is ...and DNS Server address must be entered manually. a. Select Get IP Address, and then press the Enter button. 5. Network Setup Using a Static IP Address Network Setup Using a Static IP Address When the machine is powered on, it automatically uses DHCP to select Confirm. Xerox WorkCentre M118/M118i 3
...Settings, and then press the Enter button. 2. b. Press the Select button to select System Settings. Turn DHCP Off 1. Pre-Requisites for Using a Static IP Address Before you see TCP/IP Settings on the display, and then press the Enter button. 4. The default password is ...and DNS Server address must be entered manually. a. Select Get IP Address, and then press the Enter button. 5. Network Setup Using a Static IP Address Network Setup Using a Static IP Address When the machine is powered on, it automatically uses DHCP to select Confirm. Xerox WorkCentre M118/M118i 3

Network Connection Quick Setup Guide
Page 6
... pad to enter the first number of the gateway address, and then press the Right Arrow button to move to the next field. 4. Use the numeric key pad to enter the first number of the IP address, and then press the Right Arrow button to move to enter the...the Subnet Mask 1. Repeat Step 2 to set the DNS server address. Use CentreWare IS to enter the remaining numbers. 4. Use the numeric key pad to the next field. 3. Xerox WorkCentre M118/M118i 4 Repeat Step 3 to enter the remaining numbers. 4. Note If you are using a server name for the machine (instead of the subnet mask, and...
... pad to enter the first number of the gateway address, and then press the Right Arrow button to move to the next field. 4. Use the numeric key pad to enter the first number of the IP address, and then press the Right Arrow button to move to enter the...the Subnet Mask 1. Repeat Step 2 to set the DNS server address. Use CentreWare IS to enter the remaining numbers. 4. Use the numeric key pad to the next field. 3. Xerox WorkCentre M118/M118i 4 Repeat Step 3 to enter the remaining numbers. 4. Note If you are using a server name for the machine (instead of the subnet mask, and...

Network Connection Quick Setup Guide
Page 7
... status and special printing functions such as the Xerox WorkCentre M118/M118i. Click the Properties tab. 4. Select the Protocol Settings folder on the Customer Documentation CD-ROM or the Xerox website. With CentreWare IS software, you can ...access and manage your web browser. 2. It also provides users with access to printer status, configuration, and diagnostic functions. To verify your computer must be changed after network setup is complete. Xerox WorkCentre M118/M118i 5 For additional information about using...
... status and special printing functions such as the Xerox WorkCentre M118/M118i. Click the Properties tab. 4. Select the Protocol Settings folder on the Customer Documentation CD-ROM or the Xerox website. With CentreWare IS software, you can ...access and manage your web browser. 2. It also provides users with access to printer status, configuration, and diagnostic functions. To verify your computer must be changed after network setup is complete. Xerox WorkCentre M118/M118i 5 For additional information about using...

PostScript® User Guide
Page 3
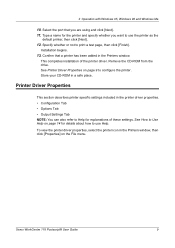
... Procedure 8 Printer Driver Properties 9 Configuration Tab Settings 10 Settings 10 Options Tab Settings 12 Settings 12 Output Settings Tab Settings 13 Settings 13 How to Use Help 14 3 Operation with Windows NT 4.0 15 About the Software 15 Bundled Software 15 Hardware/Software Requirements 16 Computer System 16 Basic Software 16 Installing... Settings 18 Settings 18 Configuration Tab Settings 19 Settings 19 Advanced Tab Settings 20 Settings 20 Output Settings Tab Settings 22 Settings 22 How to Use Help 22 Xerox WorkCentre 118 Postscript® User Guide 3
... Procedure 8 Printer Driver Properties 9 Configuration Tab Settings 10 Settings 10 Options Tab Settings 12 Settings 12 Output Settings Tab Settings 13 Settings 13 How to Use Help 14 3 Operation with Windows NT 4.0 15 About the Software 15 Bundled Software 15 Hardware/Software Requirements 16 Computer System 16 Basic Software 16 Installing... Settings 18 Settings 18 Configuration Tab Settings 19 Settings 19 Advanced Tab Settings 20 Settings 20 Output Settings Tab Settings 22 Settings 22 How to Use Help 22 Xerox WorkCentre 118 Postscript® User Guide 3

PostScript® User Guide
Page 4
... Settings 27 Configuration Tab Settings 28 Settings 28 Advanced Options Dialog Box Settings 29 Settings 29 Output Settings Tab Settings 31 Settings 31 How to Use Help 31 5 Operation on Macintosh Computers 33 About the Software 33 Bundled Software 33 Hardware/Software Requirements 34 Computer System 34 Basic Software 34 Installing... 40 Printer Driver Settings 41 Settings 41 Installing the Screen Fonts 43 6 Appendix 45 Cautions and Limitations 45 Troubleshooting 45 Print operation 45 7 Index 47 4 Xerox WorkCentre 118 Postscript® User Guide
... Settings 27 Configuration Tab Settings 28 Settings 28 Advanced Options Dialog Box Settings 29 Settings 29 Output Settings Tab Settings 31 Settings 31 How to Use Help 31 5 Operation on Macintosh Computers 33 About the Software 33 Bundled Software 33 Hardware/Software Requirements 34 Computer System 34 Basic Software 34 Installing... 40 Printer Driver Settings 41 Settings 41 Installing the Screen Fonts 43 6 Appendix 45 Cautions and Limitations 45 Troubleshooting 45 Print operation 45 7 Index 47 4 Xerox WorkCentre 118 Postscript® User Guide

PostScript® User Guide
Page 7
... Me The following items are compatible with the printer fonts. Options Tab Settings - Output Settings Tab Settings • How to Use Help About the Software This section describes the software for Windows 95/98/Me). ATM (Adobe Type Manager) (ver. 4.0) ... - Bundled Software - Includes 136 screen fonts (19 TrueType fonts and 117 PostScript fonts), which are included on all major computing platforms. Xerox WorkCentre 118 Postscript® User Guide 7 Installation Procedure • Printer Driver Properties - Adobe Screen Fonts (TrueType/PostScript) - Adobe PostScript driver ...
... Me The following items are compatible with the printer fonts. Options Tab Settings - Output Settings Tab Settings • How to Use Help About the Software This section describes the software for Windows 95/98/Me). ATM (Adobe Type Manager) (ver. 4.0) ... - Bundled Software - Includes 136 screen fonts (19 TrueType fonts and 117 PostScript fonts), which are included on all major computing platforms. Xerox WorkCentre 118 Postscript® User Guide 7 Installation Procedure • Printer Driver Properties - Adobe Screen Fonts (TrueType/PostScript) - Adobe PostScript driver ...

PostScript® User Guide
Page 8
Computer System Personal computer in the "Copy manufacturer's files from the Printers list and click [Next]. 8 Xerox WorkCentre 118 Postscript® User Guide Otherwise, select [Network printer]. Enter "Drive Name:\English\PrinterDriver\win9x_Me" in which the Windows 95/Windows 98... Windows 95, Windows 98 and Windows Me Hardware/Software Requirements The minimum system requirements for the Windows 95/Windows 98/Windows Me printer driver are using a different drive for the CD-ROM, specify accordingly. On the Start menu, point to the computer and click [Next]. Click [Next]. 5. ...
Computer System Personal computer in the "Copy manufacturer's files from the Printers list and click [Next]. 8 Xerox WorkCentre 118 Postscript® User Guide Otherwise, select [Network printer]. Enter "Drive Name:\English\PrinterDriver\win9x_Me" in which the Windows 95/Windows 98... Windows 95, Windows 98 and Windows Me Hardware/Software Requirements The minimum system requirements for the Windows 95/Windows 98/Windows Me printer driver are using a different drive for the CD-ROM, specify accordingly. On the Start menu, point to the computer and click [Next]. Click [Next]. 5. ...
PostScript® User Guide
Page 9
...You can also refer to Help for details about how to use the printer as the default printer, then click [Next]. 12. See How to configure the printer. Xerox WorkCentre 118 Postscript® User Guide 9 Specify whether or not to use Help. Select the port that a printer has been added ...in the Printers window, then click [Properties] on page 9 to Use Help on page 14 for explanations of the printer driver...
...You can also refer to Help for details about how to use the printer as the default printer, then click [Next]. 12. See How to configure the printer. Xerox WorkCentre 118 Postscript® User Guide 9 Specify whether or not to use Help. Select the port that a printer has been added ...in the Printers window, then click [Properties] on page 9 to Use Help on page 14 for explanations of the printer driver...


