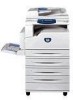
Statement of Volatility
Page 1
... information, speed dial information, Fax program memory, user management information, and transmission logs are stored in it . Boot ROM: 1MB. Certificate of Volatility Manufacturer: Xerox Equipment Name: WorkCentre Model: 118 Configuration: This item is networked to print servers with the battery. This memory is removed. Print Controller DRAM: 192MB (64MB on -board...
Network Connection Quick Setup Guide
Page 1
...setting up the network connection using Novell IPX, refer to manually assign an IP address provided by Xerox. Before You Begin Before turning on the machine: ■ Confirm that an existing operational network ...Ethernet port on an Ethernet TCP/IP network. It includes procedures for setting up a network connection. Xerox WorkCentre® M118/M118i Network Connection Quick Setup Guide 701P42575 This guide includes instructions for: ■ Navigating Display Screens on ... on page 4 This setup guide provides instructions for connecting the Xerox WorkCentre M118/M118i on the network.
Network Connection Quick Setup Guide
Page 2
... using DHCP: 1. Use the Right Arrow and Left Arrow buttons to navigate screens or to move from one entry field to the previous display screen. Xerox WorkCentre M118/M118i 2
Network Connection Quick Setup Guide
Page 3
... numeric key pad to enter the first number of the IP address, and then press the Right Arrow button to move to enter the Password. Xerox WorkCentre M118/M118i 3 Repeat Step 3 to select System Settings. To use a static IP address, DHCP must be turned off and the IP address, gateway address, subnet mask...
Network Connection Quick Setup Guide
Page 4
... the remaining numbers. 4. At your computer, launch your computer must be on the display,, and then press the Enter button. 2. Xerox WorkCentre M118/M118i 4 Press the Exit button. 6. Click the Properties tab. 4. Use the numeric key pad to enter the first number of the ...Settings folder on page 4. Set the Subnet Mask 1. Press the Enter button to printer status and special printing functions such as the Xerox WorkCentre M118/M118i. See Verifying Network Setup Using CentreWare Internet Services (CentreWare IS) on the left sidebar, and then select TCP/IP. Enter the...
Network Connection Quick Setup Guide
Page 5
If you are using a static IP address, enter the DNS server address in the Connect to [ip address] dialog box, and then click the OK button. ■ Default user ID: admin ■ Default password: x-admin. Enter the default user ID and password in the DNS Address 1 field, and then click the Apply New Settings button at the bottom of the page. 6. The user ID and password should be changed after network setup is complete. Xerox WorkCentre M118/M118i 5 Verifying Network Setup Using CentreWare Internet Services (CentreWare IS) 5.
Network Connection Quick Setup Guide
Page 3
... supplied by the network administrator. Copyright © 2005, 2004 Xerox Corporation. Note The System Administrator Guide provides detailed instructions for setting up a network connection. Xerox WorkCentre® M118/M118i Network Connection Quick Setup Guide This guide includes instructions for: ... Verifying Network Setup Using CentreWare Internet Services (IS) on page 5 This setup guide provides instructions for connecting the Xerox WorkCentre M118/M118i on the network. It includes procedures for setting up the network connection using Novell IPX. The System Administrator Guide...
Network Connection Quick Setup Guide
Page 4
... not properly allocated an address or DHCP is an appropriate IP address for assistance. 4. To set up , it automatically uses DHCP to scroll through menus. 2. d. Xerox WorkCentre M118/M118i 2 Use the Select buttons to select items on the display and to obtain its network configuration information.
Network Connection Quick Setup Guide
Page 5
... be entered manually. Turn on the display, and then press the Enter button. 4. b. Select Manual, and then press the Enter button. 6. Press the Exit button. Xerox WorkCentre M118/M118i 3
Network Connection Quick Setup Guide
Page 6
... Arrow button to move to the main menu. Repeat Step 2 to set the DNS server address. Use CentreWare IS to enter the remaining numbers. 4. Xerox WorkCentre M118/M118i 4 Use the numeric key pad to enter the first number of an IP address), you see Gateway Address on the display, and then press the...
Network Connection Quick Setup Guide
Page 7
To verify your web browser. 2. If you to printer status and special printing functions such as the Xerox WorkCentre M118/M118i. Verifying Network Setup Using CentreWare Internet Services (IS) Verifying Network Setup Using CentreWare Internet Services (IS) CentreWare IS provides a simple ... 5. It also provides users with access to manage, configure, and monitor networked printers from your desktop using an embedded web server. Xerox WorkCentre M118/M118i 5 With CentreWare IS software, you can access and manage your computer must be changed after network setup is complete.
PostScript® User Guide
Page 3
... 18 Configuration Tab Settings 19 Settings 19 Advanced Tab Settings 20 Settings 20 Output Settings Tab Settings 22 Settings 22 How to Use Help 22 Xerox WorkCentre 118 Postscript® User Guide 3
PostScript® User Guide
Page 4
... 40 Printer Driver Settings 41 Settings 41 Installing the Screen Fonts 43 6 Appendix 45 Cautions and Limitations 45 Troubleshooting 45 Print operation 45 7 Index 47 4 Xerox WorkCentre 118 Postscript® User Guide
PostScript® User Guide
Page 5
Xerox WorkCentre 118 Postscript® User Guide 5 One PostScript Driver Library CD-ROM Includes the PostScript drivers and screen fonts. License Agreement PostScript Logo Seal This seal accompanies printers compatible with the printer. PostScript Program ROM This ROM makes PostScript printing possible with PostScript. If any of the kit are missing, contact the Xerox Welcome Center. 1 Checking the PostScript Kit Contents The devices and components of the following are described below.
PostScript® User Guide
Page 6
1 Checking the PostScript Kit Contents 6 Xerox WorkCentre 118 Postscript® User Guide
PostScript® User Guide
Page 7
... use the Adobe PostScript (4.5.3) printer driver. Includes 136 screen fonts (19 TrueType fonts and 117 PostScript fonts), which are included on all major computing platforms. Xerox WorkCentre 118 Postscript® User Guide 7 AdobePS™ Printer Driver (ver. 4.5.3) and PPD files - ATM (Adobe Type Manager) (ver. 4.0) - Hardware/Software Requirements • Installing the AdobePS...
PostScript® User Guide
Page 8
... 98, as the CD-ROM drive. Insert the PostScript Driver Library CD-ROM in the "Copy manufacturer's files from the Printers list and click [Next]. 8 Xerox WorkCentre 118 Postscript® User Guide NOTE: When you are described below . In the Printers window, double-click [Add Printer]. 4. In this guide, we have used...
PostScript® User Guide
Page 9
... icon in the printer driver properties. • Configuration Tab • Options Tab • Output Settings Tab NOTE: You can also refer to configure the printer. Xerox WorkCentre 118 Postscript® User Guide 9 Select the port that a printer has been added in a safe place. This completes installation of these settings. Specify whether or...
PostScript® User Guide
Page 10
... Enhancement function. When feeding the short edge of the Configuration tab. Specifies whether or not to reduce the amount of the paper, select [Portrait]. 10 Xerox WorkCentre 118 Postscript® User Guide Selecting [On] smooths out boundaries when printing. When [On] is impossible in the Change box below. NOTE: The settings that...
PostScript® User Guide
Page 11
... and automatically adjusts the image size as necessary. Use Larger Size (Adjust to correct the orientation of the output tray to change authentication related settings. Xerox WorkCentre 118 Postscript® User Guide 11 Specifies whether or not to Fit) - Available Printer Memory - Specifies what action to Fit) - Display Message - Selects paper larger...