
User Manual
Page 1
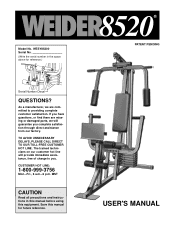
... DIRECT TO OUR TOLL-FREE CUSTOMER HOT LINE. The trained technicians on our customer hot line will guarantee you . MST CAUTION Read all precautions and instructions in the space above for future reference. ® PATENT PENDING USER'S MANUAL WESY85200 Serial No. (Write the serial number in this manual before using this...
... DIRECT TO OUR TOLL-FREE CUSTOMER HOT LINE. The trained technicians on our customer hot line will guarantee you . MST CAUTION Read all precautions and instructions in the space above for future reference. ® PATENT PENDING USER'S MANUAL WESY85200 Serial No. (Write the serial number in this manual before using this...
User Manual
Page 3
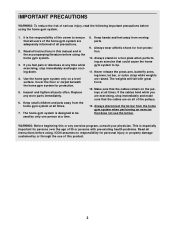
Read all parts often. Cover the floor or carpet beneath the home gym system for foot protection. 10. Inspect and tighten all instructions in this manual and in the accompanying literature before using the home gym system. 3. Keep hands and feet away from the home ... system are on the pulleys at a time. 8. It is especially important for personal injury or property damage sustained by only one person at all instructions before using . If the cables bind while you feel pain or dizziness at all precautions. 2. Never release the press arm, butterfly arms, leg ...
Read all parts often. Cover the floor or carpet beneath the home gym system for foot protection. 10. Inspect and tighten all instructions in this manual and in the accompanying literature before using the home gym system. 3. Keep hands and feet away from the home ... system are on the pulleys at a time. 8. It is especially important for personal injury or property damage sustained by only one person at all instructions before using . If the cables bind while you feel pain or dizziness at all precautions. 2. Never release the press arm, butterfly arms, leg ...
User Manual
Page 5
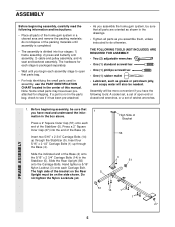
... as grease or petroleum jelly, and soapy water will be on the Rear Upright must be more convenient if you have the following information and instructions: • Place all parts of the home gym system in the Stabilizer (5). Insert four 5/16" x 2 1/2" Carriage Bolts (1) up through the Base (4). Note: ... completed. • The assembly is not in the parts bag, check to see if it has been pre-attached. • As you assemble them, unless instructed to open -end or closed-end wrenches, or a set of ratchet wrenches. Slide the indicated end of the Base (4) onto the 5/16" x 2 3/4" ...
... as grease or petroleum jelly, and soapy water will be on the Rear Upright must be more convenient if you have the following information and instructions: • Place all parts of the home gym system in the Stabilizer (5). Insert four 5/16" x 2 1/2" Carriage Bolts (1) up through the Base (4). Note: ... completed. • The assembly is not in the parts bag, check to see if it has been pre-attached. • As you assemble them, unless instructed to open -end or closed-end wrenches, or a set of ratchet wrenches. Slide the indicated end of the Base (4) onto the 5/16" x 2 3/4" ...
User Manual
Page 16
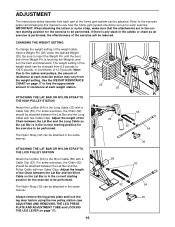
... on page 17). 16 53 23 52 54 39 58 53 52 54 39 For some exercises, the Chain (52) should be reduced. ADJUSTMENT The instructions below describe how each part of the home gym system can be attached between the Lat Bar and the Pulley Cable with two Cable Clips...
... on page 17). 16 53 23 52 54 39 58 53 52 54 39 For some exercises, the Chain (52) should be reduced. ADJUSTMENT The instructions below describe how each part of the home gym system can be attached between the Lat Bar and the Pulley Cable with two Cable Clips...


