
Statement of Volatility
Page 1
... contains any user image or document data. When the fax kit is installed, this memory is not used for temporary storage of Volatility Manufacturer: Xerox Equipment Name: WorkCentre Model: 118 Configuration: This item is lost when the power to be executed. A power-on -board + 128MB optional). This memory contains the code necessary...
... contains any user image or document data. When the fax kit is installed, this memory is not used for temporary storage of Volatility Manufacturer: Xerox Equipment Name: WorkCentre Model: 118 Configuration: This item is lost when the power to be executed. A power-on -board + 128MB optional). This memory contains the code necessary...

Network Connection Quick Setup Guide
Page 1
... provides detailed instructions for setting up the network connection using Novell IPX, refer to automatically assign an IP address. Xerox WorkCentre® M118/M118i Network Connection Quick Setup Guide 701P42575 This guide includes instructions for: ■ Navigating Display Screens on page 2...9632; Verifying Network Setup Using CentreWare Internet Services (CentreWare IS) on page 4 This setup guide provides instructions for connecting the Xerox WorkCentre M118/M118i on the network. Note The RJ45 Ethernet cable is the factory default setting. ■ Static IP address: Use this ...
... provides detailed instructions for setting up the network connection using Novell IPX, refer to automatically assign an IP address. Xerox WorkCentre® M118/M118i Network Connection Quick Setup Guide 701P42575 This guide includes instructions for: ■ Navigating Display Screens on page 2...9632; Verifying Network Setup Using CentreWare Internet Services (CentreWare IS) on page 4 This setup guide provides instructions for connecting the Xerox WorkCentre M118/M118i on the network. Note The RJ45 Ethernet cable is the factory default setting. ■ Static IP address: Use this ...

Network Connection Quick Setup Guide
Page 2
... to scroll through menus. 2. On the control panel, press the Machine Status button. b. e. Note If the IP address starts with the DHCP server for assistance. 4. Xerox WorkCentre M118/M118i 2 Navigating Display Screens 1 Navigating Display Screens 2 3 4 1. Use the Select buttons to obtain its network configuration information. To set up , it automatically uses DHCP to...
... to scroll through menus. 2. On the control panel, press the Machine Status button. b. e. Note If the IP address starts with the DHCP server for assistance. 4. Xerox WorkCentre M118/M118i 2 Navigating Display Screens 1 Navigating Display Screens 2 3 4 1. Use the Select buttons to obtain its network configuration information. To set up , it automatically uses DHCP to...

Network Connection Quick Setup Guide
Page 3
... there is an incorrect IP address in the field, press the Clear button to accept the address. 6. Press the Enter button to delete the address. 3. Xerox WorkCentre M118/M118i 3 Turn DHCP Off 1. Select Get IP Address, and then press the Enter button. 5. Press the Exit button. Network Setup Using a Static IP Address Network...
... there is an incorrect IP address in the field, press the Clear button to accept the address. 6. Press the Enter button to delete the address. 3. Xerox WorkCentre M118/M118i 3 Turn DHCP Off 1. Select Get IP Address, and then press the Enter button. 5. Press the Exit button. Network Setup Using a Static IP Address Network...
Network Connection Quick Setup Guide
Page 4
...to the next field. 3. Press the Log In/Out button to return to printer status and special printing functions such as the Xerox WorkCentre M118/M118i. Note To enter network configuration settings via CentreWare IS, your network setup using a web browser. Enter the machine's IP address... in the browser's Address field (http://xxx.xxx.xxx.xxx). 3. Xerox WorkCentre M118/M118i 4 Repeat Step 2 to set the DNS server address. See Verifying Network Setup Using CentreWare Internet Services (CentreWare IS) on the left...
...to the next field. 3. Press the Log In/Out button to return to printer status and special printing functions such as the Xerox WorkCentre M118/M118i. Note To enter network configuration settings via CentreWare IS, your network setup using a web browser. Enter the machine's IP address... in the browser's Address field (http://xxx.xxx.xxx.xxx). 3. Xerox WorkCentre M118/M118i 4 Repeat Step 2 to set the DNS server address. See Verifying Network Setup Using CentreWare Internet Services (CentreWare IS) on the left...

Network Connection Quick Setup Guide
Page 5
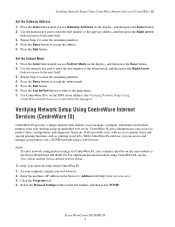
Enter the default user ID and password in the DNS Address 1 field, and then click the Apply New Settings button at the bottom of the page. 6. The user ID and password should be changed after network setup is complete. Xerox WorkCentre M118/M118i 5 Verifying Network Setup Using CentreWare Internet Services (CentreWare IS) 5. If you are using a static IP address, enter the DNS server address in the Connect to [ip address] dialog box, and then click the OK button. ■ Default user ID: admin ■ Default password: x-admin.
Enter the default user ID and password in the DNS Address 1 field, and then click the Apply New Settings button at the bottom of the page. 6. The user ID and password should be changed after network setup is complete. Xerox WorkCentre M118/M118i 5 Verifying Network Setup Using CentreWare Internet Services (CentreWare IS) 5. If you are using a static IP address, enter the DNS server address in the Connect to [ip address] dialog box, and then click the OK button. ■ Default user ID: admin ■ Default password: x-admin.

Network Connection Quick Setup Guide
Page 3
...the machine and is located on the Customer Documentation CD-ROM and on the network. Copyright © 2005, 2004 Xerox Corporation. Xerox WorkCentre® M118/M118i Network Connection Quick Setup Guide This guide includes instructions for: ■ Navigating Display Screens on page 2 ■...1 It includes procedures for setting up a network connection. Note The System Administrator Guide provides detailed instructions for connecting the Xerox WorkCentre M118/M118i on an Ethernet TCP/IP network. This is not supplied by the network administrator. Note The RJ45 Ethernet cable ...
...the machine and is located on the Customer Documentation CD-ROM and on the network. Copyright © 2005, 2004 Xerox Corporation. Xerox WorkCentre® M118/M118i Network Connection Quick Setup Guide This guide includes instructions for: ■ Navigating Display Screens on page 2 ■...1 It includes procedures for setting up a network connection. Note The System Administrator Guide provides detailed instructions for connecting the Xerox WorkCentre M118/M118i on an Ethernet TCP/IP network. This is not supplied by the network administrator. Note The RJ45 Ethernet cable ...

Network Connection Quick Setup Guide
Page 4
... setup to obtain its network configuration information. A DHCP server delivers an IP address as well as other configuration settings to print the System Settings List. 3. Xerox WorkCentre M118/M118i 2 Wait two minutes for assistance. 4. In the Communications Settings section of the System Settings List, confirm that an IP address has been allocated and...
... setup to obtain its network configuration information. A DHCP server delivers an IP address as well as other configuration settings to print the System Settings List. 3. Xerox WorkCentre M118/M118i 2 Wait two minutes for assistance. 4. In the Communications Settings section of the System Settings List, confirm that an IP address has been allocated and...

Network Connection Quick Setup Guide
Page 5
... to select Confirm. b. Select Get IP Address, and then press the Enter button. 5. Select Manual, and then press the Enter button. 6. Press the Exit button. Xerox WorkCentre M118/M118i 3 To use a static IP address, DHCP must be turned off and the IP address, gateway address, subnet mask, and DNS Server address must be...
... to select Confirm. b. Select Get IP Address, and then press the Enter button. 5. Select Manual, and then press the Enter button. 6. Press the Exit button. Xerox WorkCentre M118/M118i 3 To use a static IP address, DHCP must be turned off and the IP address, gateway address, subnet mask, and DNS Server address must be...

Network Connection Quick Setup Guide
Page 6
... button to move to the next field. 3. Repeat Step 2 to delete the address. 3. Press the Select button until you must enter the DNS server information. Xerox WorkCentre M118/M118i 4 If there is an incorrect IP address in the field, press the Clear button to enter the remaining numbers. 4. Note If you are using...
... button to move to the next field. 3. Repeat Step 2 to delete the address. 3. Press the Select button until you must enter the DNS server information. Xerox WorkCentre M118/M118i 4 If there is an incorrect IP address in the field, press the Clear button to enter the remaining numbers. 4. Note If you are using...

Network Connection Quick Setup Guide
Page 7
... after network setup is complete. Click the Properties tab. 4. Select the Protocol Settings folder on the same subnet as printing saved jobs. Xerox WorkCentre M118/M118i 5 With CentreWare IS software, you can access and manage your web browser. 2. For additional information about using a server name for...network using a web browser. Enter the machine's IP address in the Connect to printer status and special printing functions such as the Xerox WorkCentre M118/M118i. The user ID and password should be on the left sidebar, and then select TCP/IP. 5. Enter the default user ...
... after network setup is complete. Click the Properties tab. 4. Select the Protocol Settings folder on the same subnet as printing saved jobs. Xerox WorkCentre M118/M118i 5 With CentreWare IS software, you can access and manage your web browser. 2. For additional information about using a server name for...network using a web browser. Enter the machine's IP address in the Connect to printer status and special printing functions such as the Xerox WorkCentre M118/M118i. The user ID and password should be on the left sidebar, and then select TCP/IP. 5. Enter the default user ...

PostScript® User Guide
Page 3
... 18 Configuration Tab Settings 19 Settings 19 Advanced Tab Settings 20 Settings 20 Output Settings Tab Settings 22 Settings 22 How to Use Help 22 Xerox WorkCentre 118 Postscript® User Guide 3
... 18 Configuration Tab Settings 19 Settings 19 Advanced Tab Settings 20 Settings 20 Output Settings Tab Settings 22 Settings 22 How to Use Help 22 Xerox WorkCentre 118 Postscript® User Guide 3

PostScript® User Guide
Page 4
... 40 Printer Driver Settings 41 Settings 41 Installing the Screen Fonts 43 6 Appendix 45 Cautions and Limitations 45 Troubleshooting 45 Print operation 45 7 Index 47 4 Xerox WorkCentre 118 Postscript® User Guide
... 40 Printer Driver Settings 41 Settings 41 Installing the Screen Fonts 43 6 Appendix 45 Cautions and Limitations 45 Troubleshooting 45 Print operation 45 7 Index 47 4 Xerox WorkCentre 118 Postscript® User Guide

PostScript® User Guide
Page 5
License Agreement PostScript Logo Seal This seal accompanies printers compatible with the printer. Xerox WorkCentre 118 Postscript® User Guide 5 1 Checking the PostScript Kit Contents The devices and components of the following are described below. One PostScript Driver Library CD-ROM Includes the PostScript drivers and screen fonts. If any of the kit are missing, contact the Xerox Welcome Center. PostScript Program ROM This ROM makes PostScript printing possible with PostScript.
License Agreement PostScript Logo Seal This seal accompanies printers compatible with the printer. Xerox WorkCentre 118 Postscript® User Guide 5 1 Checking the PostScript Kit Contents The devices and components of the following are described below. One PostScript Driver Library CD-ROM Includes the PostScript drivers and screen fonts. If any of the kit are missing, contact the Xerox Welcome Center. PostScript Program ROM This ROM makes PostScript printing possible with PostScript.

PostScript® User Guide
Page 6
1 Checking the PostScript Kit Contents 6 Xerox WorkCentre 118 Postscript® User Guide
1 Checking the PostScript Kit Contents 6 Xerox WorkCentre 118 Postscript® User Guide

PostScript® User Guide
Page 7
... Reader - Adobe Screen Fonts (TrueType/PostScript) - Includes 136 screen fonts (19 TrueType fonts and 117 PostScript fonts), which are included on all major computing platforms. Xerox WorkCentre 118 Postscript® User Guide 7 Bundled Software - Installation Procedure • Printer Driver Properties - Options Tab Settings - Output Settings Tab Settings • How to install typefaces...
... Reader - Adobe Screen Fonts (TrueType/PostScript) - Includes 136 screen fonts (19 TrueType fonts and 117 PostScript fonts), which are included on all major computing platforms. Xerox WorkCentre 118 Postscript® User Guide 7 Bundled Software - Installation Procedure • Printer Driver Properties - Options Tab Settings - Output Settings Tab Settings • How to install typefaces...

PostScript® User Guide
Page 8
.../Windows 98/Windows Me OS can also click [Back] to ignore the settings in the "Copy manufacturer's files from the Printers list and click [Next]. 8 Xerox WorkCentre 118 Postscript® User Guide In this guide, we have used "E:" as an example. 2 Operation with Windows 95, Windows 98 and Windows Me Hardware/Software...
.../Windows 98/Windows Me OS can also click [Back] to ignore the settings in the "Copy manufacturer's files from the Printers list and click [Next]. 8 Xerox WorkCentre 118 Postscript® User Guide In this guide, we have used "E:" as an example. 2 Operation with Windows 95, Windows 98 and Windows Me Hardware/Software...
PostScript® User Guide
Page 9
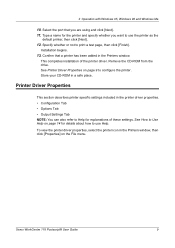
... File menu. Installation begins. 13. Remove the CD-ROM from the drive. Printer Driver Properties This section describes printer specific settings included in a safe place. Xerox WorkCentre 118 Postscript® User Guide 9 See Printer Driver Properties on page 14 for the printer and specify whether you are using and click [Next]. 11...
... File menu. Installation begins. 13. Remove the CD-ROM from the drive. Printer Driver Properties This section describes printer specific settings included in a safe place. Xerox WorkCentre 118 Postscript® User Guide 9 See Printer Driver Properties on page 14 for the printer and specify whether you are using and click [Next]. 11...

PostScript® User Guide
Page 10
... bypass tray. 2 Operation with Windows 95, Windows 98 and Windows Me Configuration Tab Settings This section describes the settings of the paper, select [Portrait]. 10 Xerox WorkCentre 118 Postscript® User Guide This is best for printing documents when high print quality is selected, the overall printed color becomes lighter. Bypass Feed...
... bypass tray. 2 Operation with Windows 95, Windows 98 and Windows Me Configuration Tab Settings This section describes the settings of the paper, select [Portrait]. 10 Xerox WorkCentre 118 Postscript® User Guide This is best for printing documents when high print quality is selected, the overall printed color becomes lighter. Bypass Feed...

PostScript® User Guide
Page 11
... Mode - When [Auto] is selected, the tray set when they are to print on Separators - Custom Paper Auto Orientation - Use Nearest Size (Adjust to Fit) - Xerox WorkCentre 118 Postscript® User Guide 11 Select the halftone settings for the transparency divider. Specifies whether or not to be confirmed on the machine is...
... Mode - When [Auto] is selected, the tray set when they are to print on Separators - Custom Paper Auto Orientation - Use Nearest Size (Adjust to Fit) - Xerox WorkCentre 118 Postscript® User Guide 11 Select the halftone settings for the transparency divider. Specifies whether or not to be confirmed on the machine is...


