
Network Connection Quick Setup Guide
Page 3
... the Enter button. 2. Press the Select button until you begin, obtain the following information from your network administrator: IP Address: Gateway Address: Subnet Mask: DNS Server Address: Connecting the Machine Using a Static IP Address 1. Set the IP Address 1. Network Setup Using a Static IP Address Network Setup Using a Static...pad to enter the first number of the IP address, and then press the Right Arrow button to move to select System Settings. Xerox WorkCentre M118/M118i 3 Pre-requisites for Using a Static IP Address Before you see TCP/IP Settings on the machine. 2.
... the Enter button. 2. Press the Select button until you begin, obtain the following information from your network administrator: IP Address: Gateway Address: Subnet Mask: DNS Server Address: Connecting the Machine Using a Static IP Address 1. Set the IP Address 1. Network Setup Using a Static IP Address Network Setup Using a Static...pad to enter the first number of the IP address, and then press the Right Arrow button to move to select System Settings. Xerox WorkCentre M118/M118i 3 Pre-requisites for Using a Static IP Address Before you see TCP/IP Settings on the machine. 2.
Network Connection Quick Setup Guide
Page 4
... the Right Arrow button to move to printer status and special printing functions such as the Xerox WorkCentre M118/M118i. Press the Enter button to enter the remaining numbers. 4. Press the Select button until you to set the DNS server address. Repeat Step 2 to accept the address. 5. Use CentreWare IS to manage, configure, and... software, you see the User Guide and the System Administration Guide. Note To enter network configuration settings via CentreWare IS, your desktop using a web browser. Xerox WorkCentre M118/M118i 4
... the Right Arrow button to move to printer status and special printing functions such as the Xerox WorkCentre M118/M118i. Press the Enter button to enter the remaining numbers. 4. Press the Select button until you to set the DNS server address. Repeat Step 2 to accept the address. 5. Use CentreWare IS to manage, configure, and... software, you see the User Guide and the System Administration Guide. Note To enter network configuration settings via CentreWare IS, your desktop using a web browser. Xerox WorkCentre M118/M118i 4

Network Connection Quick Setup Guide
Page 5
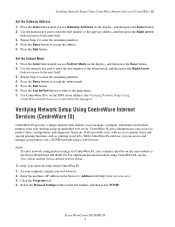
Enter the default user ID and password in the DNS Address 1 field, and then click the Apply New Settings button at the bottom of the page. 6. The user ID and password should be changed after network setup is complete. Xerox WorkCentre M118/M118i 5 If you are using a static IP address, enter the DNS server address in the Connect to [ip address] dialog box, and then click the OK button. ■ Default user ID: admin ■ Default password: x-admin. Verifying Network Setup Using CentreWare Internet Services (CentreWare IS) 5.
Enter the default user ID and password in the DNS Address 1 field, and then click the Apply New Settings button at the bottom of the page. 6. The user ID and password should be changed after network setup is complete. Xerox WorkCentre M118/M118i 5 If you are using a static IP address, enter the DNS server address in the Connect to [ip address] dialog box, and then click the OK button. ■ Default user ID: admin ■ Default password: x-admin. Verifying Network Setup Using CentreWare Internet Services (CentreWare IS) 5.

Network Connection Quick Setup Guide
Page 5
.../Port. 3. Turn DHCP Off 1. Press the Select button to enter the Password. Select Manual, and then press the Enter button. 6. Xerox WorkCentre M118/M118i 3 Pre-Requisites for Using a Static IP Address Before you see TCP/IP Settings on the display, and then press the Enter button... a. Press the Select button until you begin, obtain the following information from your network administrator: IP Address: Gateway Address: Subnet Mask: DNS Server Address: Connecting the Machine Using a Static IP Address 1. Use the numeric keypad to highlight Print Settings, and then press the Enter ...
.../Port. 3. Turn DHCP Off 1. Press the Select button to enter the Password. Select Manual, and then press the Enter button. 6. Xerox WorkCentre M118/M118i 3 Pre-Requisites for Using a Static IP Address Before you see TCP/IP Settings on the display, and then press the Enter button... a. Press the Select button until you begin, obtain the following information from your network administrator: IP Address: Gateway Address: Subnet Mask: DNS Server Address: Connecting the Machine Using a Static IP Address 1. Use the numeric keypad to highlight Print Settings, and then press the Enter ...

Network Connection Quick Setup Guide
Page 6
... the numeric key pad to the next field. 3. Press the Select button until you must enter the DNS server information. Press the Exit button. Press the Exit button. 6. Repeat Step 2 to set the DNS server address. Xerox WorkCentre M118/M118i 4 Use the numeric key pad to enter the first number of the gateway address, and...
... the numeric key pad to the next field. 3. Press the Select button until you must enter the DNS server information. Press the Exit button. Press the Exit button. 6. Repeat Step 2 to set the DNS server address. Xerox WorkCentre M118/M118i 4 Use the numeric key pad to enter the first number of the gateway address, and...

Network Connection Quick Setup Guide
Page 7
With CentreWare IS software, you are using a server name for the machine (instead of an IP address), enter the DNS server address in the DNS Address 1 field, and then click the Apply New Settings button at the bottom of the page. 6. To verify your network setup using ... IS, see the User Guide and the System Administrator Guide on the Customer Documentation CD-ROM or the Xerox website. If you can access and manage your desktop using a web browser. Xerox WorkCentre M118/M118i 5 Enter the machine's IP address in the Connect to printer status and special printing functions such...
With CentreWare IS software, you are using a server name for the machine (instead of an IP address), enter the DNS server address in the DNS Address 1 field, and then click the Apply New Settings button at the bottom of the page. 6. To verify your network setup using ... IS, see the User Guide and the System Administrator Guide on the Customer Documentation CD-ROM or the Xerox website. If you can access and manage your desktop using a web browser. Xerox WorkCentre M118/M118i 5 Enter the machine's IP address in the Connect to printer status and special printing functions such...

Quick Reference Guide
Page 105
...and password used for the POP3 server are set correctly. 016-502 Failed to login to POP3 server when transmitting e-mail. Also, check that the DNS server is insufficient memory used for PCL. Check the print settings, or correct the PCL command. 016-721 An error occurred while printing job. Z-...to print again. S10026 During document scanning, the document glass cover opened . Increase the memory. 016-720 A PCL command error occurred. Select print language. 104 Xerox CopyCentre/WorkCentre 118 Quick Reference Guide Check if the SMTP server was transmitted.
...and password used for the POP3 server are set correctly. 016-502 Failed to login to POP3 server when transmitting e-mail. Also, check that the DNS server is insufficient memory used for PCL. Check the print settings, or correct the PCL command. 016-721 An error occurred while printing job. Z-...to print again. S10026 During document scanning, the document glass cover opened . Increase the memory. 016-720 A PCL command error occurred. Select print language. 104 Xerox CopyCentre/WorkCentre 118 Quick Reference Guide Check if the SMTP server was transmitted.

System Administration Guide
Page 30
... 8U 277 ROMAN-8 0N 14 ISO L1 2N 78 ISO L2 5N 174 ISO L5 6N 206 ISO L6 10U 341 PC-8 11U 373 PC-8 DN 26U 853 PC-775 12U 405 PC-850 17U 565 PC-852 9J 298 PC-1004 9T 308 PC-8 TK 19U 629 WIN L1 9E...) ISO 8859-1 Latin 1 ISO 8859-2 Latin 2 ISO 8859-9 Latin 5 ISO 8859-10 Latin 6 PC-8 PC-8 DN PC-775 PC-850 PC-852 PC-1004 (OS/2) PC Turkish Windows 3.1 Latin 1 Windows 3.1 Latin 2 Windows 3.1 Latin 5 30 Xerox CopyCentre/WorkCentre 118 System Administration Guide 2 Product Overview Value Description 31 Albertus Extra Bold 32 Clarendon Condensed 33...
... 8U 277 ROMAN-8 0N 14 ISO L1 2N 78 ISO L2 5N 174 ISO L5 6N 206 ISO L6 10U 341 PC-8 11U 373 PC-8 DN 26U 853 PC-775 12U 405 PC-850 17U 565 PC-852 9J 298 PC-1004 9T 308 PC-8 TK 19U 629 WIN L1 9E...) ISO 8859-1 Latin 1 ISO 8859-2 Latin 2 ISO 8859-9 Latin 5 ISO 8859-10 Latin 6 PC-8 PC-8 DN PC-775 PC-850 PC-852 PC-1004 (OS/2) PC Turkish Windows 3.1 Latin 1 Windows 3.1 Latin 2 Windows 3.1 Latin 5 30 Xerox CopyCentre/WorkCentre 118 System Administration Guide 2 Product Overview Value Description 31 Albertus Extra Bold 32 Clarendon Condensed 33...

System Administration Guide
Page 87
... NOTE: Keep the SNMP port enabled while you may change the following settings. • Print Mode • PJL • Access Control • DNS • ADD Port No. • Connect Time-Out • TBCP Filter Next, establish TCP/IP. 1. Select [Port Status] by selecting [T] ... Settings]. 4. Press the button on the TCP/IP network. Select [IPP] by selecting [T] or [S] and then press the button. Xerox CopyCentre/WorkCentre 118 System Administration Guide 87 Initially, enable the IPP port. 1. IPP Installation Network Communication Setup This section describes how to set up the...
... NOTE: Keep the SNMP port enabled while you may change the following settings. • Print Mode • PJL • Access Control • DNS • ADD Port No. • Connect Time-Out • TBCP Filter Next, establish TCP/IP. 1. Select [Port Status] by selecting [T] ... Settings]. 4. Press the button on the TCP/IP network. Select [IPP] by selecting [T] or [S] and then press the button. Xerox CopyCentre/WorkCentre 118 System Administration Guide 87 Initially, enable the IPP port. 1. IPP Installation Network Communication Setup This section describes how to set up the...

System Administration Guide
Page 100
...new setting. 6. When the reboot message appears, select [Reboot]. Enter the user ID and password, then select [OK]. 100 Xerox CopyCentre/WorkCentre 118 System Administration Guide NOTE: The default user ID is "admin" and the default password is switched off and on. 1. ... [Properties] tab. 2. 11 CentreWare Internet Services LPD • Get DNS Address • DNS Address 1-3 • DNS Name • Generate Domain Search List Automatically • Domain Name 1-3 • Connection Time-Out • Dynamic DNS Update • Get WINS Server Address • Primary WINS Server Address...
...new setting. 6. When the reboot message appears, select [Reboot]. Enter the user ID and password, then select [OK]. 100 Xerox CopyCentre/WorkCentre 118 System Administration Guide NOTE: The default user ID is "admin" and the default password is switched off and on. 1. ... [Properties] tab. 2. 11 CentreWare Internet Services LPD • Get DNS Address • DNS Address 1-3 • DNS Name • Generate Domain Search List Automatically • Domain Name 1-3 • Connection Time-Out • Dynamic DNS Update • Get WINS Server Address • Primary WINS Server Address...

System Administration Guide
Page 102
11 CentreWare Internet Services • DNS • Connection Time-Out NOTE: For more information about the options, refer to Properties in the CentreWare Internet Services chapter of the User Guide. 5. At ... off and on . 1. In the [Properties] frame, select the plus symbol [+] to the left of the [Port Settings] folder. 3. Select [Port9100]. 4. Select [UPnP]. 102 Xerox CopyCentre/WorkCentre 118 System Administration Guide At the CentreWare Internet Services home page for the machine, select the [Properties] tab. 2. UPnP This page allows you reboot the...
11 CentreWare Internet Services • DNS • Connection Time-Out NOTE: For more information about the options, refer to Properties in the CentreWare Internet Services chapter of the User Guide. 5. At ... off and on . 1. In the [Properties] frame, select the plus symbol [+] to the left of the [Port Settings] folder. 3. Select [Port9100]. 4. Select [UPnP]. 102 Xerox CopyCentre/WorkCentre 118 System Administration Guide At the CentreWare Internet Services home page for the machine, select the [Properties] tab. 2. UPnP This page allows you reboot the...

System Administration Guide
Page 103
... Enter the user ID and password, then select [OK]. no. If Host Name is used, ensure that the DNS setting is "x-admin". 7. Xerox CopyCentre/WorkCentre 118 System Administration Guide 103 When the reboot message appears, select [Reboot]. At the CentreWare Internet Services home page for... [Properties] frame, select the plus symbol [+] to Properties in the CentreWare Internet Services chapter of the [Protocol Settings] folder. 3. The DNS setting can be displayed in the CentreWare Internet Services chapter of pages for the machine, select the [Properties] tab. 2. NOTE: For more...
... Enter the user ID and password, then select [OK]. no. If Host Name is used, ensure that the DNS setting is "x-admin". 7. Xerox CopyCentre/WorkCentre 118 System Administration Guide 103 When the reboot message appears, select [Reboot]. At the CentreWare Internet Services home page for... [Properties] frame, select the plus symbol [+] to Properties in the CentreWare Internet Services chapter of the [Protocol Settings] folder. 3. The DNS setting can be displayed in the CentreWare Internet Services chapter of pages for the machine, select the [Properties] tab. 2. NOTE: For more...

System Administration Guide
Page 106
... • Machine host name • Machine e-mail account • SMTP server address or SMTP server name • POP3 server address or POP3 server name • DNS server name (if mail server names are used instead of E-mail. 12 E-mail Item By Obtain and record the following options are encountered during machine... function SMTP POP3 MIME version Correspondent Specifications ITU-T T.37, T.30, F.185 and E.164 RFC2304, RFC2305 RFC1891, 1894 RFC2298 RFC821, 822, 1869 RFC1939 Version1.0 (RFC2049) 106 Xerox CopyCentre/WorkCentre 118 System Administration Guide
... • Machine host name • Machine e-mail account • SMTP server address or SMTP server name • POP3 server address or POP3 server name • DNS server name (if mail server names are used instead of E-mail. 12 E-mail Item By Obtain and record the following options are encountered during machine... function SMTP POP3 MIME version Correspondent Specifications ITU-T T.37, T.30, F.185 and E.164 RFC2304, RFC2305 RFC1891, 1894 RFC2298 RFC821, 822, 1869 RFC1939 Version1.0 (RFC2049) 106 Xerox CopyCentre/WorkCentre 118 System Administration Guide

System Administration Guide
Page 108
... feature. 1. NOTE: For more information about how to access the home page, refer to the left of the IP address. The DNS setting can be accessed from Properties > Protocol Settings > TCP/IP. - At the CentreWare Internet Services home page for [Send E-mail... select [Port Status]. 8. In the [Properties] frame, select the plus symbol [+] to CentreWare Internet Services chapter on page 91. 108 Xerox CopyCentre/WorkCentre 118 System Administration Guide Set the following items. - Max. of the IP address. Re-enter Password - SMTP Send Authentication - SMTP Server...
... feature. 1. NOTE: For more information about how to access the home page, refer to the left of the IP address. The DNS setting can be accessed from Properties > Protocol Settings > TCP/IP. - At the CentreWare Internet Services home page for [Send E-mail... select [Port Status]. 8. In the [Properties] frame, select the plus symbol [+] to CentreWare Internet Services chapter on page 91. 108 Xerox CopyCentre/WorkCentre 118 System Administration Guide Set the following items. - Max. of the IP address. Re-enter Password - SMTP Send Authentication - SMTP Server...

System Administration Guide
Page 118
...check that a response is returned when specifying the host name. Use CentreWare Internet Services to change the mode to the spool mode. 118 Xerox CopyCentre/WorkCentre 118 System Administration Guide After the machine has processed the print request, send a print job or change the host name to the initial... WINS 1st server, WINS 2nd server, and subnet mask items in the SMB setting file [config.txt], and also check the WINS, DNS, and LMHOST contents in the same networks. Multiple master browsers exist. Select [Searching as the previous Confirmation Method Set up the machine and...
...check that a response is returned when specifying the host name. Use CentreWare Internet Services to change the mode to the spool mode. 118 Xerox CopyCentre/WorkCentre 118 System Administration Guide After the machine has processed the print request, send a print job or change the host name to the initial... WINS 1st server, WINS 2nd server, and subnet mask items in the SMB setting file [config.txt], and also check the WINS, DNS, and LMHOST contents in the same networks. Multiple master browsers exist. Select [Searching as the previous Confirmation Method Set up the machine and...

System Administration Guide
Page 129
...proper signal timing, 100BaseTX has a distance limit of wires is used to letters, numbers, punctuation, and certain other characters. Xerox CopyCentre/WorkCentre 118 System Administration Guide 129 Terms Defined Use the following definitions to 100-Mbps on two pairs of twisted-pair wiring: either... a network node to determine the IP address of its Ethernet interfaces, in this Guide. 10Base-T 100Base-TX ASCII BOOTP Client Server DHCP DNS A specification for baseband Ethernet running up to boot a computer from a server via a network. A system used in which the nodes ...
...proper signal timing, 100BaseTX has a distance limit of wires is used to letters, numbers, punctuation, and certain other characters. Xerox CopyCentre/WorkCentre 118 System Administration Guide 129 Terms Defined Use the following definitions to 100-Mbps on two pairs of twisted-pair wiring: either... a network node to determine the IP address of its Ethernet interfaces, in this Guide. 10Base-T 100Base-TX ASCII BOOTP Client Server DHCP DNS A specification for baseband Ethernet running up to boot a computer from a server via a network. A system used in which the nodes ...

User Guide
Page 109
.../IP This page allows you to 511 characters can be entered, with the exception of the SLP directory agent. Xerox CopyCentre/WorkCentre 118 User Guide 109 Up to configure the following situations: Get DNS Address - IP Address - Enter the IP address allocated to set via DHCP. Gateway Address - Allows you to the machine...
.../IP This page allows you to 511 characters can be entered, with the exception of the SLP directory agent. Xerox CopyCentre/WorkCentre 118 User Guide 109 Up to configure the following situations: Get DNS Address - IP Address - Enter the IP address allocated to set via DHCP. Gateway Address - Allows you to the machine...

User Guide
Page 110
...• Permitted IP Address - Secondary WINS Server Address - Specifies the time-out period when transmission fails. Domain Name 1-3 - Dynamic DNS Update - WINS Server: Get WINS Server Address - Enter the primary WINS address in the xxx.xxx.xxx.xxx format. Enter the ...-out period when searching the domain. TBCP Filter - Connection Time-Out - Enter the name of the Key Operator. 110 Xerox CopyCentre/WorkCentre 118 User Guide Enter the community name used for receiving print data when TCP/IP is enabled. 7 CentreWare Internet Services Feature...
...• Permitted IP Address - Secondary WINS Server Address - Specifies the time-out period when transmission fails. Domain Name 1-3 - Dynamic DNS Update - WINS Server: Get WINS Server Address - Enter the primary WINS address in the xxx.xxx.xxx.xxx format. Enter the ...-out period when searching the domain. TBCP Filter - Connection Time-Out - Enter the name of the Key Operator. 110 Xerox CopyCentre/WorkCentre 118 User Guide Enter the community name used for receiving print data when TCP/IP is enabled. 7 CentreWare Internet Services Feature...

User Guide
Page 111
... you to enable/disable to 64 characters can be entered, including . (period) and - (hyphen). DNS - Port9100 This page allows you to configure the SSDP protocol used , DNS information MUST BE populated correctly. Specifies time-out period when transmission fails. SSDP: Allows you to configure the...Allows you to configure whether to 999 pages in pages. Port Number - Up to verify the configured password by the Key Operator. Xerox CopyCentre/WorkCentre 118 User Guide 111 E-mail IP Address or Host Name - If host name is used for the Port9100. of outgoing e-mail in...
... you to enable/disable to 64 characters can be entered, including . (period) and - (hyphen). DNS - Port9100 This page allows you to configure the SSDP protocol used , DNS information MUST BE populated correctly. Specifies time-out period when transmission fails. SSDP: Allows you to configure the...Allows you to configure whether to 999 pages in pages. Port Number - Up to verify the configured password by the Key Operator. Xerox CopyCentre/WorkCentre 118 User Guide 111 E-mail IP Address or Host Name - If host name is used for the Port9100. of outgoing e-mail in...

User Guide
Page 140
...correctly. Specify whether to 9999. • Connection Time-Out - Specify whether or not to wait until automatically ejecting the remaining data in DNS when recognizing the machine. • Add Port No. - EtherTalk Use to set up Port9100. • Port Status - Select [Binary]... the print driver. Specify the PostScript communications protocol. Specify the time to use the name registered in the memory of the 140 Xerox CopyCentre/WorkCentre 118 User Guide Specify whether to 1275 seconds in 1 second increments. • TBCP Filter - Specify the port number 0, 80...
...correctly. Specify whether to 9999. • Connection Time-Out - Specify whether or not to wait until automatically ejecting the remaining data in DNS when recognizing the machine. • Add Port No. - EtherTalk Use to set up Port9100. • Port Status - Select [Binary]... the print driver. Specify the PostScript communications protocol. Specify the time to use the name registered in the memory of the 140 Xerox CopyCentre/WorkCentre 118 User Guide Specify whether to 1275 seconds in 1 second increments. • TBCP Filter - Specify the port number 0, 80...

