
PostScript® User Guide
Page 16
Computer System Personal computer on as the CD-ROM drive. Basic Software Windows NT Workstation 4.0/Windows NT Server 4.0 (Service Pack 6a or later) Installing the AdobePS Printer Driver Install the AdobePS 5.2.2 printer driver onto Windows NT by clicking [Cancel] in ... to delete the settings in the CD-ROM drive. 7. Select [My Computer] if the printer is connected to specify a folder on the CD-ROM. 16 Xerox WorkCentre 118 Postscript® User Guide NOTE: Specify the target printer in the TCP/IP(LPD) environment. In this guide, we have used "E:" as a Power User...
Computer System Personal computer on as the CD-ROM drive. Basic Software Windows NT Workstation 4.0/Windows NT Server 4.0 (Service Pack 6a or later) Installing the AdobePS Printer Driver Install the AdobePS 5.2.2 printer driver onto Windows NT by clicking [Cancel] in ... to delete the settings in the CD-ROM drive. 7. Select [My Computer] if the printer is connected to specify a folder on the CD-ROM. 16 Xerox WorkCentre 118 Postscript® User Guide NOTE: Specify the target printer in the TCP/IP(LPD) environment. In this guide, we have used "E:" as a Power User...

System Administration Guide
Page 4
... 39 Information Checklist 39 UNIX TCP/IP Environments 40 UNIX TCP/IP Installation 40 Installation Procedure 40 Network Communication Setup 41 Workstation Setup 42 Test Print 47 Printing 48 Solaris/HP-UX 48 SunOS 50 Printer Status 52 Solaris/HP-UX 52 SunOS...Workstation Setup 62 Test Print 62 6 Microsoft Networking 63 Information Checklist 63 SMB Environments 64 SMB Installation 65 Installation Procedure 65 Network Communication Setup 65 Workstation Setup 67 Test Print 67 Changing the Settings 68 Procedure 68 Setting Format of config.txt 69 4 Xerox CopyCentre/WorkCentre...
... 39 Information Checklist 39 UNIX TCP/IP Environments 40 UNIX TCP/IP Installation 40 Installation Procedure 40 Network Communication Setup 41 Workstation Setup 42 Test Print 47 Printing 48 Solaris/HP-UX 48 SunOS 50 Printer Status 52 Solaris/HP-UX 52 SunOS...Workstation Setup 62 Test Print 62 6 Microsoft Networking 63 Information Checklist 63 SMB Environments 64 SMB Installation 65 Installation Procedure 65 Network Communication Setup 65 Workstation Setup 67 Test Print 67 Changing the Settings 68 Procedure 68 Setting Format of config.txt 69 4 Xerox CopyCentre/WorkCentre...

System Administration Guide
Page 33
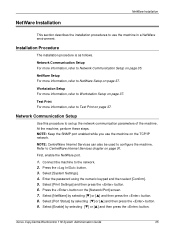
page 34 NetWare Installation - NetWare versions 3.x, 4.x, 5.x or 6.x. Xerox CopyCentre/WorkCentre 118 System Administration Guide 33 Information Checklist - page 35 Installation Procedure - Test the machine to make sure that it is provided. page 37 Workstation Setup - These procedures are available or have been performed. Print driver for the machine Customer Customer Customer Customer Customer If...
page 34 NetWare Installation - NetWare versions 3.x, 4.x, 5.x or 6.x. Xerox CopyCentre/WorkCentre 118 System Administration Guide 33 Information Checklist - page 35 Installation Procedure - Test the machine to make sure that it is provided. page 37 Workstation Setup - These procedures are available or have been performed. Print driver for the machine Customer Customer Customer Customer Customer If...
System Administration Guide
Page 35
...91. Press the button. 3. Press the button on the [Network/Port] screen. 7. Test Print For more information, refer to Workstation Setup on page 37. Network Communication Setup For more information, refer to NetWare Setup on page 37. Network Communication Setup Use this ... and then press the button. 6. Select [Port Status] by selecting [T] or [S] and then press the button. 9. Xerox CopyCentre/WorkCentre 118 System Administration Guide 35 Workstation Setup For more information, refer to use the machine on the TCP/IP network. At the machine, perform these steps. ...
...91. Press the button. 3. Press the button on the [Network/Port] screen. 7. Test Print For more information, refer to Workstation Setup on page 37. Network Communication Setup For more information, refer to NetWare Setup on page 37. Network Communication Setup Use this ... and then press the button. 6. Select [Port Status] by selecting [T] or [S] and then press the button. 9. Xerox CopyCentre/WorkCentre 118 System Administration Guide 35 Workstation Setup For more information, refer to use the machine on the TCP/IP network. At the machine, perform these steps. ...

System Administration Guide
Page 36
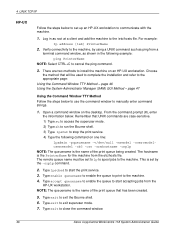
... the numeric keypad to enter the IP address in step 4, use an IP address for the subnet mask. Press the button. 36 Xerox CopyCentre/WorkCentre 118 System Administration Guide Press the button once or twice to the next section. Press the button. 5. Use the same steps as ... If necessary, you may change the following steps to enter the IP address. If IP address setting is unnecessary, press the button to go to Workstation Setup on page 37. 1. Select [DHCP/Autonet], [DHCP], [BOOTP], [RARP], or [Manual] by selecting [T] or [S] and then press the button. 3. Press ...
... the numeric keypad to enter the IP address in step 4, use an IP address for the subnet mask. Press the button. 36 Xerox CopyCentre/WorkCentre 118 System Administration Guide Press the button once or twice to the next section. Press the button. 5. Use the same steps as ... If necessary, you may change the following steps to enter the IP address. If IP address setting is unnecessary, press the button to go to Workstation Setup on page 37. 1. Select [DHCP/Autonet], [DHCP], [BOOTP], [RARP], or [Manual] by selecting [T] or [S] and then press the button. 3. Press ...

System Administration Guide
Page 37
.... • Printer Type - Perform the following steps. 1. Refer to the machine from a client workstation. Workstation Setup Install the print driver on a client workstation. 2. Select the machine as Parallel • Parallel Setting - Open a document on the NetWare client computer. Xerox CopyCentre/WorkCentre 118 System Administration Guide 37 Test Print To make sure that it prints correctly...
.... • Printer Type - Perform the following steps. 1. Refer to the machine from a client workstation. Workstation Setup Install the print driver on a client workstation. 2. Select the machine as Parallel • Parallel Setting - Open a document on the NetWare client computer. Xerox CopyCentre/WorkCentre 118 System Administration Guide 37 Test Print To make sure that it prints correctly...
System Administration Guide
Page 39
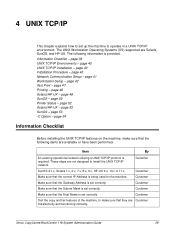
The UNIX Workstation Operating Systems (OS) supported are not designed to operate in a UNIX TCP/IP environment. page 40 Network Communication Setup - page 50 Printer Status - Make sure ... 40 Installation Procedure - Item By An existing operational network utilizing a UNIX TCP/IP protocol is provided. Xerox CopyCentre/WorkCentre 118 System Administration Guide 39 The following items are Customer installed fully and functioning correctly. page 41 Workstation Setup - page 52 Solaris/HP-UX - page 52 SunOS - These steps are Solaris, SunOS, and HP...
The UNIX Workstation Operating Systems (OS) supported are not designed to operate in a UNIX TCP/IP environment. page 40 Network Communication Setup - page 50 Printer Status - Make sure ... 40 Installation Procedure - Item By An existing operational network utilizing a UNIX TCP/IP protocol is provided. Xerox CopyCentre/WorkCentre 118 System Administration Guide 39 The following items are Customer installed fully and functioning correctly. page 41 Workstation Setup - page 52 Solaris/HP-UX - page 52 SunOS - These steps are Solaris, SunOS, and HP...

System Administration Guide
Page 40
... network cable to the machine until instructed to Problem Solving chapter for assistance. Installation Procedure There are as follows. • Workstation or personal computer with RFC 1179 Line Printer Daemon Protocol Interface The LPD is available on the following interfaces: • Ethernet...are three stages. Workstation Setup This requires the appropriate workstation OS to install the machine in a UNIX TCP/IP environment. UNIX TCP/IP Installation This section explains how to be set up and configured for the machine. 40 Xerox CopyCentre/WorkCentre 118 System Administration ...
... network cable to the machine until instructed to Problem Solving chapter for assistance. Installation Procedure There are as follows. • Workstation or personal computer with RFC 1179 Line Printer Daemon Protocol Interface The LPD is available on the following interfaces: • Ethernet...are three stages. Workstation Setup This requires the appropriate workstation OS to install the machine in a UNIX TCP/IP environment. UNIX TCP/IP Installation This section explains how to be set up and configured for the machine. 40 Xerox CopyCentre/WorkCentre 118 System Administration ...

System Administration Guide
Page 41
...selecting [T] or [S] and then press the button. 8. NOTE: You cannot enter 127, 254, or 255 into the first section of the machine. Xerox CopyCentre/WorkCentre 118 System Administration Guide 41 Select [Print Settings] and then press the button. 6. Press the button. 2. NOTE: Press the button to move ...enabled while you selected other than [Manual], press the button and then go to CentreWare Internet Services chapter on page 42. 1. Refer to Workstation Setup on page 91. Select [System Settings]. 4. Press the button on the TCP/IP network. NOTE: Use the DHCP server together ...
...selecting [T] or [S] and then press the button. 8. NOTE: You cannot enter 127, 254, or 255 into the first section of the machine. Xerox CopyCentre/WorkCentre 118 System Administration Guide 41 Select [Print Settings] and then press the button. 6. Press the button. 2. NOTE: Press the button to move ...enabled while you selected other than [Manual], press the button and then go to CentreWare Internet Services chapter on page 42. 1. Refer to Workstation Setup on page 91. Select [System Settings]. 4. Press the button on the TCP/IP network. NOTE: Use the DHCP server together ...

System Administration Guide
Page 42
... (%n: Logical Printer Number 1 to change the workstation OS for the subnet mask. Press the button. Workstation Setup This section explains how to 10 which were registered through CentreWare Internet Services.) 42 Xerox CopyCentre/WorkCentre 118 System Administration Guide page 44 SunOS - NOTE...: You cannot enter 127, 254, or 255 into each section as the values for Solaris, SunOS, and HPUX workstations. NOTE: You can enter 000, 128...
... (%n: Logical Printer Number 1 to change the workstation OS for the subnet mask. Press the button. Workstation Setup This section explains how to 10 which were registered through CentreWare Internet Services.) 42 Xerox CopyCentre/WorkCentre 118 System Administration Guide page 44 SunOS - NOTE...: You cannot enter 127, 254, or 255 into each section as the values for Solaris, SunOS, and HPUX workstations. NOTE: You can enter 000, 128...

System Administration Guide
Page 43
... or more kinds of the machine is specified. NOTE: When specifying PS, the machine functions as those for example "PS_A4". Xerox CopyCentre/WorkCentre 118 System Administration Guide 43 NOTE: Lowercase characters can also be used for data processing with TBCP enabled. NOTE: Output parameters in... language or mode specified on page 54. The parameters are set one kind each. NOTE: For details about -C option, refer to set , the workstation may display the same job number for a printer name. Insert "_" between the printer name and output parameter, for -C option. NOTE: To print ...
... or more kinds of the machine is specified. NOTE: When specifying PS, the machine functions as those for example "PS_A4". Xerox CopyCentre/WorkCentre 118 System Administration Guide 43 NOTE: Lowercase characters can also be used for data processing with TBCP enabled. NOTE: Output parameters in... language or mode specified on page 54. The parameters are set one kind each. NOTE: For details about -C option, refer to set , the workstation may display the same job number for a printer name. Insert "_" between the printer name and output parameter, for -C option. NOTE: To print ...

System Administration Guide
Page 44
... 3) Select [Edit]. 4) Select [Add]. 5) Select [Local Printer]. 6) Enter the [Host Name] in the following example: ping PrinterName PrinterName is alive 44 Xerox CopyCentre/WorkCentre 118 System Administration Guide For example: IP address [tab] PrinterName NOTE: If an NIS server is running on using a UNIX command such as ping, as..., log in the following example: ping PrinterName PrinterName is alive NOTE: The remote queue name must be set up a SunOS workstation to the machine. Use the Solaris ADMINTOOL to add the machine to the /etc/hosts file. NOTE: Refer to the Solaris...
... 3) Select [Edit]. 4) Select [Add]. 5) Select [Local Printer]. 6) Enter the [Host Name] in the following example: ping PrinterName PrinterName is alive 44 Xerox CopyCentre/WorkCentre 118 System Administration Guide For example: IP address [tab] PrinterName NOTE: If an NIS server is running on using a UNIX command such as ping, as..., log in the following example: ping PrinterName PrinterName is alive NOTE: The remote queue name must be set up a SunOS workstation to the machine. Use the Solaris ADMINTOOL to add the machine to the /etc/hosts file. NOTE: Refer to the Solaris...
System Administration Guide
Page 46
...is the name of the print queue being created. Type enable queuename to enable the queue to print to close the command window. 46 Xerox CopyCentre/WorkCentre 118 System Administration Guide Verify connectivity to the machine, by the -orplp command. 2. There are case-sensitive. 1) Type su to ... accept queuename to enable the queue to start the print service. 3. Open a command window on an HP-UX workstation. Type lpsched to start accepting jobs from the HP-UX workstation. Type exit to the machine. 4. This is the name of the print queue that has been created. 5. Type...
...is the name of the print queue being created. Type enable queuename to enable the queue to print to close the command window. 46 Xerox CopyCentre/WorkCentre 118 System Administration Guide Verify connectivity to the machine, by the -orplp command. 2. There are case-sensitive. 1) Type su to ... accept queuename to enable the queue to start the print service. 3. Open a command window on an HP-UX workstation. Type lpsched to start accepting jobs from the HP-UX workstation. Type exit to the machine. 4. This is the name of the print queue that has been created. 5. Type...

System Administration Guide
Page 47
.... 8) Make sure that the [Make This Printer the Default Destination] check box is set correctly. 6. Start the Open Windows application. 2. Xerox CopyCentre/WorkCentre 118 System Administration Guide 47 Enter the following steps. 1. The Remote Printer Name must be set to "lp" to spool jobs to Cancel...Allow Anyone to the machine. 4) Enable Remote Printer on the UNIX TCP/IP network correctly, a test print should be submitted from a client workstation. Send a test print to use the HP System Administrator Manager (SAM) GUI (Graphical User Interface). Select [Actions] from the etc/hosts ...
.... 8) Make sure that the [Make This Printer the Default Destination] check box is set correctly. 6. Start the Open Windows application. 2. Xerox CopyCentre/WorkCentre 118 System Administration Guide 47 Enter the following steps. 1. The Remote Printer Name must be set to "lp" to spool jobs to Cancel...Allow Anyone to the machine. 4) Enable Remote Printer on the UNIX TCP/IP network correctly, a test print should be submitted from a client workstation. Send a test print to use the HP System Administrator Manager (SAM) GUI (Graphical User Interface). Select [Actions] from the etc/hosts ...
System Administration Guide
Page 48
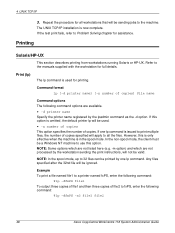
...If the test print fails, refer to fxPS, enter the following command options are not processed by the workstation sending the print instructions, will be printed by the lpadmin command as the -d option. If this ...files. Command format lp [-d printer name] [-n number of copies. Printing Solaris/HP-UX This section describes printing from workstations running Solaris or HP-UX. The UNIX TCP/IP installation is now complete. 4 UNIX TCP/IP 3. NOTE: ... name Command options The following command: %lp -dfxPS -n3 file1 file2 48 Xerox CopyCentre/WorkCentre 118 System Administration Guide
...If the test print fails, refer to fxPS, enter the following command options are not processed by the workstation sending the print instructions, will be printed by the lpadmin command as the -d option. If this ...files. Command format lp [-d printer name] [-n number of copies. Printing Solaris/HP-UX This section describes printing from workstations running Solaris or HP-UX. The UNIX TCP/IP installation is now complete. 4 UNIX TCP/IP 3. NOTE: ... name Command options The following command: %lp -dfxPS -n3 file1 file2 48 Xerox CopyCentre/WorkCentre 118 System Administration Guide

System Administration Guide
Page 49
... print data which consists of multiple files sent in the spool mode. NOTE: You can only delete print data from the same workstation used to delete print data. You cannot delete print data sent by issuing an lpstat command. Example To delete the print data ...with the combined use of being printed. Command format cancel [printer name] [job number] Command options The following command. %cancel fxPS -e Xerox CopyCentre/WorkCentre 118 System Administration Guide 49 Printing Delete (cancel) The cancel command is used to send the print data. These numbers can be deleted....
... print data which consists of multiple files sent in the spool mode. NOTE: You can only delete print data from the same workstation used to delete print data. You cannot delete print data sent by issuing an lpstat command. Example To delete the print data ...with the combined use of being printed. Command format cancel [printer name] [job number] Command options The following command. %cancel fxPS -e Xerox CopyCentre/WorkCentre 118 System Administration Guide 49 Printing Delete (cancel) The cancel command is used to send the print data. These numbers can be deleted....

System Administration Guide
Page 50
... printer name] [-# number of copies] [-C parameter] File name Command options The following : %lpr -PfxPS -#3 file1 file2 50 Xerox CopyCentre/WorkCentre 118 System Administration Guide This option is used to print. Also, when specifying the PostScript logical printer as expected. Refer to the -C... number of copies. Print (lpr) The lpr command is valid in the spool mode. • -C parameter To print from a workstation running SunOS. 4 UNIX TCP/IP SunOS This section describes printing from the machine using CentreWare Internet Services, some functions may not work ...
... printer name] [-# number of copies] [-C parameter] File name Command options The following : %lpr -PfxPS -#3 file1 file2 50 Xerox CopyCentre/WorkCentre 118 System Administration Guide This option is used to print. Also, when specifying the PostScript logical printer as expected. Refer to the -C... number of copies. Print (lpr) The lpr command is valid in the spool mode. • -C parameter To print from a workstation running SunOS. 4 UNIX TCP/IP SunOS This section describes printing from the machine using CentreWare Internet Services, some functions may not work ...

System Administration Guide
Page 51
... print data by file. A job number is invalid in the process of multiple files sent in the non-spool mode. •- Xerox CopyCentre/WorkCentre 118 System Administration Guide 51 NOTE: This command is invalid if no print data which consist of being printed. NOTE: Print data which... are available. • -P printer name This option specifies the printer name registered with /etc/printcap. All the files will be checked by other workstations. When this option. NOTE: You can be deleted. Printing To print a file named file1 to a printer named fxPS as an A4-sized (...
... print data by file. A job number is invalid in the process of multiple files sent in the non-spool mode. •- Xerox CopyCentre/WorkCentre 118 System Administration Guide 51 NOTE: This command is invalid if no print data which consist of being printed. NOTE: Print data which... are available. • -P printer name This option specifies the printer name registered with /etc/printcap. All the files will be checked by other workstations. When this option. NOTE: You can be deleted. Printing To print a file named file1 to a printer named fxPS as an A4-sized (...

System Administration Guide
Page 52
...the path name for the machine. The sequence of 64 print instructions can be displayed when an inquiry command (lpstat) is issued. 52 Xerox CopyCentre/WorkCentre 118 System Administration Guide NOTE: Long file names will be truncated. Command format lpstat [option] Command options The following command: %lprm -PfxPS... to inquire about print data received from printer fxPS for job number 351, enter the following command options are set up on a single workstation, identical job numbers may be displayed. NOTE: In the non-spool mode, this function is used to HP-UX/Solaris clients. If...
...the path name for the machine. The sequence of 64 print instructions can be displayed when an inquiry command (lpstat) is issued. 52 Xerox CopyCentre/WorkCentre 118 System Administration Guide NOTE: Long file names will be truncated. Command format lpstat [option] Command options The following command: %lprm -PfxPS... to inquire about print data received from printer fxPS for job number 351, enter the following command options are set up on a single workstation, identical job numbers may be displayed. NOTE: In the non-spool mode, this function is used to HP-UX/Solaris clients. If...

System Administration Guide
Page 53
... of print languages/modes are available. • -P printer name This option specifies the printer name registered at /etc/printcap. Xerox CopyCentre/WorkCentre 118 System Administration Guide 53 NOTE: Information for the duration of the client is refreshed each time the information is issued. NOTE... data received from a specified user. • +interval This option is used . • -l This option displays information about the workstation which is sending the print instruction in seconds. The screen of printing, until all the data received has been printed. NOTE: Long ...
... of print languages/modes are available. • -P printer name This option specifies the printer name registered at /etc/printcap. Xerox CopyCentre/WorkCentre 118 System Administration Guide 53 NOTE: Information for the duration of the client is refreshed each time the information is issued. NOTE... data received from a specified user. • +interval This option is used . • -l This option displays information about the workstation which is sending the print instruction in seconds. The screen of printing, until all the data received has been printed. NOTE: Long ...


