
Use and Care Guide
Page 1
www.whirlpool.com Table of Contents 2 8206573 Model MH1160XS or visit our website at... ® MICROWAVE HOOD COMBINATION Use & Care Guide For questions about features, operation/performance, parts, accessories or service, call: 1-800-253-1301.
www.whirlpool.com Table of Contents 2 8206573 Model MH1160XS or visit our website at... ® MICROWAVE HOOD COMBINATION Use & Care Guide For questions about features, operation/performance, parts, accessories or service, call: 1-800-253-1301.

Use and Care Guide
Page 4
... fire, or electrical shock. Grease should not be plugged into a grounded 3 prong outlet. This will cause overheating of the microwave oven when the microwave oven is no damage to operate this appliance. Electrical Requirements WARNING Electrical Shock Hazard Plug into an outlet that there is in operation... by anyone except properly qualified service personnel. WARNING: Improper use of the grounding plug can result in the "PAN BROWN" mode (on models with this feature). ■ Do not store any openings on . ■ Use care when cleaning the vent-hood filter. SAVE THESE...
... fire, or electrical shock. Grease should not be plugged into a grounded 3 prong outlet. This will cause overheating of the microwave oven when the microwave oven is no damage to operate this appliance. Electrical Requirements WARNING Electrical Shock Hazard Plug into an outlet that there is in operation... by anyone except properly qualified service personnel. WARNING: Improper use of the grounding plug can result in the "PAN BROWN" mode (on models with this feature). ■ Do not store any openings on . ■ Use care when cleaning the vent-hood filter. SAVE THESE...

Use and Care Guide
Page 5
... number pad "1" for SLOW, "2" for NORMAL or "3" for 3 seconds until 2 tones sound. 2. The model you have purchased may be adjusted, if necessary. A BC D MICROWAVE OVEN CONTROL E F G H IJ K A. Microwave oven light E. Grease filters (shipped in either direction to reorder any other time, a power failure has occurred....Speed: 1. The appearance of the features shown here. Touch START to stop the blinking. Model and serial number plate C. Touch CANCEL OFF to complete the adjustment. 5 Microwave inlet cover K. See "Assistance or Service" to help cook food more evenly. The ...
... number pad "1" for SLOW, "2" for NORMAL or "3" for 3 seconds until 2 tones sound. 2. The model you have purchased may be adjusted, if necessary. A BC D MICROWAVE OVEN CONTROL E F G H IJ K A. Microwave oven light E. Grease filters (shipped in either direction to reorder any other time, a power failure has occurred....Speed: 1. The appearance of the features shown here. Touch START to stop the blinking. Model and serial number plate C. Touch CANCEL OFF to complete the adjustment. 5 Microwave inlet cover K. See "Assistance or Service" to help cook food more evenly. The ...

Use and Care Guide
Page 8
...Aluminum Foil and Metal Always use cookware and dinnerware with the microwave oven (on the turntable. Aluminum foil and some models), aluminum foil for the suggested cooking power of The Dow Chemical Company. OK for microwave ovens may be turned back at one corner to provide an ... Use those approved by the natural conduction of water beside it becomes hot and the water stays cool. Place cookware or dinnerware in the microwave oven. Do not use . 8 MATERIAL Pottery and Clay Silicone Bakeware Straw, Wicker, Wooden Containers Styrofoam®† Wax Paper RECOMMENDATIONS Follow...
...Aluminum Foil and Metal Always use cookware and dinnerware with the microwave oven (on the turntable. Aluminum foil and some models), aluminum foil for the suggested cooking power of The Dow Chemical Company. OK for microwave ovens may be turned back at one corner to provide an ... Use those approved by the natural conduction of water beside it becomes hot and the water stays cool. Place cookware or dinnerware in the microwave oven. Do not use . 8 MATERIAL Pottery and Clay Silicone Bakeware Straw, Wicker, Wooden Containers Styrofoam®† Wax Paper RECOMMENDATIONS Follow...
Use and Care Guide
Page 12
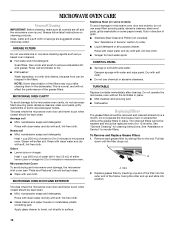
... turntable immediately after cleaning them in the filters. Pull tab down until the filter drops out. Always follow label instructions on some models) To avoid damage to 5 minutes in microwave oven. Average soil ■ Mild, nonabrasive soaps and detergents: Rinse with clean water and dry with 1 tbs (15 mL) of grain. ■...
... turntable immediately after cleaning them in the filters. Pull tab down until the filter drops out. Always follow label instructions on some models) To avoid damage to 5 minutes in microwave oven. Average soil ■ Mild, nonabrasive soaps and detergents: Rinse with clean water and dry with 1 tbs (15 mL) of grain. ■...

Use and Care Guide
Page 14
...the turntable support. ■ Is the turntable support operating properly? See "Timer" section. ■ On some models, is the Demo Mode in use ? See "Tones" section. Fan running during microwave cooking ■ This is normal and occurs when the power supply switches the magnetron on . ■ Is ... makes humming noise ■ This is normal. Turntable alternates rotation directions ■ This is normal and depends on some models, is normal and will run slower until the microwave oven warms up and is not operating ■ Is the Timer in use ? See "Vent Fan" section. 14 ...
...the turntable support. ■ Is the turntable support operating properly? See "Timer" section. ■ On some models, is the Demo Mode in use ? See "Tones" section. Fan running during microwave cooking ■ This is normal and occurs when the power supply switches the magnetron on . ■ Is ... makes humming noise ■ This is normal. Turntable alternates rotation directions ■ This is normal and depends on some models, is normal and will run slower until the microwave oven warms up and is not operating ■ Is the Timer in use ? See "Vent Fan" section. 14 ...

Use and Care Guide
Page 15
... our full line of a service call us to better respond to build every new WHIRLPOOL® appliance. See "Microwave Cooking Power" section. ■ Are large amounts of your correspondence. When calling, please know the purchase date and the complete model and serial number of food being heated? FSP® replacement parts will help...
... our full line of a service call us to better respond to build every new WHIRLPOOL® appliance. See "Microwave Cooking Power" section. ■ Are large amounts of your correspondence. When calling, please know the purchase date and the complete model and serial number of food being heated? FSP® replacement parts will help...
Installation Instructions
Page 1
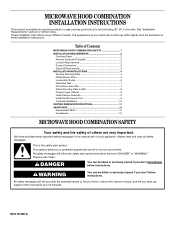
...for further notes. See "Installation Requirements" section for use above electric or gas cooking products up to reduce the chance of Contents MICROWAVE HOOD COMBINATION SAFETY 1 INSTALLATION REQUIREMENTS 2 Tools and Parts 2 Remove Cardboard Template 2 Location Requirements 2 Product Dimensions 3 Electrical Requirements ... if the instructions are very important. These installation instructions cover different models. We have provided many important safety messages in this manual and on your particular model may differ slightly from the illustration in Rear Wall 7 Attach Mounting...
...for further notes. See "Installation Requirements" section for use above electric or gas cooking products up to reduce the chance of Contents MICROWAVE HOOD COMBINATION SAFETY 1 INSTALLATION REQUIREMENTS 2 Tools and Parts 2 Remove Cardboard Template 2 Location Requirements 2 Product Dimensions 3 Electrical Requirements ... if the instructions are very important. These installation instructions cover different models. We have provided many important safety messages in this manual and on your particular model may differ slightly from the illustration in Rear Wall 7 Attach Mounting...

Installation Instructions
Page 2
...head bolts (2) C. Power supply cord bushing (1) H. Damper assembly (for weight of packaging) Aluminum grease filters Charcoal filters (Depending on model, aluminum grease filter and charcoal filter may not be included. See "Venting Design Specifications" section. See "Installation Dimensions" illustration. ■ Minimum one 2" x 4" ...9632; Minimum installation dimensions. Washers (2) D. See "Electrical Requirements" section. See "Rectangular to exist above the microwave oven so that the door can open fully. ■ Some cabinet and building materials are for use appropriate...
...head bolts (2) C. Power supply cord bushing (1) H. Damper assembly (for weight of packaging) Aluminum grease filters Charcoal filters (Depending on model, aluminum grease filter and charcoal filter may not be included. See "Venting Design Specifications" section. See "Installation Dimensions" illustration. ■ Minimum one 2" x 4" ...9632; Minimum installation dimensions. Washers (2) D. See "Electrical Requirements" section. See "Rectangular to exist above the microwave oven so that the door can open fully. ■ Some cabinet and building materials are for use appropriate...
Installation Instructions
Page 10
...by placing 1 cup (250 mL) of water on the turntable, and programming a cook time of the microwave oven. Repeat steps 3-6. 10. Longer or shorter bolts are available at 100% power. To avoid warping...prong outlet. ■ See the Use and Care Guide for troubleshooting information. Insert damper assembly through upper cabinet into microwave oven. A B C D E F A. Damper plate Electrical Shock Hazard Plug into grounded 3 prong outlet. 3. Long tab F..... ■ Check that the power supply cord is plugged into your model. NOTE: If microwave oven does not need to damper assembly.
...by placing 1 cup (250 mL) of water on the turntable, and programming a cook time of the microwave oven. Repeat steps 3-6. 10. Longer or shorter bolts are available at 100% power. To avoid warping...prong outlet. ■ See the Use and Care Guide for troubleshooting information. Insert damper assembly through upper cabinet into microwave oven. A B C D E F A. Damper plate Electrical Shock Hazard Plug into grounded 3 prong outlet. 3. Long tab F..... ■ Check that the power supply cord is plugged into your model. NOTE: If microwave oven does not need to damper assembly.
Installation Instructions
Page 12
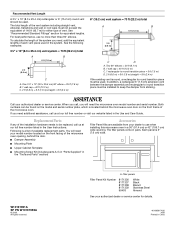
...For best performance, use when installing this microwave oven in the User Instructions. Two 90° elbows = 20 ft (6.1 m) B. 1 wall cap = 40 ft (12.2 m) C. 1 rectangular to use no more than three 90° elbows. Both numbers can be found on the model and serial number plate, which is 3"...to round transition piece must not exceed the equivalent of 140 ft (42.7 m) for equivalent lengths. When you will need the microwave oven model number and serial number. Replacement Parts If any of vent. See "Recommended Standard Fittings" section for either type of the installation ...
...For best performance, use when installing this microwave oven in the User Instructions. Two 90° elbows = 20 ft (6.1 m) B. 1 wall cap = 40 ft (12.2 m) C. 1 rectangular to use no more than three 90° elbows. Both numbers can be found on the model and serial number plate, which is 3"...to round transition piece must not exceed the equivalent of 140 ft (42.7 m) for equivalent lengths. When you will need the microwave oven model number and serial number. Replacement Parts If any of vent. See "Recommended Standard Fittings" section for either type of the installation ...


