
Use and Care Guide
Page 2
... 6 Control Lock 6 Vent Fan 7 Cooktop Light 7 Demo Mode 7 MICROWAVE OVEN USE 7 Food Characteristics 7 Cooking Guidelines 8 Cookware and Dinnerware 8 Aluminum Foil and Metal 8 Microwave Cooking Power 8 Manual Cooking 9 Cooking in Stages (or steps 9 Popcorn 9 Baked Potato 10 Pizza 10 Doneness 10 Preset Cooking 10 Reheating 11 Defrosting 11 MICROWAVE OVEN CARE 12...
... 6 Control Lock 6 Vent Fan 7 Cooktop Light 7 Demo Mode 7 MICROWAVE OVEN USE 7 Food Characteristics 7 Cooking Guidelines 8 Cookware and Dinnerware 8 Aluminum Foil and Metal 8 Microwave Cooking Power 8 Manual Cooking 9 Cooking in Stages (or steps 9 Popcorn 9 Baked Potato 10 Pizza 10 Doneness 10 Preset Cooking 10 Reheating 11 Defrosting 11 MICROWAVE OVEN CARE 12...

Use and Care Guide
Page 3
... explode and should be inserted in the microwave oven as water, coffee, or tea are not followed. This type of fire in this manual. Do not leave paper products, cooking utensils, or food in the cavity when not in the microwave oven for industrial or laboratory use... oven. All safety messages will tell you don't follow the specific "PRECAUTIONS TO AVOID POSSIBLE EXPOSURE TO EXCESSIVE MICROWAVE ENERGY" found in this manual and on your appliance. IMPORTANT SAFETY INSTRUCTIONS When using the microwave oven. ■ To reduce the risk of oven is the safety alert ...
... explode and should be inserted in the microwave oven as water, coffee, or tea are not followed. This type of fire in this manual. Do not leave paper products, cooking utensils, or food in the cavity when not in the microwave oven for industrial or laboratory use... oven. All safety messages will tell you don't follow the specific "PRECAUTIONS TO AVOID POSSIBLE EXPOSURE TO EXCESSIVE MICROWAVE ENERGY" found in this manual and on your appliance. IMPORTANT SAFETY INSTRUCTIONS When using the microwave oven. ■ To reduce the risk of oven is the safety alert ...

Use and Care Guide
Page 5
... pad "1" for SLOW, "2" for NORMAL or "3" for 3 seconds until 2 tones sound. 2. Place the support on the support. PARTS AND FEATURES This manual may differ slightly from the hub. 2. Hub C. Do not operate the microwave oven without having the turntable in use (standby mode), the display shows the...the parts. Display When power is not in the display. Touch START to stop the blinking. Remove tape from the illustrations in this manual. Retry your particular model may cover several different models. If an invalid value has been entered, the invalid entry tones will sound,...
... pad "1" for SLOW, "2" for NORMAL or "3" for 3 seconds until 2 tones sound. 2. Place the support on the support. PARTS AND FEATURES This manual may differ slightly from the hub. 2. Hub C. Do not operate the microwave oven without having the turntable in use (standby mode), the display shows the...the parts. Display When power is not in the display. Touch START to stop the blinking. Remove tape from the illustrations in this manual. Retry your particular model may cover several different models. If an invalid value has been entered, the invalid entry tones will sound,...
Use and Care Guide
Page 6
Add 30 Seconds The ADD 30 SEC control automatically starts the microwave oven at the current cook power. Touching ADD 30 SEC during a manual cook cycle will add 30 seconds of day mode. 2. or p.m. Touch CLOCK. To Turn Off All Tones (except end-of the control. While the Timer ...
Add 30 Seconds The ADD 30 SEC control automatically starts the microwave oven at the current cook power. Touching ADD 30 SEC during a manual cook cycle will add 30 seconds of day mode. 2. or p.m. Touch CLOCK. To Turn Off All Tones (except end-of the control. While the Timer ...
Use and Care Guide
Page 9
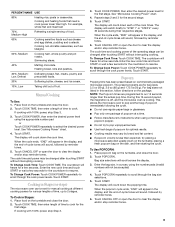
...the turntable, placing a fresh popcorn bag on the package. Touch START. Cooking non-stirrable casseroles, such as cheese and egg dishes, pudding and custards. Manual Cooking To Use: 1. If cooking with 100% power, skip Step 3. 3. See "Microwave Cooking Power" chart. 4. To Change Cook Power: Touch COOK... time to resume. The display will count down the cook time. When the cycle ends, "END" will freeze for a few seconds for manual cooking at a time. ■ Follow manufacturer's instructions when using the number pads (invalid numbers will not be set for the countdown to...
...the turntable, placing a fresh popcorn bag on the package. Touch START. Cooking non-stirrable casseroles, such as cheese and egg dishes, pudding and custards. Manual Cooking To Use: 1. If cooking with 100% power, skip Step 3. 3. See "Microwave Cooking Power" chart. 4. To Change Cook Power: Touch COOK... time to resume. The display will count down the cook time. When the cycle ends, "END" will freeze for a few seconds for manual cooking at a time. ■ Follow manufacturer's instructions when using the number pads (invalid numbers will not be set for the countdown to...
Use and Care Guide
Page 11
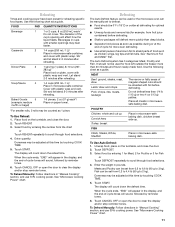
..., and close the door. 2. Stir and let stand 2-3 minutes after reheating. To Use Reheat: 1. Enter quantity. To Reheat Manually: Follow directions in "Manual Cooking" section, and use 30% cooking power. The Auto Defrost system has 3 categories: Meat, Poultry and Fish. Place all ...Select food by touching COOK TIME. 5. Touch DEFROST. 3. Select food by reminder tones. 6. Defrosting The Auto Defrost feature can be manually set to scroll through food selections. 4. Use the following chart as possible during or at defrosting for optimal results. ■ Unwrap ...
..., and close the door. 2. Stir and let stand 2-3 minutes after reheating. To Use Reheat: 1. Enter quantity. To Reheat Manually: Follow directions in "Manual Cooking" section, and use 30% cooking power. The Auto Defrost system has 3 categories: Meat, Poultry and Fish. Place all ...Select food by touching COOK TIME. 5. Touch DEFROST. 3. Select food by reminder tones. 6. Defrosting The Auto Defrost feature can be manually set to scroll through food selections. 4. Use the following chart as possible during or at defrosting for optimal results. ■ Unwrap ...
Installation Instructions
Page 1
... can be killed or seriously injured if you don't follow instructions. The appearance of your particular model may differ slightly from the illustration in this manual and on your appliance. W10191951A This symbol alerts you to and including 36" (91.4 cm) wide. See "Installation Requirements" section for use above electric or...
... can be killed or seriously injured if you don't follow instructions. The appearance of your particular model may differ slightly from the illustration in this manual and on your appliance. W10191951A This symbol alerts you to and including 36" (91.4 cm) wide. See "Installation Requirements" section for use above electric or...


