Whirlpool MH1170XSS Support and Manuals
Get Help and Manuals for this Whirlpool item

View All Support Options Below
Free Whirlpool MH1170XSS manuals!
Problems with Whirlpool MH1170XSS?
Ask a Question
Free Whirlpool MH1170XSS manuals!
Problems with Whirlpool MH1170XSS?
Ask a Question
Most Recent Whirlpool MH1170XSS Questions

Dimentions
What are the dimensions of the Whirlpool Electric Built In Oven? Model #RBS240PD
What are the dimensions of the Whirlpool Electric Built In Oven? Model #RBS240PD
(Posted by suzibel 10 years ago)

My Whirlpool Oven Displays The Word Cal And Oven Won't Turn On.
(Posted by Anonymous-94501 11 years ago)

How Do I Check The Fuse? Where Is It Located?
(Posted by nmontes 11 years ago)

How Do I Make The Timer On The Oven Louder? It's A Model From 1997. Glass Top.
(Posted by mouseears 12 years ago)

Need A Knob For My 1986 Whirpool Electric Oven? It's The Off, Bake Broil Knob.
(Posted by norsisec 12 years ago)
Popular Whirlpool MH1170XSS Manual Pages
User Instructions - Page 1
... HOOD COMBINATION USER INSTRUCTIONS
THANK YOU for purchasing this manual and on your model and serial number located on the front facing of burns, electric shock, fire,
injury to persons, or exposure to excessive microwave energy:
■ Install or locate the microwave oven only in accordance with the provided Installation Instructions.
■ Read all safety messages. We have provided...
User Instructions - Page 2

... is specifically designed to the: (1) Door (bent), (2) Hinges and latches (broken or loosened), (3) Door seals and sealing surfaces.
(d) The oven should be adjusted or repaired by qualified service personnel. This will cause overheating of oven is no damage to heat, cook, or dry food.
SAVE THESE INSTRUCTIONS
PRECAUTIONS TO AVOID POSSIBLE EXPOSURE TO EXCESSIVE MICROWAVE...
User Instructions - Page 3
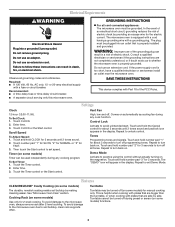
...- GROUNDING INSTRUCTIONS
■ For all cord connected appliances: The microwave oven must be plugged into a grounded 3 prong outlet. If the power supply cord is helpful when cooking with plates that are bigger than the turntable, or when cooking with Part 18 of electric shock by making cleaning easier. To Set Clock: 1. To Set Timer: 1. Vent Fan
High...
User Instructions - Page 4
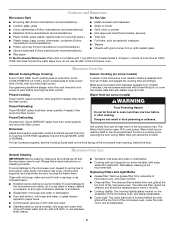
... list of preset programs, see the Cooking Guide label on cleaning products.
Replacing Filters and Light Bulbs
■ Grease filter: Remove grease filter from food as it . The charcoal filter cannot be cleaned, and should be programmed to follow label instructions on the front facing of the microwave oven, and is(are off and the microwave oven is not recommended. If dish becomes...
User Instructions - Page 5
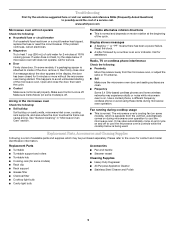
... support ■ Grease filter ■ Charcoal filter ■ Cooktop light bulb ■ Cavity light bulb
■ Pan and handle ■ Steamer vessel Cleaning Supplies ■ Heavy Duty Degreaser ■ All-Purpose Appliance Cleaner ■ Stainless Steel Cleaner and Polish
5 It may experience static or noise while microwave oven is attached to cool the microwave oven. Troubleshooting...
User Instructions - Page 6
... your product, you do not have been removed, altered or cannot be provided by an authorized Whirlpool servicer is not available.
10. Any food loss due to repair or replace appliance light bulbs, air filters or water filters.
For assistance or service, call 1-800-253-1301. If you need assistance using your major appliance is located in accordance with...
Installation Instructions - Page 1
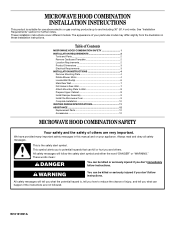
... messages will follow instructions. Always read and obey all safety messages. These words mean:
DANGER
You can be killed or seriously injured if you what the potential hazard is, tell you to Wall 8 Prepare Upper Cabinet 8 Install Damper Assembly 9 Install the Microwave Oven 9 Complete Installation 10 VENTING DESIGN SPECIFICATIONS 11 ASSISTANCE 12 Replacement Parts 12 Accessories...
Installation Instructions - Page 2
... (2) F.
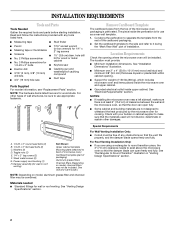
The location must be installed. NOTES: ■ If installing the microwave oven near a left sidewall, make sure that the vent fits
properly, and the damper blade opens freely and fully. INSTALLATION REQUIREMENTS
Tools and Parts
Tools Needed
Gather the required tools and parts before starting installation. See "Venting Design Specifications" section. Cut along the perforation...
Installation Instructions - Page 4
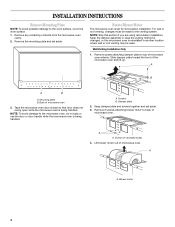
...door does not swing open while the microwave oven is set for recirculation installation.
Blower motor
4 For wall or roof venting, changes must be used. NOTE: Skip this section if you are using recirculation installation. Screws (in another location where wall or roof venting may be made to top of microwave oven. INSTALLATION INSTRUCTIONS
Remove Mounting Plate
NOTE: To avoid possible...
Installation Instructions - Page 6
...edges of the vertical centerline (see "Mark Rear Wall" section), only recirculation or roof venting installation can be done. Mounting plate center markers
6 Locate Wall Stud(s)
NOTE: If no...: If wall stud is within 6" (15.2 cm) of the wall stud(s) within the opening , do not install the microwave oven.
1.
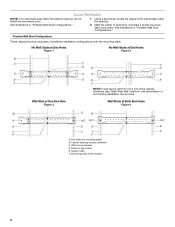
Wall stud centerlines D.
End holes (on mounting plate) B. Support tabs F.
Installation Instructions - Page 7
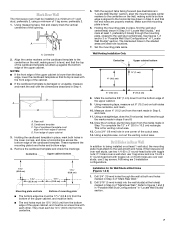
... vertical centerline of cabinet. Set the mounting plate aside. Draw...in one 1/4-20 x 3" round-head bolt with toggle nut; Wall Venting Installation Only
Centerline
Upper cabinet bottom
4" (10.2 cm)
³⁄&#...installed on both end holes marked in "Locate Wall Stud(s)" section.
7 With the support...microwave oven must be 14¹⁄₈" (35.9 cm) from the centerline.
5....
Installation Instructions - Page 8
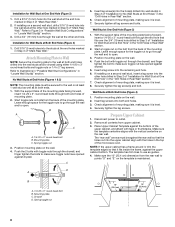
...toggle nuts or 1/4 x 2" lag screws. With the support tabs of the mounting plate facing forward,
insert 1/4-20 x 3" round-head ...making sure it fits inside the frame, against the bottom of the microwave oven. Remove all lag screws and bolts.
D A
B
A. 1/4-20...guides. 4. Securely tighten the lag screw(s) and bolt. Drill 3/16" (5 mm) holes into wall stud(s) in Step 2 of "Installation...
Installation Instructions - Page 9
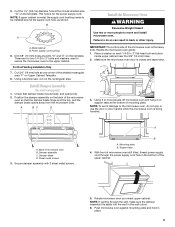
... on the template. Make sure the microwave oven door is for wall venting only)
1. Sheet metal screws
3.
NOTE: To avoid damage to move and install microwave oven. Damper blade D. Mounting plate B. 5. Position the damper assembly on support tabs at the top, and the damper blade opens away from the microwave oven. Back of microwave oven still tilted, thread power supply cord...
Installation Instructions - Page 10
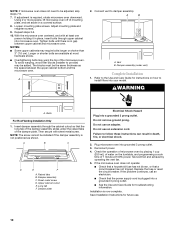
... is not positioned as the space between upper cabinet and microwave oven. Adjust mounting plate and retighten screws.
9. Vent B.
Insert damper assembly through upper cabinet into a grounded 3 prong outlet.
■ See the Use and Care Guide for future use.
10 Save Installation Instructions for troubleshooting information. Longer or shorter bolts are available at most hardware...
Installation Instructions - Page 12
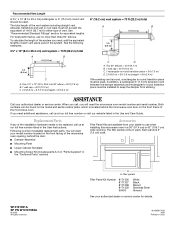
... Screw Kit (includes parts A-G in "Parts Supplied" in the Use and Care Guide.
You will need the microwave oven model number and serial number. Each panel is round, a rectangular to round transition piece must be installed to be replaced, call us at our toll free number listed in the User Instructions.
The total length of the installation hardware needs to...
Whirlpool MH1170XSS Reviews
We have not received any reviews for Whirlpool yet.