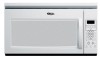
Whirlpool MH1170XSQ Support and Manuals
Get Help and Manuals for this Whirlpool item
View All Support Options Below
Free Whirlpool MH1170XSQ manuals!
Problems with Whirlpool MH1170XSQ?
Ask a Question
Free Whirlpool MH1170XSQ manuals!
Problems with Whirlpool MH1170XSQ?
Ask a Question
Most Recent Whirlpool MH1170XSQ Questions

Microwave Quits Heating After 2 Minutes
When we use the microwave, for popcorn for example, we set the timer for 3 minutes or however long i...
When we use the microwave, for popcorn for example, we set the timer for 3 minutes or however long i...
(Posted by suntravel 7 years ago)

What Is The Grease Filter Manufacture Part Number
(Posted by kfont72 11 years ago)

Popular Whirlpool MH1170XSQ Manual Pages
User Instructions - Page 1
... at www.whirlpool.com for example, closed glass jars -
All safety messages will follow the specific "PRECAUTIONS TO AVOID POSSIBLE EXPOSURE TO EXCESSIVE MICROWAVE ENERGY" found in this manual and on your model and serial number located on the front facing of injury, and tell you don't follow instructions.
Always read and obey all instructions before using...
User Instructions - Page 2

...breaker panel.
- Call an authorized service company for examination, repair, or adjustment.
■ See door surface cleaning instructions in the "Microwave Oven Care" section.
■ To...part of the oven with maximum width of injury to stand in the microwave oven for example, near a kitchen sink, in water.
■ Keep cord away from the microwave oven is specifically designed to microwave...
User Instructions - Page 3
..., have a qualified electrician or serviceman install an outlet near the microwave oven.
To avoid damage to the microwave oven due to set speed. This is helpful when cooking with plates that are not completely understood, or if doubt exists as cooling fan during preset or sensor (on some models) functions.
3 Turntable cannot be turned off programming tones...
User Instructions - Page 4
... indicated below.
■ Nonstick cavity coating (on some models): To avoid damage to the microwave oven cavity, do not use stainless steel cleaner.
■ Turntable: mild soap and water or dishwasher.
■ Cooking rack and supports (on some models): mild soap, water and washcloth.
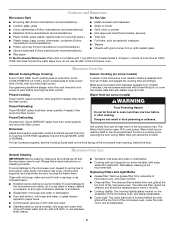
Microwave Oven Use
Manual Cooking/Stage Cooking
Touch COOK TIME, touch number pads...
User Instructions - Page 5
... (on some models, if a packaging spacer is attached to inside of the cycle. Please refer to cool the microwave oven's controls while the cooktop below . Make sure Demo Mode (on and off to the cover for assistance. Reset the clock.
■ A letter followed by a number is set properly. Replacment Parts
Accessories
■ Turntable ■ Turntable support and rollers...
User Instructions - Page 6
... User Instructions and model number information for Factory Specified Parts and repair labor to view FAQs (Frequently Asked Questions), visit www.whirlpool.com. This major appliance is designed to Whirlpool with electrical or plumbing codes, or use or when it is used in the country in which it is installed in China The removal and reinstallation of the microwave...
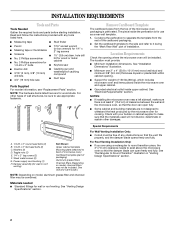
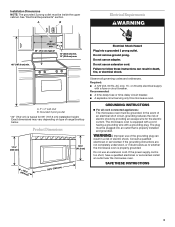
Installation Instructions - Page 1
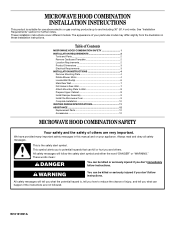
... important safety messages in this manual and on your particular model may differ slightly from the illustration in Rear Wall 7 Attach Mounting Plate to Wall 8 Prepare Upper Cabinet 8 Install Damper Assembly 9 Install the Microwave Oven 9 Complete Installation 10 VENTING DESIGN SPECIFICATIONS 11 ASSISTANCE 12 Replacement Parts 12 Accessories 12
MICROWAVE HOOD COMBINATION SAFETY
Your...
Installation Instructions - Page 2
... Care Guide.)
NOTE: Depending on model, charcoal filters may be installed. NOTES: ■ If installing the microwave oven near a left sidewall, make sure that the damper blade can open fully.
■ Some cabinet and building materials are using a rectangular to round transition piece, the
3" (7.6 cm) clearance needs to it during
the "Mark Rear Wall" part of...
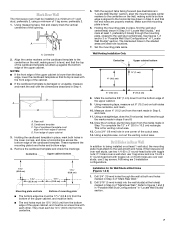
Installation Instructions - Page 3
...;c⁄₄m")
29⁷⁄₈" (76.0 cm)
GROUNDING INSTRUCTIONS
■ For all governing codes and ordinances.
If the power supply cord is properly grounded.
Do...INSTRUCTIONS
3 See "Electrical Requirements" section. Do not use an adapter. Failure to whether the microwave oven is too short, have a qualified electrician or serviceman install an outlet near the microwave...
Installation Instructions - Page 7
...support tabs facing forward (see illustrations in "Locate Wall Stud(s)" section, align the mounting plate... the mounting plate, closest to being installed on a minimum of 1 wall stud, preferably 2, using a minimum of the cutout area.
14. Mark Rear Wall
The microwave oven must each...the venting cutout area. Rear wall B. Set the mounting plate aside. Using measuring tape, find the ...
Installation Instructions - Page 8
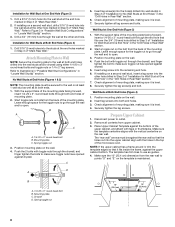
...plate C. Refer to the wall on at least 1 wall stud as well as guides. 4. No Wall Studs at End Holes (Figures 1 & 2)
NOTE: The mounting plate...the support tabs of the mounting plate facing...plate, making sure it fits inside the frame, against the rear wall so that fits over the 3/4" (19 mm) hole drilled in Step 3 of "Installation for Wall Stud at the end holes marked in Step 3 of the microwave...
Installation Instructions - Page 9
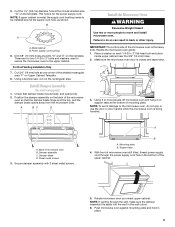
... washers used to secure the microwave oven to move and install microwave oven. Check that the damper blade hinge is closed and taped shut.
3. Place a washer on Upper Cabinet Template.
8. A. B
A
A.
Position the damper assembly on support tabs at points "D" and "E" on the template. Mounting plate B. For Roof Venting Installation Only
7. Damper assembly C. Using 2 or...
Installation Instructions - Page 10
... or shorter bolts are available at 100% power. Refer to the Use and Care Guide for troubleshooting information.
Reconnect power. 4. Replace the fuse or reset the circuit breaker.
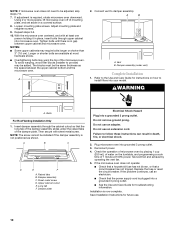
WARNING
A.
Raised tabs B. Plug microwave oven into your model. Loosen mounting plate screws. Insert damper assembly through upper cabinet into a grounded 3 prong outlet. Repeat steps 3-6.
10...
Installation Instructions - Page 12
...
Call your model number located on the front facing of the microwave oven opening . Both numbers can be replaced, call us at our toll free number listed in the User Instructions. Following is located behind the door. ■ Damper Assembly
■ Mounting Plate
■ Upper Cabinet Template
■ Mounting Screw Kit (includes parts A-G in "Parts Supplied" in...
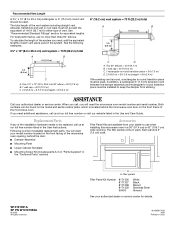
Dimensions - Page 1

... duct tape to the microwave oven hood.
Flexible metal elbows count twice as much as possible to seal all joints in the vent system. ✔ using rigid metal vent. ✔ that there is proper clearance within the wall for 66" (167.6 cm) installation height. transition 2 - 90° elbows 1 - Instructions packed with product.
A
B
NOTE...
Whirlpool MH1170XSQ Reviews
We have not received any reviews for Whirlpool yet.