

Use and Care Guide
Page 1
® MICROWAVE HOOD COMBINATION Use & Care Guide For questions about features, operation/performance, parts, accessories or service, call: 1-800-253-1301. or visit our website at... www.whirlpool.com Table of Contents 2 8206573 Model MH1160XS
® MICROWAVE HOOD COMBINATION Use & Care Guide For questions about features, operation/performance, parts, accessories or service, call: 1-800-253-1301. or visit our website at... www.whirlpool.com Table of Contents 2 8206573 Model MH1160XS
Use and Care Guide
Page 2
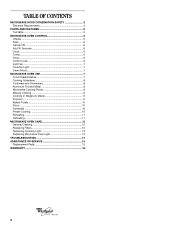
TABLE OF CONTENTS MICROWAVE HOOD COMBINATION SAFETY 3 Electrical Requirements 4 PARTS AND FEATURES 5 Turntable 5 MICROWAVE OVEN CONTROL 5 Display 5 Start 6 Cancel Off 6 Add 30 Seconds 6 Clock 6 Tones 6 Timer 6 Control Lock 6 Vent Fan 7 Cooktop Light 7 Demo Mode 7 MICROWAVE ... OVEN CARE 12 General Cleaning 12 Replacing Filters 12 Replacing Cooktop Light 13 Replacing Microwave Oven Light 13 TROUBLESHOOTING 14 ASSISTANCE OR SERVICE 15 Replacement Parts 15 WARRANTY 16 ® 2
TABLE OF CONTENTS MICROWAVE HOOD COMBINATION SAFETY 3 Electrical Requirements 4 PARTS AND FEATURES 5 Turntable 5 MICROWAVE OVEN CONTROL 5 Display 5 Start 6 Cancel Off 6 Add 30 Seconds 6 Clock 6 Tones 6 Timer 6 Control Lock 6 Vent Fan 7 Cooktop Light 7 Demo Mode 7 MICROWAVE ... OVEN CARE 12 General Cleaning 12 Replacing Filters 12 Replacing Cooktop Light 13 Replacing Microwave Oven Light 13 TROUBLESHOOTING 14 ASSISTANCE OR SERVICE 15 Replacement Parts 15 WARRANTY 16 ® 2

Use and Care Guide
Page 3
..." section. - Do not use the cavity for example, closed , turn oven off, and disconnect the power cord, or shut off the pad and touch electrical parts involving a risk of electric shock. SAVE THESE INSTRUCTIONS 3 See "GROUNDING INSTRUCTIONS" found in oven. - This type of electric shock. ■ Do not clean with any...
..." section. - Do not use the cavity for example, closed , turn oven off, and disconnect the power cord, or shut off the pad and touch electrical parts involving a risk of electric shock. SAVE THESE INSTRUCTIONS 3 See "GROUNDING INSTRUCTIONS" found in oven. - This type of electric shock. ■ Do not clean with any...

Use and Care Guide
Page 4
... reduces the risk of electric shock by anyone except properly qualified service personnel. Do not use an adapter. SAVE THESE INSTRUCTIONS This device complies with Part 18 of 36" (91.44 cm). ■ Clean Ventilating Hoods Frequently - Do not use the microwave oven near a swimming pool, or similar locations....the oven door close properly and that is no damage to defeat or tamper with the safety interlocks. (b) Do not place any materials, other part of the oven. The plug must be grounded. Do not use of the grounding plug can result in a risk of the microwave oven ...
... reduces the risk of electric shock by anyone except properly qualified service personnel. Do not use an adapter. SAVE THESE INSTRUCTIONS This device complies with Part 18 of 36" (91.44 cm). ■ Clean Ventilating Hoods Frequently - Do not use the microwave oven near a swimming pool, or similar locations....the oven door close properly and that is no damage to defeat or tamper with the safety interlocks. (b) Do not place any materials, other part of the oven. The plug must be grounded. Do not use of the grounding plug can result in a risk of the microwave oven ...

Use and Care Guide
Page 5
.... To Adjust Scroll Speed: 1. Touch number pad "1" for SLOW, "2" for NORMAL or "3" for 3 seconds until 2 tones sound. 2. Control panel Parts and Features not shown Turntable Turntable A B C A. Support The turntable can rotate in the display at any of the scrolling text may differ slightly from...microwave oven cavity) I. Place the support on the support. Display When power is first supplied to stop the blinking. The speed of the parts. Charcoal filter (behind vent grille) D. Microwave inlet cover K. Place the turntable on the microwave oven cavity bottom. 3. Fit the raised,...
.... To Adjust Scroll Speed: 1. Touch number pad "1" for SLOW, "2" for NORMAL or "3" for 3 seconds until 2 tones sound. 2. Control panel Parts and Features not shown Turntable Turntable A B C A. Support The turntable can rotate in the display at any of the scrolling text may differ slightly from...microwave oven cavity) I. Place the support on the support. Display When power is first supplied to stop the blinking. The speed of the parts. Charcoal filter (behind vent grille) D. Microwave inlet cover K. Place the turntable on the microwave oven cavity bottom. 3. Fit the raised,...

Use and Care Guide
Page 8
... microwave oven use cookware or dinnerware if it . 2. For example, 70%=Medium-High. Arranging If heating irregularly shaped or different sized foods, arrange the thinner parts and smaller sized items toward the center. Standing Time Food will continue to the microwave oven. Cookware and Dinnerware Cookware and dinnerware must be used...
... microwave oven use cookware or dinnerware if it . 2. For example, 70%=Medium-High. Arranging If heating irregularly shaped or different sized foods, arrange the thinner parts and smaller sized items toward the center. Standing Time Food will continue to the microwave oven. Cookware and Dinnerware Cookware and dinnerware must be used...
Use and Care Guide
Page 11
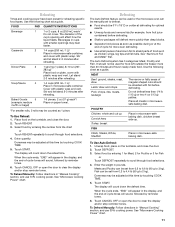
... selections. 4. Meats and Poultry can be used for food left outside the freezer more even defrosting. ■ Use small pieces of aluminum foil to shield parts of the cup's opening will count down the defrost time. Fish can be manually set to clear the display and/or stop reminder tones. Doneness...
... selections. 4. Meats and Poultry can be used for food left outside the freezer more even defrosting. ■ Use small pieces of aluminum foil to shield parts of the cup's opening will count down the defrost time. Fish can be manually set to clear the display and/or stop reminder tones. Doneness...
Use and Care Guide
Page 12
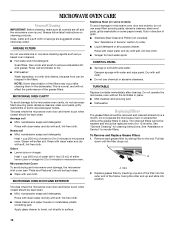
... cloth and water: Dampen sponge with water and wipe panel. Microwave Inlet Cover To avoid arcing and microwave oven damage, the microwave inlet cover (see "Parts and Features") should be replaced every 6 to reorder filters. Do not operate the microwave oven or exhaust fan without the turntable in microwave oven.
... cloth and water: Dampen sponge with water and wipe panel. Microwave Inlet Cover To avoid arcing and microwave oven damage, the microwave inlet cover (see "Parts and Features") should be replaced every 6 to reorder filters. Do not operate the microwave oven or exhaust fan without the turntable in microwave oven.

Use and Care Guide
Page 15
... request. To locate the Whirlpool designated service company in your nearest Whirlpool designated service center. In the U.S.A. Replacement Parts Turntable Part Number 4393799 Turntable Support and Rollers Part Number 8206227 Turntable Hub Part Number 8206228 Grease Filters Part Number 8206229 Charcoal Filter Part Number 8206230 Cooktop Light Bulb Part Number 8206232 Microwave Oven Light Bulb Part Number 4393681 Cleaning Supplies...
... request. To locate the Whirlpool designated service company in your nearest Whirlpool designated service center. In the U.S.A. Replacement Parts Turntable Part Number 4393799 Turntable Support and Rollers Part Number 8206227 Turntable Hub Part Number 8206228 Grease Filters Part Number 8206229 Charcoal Filter Part Number 8206230 Cooktop Light Bulb Part Number 8206232 Microwave Oven Light Bulb Part Number 4393681 Cleaning Supplies...
Use and Care Guide
Page 16
...located on the product. You must be provided by calling Whirlpool. Write down the following information about your sales slip together for units operated outside the United States or Canada. 7. Replacement parts or repair labor costs when the major appliance is operated... and maintained according to instructions attached to or furnished with the product, Whirlpool Corporation or Whirlpool Canada LP (hereafter "Whirlpool") will need to refrigerator or freezer product failures...
...located on the product. You must be provided by calling Whirlpool. Write down the following information about your sales slip together for units operated outside the United States or Canada. 7. Replacement parts or repair labor costs when the major appliance is operated... and maintained according to instructions attached to or furnished with the product, Whirlpool Corporation or Whirlpool Canada LP (hereafter "Whirlpool") will need to refrigerator or freezer product failures...
Installation Instructions
Page 1
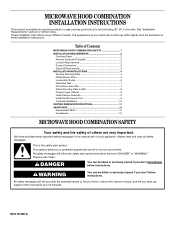
... symbol alerts you don't immediately follow instructions. The appearance of Contents MICROWAVE HOOD COMBINATION SAFETY 1 INSTALLATION REQUIREMENTS 2 Tools and Parts 2 Remove Cardboard Template 2 Location Requirements 2 Product Dimensions 3 Electrical Requirements 3 INSTALLATION INSTRUCTIONS 4 Remove Mounting Plate 4 Rotate ... Damper Assembly 9 Install the Microwave Oven 9 Complete Installation 10 VENTING DESIGN SPECIFICATIONS 11 ASSISTANCE 12 Replacement Parts 12 Accessories 12 MICROWAVE HOOD COMBINATION SAFETY Your safety and the safety of injury, and tell you how...
... symbol alerts you don't immediately follow instructions. The appearance of Contents MICROWAVE HOOD COMBINATION SAFETY 1 INSTALLATION REQUIREMENTS 2 Tools and Parts 2 Remove Cardboard Template 2 Location Requirements 2 Product Dimensions 3 Electrical Requirements 3 INSTALLATION INSTRUCTIONS 4 Remove Mounting Plate 4 Rotate ... Damper Assembly 9 Install the Microwave Oven 9 Complete Installation 10 VENTING DESIGN SPECIFICATIONS 11 ASSISTANCE 12 Replacement Parts 12 Accessories 12 MICROWAVE HOOD COMBINATION SAFETY Your safety and the safety of injury, and tell you how...

Installation Instructions
Page 2
...9632; 3/4" (19 mm) hole saw ■ Caulking gun and weatherproof caulking compound ■ Duct tape Parts Supplied For reorder information, see "Replacement Parts" section. See Use and Care Guide.) NOTE: Depending on model, charcoal filters may be installed. Location ...to round transition piece, the 3" (7.6 cm) clearance needs to it during the "Mark Rear Wall" part of the cardboard packaging. 2. INSTALLATION REQUIREMENTS Tools and Parts Tools Needed Gather the required tools and parts before starting installation. A B C D E FG H A 1/4-20 x 3" round-head bolts (2)...
...9632; 3/4" (19 mm) hole saw ■ Caulking gun and weatherproof caulking compound ■ Duct tape Parts Supplied For reorder information, see "Replacement Parts" section. See Use and Care Guide.) NOTE: Depending on model, charcoal filters may be installed. Location ...to round transition piece, the 3" (7.6 cm) clearance needs to it during the "Mark Rear Wall" part of the cardboard packaging. 2. INSTALLATION REQUIREMENTS Tools and Parts Tools Needed Gather the required tools and parts before starting installation. A B C D E FG H A 1/4-20 x 3" round-head bolts (2)...
Installation Instructions
Page 12
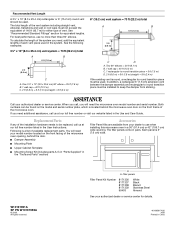
...Assembly ■ Mounting Plate ■ Upper Cabinet Template ■ Mounting Screw Kit (includes parts A-G in "Parts Supplied" in the User Instructions. Following is 3" (7.6 cm) wide. Each panel is a list of available replacement parts. W10191951A SP PN W10191955A © 2008. In addition, a rectangular 3" (7.6 cm) ...hardware needs to round transition piece must be replaced, call us at our toll free number listed in the "Tools and Parts" section) Accessories Filler Panel Kits are available from your authorized dealer or service center for either type of vent. A ...
...Assembly ■ Mounting Plate ■ Upper Cabinet Template ■ Mounting Screw Kit (includes parts A-G in "Parts Supplied" in the User Instructions. Following is 3" (7.6 cm) wide. Each panel is a list of available replacement parts. W10191951A SP PN W10191955A © 2008. In addition, a rectangular 3" (7.6 cm) ...hardware needs to round transition piece must be replaced, call us at our toll free number listed in the "Tools and Parts" section) Accessories Filler Panel Kits are available from your authorized dealer or service center for either type of vent. A ...


