
Use and Care Guide
Page 1
or visit our website at... ® MICROWAVE HOOD COMBINATION Use & Care Guide For questions about features, operation/performance, parts, accessories or service, call: 1-800-253-1301. www.whirlpool.com Table of Contents 2 8206573 Model MH1160XS
or visit our website at... ® MICROWAVE HOOD COMBINATION Use & Care Guide For questions about features, operation/performance, parts, accessories or service, call: 1-800-253-1301. www.whirlpool.com Table of Contents 2 8206573 Model MH1160XS
Use and Care Guide
Page 2
TABLE OF CONTENTS MICROWAVE HOOD COMBINATION SAFETY 3 Electrical Requirements 4 PARTS AND FEATURES 5 Turntable 5 MICROWAVE OVEN CONTROL 5 Display 5 Start 6 Cancel Off 6 Add 30 Seconds 6 Clock 6 Tones 6 Timer 6 Control Lock 6 Vent Fan 7 Cooktop Light 7 Demo Mode 7 MICROWAVE ... OVEN CARE 12 General Cleaning 12 Replacing Filters 12 Replacing Cooktop Light 13 Replacing Microwave Oven Light 13 TROUBLESHOOTING 14 ASSISTANCE OR SERVICE 15 Replacement Parts 15 WARRANTY 16 ® 2
TABLE OF CONTENTS MICROWAVE HOOD COMBINATION SAFETY 3 Electrical Requirements 4 PARTS AND FEATURES 5 Turntable 5 MICROWAVE OVEN CONTROL 5 Display 5 Start 6 Cancel Off 6 Add 30 Seconds 6 Clock 6 Tones 6 Timer 6 Control Lock 6 Vent Fan 7 Cooktop Light 7 Demo Mode 7 MICROWAVE ... OVEN CARE 12 General Cleaning 12 Replacing Filters 12 Replacing Cooktop Light 13 Replacing Microwave Oven Light 13 TROUBLESHOOTING 14 ASSISTANCE OR SERVICE 15 Replacement Parts 15 WARRANTY 16 ® 2

Use and Care Guide
Page 3
... industrial or laboratory use the cavity for example, closed , turn oven off, and disconnect the power cord, or shut off the pad and touch electrical parts involving a risk of electric shock. Always read and obey all instructions before removing the container. - This type of oven is the safety alert symbol. To...
... industrial or laboratory use the cavity for example, closed , turn oven off, and disconnect the power cord, or shut off the pad and touch electrical parts involving a risk of electric shock. Always read and obey all instructions before removing the container. - This type of oven is the safety alert symbol. To...

Use and Care Guide
Page 4
... with a fuse or circuit breaker. Required: ■ A 120 Volt, 60 Hz, AC only, 15- or 20-amp electrical supply with Part 18 of electric shock by anyone except properly qualified service personnel. Consult a qualified electrician or serviceman if the grounding instructions are not completely understood,...or if doubt exists as lye-based oven cleaners, may damage the filter. ■ Do not cover or block any materials, other part of electric shock. GROUNDING INSTRUCTIONS ■ For all governing codes and ordinances. Grease should not be allowed to whether the microwave oven ...
... with a fuse or circuit breaker. Required: ■ A 120 Volt, 60 Hz, AC only, 15- or 20-amp electrical supply with Part 18 of electric shock by anyone except properly qualified service personnel. Consult a qualified electrician or serviceman if the grounding instructions are not completely understood,...or if doubt exists as lye-based oven cleaners, may damage the filter. ■ Do not cover or block any materials, other part of electric shock. GROUNDING INSTRUCTIONS ■ For all governing codes and ordinances. Grease should not be allowed to whether the microwave oven ...

Use and Care Guide
Page 5
...number plate C. Metal shielded window G. Turntable B. Hub C. To Install: 1. Remove tape from the illustrations in the display at any of the parts. Fit the raised, curved lines in use , the display shows cooking power, quantities, weights and/or prompts. Touch CANCEL OFF and reset the ... or Service" to the microwave oven, a ":" will reappear in the display. Microwave oven light E. Place the turntable on the support. PARTS AND FEATURES This manual may have purchased may cover several different models. The speed of the scrolling text may differ slightly from the hub. ...
...number plate C. Metal shielded window G. Turntable B. Hub C. To Install: 1. Remove tape from the illustrations in the display at any of the parts. Fit the raised, curved lines in use , the display shows cooking power, quantities, weights and/or prompts. Touch CANCEL OFF and reset the ... or Service" to the microwave oven, a ":" will reappear in the display. Microwave oven light E. Place the turntable on the support. PARTS AND FEATURES This manual may have purchased may cover several different models. The speed of the scrolling text may differ slightly from the hub. ...

Use and Care Guide
Page 8
... use . Do not use the turntable. ■ Do not allow steam to center. Arranging If heating irregularly shaped or different sized foods, arrange the thinner parts and smaller sized items toward the center. Ceramic Glass, Glass Acceptable for the suggested cooking power of food. Follow manufacturer's recommendations. Cook at one corner...
... use . Do not use the turntable. ■ Do not allow steam to center. Arranging If heating irregularly shaped or different sized foods, arrange the thinner parts and smaller sized items toward the center. Ceramic Glass, Glass Acceptable for the suggested cooking power of food. Follow manufacturer's recommendations. Cook at one corner...
Use and Care Guide
Page 11
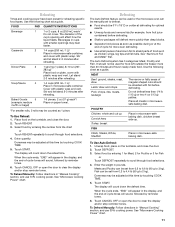
... The Auto Defrost feature can be used or the microwave oven can be used for example, from the chart or Touch REHEAT repeatedly to shield parts of -cycle tones will defrost more than 20 minutes and frozen ready-made food. It should be adjusted at this time by touching COOK TIME...
... The Auto Defrost feature can be used or the microwave oven can be used for example, from the chart or Touch REHEAT repeatedly to shield parts of -cycle tones will defrost more than 20 minutes and frozen ready-made food. It should be adjusted at this time by touching COOK TIME...
Use and Care Guide
Page 12
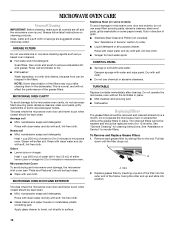
... closed should be kept clean. ■ Wipe with wet cloth. Microwave Inlet Cover To avoid arcing and microwave oven damage, the microwave inlet cover (see "Parts and Features") should be kept clean. ■ Mild, nonabrasive soaps and detergents: Rinse with clean water and dry with soft cloth. ■ Do not use...
... closed should be kept clean. ■ Wipe with wet cloth. Microwave Inlet Cover To avoid arcing and microwave oven damage, the microwave inlet cover (see "Parts and Features") should be kept clean. ■ Mild, nonabrasive soaps and detergents: Rinse with clean water and dry with soft cloth. ■ Do not use...

Use and Care Guide
Page 15
...the same outlet? If you need replacement parts If you need to build every new WHIRLPOOL® appliance. To locate FSP® replacement parts in "Microwave Hood Combination Safety?" If you use only FSP® replacement parts. Whirlpool designated service technicians are made with the ...same precision used to order replacement parts, we recommend that specified in your area, call . For further assistance If you need longer cooking times...
...the same outlet? If you need replacement parts If you need to build every new WHIRLPOOL® appliance. To locate FSP® replacement parts in "Microwave Hood Combination Safety?" If you use only FSP® replacement parts. Whirlpool designated service technicians are made with the ...same precision used to order replacement parts, we recommend that specified in your area, call . For further assistance If you need longer cooking times...
Use and Care Guide
Page 16
..., installation not in accordance with electrical or plumbing codes, or use of products not approved by calling Whirlpool. Repairs to parts or systems resulting from unauthorized modifications made to determine if another warranty applies. Replacement parts or repair labor costs when the major appliance is used for in-warranty service. SOME STATES AND...
..., installation not in accordance with electrical or plumbing codes, or use of products not approved by calling Whirlpool. Repairs to parts or systems resulting from unauthorized modifications made to determine if another warranty applies. Replacement parts or repair labor costs when the major appliance is used for in-warranty service. SOME STATES AND...
Installation Instructions
Page 1
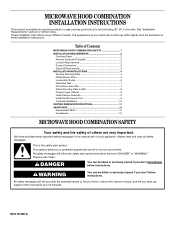
Table of your appliance. The appearance of Contents MICROWAVE HOOD COMBINATION SAFETY 1 INSTALLATION REQUIREMENTS 2 Tools and Parts 2 Remove Cardboard Template 2 Location Requirements 2 Product Dimensions 3 Electrical Requirements 3 INSTALLATION INSTRUCTIONS 4 Remove Mounting Plate 4 Rotate ...Cabinet 8 Install Damper Assembly 9 Install the Microwave Oven 9 Complete Installation 10 VENTING DESIGN SPECIFICATIONS 11 ASSISTANCE 12 Replacement Parts 12 Accessories 12 MICROWAVE HOOD COMBINATION SAFETY Your safety and the safety of injury, and tell you what the potential ...
Table of your appliance. The appearance of Contents MICROWAVE HOOD COMBINATION SAFETY 1 INSTALLATION REQUIREMENTS 2 Tools and Parts 2 Remove Cardboard Template 2 Location Requirements 2 Product Dimensions 3 Electrical Requirements 3 INSTALLATION INSTRUCTIONS 4 Remove Mounting Plate 4 Rotate ...Cabinet 8 Install Damper Assembly 9 Install the Microwave Oven 9 Complete Installation 10 VENTING DESIGN SPECIFICATIONS 11 ASSISTANCE 12 Replacement Parts 12 Accessories 12 MICROWAVE HOOD COMBINATION SAFETY Your safety and the safety of injury, and tell you what the potential ...

Installation Instructions
Page 2
... Support for wall or roof venting) Not Shown: Upper cabinet template Mounting plate (attached to back of microwave oven) Cardboard template (part of wall structures, be sure to use as a rear wall template. 1. See "Electrical Requirements" section. For Roof Venting Installation Only...x 2" lag screws (2) F. Read and follow the instructions provided with your builder or cabinet supplier to it during the "Mark Rear Wall" part of the microwave oven packaging is for cooking. Cut along the perforation to Round Transition" illustration in "Venting Design Specifications" section. 2 hole...
... Support for wall or roof venting) Not Shown: Upper cabinet template Mounting plate (attached to back of microwave oven) Cardboard template (part of wall structures, be sure to use as a rear wall template. 1. See "Electrical Requirements" section. For Roof Venting Installation Only...x 2" lag screws (2) F. Read and follow the instructions provided with your builder or cabinet supplier to it during the "Mark Rear Wall" part of the microwave oven packaging is for cooking. Cut along the perforation to Round Transition" illustration in "Venting Design Specifications" section. 2 hole...
Installation Instructions
Page 12
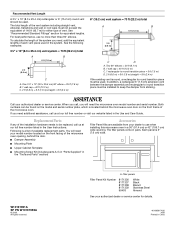
...m) If the existing vent is located behind the door. ■ Damper Assembly ■ Mounting Plate ■ Upper Cabinet Template ■ Mounting Screw Kit (includes parts A-G in "Parts Supplied" in China A A. To calculate the length of each vent piece used . One 3¹⁄₄" x 10" (8.3 x 25.4 cm) 90°...or 6" (15.2 cm) round vent should be installed to use no more than three 90° elbows. The total length of available replacement parts. For best performance, use when installing this microwave oven in pairs. The filler panels come in a 36" (91.4 cm) or 42" ...
...m) If the existing vent is located behind the door. ■ Damper Assembly ■ Mounting Plate ■ Upper Cabinet Template ■ Mounting Screw Kit (includes parts A-G in "Parts Supplied" in China A A. To calculate the length of each vent piece used . One 3¹⁄₄" x 10" (8.3 x 25.4 cm) 90°...or 6" (15.2 cm) round vent should be installed to use no more than three 90° elbows. The total length of available replacement parts. For best performance, use when installing this microwave oven in pairs. The filler panels come in a 36" (91.4 cm) or 42" ...


