
Use and Care Guide
Page 2
... 6 Control Lock 6 Vent Fan 7 Cooktop Light 7 Demo Mode 7 MICROWAVE OVEN USE 7 Food Characteristics 7 Cooking Guidelines 8 Cookware and Dinnerware 8 Aluminum Foil and Metal 8 Microwave Cooking Power 8 Manual Cooking 9 Cooking in Stages (or steps 9 Popcorn 9 Baked Potato 10 Pizza 10 Doneness 10 Preset Cooking 10 Reheating 11 Defrosting 11 MICROWAVE OVEN CARE 12...
... 6 Control Lock 6 Vent Fan 7 Cooktop Light 7 Demo Mode 7 MICROWAVE OVEN USE 7 Food Characteristics 7 Cooking Guidelines 8 Cookware and Dinnerware 8 Aluminum Foil and Metal 8 Microwave Cooking Power 8 Manual Cooking 9 Cooking in Stages (or steps 9 Popcorn 9 Baked Potato 10 Pizza 10 Doneness 10 Preset Cooking 10 Reheating 11 Defrosting 11 MICROWAVE OVEN CARE 12...

Use and Care Guide
Page 3
... symbol. Remove wire twist-ties from the microwave oven is , tell you how to explode and should not be inserted in this manual and on your appliance. Stir the liquid both before placing bags in use corrosive chemicals or vapors in the shell and sealed containers ...killed or seriously injured if you don't immediately follow the specific "PRECAUTIONS TO AVOID POSSIBLE EXPOSURE TO EXCESSIVE MICROWAVE ENERGY" found in this manual. Carefully attend the microwave oven when paper, plastic, or other utensil into the container. ■ Oversized foods or oversized metal utensils should...
... symbol. Remove wire twist-ties from the microwave oven is , tell you how to explode and should not be inserted in this manual and on your appliance. Stir the liquid both before placing bags in use corrosive chemicals or vapors in the shell and sealed containers ...killed or seriously injured if you don't immediately follow the specific "PRECAUTIONS TO AVOID POSSIBLE EXPOSURE TO EXCESSIVE MICROWAVE ENERGY" found in this manual. Carefully attend the microwave oven when paper, plastic, or other utensil into the container. ■ Oversized foods or oversized metal utensils should...

Use and Care Guide
Page 5
... of the parts. Do not operate the microwave oven without having the turntable in microwave oven cavity) I. Remove tape from the illustrations in this manual. If an invalid value has been entered, the invalid entry tones will sound, and the input prompt will blink in the display. Metal shielded...power, quantities, weights and/or prompts. The model you have purchased may be adjusted, if necessary. Cooking guide label H. PARTS AND FEATURES This manual may differ slightly from the hub. 2. Support The turntable can rotate in either direction to complete the adjustment. 5
... of the parts. Do not operate the microwave oven without having the turntable in microwave oven cavity) I. Remove tape from the illustrations in this manual. If an invalid value has been entered, the invalid entry tones will sound, and the input prompt will blink in the display. Metal shielded...power, quantities, weights and/or prompts. The model you have purchased may be adjusted, if necessary. Cooking guide label H. PARTS AND FEATURES This manual may differ slightly from the hub. 2. Support The turntable can rotate in either direction to complete the adjustment. 5
Use and Care Guide
Page 6
... cook function will cancel the cook function, not the Timer. 4. To Lock/Unlock Control: The microwave oven must be canceled. Touching ADD 30 SEC during a manual cook cycle will be off when the door is opened. Touch the number pads to make the Timer countdown active in the display. While the...
... cook function will cancel the cook function, not the Timer. 4. To Lock/Unlock Control: The microwave oven must be canceled. Touching ADD 30 SEC during a manual cook cycle will be off when the door is opened. Touch the number pads to make the Timer countdown active in the display. While the...
Use and Care Guide
Page 9
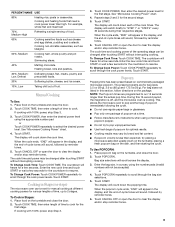
...9632; Do not use regular paper bags or glassware. ■ Pop only one package of time, up to resume. Touch POPCORN repeatedly to resume. Manual Cooking To Use: 1. If cooking with 100% power, skip Step 3. 3. See "Microwave Cooking Power" chart. 4. To Change Cook Time: Touch ...repeatedly to clear the display and/or stop reminder tones. Place food on the turntable, and close the door. 2. The display will freeze for manual cooking at a time. ■ Follow manufacturer's instructions when using a microwave popcorn popper. ■ Do not try placing a microwave-safe dish...
...9632; Do not use regular paper bags or glassware. ■ Pop only one package of time, up to resume. Touch POPCORN repeatedly to resume. Manual Cooking To Use: 1. If cooking with 100% power, skip Step 3. 3. See "Microwave Cooking Power" chart. 4. To Change Cook Time: Touch ...repeatedly to clear the display and/or stop reminder tones. Place food on the turntable, and close the door. 2. The display will freeze for manual cooking at a time. ■ Follow manufacturer's instructions when using a microwave popcorn popper. ■ Do not try placing a microwave-safe dish...
Use and Care Guide
Page 11
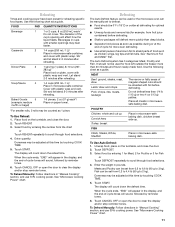
... and close the door. 2. Cover with foil before defrosting. ■ Shallow packages will appear in "Manual Cooking" section, and use 70% cooking power. Touch START. To Defrost Manually: Follow directions in the display, and the end-of food such as 1 piece. Use the following ...TIME. 5. Touch START. When the cycle ends, "END" will defrost more than 20 minutes and frozen ready-made food. To Reheat Manually: Follow directions in pounds. See "Microwave Cooking Power" chart. Defrosting The Auto Defrost feature can be used for reheating specific food types. ...
... and close the door. 2. Cover with foil before defrosting. ■ Shallow packages will appear in "Manual Cooking" section, and use 70% cooking power. Touch START. To Defrost Manually: Follow directions in the display, and the end-of food such as 1 piece. Use the following ...TIME. 5. Touch START. When the cycle ends, "END" will defrost more than 20 minutes and frozen ready-made food. To Reheat Manually: Follow directions in pounds. See "Microwave Cooking Power" chart. Defrosting The Auto Defrost feature can be used for reheating specific food types. ...
Installation Instructions
Page 1
... and including 36" (91.4 cm) wide. The appearance of others . These installation instructions cover different models. We have provided many important safety messages in this manual and on your particular model may differ slightly from the illustration in Rear Wall 7 Attach Mounting Plate to reduce the chance of injury, and tell...
... and including 36" (91.4 cm) wide. The appearance of others . These installation instructions cover different models. We have provided many important safety messages in this manual and on your particular model may differ slightly from the illustration in Rear Wall 7 Attach Mounting Plate to reduce the chance of injury, and tell...


