
Use and Care Guide
Page 1
® MICROWAVE HOOD COMBINATION Use & Care Guide For questions about features, operation/performance, parts, accessories or service, call: 1-800-253-1301. www.whirlpool.com Table of Contents 2 8206573 Model MH1160XS or visit our website at...
® MICROWAVE HOOD COMBINATION Use & Care Guide For questions about features, operation/performance, parts, accessories or service, call: 1-800-253-1301. www.whirlpool.com Table of Contents 2 8206573 Model MH1160XS or visit our website at...
Use and Care Guide
Page 2
TABLE OF CONTENTS MICROWAVE HOOD COMBINATION SAFETY 3 Electrical Requirements 4 PARTS AND FEATURES 5 Turntable 5 MICROWAVE OVEN CONTROL 5 Display 5 Start 6 Cancel Off 6 Add 30 Seconds 6 Clock 6 Tones 6 Timer 6 Control Lock 6 Vent Fan 7 Cooktop Light 7 Demo Mode 7 MICROWAVE ... OVEN CARE 12 General Cleaning 12 Replacing Filters 12 Replacing Cooktop Light 13 Replacing Microwave Oven Light 13 TROUBLESHOOTING 14 ASSISTANCE OR SERVICE 15 Replacement Parts 15 WARRANTY 16 ® 2
TABLE OF CONTENTS MICROWAVE HOOD COMBINATION SAFETY 3 Electrical Requirements 4 PARTS AND FEATURES 5 Turntable 5 MICROWAVE OVEN CONTROL 5 Display 5 Start 6 Cancel Off 6 Add 30 Seconds 6 Clock 6 Tones 6 Timer 6 Control Lock 6 Vent Fan 7 Cooktop Light 7 Demo Mode 7 MICROWAVE ... OVEN CARE 12 General Cleaning 12 Replacing Filters 12 Replacing Cooktop Light 13 Replacing Microwave Oven Light 13 TROUBLESHOOTING 14 ASSISTANCE OR SERVICE 15 Replacement Parts 15 WARRANTY 16 ® 2

Use and Care Guide
Page 3
... to stand in the microwave oven for example, closed , turn oven off, and disconnect the power cord, or shut off the pad and touch electrical parts involving a risk of electric shock. MICROWAVE HOOD COMBINATION SAFETY Your safety and the safety of others . We have provided many important safety messages in this...
... to stand in the microwave oven for example, closed , turn oven off, and disconnect the power cord, or shut off the pad and touch electrical parts involving a risk of electric shock. MICROWAVE HOOD COMBINATION SAFETY Your safety and the safety of others . We have provided many important safety messages in this...

Use and Care Guide
Page 4
...over edge of table or counter. ■ Do not mount over a sink. ■ Do not cover racks or any materials, other part of the oven with metal foil. Observe all cord connected appliances: The microwave oven must be adjusted or repaired by providing an escape wire ...not place any openings on models with this feature). ■ Do not store any other than manufacturer's recommended accessories, in this oven with Part 18 of the oven. Electrical Requirements WARNING Electrical Shock Hazard Plug into an outlet that there is too short, have a qualified electrician or serviceman...
...over edge of table or counter. ■ Do not mount over a sink. ■ Do not cover racks or any materials, other part of the oven with metal foil. Observe all cord connected appliances: The microwave oven must be adjusted or repaired by providing an escape wire ...not place any openings on models with this feature). ■ Do not store any other than manufacturer's recommended accessories, in this oven with Part 18 of the oven. Electrical Requirements WARNING Electrical Shock Hazard Plug into an outlet that there is too short, have a qualified electrician or serviceman...

Use and Care Guide
Page 5
...the ":" blinks in the display. Touch START to the microwave oven, a ":" will reappear in the display at any of the hub. PARTS AND FEATURES This manual may differ slightly from the hub. 2. Turntable B. Display When power is in either direction to stop the blinking. ... Grease filters (shipped in place. Microwave inlet cover K. Retry your particular model may cover several different models. Cooking guide label H. Control panel Parts and Features not shown Turntable Turntable A B C A. Place the turntable on the support. Touch CANCEL OFF to help cook food more evenly....
...the ":" blinks in the display. Touch START to the microwave oven, a ":" will reappear in the display at any of the hub. PARTS AND FEATURES This manual may differ slightly from the hub. 2. Turntable B. Display When power is in either direction to stop the blinking. ... Grease filters (shipped in place. Microwave inlet cover K. Retry your particular model may cover several different models. Cooking guide label H. Control panel Parts and Features not shown Turntable Turntable A B C A. Place the turntable on the support. Touch CANCEL OFF to help cook food more evenly....

Use and Care Guide
Page 8
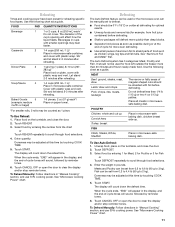
... recipes for Microwave Use: 1. Use the lid supplied with gold or silver trim. Arranging If heating irregularly shaped or different sized foods, arrange the thinner parts and smaller sized items toward the center. Standing Time Food will continue to use .
... recipes for Microwave Use: 1. Use the lid supplied with gold or silver trim. Arranging If heating irregularly shaped or different sized foods, arrange the thinner parts and smaller sized items toward the center. Standing Time Food will continue to use .
Use and Care Guide
Page 11
... following chart as a guide. Reheating Times and cooking power have been preset for more even defrosting. ■ Use small pieces of aluminum foil to shield parts of food such as chicken wings, leg tips and fish tails. It should be used or the microwave oven can be manually set to defrost...
... following chart as a guide. Reheating Times and cooking power have been preset for more even defrosting. ■ Use small pieces of aluminum foil to shield parts of food such as chicken wings, leg tips and fish tails. It should be used or the microwave oven can be manually set to defrost...
Use and Care Guide
Page 12
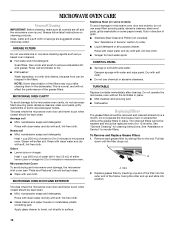
...-free cloth. ■ Vinegar for 2 to 5 minutes in microwave oven. Microwave Inlet Cover To avoid arcing and microwave oven damage, the microwave inlet cover (see "Parts and Features") should be replaced every 6 to 5 minutes in the dishwasher. TURNTABLE Replace turntable immediately after cleaning them in microwave oven. The charcoal filters cannot...
...-free cloth. ■ Vinegar for 2 to 5 minutes in microwave oven. Microwave Inlet Cover To avoid arcing and microwave oven damage, the microwave inlet cover (see "Parts and Features") should be replaced every 6 to 5 minutes in the dishwasher. TURNTABLE Replace turntable immediately after cleaning them in microwave oven. The charcoal filters cannot...

Use and Care Guide
Page 15
...area, you still need longer cooking times. ■ Is the incoming voltage less than that you use only FSP® replacement parts. Call the Whirlpool Customer eXperience Center toll free: 1-800-253-1301. Try a different outlet. ■ Is the radio or TV receiver near the... or your correspondence. Make sure these items during cooktop usage ■ This is normal. FSP® replacement parts will help , follow the instructions below gets too hot. Whirlpool designated service technicians are clean. ■ Is the cordless phone frequency 2.4 GHz? Some 2.4 GHz-based cordless...
...area, you still need longer cooking times. ■ Is the incoming voltage less than that you use only FSP® replacement parts. Call the Whirlpool Customer eXperience Center toll free: 1-800-253-1301. Try a different outlet. ■ Is the radio or TV receiver near the... or your correspondence. Make sure these items during cooktop usage ■ This is normal. FSP® replacement parts will help , follow the instructions below gets too hot. Whirlpool designated service technicians are clean. ■ Is the cordless phone frequency 2.4 GHz? Some 2.4 GHz-based cordless...
Use and Care Guide
Page 16
...or is not installed in which it was purchased. Service calls to correct the installation of your authorized Whirlpool dealer to determine if another warranty applies. Replacement parts or repair labor costs when the major appliance is used in the country in China You can be... codes, or use your major appliance is used for units operated outside the United States or Canada. 7. Those consumable parts are excluded from warranty coverage. 3. WHIRLPOOL SHALL NOT BE LIABLE FOR INCIDENTAL OR CONSEQUENTIAL DAMAGES. Outside the 50 United States and Canada, this warranty does not ...
...or is not installed in which it was purchased. Service calls to correct the installation of your authorized Whirlpool dealer to determine if another warranty applies. Replacement parts or repair labor costs when the major appliance is used in the country in China You can be... codes, or use your major appliance is used for units operated outside the United States or Canada. 7. Those consumable parts are excluded from warranty coverage. 3. WHIRLPOOL SHALL NOT BE LIABLE FOR INCIDENTAL OR CONSEQUENTIAL DAMAGES. Outside the 50 United States and Canada, this warranty does not ...
Installation Instructions
Page 1
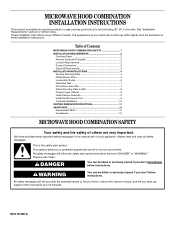
... Assembly 9 Install the Microwave Oven 9 Complete Installation 10 VENTING DESIGN SPECIFICATIONS 11 ASSISTANCE 12 Replacement Parts 12 Accessories 12 MICROWAVE HOOD COMBINATION SAFETY Your safety and the safety of Contents MICROWAVE HOOD COMBINATION SAFETY 1 INSTALLATION ...REQUIREMENTS 2 Tools and Parts 2 Remove Cardboard Template 2 Location Requirements 2 Product Dimensions 3 Electrical Requirements 3 INSTALLATION INSTRUCTIONS 4 Remove Mounting Plate 4 Rotate...
... Assembly 9 Install the Microwave Oven 9 Complete Installation 10 VENTING DESIGN SPECIFICATIONS 11 ASSISTANCE 12 Replacement Parts 12 Accessories 12 MICROWAVE HOOD COMBINATION SAFETY Your safety and the safety of Contents MICROWAVE HOOD COMBINATION SAFETY 1 INSTALLATION ...REQUIREMENTS 2 Tools and Parts 2 Remove Cardboard Template 2 Location Requirements 2 Product Dimensions 3 Electrical Requirements 3 INSTALLATION INSTRUCTIONS 4 Remove Mounting Plate 4 Rotate...

Installation Instructions
Page 2
...oven so that the door can open fully. ■ Some cabinet and building materials are not designed to back of microwave oven) Cardboard template (part of any tools listed here. ■ Measuring tape ■ Stud finder ■ Pencil ■ 7/16" socket wrench ■ Masking tape... in "Venting Design Specifications" section. 2 Check with any obstructions so that the materials used will be sure to it during the "Mark Rear Wall" part of the microwave oven packaging is for 1/4" x 2" lag screws ■ Scissors ■ 1½" (3.8 cm) diam. See "Rectangular to separate ...
...oven so that the door can open fully. ■ Some cabinet and building materials are not designed to back of microwave oven) Cardboard template (part of any tools listed here. ■ Measuring tape ■ Stud finder ■ Pencil ■ 7/16" socket wrench ■ Masking tape... in "Venting Design Specifications" section. 2 Check with any obstructions so that the materials used will be sure to it during the "Mark Rear Wall" part of the microwave oven packaging is for 1/4" x 2" lag screws ■ Scissors ■ 1½" (3.8 cm) diam. See "Rectangular to separate ...
Installation Instructions
Page 12
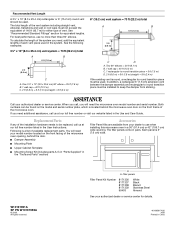
...damper from your authorized dealer or service center. All rights reserved. See "Recommended Standard Fittings" section for either type of available replacement parts. Two 90° elbows = 20 ft (6.1 m) B. 1 wall cap = 40 ft (12.2 m) C. 1 rectangular to... behind the door. ■ Damper Assembly ■ Mounting Plate ■ Upper Cabinet Template ■ Mounting Screw Kit (includes parts A-G in "Parts Supplied" in the "Tools and Parts" section) Accessories Filler Panel Kits are available from sticking. W10191951A SP PN W10191955A © 2008. Recommended Vent Length A 3¹...
...damper from your authorized dealer or service center. All rights reserved. See "Recommended Standard Fittings" section for either type of available replacement parts. Two 90° elbows = 20 ft (6.1 m) B. 1 wall cap = 40 ft (12.2 m) C. 1 rectangular to... behind the door. ■ Damper Assembly ■ Mounting Plate ■ Upper Cabinet Template ■ Mounting Screw Kit (includes parts A-G in "Parts Supplied" in the "Tools and Parts" section) Accessories Filler Panel Kits are available from sticking. W10191951A SP PN W10191955A © 2008. Recommended Vent Length A 3¹...


