Operating Instructions
Page 5
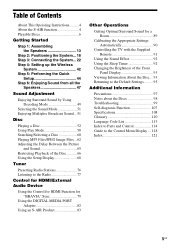
...function 4 Playable Discs 6 Getting Started Step 1: Assembling the Speakers 13 Step 2: Positioning the System... 18 Step 3: Connecting the System... 22 Step 4: Setting up the Wireless System 42 Step 5: Performing the Quick Setup 44 Step 6: Enjoying Sound from all the Speakers 47 Sound Adjustment Enjoying Surround Sound by ... Image Files... 62 Adjusting the Delay Between the Picture and Sound 65 Restricting Playback of the Disc........... 66 Using the Setup Display 68 Tuner Presetting Radio Stations 76 Listening to the Radio 77 Control for HDMI/External Audio Device Using the Control ...
...function 4 Playable Discs 6 Getting Started Step 1: Assembling the Speakers 13 Step 2: Positioning the System... 18 Step 3: Connecting the System... 22 Step 4: Setting up the Wireless System 42 Step 5: Performing the Quick Setup 44 Step 6: Enjoying Sound from all the Speakers 47 Sound Adjustment Enjoying Surround Sound by ... Image Files... 62 Adjusting the Delay Between the Picture and Sound 65 Restricting Playback of the Disc........... 66 Using the Setup Display 68 Tuner Presetting Radio Stations 76 Listening to the Radio 77 Control for HDMI/External Audio Device Using the Control ...
Operating Instructions
Page 44
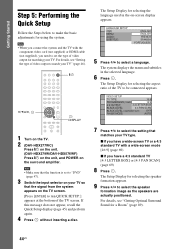
... at the bottom of video output for using the system. If this message does not appear, recall the Quick Setup display (page 45) and perform again. 4 Press without inserting a disc. "/1 C/X/x/c, DISPLAY 1 Turn on the TV. 2 (DAV-HDX277WC) Press [/1 on the unit. (DAV-HDX279W/DAV-HDX576WF) Press [/1 on the unit, and POWER on -screen display appears...
... at the bottom of video output for using the system. If this message does not appear, recall the Quick Setup display (page 45) and perform again. 4 Press without inserting a disc. "/1 C/X/x/c, DISPLAY 1 Turn on the TV. 2 (DAV-HDX277WC) Press [/1 on the unit. (DAV-HDX279W/DAV-HDX576WF) Press [/1 on the unit, and POWER on -screen display appears...
Operating Instructions
Page 45
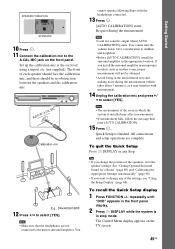
... at the ear level using a tripod, etc. (not supplied). Be quiet during the measurement (which the system is in the appropriate location. To recall the Quick Setup display 1 Press FUNCTION +/- Note • The environment of the speakers, reset the speaker settings. All connections... and setup operations are not connected to select [YES]. The Control Menu display appears on the front panel. Quick Setup is output when [AUTO CALIBRATION] starts. AUDIO IN / A.CAL MIC Calibration mic E.g., DAV-HDX576WF 12 Press C/c to the unit ...
... at the ear level using a tripod, etc. (not supplied). Be quiet during the measurement (which the system is in the appropriate location. To recall the Quick Setup display 1 Press FUNCTION +/- Note • The environment of the speakers, reset the speaker settings. All connections... and setup operations are not connected to select [YES]. The Control Menu display appears on the front panel. Quick Setup is output when [AUTO CALIBRATION] starts. AUDIO IN / A.CAL MIC Calibration mic E.g., DAV-HDX576WF 12 Press C/c to the unit ...

Operating Instructions
Page 46
... until "DVD" appears in the front panel display. 2 Press DISPLAY while the system is in the front panel display. 2 Press DISPLAY while the system is the method for [SETUP] appear. 4 Press X/x to select [VIDEO SETUP], then press . Setting the type of the system. For details, refer also to a TV that accepts progressive signals. 1 Press FUNCTION...
... until "DVD" appears in the front panel display. 2 Press DISPLAY while the system is in the front panel display. 2 Press DISPLAY while the system is the method for [SETUP] appear. 4 Press X/x to select [VIDEO SETUP], then press . Setting the type of the system. For details, refer also to a TV that accepts progressive signals. 1 Press FUNCTION...
Operating Instructions
Page 51
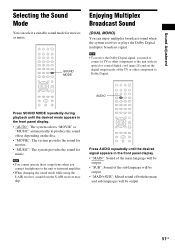
...Dolby Digital signal, you connect headphones to produce the sound effect depending on the disc. • "MOVIE": The system provides the sound for movies. • "MUSIC": The system provides the sound for movies or music. SOUND MODE Enjoying Multiplex Broadcast Sound (DUAL MONO) You can select a suitable... sound mode for music. Note • You cannot operate these setup items when you need to connect a TV or other...
...Dolby Digital signal, you connect headphones to produce the sound effect depending on the disc. • "MOVIE": The system provides the sound for movies. • "MUSIC": The system provides the sound for movies or music. SOUND MODE Enjoying Multiplex Broadcast Sound (DUAL MONO) You can select a suitable... sound mode for music. Note • You cannot operate these setup items when you need to connect a TV or other...
Operating Instructions
Page 57
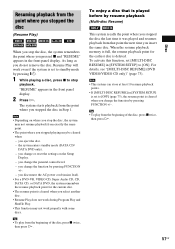
... the disc, Resume Play will work properly with some discs. The system starts playback from the point where you stopped the disc in [SYSTEM SETUP] is set to standby mode by resume playback (Multi-disc Resume) This system recalls the point where you stopped the disc the last time it ...resume playback from exactly the same point. • The point where you stopped playing may not work even if the system is set [MULTI-DISC RESUME] in [SYSTEM SETUP] to stop the disc, the system remembers the point where you pressed x and "RESUME" appears in the front panel display. 2 Press H. Note &#...
... the disc, Resume Play will work properly with some discs. The system starts playback from the point where you stopped the disc in [SYSTEM SETUP] is set to standby mode by resume playback (Multi-disc Resume) This system recalls the point where you stopped the disc the last time it ...resume playback from exactly the same point. • The point where you stopped playing may not work even if the system is set [MULTI-DISC RESUME] in [SYSTEM SETUP] to stop the disc, the system remembers the point where you pressed x and "RESUME" appears in the front panel display. 2 Press H. Note &#...

Operating Instructions
Page 64
... 1080i) HD ] or [(1920 × 1080i) HD] (page 71). The list of the JPEG image file. The system starts playing the selected folder. If the sound still skips, reduce the size of folders recorded on the TV screen. 2 ...Menu display appears on the TV screen. 2 Press X/x to normal view. return to select [MODE (MUSIC, IMAGE)], then press . Sony recommends that you play only JPEG image files as a slide show . 5 Press . 6 Press DVD MENU. To rotate a JPEG ...; [PICTURE LIST]: Images of JPEG image files in the folder appear in [HDMI SETUP] to 128 kbps or lower when creating the file.
... 1080i) HD ] or [(1920 × 1080i) HD] (page 71). The list of the JPEG image file. The system starts playing the selected folder. If the sound still skips, reduce the size of folders recorded on the TV screen. 2 ...Menu display appears on the TV screen. 2 Press X/x to normal view. return to select [MODE (MUSIC, IMAGE)], then press . Sony recommends that you play only JPEG image files as a slide show . 5 Press . 6 Press DVD MENU. To rotate a JPEG ...; [PICTURE LIST]: Images of JPEG image files in the folder appear in [HDMI SETUP] to 128 kbps or lower when creating the file.

Operating Instructions
Page 65
... Menu display appears on the TV screen. 2 Press X/x to display than [SLOW 1]. 4 Press . The Control Menu display appears on the [JPEG RESOLUTION] setting in [HDMI SETUP] to select a setting. • [OFF]: Off. • [ON]: You can adjust the delay between picture and sound. 4 Press . To select an effect for [EFFECT] appear... set the duration shorter than [NORMAL]. • [SLOW 1]: You can set the duration longer than [NORMAL]. • [SLOW 2]: You can set [JPEG RESOLUTION] in [HDMI SETUP] (page 70).
... Menu display appears on the TV screen. 2 Press X/x to display than [SLOW 1]. 4 Press . The Control Menu display appears on the [JPEG RESOLUTION] setting in [HDMI SETUP] to select a setting. • [OFF]: Off. • [ON]: You can adjust the delay between picture and sound. 4 Press . To select an effect for [EFFECT] appear... set the duration shorter than [NORMAL]. • [SLOW 1]: You can set the duration longer than [NORMAL]. • [SLOW 2]: You can set [JPEG RESOLUTION] in [HDMI SETUP] (page 70).
Operating Instructions
Page 66
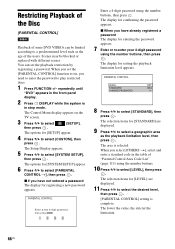
...can set the [PARENTAL CONTROL] function to on the TV screen. 3 Press X/x to select then press . [SETUP], The options for [SETUP] appear. 4 Press X/x to select [SYSTEM SETUP], then press . Scenes may be limited according to a predetermined level such as the playback limitation level, then press .... The Control Menu display appears on , you need to enter the password to select [LEVEL], then press . The options for [SYSTEM SETUP] appear. 6 Press X/x to select [STANDARD], then press . x When you have already registered a password The display for registering a new password...
...can set the [PARENTAL CONTROL] function to on the TV screen. 3 Press X/x to select then press . [SETUP], The options for [SETUP] appear. 4 Press X/x to select [SYSTEM SETUP], then press . Scenes may be limited according to a predetermined level such as the playback limitation level, then press .... The Control Menu display appears on , you need to enter the password to select [LEVEL], then press . The options for [SYSTEM SETUP] appear. 6 Press X/x to select [STANDARD], then press . x When you have already registered a password The display for registering a new password...
Operating Instructions
Page 67
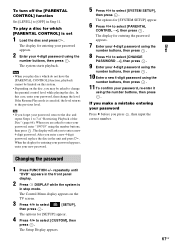
... for entering your password appears, enter your new password. 5 Press X/x to select [SYSTEM SETUP], then press . When the display for [SYSTEM SETUP] appear. 6 Press X/x to select [PARENTAL CONTROL t], then press . The Setup Display appears. 67US The display will ask you press , then input the correct number....this case, enter your password, enter "199703" using the number buttons, then press . In this system. • Depending on the TV screen. 3 Press X/x to select [SETUP], then press . The Control Menu display appears on the disc, you are asked to change the...
... for entering your password appears, enter your new password. 5 Press X/x to select [SYSTEM SETUP], then press . When the display for [SYSTEM SETUP] appear. 6 Press X/x to select [PARENTAL CONTROL t], then press . The Setup Display appears. 67US The display will ask you press , then input the correct number....this case, enter your password, enter "199703" using the number buttons, then press . In this system. • Depending on the TV screen. 3 Press X/x to select [SETUP], then press . The Control Menu display appears on the disc, you are asked to change the...
Operating Instructions
Page 68
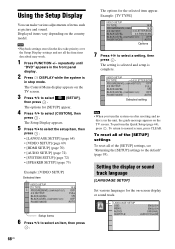
... to select a setting, then press . The Setup Display appears. 5 Press X/x to select the setup item, then press . • [LANGUAGE SETUP] (page 68) • [VIDEO SETUP] (page 69) • [HDMI SETUP] (page 70) • [AUDIO SETUP] (page 72) • [SYSTEM SETUP] (page 72) • [SPEAKER SETUP] (page 73) Example: [VIDEO SETUP] Selected item VIDEO SETUP TV TYPE: PROGRESSIVE (COMPONENT OUT): 4:3 OUTPUT: BLACK...
... to select a setting, then press . The Setup Display appears. 5 Press X/x to select the setup item, then press . • [LANGUAGE SETUP] (page 68) • [VIDEO SETUP] (page 69) • [HDMI SETUP] (page 70) • [AUDIO SETUP] (page 72) • [SYSTEM SETUP] (page 72) • [SPEAKER SETUP] (page 73) Example: [VIDEO SETUP] Selected item VIDEO SETUP TV TYPE: PROGRESSIVE (COMPONENT OUT): 4:3 OUTPUT: BLACK...

Operating Instructions
Page 69
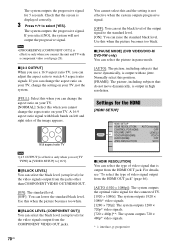
...When you select [ORIGINAL], the language given priority in the disc is output from "Language Code List" (page 113) using the number buttons. VIDEO SETUP TV TYPE: PROGRESSIVE (COMPONENT OUT): 4:3 OUTPUT: BLACK LEVEL: BLACK LEVEL (COMPONENT OUT): PAUSE MODE: 16:9 OFF FULL ON OFF AUTO x [TV... be selected automatically instead of the sound track. The confirmation display appears. 2 Press C/c to on/off the portions that do not fit. The system automatically displays the wide picture on the TV screen. x [AUDIO] (DVD VIDEO only) You can switch the language for the sound track. Disc...
...When you select [ORIGINAL], the language given priority in the disc is output from "Language Code List" (page 113) using the number buttons. VIDEO SETUP TV TYPE: PROGRESSIVE (COMPONENT OUT): 4:3 OUTPUT: BLACK LEVEL: BLACK LEVEL (COMPONENT OUT): PAUSE MODE: 16:9 OFF FULL ON OFF AUTO x [TV... be selected automatically instead of the sound track. The confirmation display appears. 2 Press C/c to on/off the portions that do not fit. The system automatically displays the wide picture on the TV screen. x [AUDIO] (DVD VIDEO only) You can switch the language for the sound track. Disc...
Operating Instructions
Page 70
...[OFF]: You can select the black level (setup level) for the connected TV. [1920 × 1080i]: The system outputs 1920 × 1080i* video signals. [1280 × 720p]: The system outputs 1280 × 720p* video signals. [720 × 480p]**: The system outputs 720 × 480p* video signals.... * i: interlace, p: progressive 70US The system outputs the progressive signal for the HDMI [HDMI SETUP] HDMI SETUP HDMI RESOLUTION: CONTROL FOR HDMI: VOLUME...
...[OFF]: You can select the black level (setup level) for the connected TV. [1920 × 1080i]: The system outputs 1920 × 1080i* video signals. [1280 × 720p]: The system outputs 1280 × 720p* video signals. [720 × 480p]**: The system outputs 720 × 480p* video signals.... * i: interlace, p: progressive 70US The system outputs the progressive signal for the HDMI [HDMI SETUP] HDMI SETUP HDMI RESOLUTION: CONTROL FOR HDMI: VOLUME...
Operating Instructions
Page 71
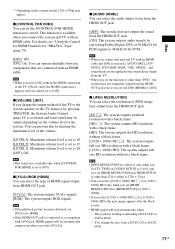
... is selected, [AUDIO DRC], [A/V SYNC], DYNAMIC BASS, "DEC. You change the output method of the TV to the system speaker on the TV menu or by pressing THEATER, the System Audio Control (page 81) is activated and loud sound may appear. For details, see "Using the Control for HDMI Function ...- Note • When you select [YCBCR]. Note • [JPEG RESOLUTION] is effective only when you set [TV TYPE] in [VIDEO SETUP] to [16:9], and you set [HDMI RESOLUTION] in [HDMI SETUP] to [1920 × 1080i]. • If you select [(1920 × 1080i) HD ] or [(1920 × 1080i) HD], the...
... is selected, [AUDIO DRC], [A/V SYNC], DYNAMIC BASS, "DEC. You change the output method of the TV to the system speaker on the TV menu or by pressing THEATER, the System Audio Control (page 81) is activated and loud sound may appear. For details, see "Using the Control for HDMI Function ...- Note • When you select [YCBCR]. Note • [JPEG RESOLUTION] is effective only when you set [TV TYPE] in [VIDEO SETUP] to [16:9], and you set [HDMI RESOLUTION] in [HDMI SETUP] to [1920 × 1080i]. • If you select [(1920 × 1080i) HD ] or [(1920 × 1080i) HD], the...
Operating Instructions
Page 72
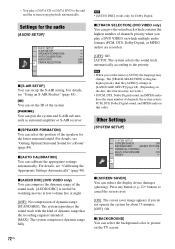
... Settings Automatically" (page 90). Note • When you play a DATA CD or DATA DVD to the priority. Other Settings [SYSTEM SETUP] SYSTEM SETUP SCREEN SAVER: ON BACKGROUND: JACKET PICTURE PARENTAL CONTROL: MULTI-DISC RESUME: ON RESET: x [SCREEN SAVER] You can calibrate the appropriate... settings automatically. x [BACKGROUND] You can select the position of channels, the system selects PCM, DTS, Dolby Digital sound, and MPEG audio in [LANGUAGE SETUP] (page 68). (Depending on which contains the highest number of channels priority when you set ...
... Settings Automatically" (page 90). Note • When you play a DATA CD or DATA DVD to the priority. Other Settings [SYSTEM SETUP] SYSTEM SETUP SCREEN SAVER: ON BACKGROUND: JACKET PICTURE PARENTAL CONTROL: MULTI-DISC RESUME: ON RESET: x [SCREEN SAVER] You can calibrate the appropriate... settings automatically. x [BACKGROUND] You can select the position of channels, the system selects PCM, DTS, Dolby Digital sound, and MPEG audio in [LANGUAGE SETUP] (page 68). (Depending on which contains the highest number of channels priority when you set ...
Operating Instructions
Page 73
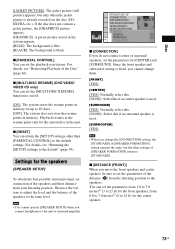
... CD only) You can set connection of the speakers to 10 discs. [OFF]: The system does not store the resume points in memory for the center speaker. 73US Settings for the speakers [SPEAKER SETUP] To obtain the best possible surround sound, set the parameters from 1.0 to 7.0 meters1)... is used. [SURROUND] [YES]: Normally select this. [NONE]: Select this if no surround speaker is already recorded on /off. [ON]: The system stores the resume points in memory. If the disc does not contain a jacket picture, the [GRAPHICS] picture appears. [GRAPHICS]: A preset picture stored...
... CD only) You can set connection of the speakers to 10 discs. [OFF]: The system does not store the resume points in memory for the center speaker. 73US Settings for the speakers [SPEAKER SETUP] To obtain the best possible surround sound, set the parameters from 1.0 to 7.0 meters1)... is used. [SURROUND] [YES]: Normally select this. [NONE]: Select this if no surround speaker is already recorded on /off. [ON]: The system stores the resume points in memory. If the disc does not contain a jacket picture, the [GRAPHICS] picture appears. [GRAPHICS]: A preset picture stored...
Operating Instructions
Page 74
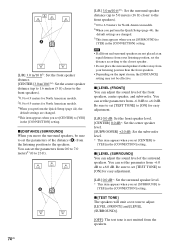
... speaker distance (up to 5.0 meters (16 ft) closer to the front speakers). 1)0.0 to 6.9 meters for North American models. 2)When you perform the Quick Setup (page 44), the default settings are not placed at an equal distance from your listening position than the front speakers. • Depending on the input...SURROUND] to [YES] in the [CONNECTION] setting. Be sure to set [TEST TONE] to [ON] for North American models. 3)When you perform the Quick Setup (page 44), the default settings are changed . 3)This item appears when you set [CENTER] to [YES] in the [CONNECTION] setting.
... speaker distance (up to 5.0 meters (16 ft) closer to the front speakers). 1)0.0 to 6.9 meters for North American models. 2)When you perform the Quick Setup (page 44), the default settings are not placed at an equal distance from your listening position than the front speakers. • Depending on the input...SURROUND] to [YES] in the [CONNECTION] setting. Be sure to set [TEST TONE] to [ON] for North American models. 3)When you perform the Quick Setup (page 44), the default settings are changed . 3)This item appears when you set [CENTER] to [YES] in the [CONNECTION] setting.
Operating Instructions
Page 75
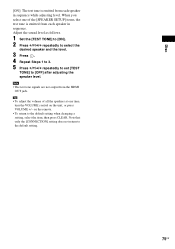
...]: The test tone is emitted from the HDMI OUT jack. Tip • To adjust the volume of all the speakers at one of the [SPEAKER SETUP] items, the test tone is emitted from each speaker in sequence while adjusting level. Adjust the sound level as follows. 1 Set the [TEST TONE] to...
...]: The test tone is emitted from the HDMI OUT jack. Tip • To adjust the volume of all the speakers at one of the [SPEAKER SETUP] items, the test tone is emitted from each speaker in sequence while adjusting level. Adjust the sound level as follows. 1 Set the [TEST TONE] to...
Operating Instructions
Page 80
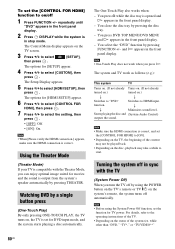
....) r r Switches to "DVD" Switches to HDMI input. Turning the system off 1 Press FUNCTION +/- The Setup Display appears. 5 Press X/x to select [CUSTOM], then press . The One-Touch Play also works when: - Using the Theater Mode (Theater Mode) If your TV is compatible with the TV (System Power Off) When you press H. You select the "DVD" function...
....) r r Switches to "DVD" Switches to HDMI input. Turning the system off 1 Press FUNCTION +/- The Setup Display appears. 5 Press X/x to select [CUSTOM], then press . The One-Touch Play also works when: - Using the Theater Mode (Theater Mode) If your TV is compatible with the TV (System Power Off) When you press H. You select the "DVD" function...
Operating Instructions
Page 83
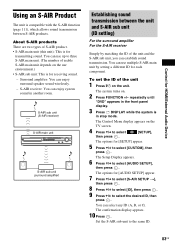
...; S-AIR sub unit: This is in another room. The system turns on the unit. The options for transmitting sound. You can enjoy surround speaker sound wirelessly. - S-AIR receiver: You can enjoy system sound in stop mode. The Setup Display appears. 6 Press X/x to the same ID. 83US ...C). To set the ID of usable S-AIR main unit depends on the use up to select [SETUP], then press . repeatedly until "DVD" appears in the front panel display. 3 Press DISPLAY while the system is for each component. The Control Menu display appears on the TV screen. 4 Press X/x to...
...; S-AIR sub unit: This is in another room. The system turns on the unit. The options for transmitting sound. You can enjoy surround speaker sound wirelessly. - S-AIR receiver: You can enjoy system sound in stop mode. The Setup Display appears. 6 Press X/x to the same ID. 83US ...C). To set the ID of usable S-AIR main unit depends on the use up to select [SETUP], then press . repeatedly until "DVD" appears in the front panel display. 3 Press DISPLAY while the system is for each component. The Control Menu display appears on the TV screen. 4 Press X/x to...

