Product Information Guide
Page 9
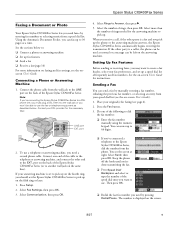
...number you want to dial the fax number: ❏ Enter the fax number manually using the numeric keypad. Press the Fax button. 3. Epson Stylus CX9400Fax Series Faxing a Document or Photo Your Epson Stylus CX9400Fax Series lets you need a second phone cable. Connect one of rings needed ...for instructions. To use the fax or telephone equipment as normal or a message can enter up . See the on-screen User's ...
...number you want to dial the fax number: ❏ Enter the fax number manually using the numeric keypad. Press the Fax button. 3. Epson Stylus CX9400Fax Series Faxing a Document or Photo Your Epson Stylus CX9400Fax Series lets you need a second phone cable. Connect one of rings needed ...for instructions. To use the fax or telephone equipment as normal or a message can enter up . See the on-screen User's ...
Product Information Guide
Page 12
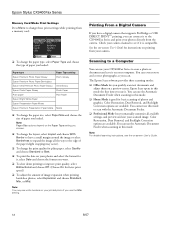
... cropping may see white borders on your photos directly from the camera. Color Restoration, Dust Removal, and Backlight Correction options are available. Check your camera manual to see the on printing from your CX9400Fax Series to scan a photo or document and save it is good for...choose the type of paper you scan. Epson Scan opens in this mode. See the on-screen User's Guide for instructions on -screen User's Guide. 12 8/07 Note: For detailed scanning instructions, see if it on your scanned image. Epson Stylus CX9400Fax Series Memory Card Mode Print Settings Press ...
... cropping may see white borders on your photos directly from the camera. Color Restoration, Dust Removal, and Backlight Correction options are available. Check your camera manual to see the on printing from your CX9400Fax Series to scan a photo or document and save it is good for...choose the type of paper you scan. Epson Scan opens in this mode. See the on-screen User's Guide for instructions on -screen User's Guide. 12 8/07 Note: For detailed scanning instructions, see if it on your scanned image. Epson Stylus CX9400Fax Series Memory Card Mode Print Settings Press ...

Product Information Guide
Page 16
...-24114 CPD-24159 CPD-23925R1 Epson Stylus CX9400Fax Series Start Here (English/French) Epson Stylus CX9400Fax Series Quick Guide (English) Epson Stylus CX9400Fax Series Quick Guide (French) Epson Stylus CX9400Fax Series CD-ROM with on the CX9400Fax Series, then turn on -screen User's Guide (English/French) 16 8/07 If necessary, enter the number of manuals varies by location. Cleaning the CX9400Fax Series To keep it from...
...-24114 CPD-24159 CPD-23925R1 Epson Stylus CX9400Fax Series Start Here (English/French) Epson Stylus CX9400Fax Series Quick Guide (English) Epson Stylus CX9400Fax Series Quick Guide (French) Epson Stylus CX9400Fax Series CD-ROM with on the CX9400Fax Series, then turn on -screen User's Guide (English/French) 16 8/07 If necessary, enter the number of manuals varies by location. Cleaning the CX9400Fax Series To keep it from...
Start Here Book (with wireless print server)
Page 12
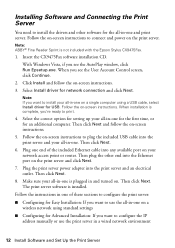
... power adapter into any available port on -screen instructions. 5. The print server software is not included with the Epson Stylus CX9475Fax. 1. Follow the on -screen instructions to plug the included USB cable into the print server and your .... 3. Select Install driver for USB. Then click Next. Note: If you want to configure the IP address manually or use the all -in -one of the included Ethernet cable into the print server and an electrical outlet....print server: ■ Configuring for Easy Installation: If you see the User Account Control screen, click Continue. 2.
... power adapter into any available port on -screen instructions. 5. The print server software is not included with the Epson Stylus CX9475Fax. 1. Follow the on -screen instructions to plug the included USB cable into the print server and your .... 3. Select Install driver for USB. Then click Next. Note: If you want to configure the IP address manually or use the all -in -one of the included Ethernet cable into the print server and an electrical outlet....print server: ■ Configuring for Easy Installation: If you see the User Account Control screen, click Continue. 2.


