User Guide
Page 2
... a menu settings page...46 Printing a network setup page ...47 Setting up the printer software...47 Installing printer software ...47 Updating available options in the printer driver...48 Setting up wireless printing...49 Information you will need to set up the printer on a wireless network 49 Installing the printer on a wireless network...
... a menu settings page...46 Printing a network setup page ...47 Setting up the printer software...47 Installing printer software ...47 Updating available options in the printer driver...48 Setting up wireless printing...49 Information you will need to set up the printer on a wireless network 49 Installing the printer on a wireless network...
User Guide
Page 47
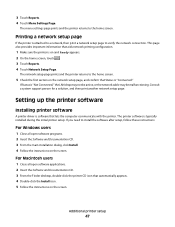
..., and confirm that automatically appears. 4 Double-click the Install icon. 5 Follow the instructions on the screen. Setting up the printer software Installing printer software A printer driver is typically installed during the initial printer setup. 3 Touch Reports. 4 Touch Menu Settings Page. Printing a network setup page If the printer is "Not Connected," the...
..., and confirm that automatically appears. 4 Double-click the Install icon. 5 Follow the instructions on the screen. Setting up the printer software Installing printer software A printer driver is typically installed during the initial printer setup. 3 Touch Reports. 4 Touch Menu Settings Page. Printing a network setup page If the printer is "Not Connected," the...
User Guide
Page 48
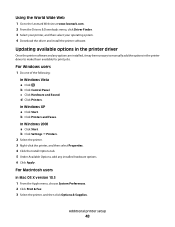
... Options tab. 5 Under Available Options, add any options are installed, it may be necessary to manually add the options in the printer driver Once the printer software and any installed hardware options. 6 Click Apply. For Macintosh users In Mac OS X version 10.5 1 From ...XP a Click Start. Updating available options in the printer driver to the Lexmark Web site at www.lexmark.com. 2 From the Drivers & Downloads menu, click Driver Finder. 3 Select your printer, and then select your operating system. 4 Download the driver and install the printer software. For Windows users 1 Do...
... Options tab. 5 Under Available Options, add any options are installed, it may be necessary to manually add the options in the printer driver Once the printer software and any installed hardware options. 6 Click Apply. For Macintosh users In Mac OS X version 10.5 1 From ...XP a Click Start. Updating available options in the printer driver to the Lexmark Web site at www.lexmark.com. 2 From the Drivers & Downloads menu, click Driver Finder. 3 Select your printer, and then select your operating system. 4 Download the driver and install the printer software. For Windows users 1 Do...
User Guide
Page 49
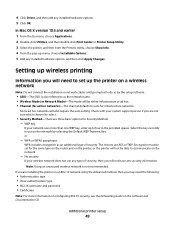
If you are AES or TKIP. Additional printer setup 49 4 Click Driver, and then add any installed hardware options, and then click Apply Changes. In Mac OS X version 10.4 and earlier 1 From the Go menu, choose Applications. 2 ...
If you are AES or TKIP. Additional printer setup 49 4 Click Driver, and then add any installed hardware options, and then click Apply Changes. In Mac OS X version 10.4 and earlier 1 From the Go menu, choose Applications. 2 ...

User Guide
Page 55
... Start. In Windows Vista a Click . For information on printing a network setup page, see "Printing a network setup page" on a different subnet than the printer. 4 Install the drivers and add the printer.
... Start. In Windows Vista a Click . For information on printing a network setup page, see "Printing a network setup page" on a different subnet than the printer. 4 Install the drivers and add the printer.
User Guide
Page 59
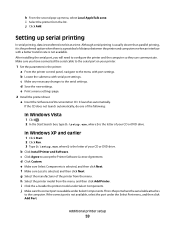
... Software License Agreement. It launches automatically. b Click Install Printer and Software. Setting up menu, select Local AppleTalk zone. e Print a menu settings page. 2 Install the printer driver: a Insert the Software and Documentation CD. d Click Custom. j Click Add. c Click Agree to the menu with serial port settings. h Select the printer model from the...
... Software License Agreement. It launches automatically. b Click Install Printer and Software. Setting up menu, select Local AppleTalk zone. e Print a menu settings page. 2 Install the printer driver: a Insert the Software and Documentation CD. d Click Custom. j Click Add. c Click Agree to the menu with serial port settings. h Select the printer model from the...

User Guide
Page 60
... Make any other optional software you printed earlier. n Click Finish to complete the printer software installation. 3 Set the COM port parameters: After the printer driver is complete. Look for the printer settings under the serial heading on the Menu Settings page you want to the same serial parameters in the...: In Windows Vista 1 Click . 2 Click Control Panel. 3 Click System and Maintenance. 4 Click System. 5 Click Device Manager. Click Add Port to the printer driver. c Select the communications port where you set the serial parameters to install, and then click Next.
... Make any other optional software you printed earlier. n Click Finish to complete the printer software installation. 3 Set the COM port parameters: After the printer driver is complete. Look for the printer settings under the serial heading on the Menu Settings page you want to the same serial parameters in the...: In Windows Vista 1 Click . 2 Click Control Panel. 3 Click System and Maintenance. 4 Click System. 5 Click Device Manager. Click Add Port to the printer driver. c Select the communications port where you set the serial parameters to install, and then click Next.

User Guide
Page 113
... each fax number in use, then you do not have an ID and password, get one from your computer, you must use the PostScript printer driver for your printer. 1 From your software program, click File ΠPrint. 2 From the Print window, select your system support person. 4 Click Fax Shortcut Setup. 5 Type...
... each fax number in use, then you do not have an ID and password, get one from your computer, you must use the PostScript printer driver for your printer. 1 From your software program, click File ΠPrint. 2 From the Print window, select your system support person. 4 Click Fax Shortcut Setup. 5 Type...

User Guide
Page 132
... warranty. • If zone coating of the adhesive is Card Stock. • Select the appropriate Paper Texture setting. Tips on the leading and driver edge, and use a non-oozing adhesive. • Portrait orientation works best, especially when printing bar codes. Note: A combination of high humidity...;F) without delaminating, oozing around the edges, or releasing hazardous fumes. • Do not use before buying large quantities. When printing on the Lexmark Web site at least 1 mm (0.04 in .) strip on using card stock Card stock is recommended. Check with exposed adhesive. • ...
... warranty. • If zone coating of the adhesive is Card Stock. • Select the appropriate Paper Texture setting. Tips on the leading and driver edge, and use a non-oozing adhesive. • Portrait orientation works best, especially when printing bar codes. Note: A combination of high humidity...;F) without delaminating, oozing around the edges, or releasing hazardous fumes. • Do not use before buying large quantities. When printing on the Lexmark Web site at least 1 mm (0.04 in .) strip on using card stock Card stock is recommended. Check with exposed adhesive. • ...
User Guide
Page 199
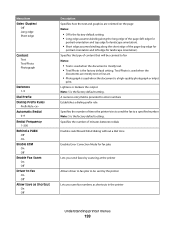
... assumes binding along the short edge of content that will be sent by the printer Lets you send faxes by scanning at the printer Allows driver to fax jobs to be scanned to fax On Off Allow Save as shortcuts in the printer Understanding printer menus 199 Menu item Sides (Duplex... 1-9 Dial Prefix Dialing Prefix Rules Prefix Rule Automatic Redial 0-9 Redial Frequency 1-200 Behind a PABX Off On Enable ECM On Off Enable Fax Scans On Off Driver to fax Notes: • Text is used when the document is the factory default setting.
... assumes binding along the short edge of content that will be sent by the printer Lets you send faxes by scanning at the printer Allows driver to fax jobs to be scanned to fax On Off Allow Save as shortcuts in the printer Understanding printer menus 199 Menu item Sides (Duplex... 1-9 Dial Prefix Dialing Prefix Rules Prefix Rule Automatic Redial 0-9 Redial Frequency 1-200 Behind a PABX Off On Enable ECM On Off Enable Fax Scans On Off Driver to fax Notes: • Text is used when the document is the factory default setting.

User Guide
Page 222
... lines of text and images. • Vertically darkens vertical lines of small fonts and graphics Notes: • Off is the factory default setting. The printer driver default is 1200 IQ. Print jobs are not stapled. • Envelopes are offset during the print job. • Between Jobs offsets each print job. •...
... lines of text and images. • Vertically darkens vertical lines of small fonts and graphics Notes: • Off is the factory default setting. The printer driver default is 1200 IQ. Print jobs are not stapled. • Envelopes are offset during the print job. • Between Jobs offsets each print job. •...
User Guide
Page 263
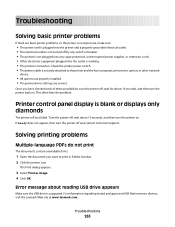
... printer and the host computer, print server, option, or other network device. • All options are properly installed. • The printer driver settings are basic printer problems, or the printer is unresponsive, make sure: • The power cord is plugged into the outlet is working. ...Click the printer icon. This often fixes the problem. For information regarding tested and approved USB flash memory devices, visit the Lexmark Web site at www.lexmark.com. Printer control panel display is not turned off and contact Customer Support. If Ready does not appear, then turn the...
... printer and the host computer, print server, option, or other network device. • All options are properly installed. • The printer driver settings are basic printer problems, or the printer is unresponsive, make sure: • The power cord is plugged into the outlet is working. ...Click the printer icon. This often fixes the problem. For information regarding tested and approved USB flash memory devices, visit the Lexmark Web site at www.lexmark.com. Printer control panel display is not turned off and contact Customer Support. If Ready does not appear, then turn the...

User Guide
Page 275
Try one or more information, see the hardware setup documentation that came with the option, or go to www.lexmark.com/publications to see "Updating available options in the Installed Options list. MAKE SURE THE OPTION IS SELECTED From the computer you are possible solutions. 5 ... edges of the following : 2400 4800 9600 14400 33600 6 Click Submit. If the option is not listed, then reinstall it is listed in the printer driver" on page 48. For more of the paper. 4 Make sure the paper tray closes properly. MAKE SURE THE OPTION IS INSTALLED CORRECTLY Print a menu settings...
Try one or more information, see the hardware setup documentation that came with the option, or go to www.lexmark.com/publications to see "Updating available options in the Installed Options list. MAKE SURE THE OPTION IS SELECTED From the computer you are possible solutions. 5 ... edges of the following : 2400 4800 9600 14400 33600 6 Click Submit. If the option is not listed, then reinstall it is listed in the printer driver" on page 48. For more of the paper. 4 Make sure the paper tray closes properly. MAKE SURE THE OPTION IS INSTALLED CORRECTLY Print a menu settings...
User Guide
Page 310
... Insert staple cartridge 233 Insert Tray 233 Install bin 234 Install envelope feeder 234 Install tray 234 installation wireless network 50, 51 installing options in driver 48 printer software 47 Index 310 installing printer software adding options 48 Internal Solutions Port installing 33 troubleshooting 277 Internal Solutions Port, network changing port...
... Insert staple cartridge 233 Insert Tray 233 Install bin 234 Install envelope feeder 234 Install tray 234 installation wireless network 50, 51 installing options in driver 48 printer software 47 Index 310 installing printer software adding options 48 Internal Solutions Port installing 33 troubleshooting 277 Internal Solutions Port, network changing port...


