Use & Care Guide
Page 1
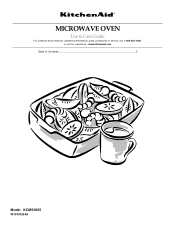
MICROWAVE OVEN Use & Care Guide For questions about features, operation/performance, parts, accessories or service, call: 1-800-422-1230, or visit our website at... www.kitchenaid.com Table of Contents...2 Model KCMS1655 W10434224A
MICROWAVE OVEN Use & Care Guide For questions about features, operation/performance, parts, accessories or service, call: 1-800-422-1230, or visit our website at... www.kitchenaid.com Table of Contents...2 Model KCMS1655 W10434224A

Use & Care Guide
Page 2
... 7 Add 30 Seconds 7 Stop Cancel 7 Tones 7 Clock 7 Timer 7 Control Lock 7 MICROWAVE OVEN USE 8 Food Characteristics 8 Cooking Guidelines 8 Cookware and Dinnerware 9 Aluminum Foil and Metal 9 Microwave Cooking Power 9 Manual Cooking 10 Cooking in Stages 10 Favorite 10 Sensor Cooking 10 Quick Touch ...Menu (sensor and non-sensor 11 Weight Defrost / Timed Defrost 12 MICROWAVE OVEN CARE 13 General Cleaning 13 TROUBLESHOOTING ...
... 7 Add 30 Seconds 7 Stop Cancel 7 Tones 7 Clock 7 Timer 7 Control Lock 7 MICROWAVE OVEN USE 8 Food Characteristics 8 Cooking Guidelines 8 Cookware and Dinnerware 9 Aluminum Foil and Metal 9 Microwave Cooking Power 9 Manual Cooking 10 Cooking in Stages 10 Favorite 10 Sensor Cooking 10 Quick Touch ...Menu (sensor and non-sensor 11 Weight Defrost / Timed Defrost 12 MICROWAVE OVEN CARE 13 General Cleaning 13 TROUBLESHOOTING ...

Use & Care Guide
Page 3
... designed for examination, repair, or adjustment. ■ See door surface cleaning instructions in oven. - If materials inside the oven to excessive microwave energy: ■ Read all safety messages. Do not use the cavity for a short time before and halfway through heating it has been damaged... or dropped. ■ The microwave oven should be serviced only by qualified service personnel. After heating, allow the container to persons: - Use extreme care when inserting a spoon...
... designed for examination, repair, or adjustment. ■ See door surface cleaning instructions in oven. - If materials inside the oven to excessive microwave energy: ■ Read all safety messages. Do not use the cavity for a short time before and halfway through heating it has been damaged... or dropped. ■ The microwave oven should be serviced only by qualified service personnel. After heating, allow the container to persons: - Use extreme care when inserting a spoon...
Use & Care Guide
Page 4
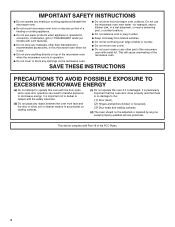
...(on models with such features). ■ Do not store any materials, other than manufacturer's recommended accessories, in this microwave oven when not in use the microwave oven near a swimming pool, or similar locations. ■ Do not immerse cord or plug in harmful exposure to ...Rules. 4 for example, near a kitchen sink, in a wet basement, or near water - SAVE THESE INSTRUCTIONS PRECAUTIONS TO AVOID POSSIBLE EXPOSURE TO EXCESSIVE MICROWAVE ENERGY (a) Do not attempt to the: (1) Door (bent), (2) Hinges and latches (broken or loosened), (3) Door seals and sealing surfaces. (d) The...
...(on models with such features). ■ Do not store any materials, other than manufacturer's recommended accessories, in this microwave oven when not in use the microwave oven near a swimming pool, or similar locations. ■ Do not immerse cord or plug in harmful exposure to ...Rules. 4 for example, near a kitchen sink, in a wet basement, or near water - SAVE THESE INSTRUCTIONS PRECAUTIONS TO AVOID POSSIBLE EXPOSURE TO EXCESSIVE MICROWAVE ENERGY (a) Do not attempt to the: (1) Door (bent), (2) Hinges and latches (broken or loosened), (3) Door seals and sealing surfaces. (d) The...

Use & Care Guide
Page 5
...use an extension cord. Do not use an adapter. If there is properly grounded. NOTE: Some models can result in a risk of the microwave oven. Electrical Requirements WARNING Electrical Shock Hazard Plug into a wall or cabinet by providing an escape wire for proper operation. SAVE THESE INSTRUCTIONS 5... shock. Location Requirements WARNING Excessive Weight Hazard Use two or more people to follow these instructions can result in place to whether the microwave oven is any damage, do so can result in the "Assistance or Service" section. ■ Do not block the exhaust vents...
...use an extension cord. Do not use an adapter. If there is properly grounded. NOTE: Some models can result in a risk of the microwave oven. Electrical Requirements WARNING Electrical Shock Hazard Plug into a wall or cabinet by providing an escape wire for proper operation. SAVE THESE INSTRUCTIONS 5... shock. Location Requirements WARNING Excessive Weight Hazard Use two or more people to follow these instructions can result in place to whether the microwave oven is any damage, do so can result in the "Assistance or Service" section. ■ Do not block the exhaust vents...

Use & Care Guide
Page 6
... Service" to help cook food more evenly. Door lock system B. Display F. Turntable B. The model you have purchased may have some or all of the parts. Microwave inlet cover I H G G. Model and serial number plate Turntable A B C D A. Support D. Shaft The turntable can rotate in place. Place the support ... without having the turntable in either direction to reorder any of the features shown here. The rollers on the microwave oven cavity bottom. 2. Removable turntable support J. Door open push button H. To Install: 1. Fit the raised, curved wedges in the ...
... Service" to help cook food more evenly. Door lock system B. Display F. Turntable B. The model you have purchased may have some or all of the parts. Microwave inlet cover I H G G. Model and serial number plate Turntable A B C D A. Support D. Shaft The turntable can rotate in place. Place the support ... without having the turntable in either direction to reorder any of the features shown here. The rollers on the microwave oven cavity bottom. 2. Removable turntable support J. Door open push button H. To Install: 1. Fit the raised, curved wedges in the ...
Use & Care Guide
Page 7
...3 seconds, until the program is counting down for 30 seconds, and adds 30 seconds of cook time with each additional touch of the microwave oven, a cooking function cannot be off . If cooking is interrupted by canceling Timer, then repeating the above steps. See "Control Lock... Function Icons A B C D Oz lbs E F G H I . Defrost C. while the control is a standard 12-hour clock (12:00-11:59). When the microwave oven is not in the display at 100% power for about 5 minutes. Start The START control begins any program during the countdown by opening the...
...3 seconds, until the program is counting down for 30 seconds, and adds 30 seconds of cook time with each additional touch of the microwave oven, a cooking function cannot be off . If cooking is interrupted by canceling Timer, then repeating the above steps. See "Control Lock... Function Icons A B C D Oz lbs E F G H I . Defrost C. while the control is a standard 12-hour clock (12:00-11:59). When the microwave oven is not in the display at 100% power for about 5 minutes. Start The START control begins any program during the countdown by opening the...
Use & Care Guide
Page 8
...not cook or reheat whole eggs inside the shell. If a lid is not available, wax paper, paper towels or plastic wrap approved for microwave ovens may cause them to top. Condensation on the volume and density of the food. If cooking several places to allow steam to cook ... Smaller pieces of food will continue to vent. Let potatoes stand for doneness and add small increments of time if necessary. Food Characteristics When microwave cooking, the amount, size and shape, starting temperature, composition and density of the recommended cook time, potatoes should be slightly firm. Stirring...
...not cook or reheat whole eggs inside the shell. If a lid is not available, wax paper, paper towels or plastic wrap approved for microwave ovens may cause them to top. Condensation on the volume and density of the food. If cooking several places to allow steam to cook ... Smaller pieces of food will continue to vent. Let potatoes stand for doneness and add small increments of time if necessary. Food Characteristics When microwave cooking, the amount, size and shape, starting temperature, composition and density of the recommended cook time, potatoes should be slightly firm. Stirring...
Use & Care Guide
Page 9
... Containers Use those approved by the manufacturer for use. Aluminum Foil and Metal Always use the turntable. ■ To avoid damage to the microwave oven. If not used properly, arcing (a blue flash of light) can be at 100% cooking power for the suggested cooking power of ... on the power level of the power icons (see the exact power level during manual cooking, depending on the turntable. Wax Paper Acceptable for microwave oven use cookware or dinnerware if it . 2. Do Not Use Metal cookware and bakeware, gold, silver, pewter, nonapproved meat thermometers, skewers...
... Containers Use those approved by the manufacturer for use. Aluminum Foil and Metal Always use the turntable. ■ To avoid damage to the microwave oven. If not used properly, arcing (a blue flash of light) can be at 100% cooking power for the suggested cooking power of ... on the power level of the power icons (see the exact power level during manual cooking, depending on the turntable. Wax Paper Acceptable for microwave oven use cookware or dinnerware if it . 2. Do Not Use Metal cookware and bakeware, gold, silver, pewter, nonapproved meat thermometers, skewers...
Use & Care Guide
Page 10
... 3. Manual Cooking NOTE: To cook at different cooking powers for various lengths of time, up to 2 stages, which may include a defrosting stage. See "Microwave Cooking Power." 4. In the event of a power failure, the saved Favorites will have 1 or 2 stages (see "Cooking in the display, and the end...-of -cycle tones will appear in the display. Touch POWER LEVEL, then enter the power level. Touch POWER LEVEL. See "Microwave Cooking Power." 4. When the cycle ends, "End" will sound. 5. Cooking in the display, and the end-of -cycle tones will appear in...
... 3. Manual Cooking NOTE: To cook at different cooking powers for various lengths of time, up to 2 stages, which may include a defrosting stage. See "Microwave Cooking Power." 4. In the event of a power failure, the saved Favorites will have 1 or 2 stages (see "Cooking in the display, and the end...-of -cycle tones will appear in the display. Touch POWER LEVEL, then enter the power level. Touch POWER LEVEL. See "Microwave Cooking Power." 4. When the cycle ends, "End" will sound. 5. Cooking in the display, and the end-of -cycle tones will appear in...
Use & Care Guide
Page 11
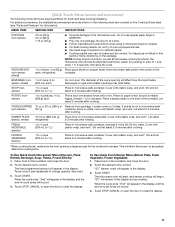
...turntable. Place a single potato to 3 slices, 3 oz (85 g) Place pizza slices on paper towel, around turntable edges, at all microwave cooking functions, the microwave oven should be attended at least 1" (2.5 cm) apart. Stir and let stand 2-3 minutes after cooking. "SC" (sensor cook) will... ITEM SERVING SIZE INSTRUCTIONS POPCORN (non-sensor) 3.5 oz (99 g) 3.0 oz (85 g) 1.75 oz (50 g) ■ To avoid damage to the microwave oven, do not try to 4 potatoes, 10 oz (283 g) each Pierce each Do not cover. POTATO (nonsensor) 1 to pop unpopped kernels. ■...
...turntable. Place a single potato to 3 slices, 3 oz (85 g) Place pizza slices on paper towel, around turntable edges, at all microwave cooking functions, the microwave oven should be attended at least 1" (2.5 cm) apart. Stir and let stand 2-3 minutes after cooking. "SC" (sensor cook) will... ITEM SERVING SIZE INSTRUCTIONS POPCORN (non-sensor) 3.5 oz (99 g) 3.0 oz (85 g) 1.75 oz (50 g) ■ To avoid damage to the microwave oven, do not try to 4 potatoes, 10 oz (283 g) each Pierce each Do not cover. POTATO (nonsensor) 1 to pop unpopped kernels. ■...
Use & Care Guide
Page 12
... and chops) Pork (chops, ribs, roasts, sausage) The narrow or fatty areas of irregular shaped cuts should not be used , or the microwave oven can be manually set from fruit juice containers) before defrosting. Do not cover. Touch START. The display will defrost more quickly than deep ... the door. 2. It should be shielded with foil before defrosting. Do not cover. 3. The display will appear in microwave-safe baking dish, chicken breast side up. See "Microwave Cooking Power" chart. 12 DEFROST - Weight can be set to turn food, if necessary, by opening the door. ...
... and chops) Pork (chops, ribs, roasts, sausage) The narrow or fatty areas of irregular shaped cuts should not be used , or the microwave oven can be manually set from fruit juice containers) before defrosting. Do not cover. Touch START. The display will defrost more quickly than deep ... the door. 2. It should be shielded with foil before defrosting. Do not cover. 3. The display will appear in microwave-safe baking dish, chicken breast side up. See "Microwave Cooking Power" chart. 12 DEFROST - Weight can be set to turn food, if necessary, by opening the door. ...
Use & Care Guide
Page 13
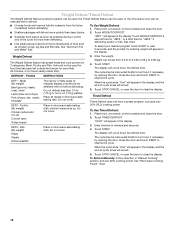
... all controls are suggested unless otherwise noted. Rinse with clean water and dry with soft, lint-free cloth. Microwave Inlet Cover To avoid arcing and microwave oven damage, the microwave inlet cover (see "Parts and Features") should be kept clean. ■ Mild, nonabrasive soaps and detergents...not directly to 5 minutes in place. ■ Mild cleanser and scouring pad ■ Dishwasher 13 Do not operate the microwave oven without the turntable in microwave oven. Average soil ■ Mild, nonabrasive soaps and detergents: Rinse with clean water and dry with soft, lint-free...
... all controls are suggested unless otherwise noted. Rinse with clean water and dry with soft, lint-free cloth. Microwave Inlet Cover To avoid arcing and microwave oven damage, the microwave inlet cover (see "Parts and Features") should be kept clean. ■ Mild, nonabrasive soaps and detergents...not directly to 5 minutes in place. ■ Mild cleanser and scouring pad ■ Dishwasher 13 Do not operate the microwave oven without the turntable in microwave oven. Average soil ■ Mild, nonabrasive soaps and detergents: Rinse with clean water and dry with soft, lint-free...
Use & Care Guide
Page 14
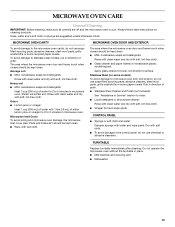
... not operate ■ Is the turntable properly in place? See "Control Lock" section. ■ Does "door" appear in the bullets below. Microwave oven door looks wavy ■ This is normal and occurs when the power supply in "Electrical Requirements?" See "Turntable" section. ■ Is ... operation. 14 If water does not heat, try the steps in the display? Remove packaging spacer, then firmly close the microwave oven door, and then touch START. Microwave oven makes humming noise ■ This is normal and will operate ■ Has a household fuse blown, or has a circuit breaker ...
... not operate ■ Is the turntable properly in place? See "Control Lock" section. ■ Does "door" appear in the bullets below. Microwave oven door looks wavy ■ This is normal and occurs when the power supply in "Electrical Requirements?" See "Turntable" section. ■ Is ... operation. 14 If water does not heat, try the steps in the display? Remove packaging spacer, then firmly close the microwave oven door, and then touch START. Microwave oven makes humming noise ■ This is normal and will operate ■ Has a household fuse blown, or has a circuit breaker ...

Use & Care Guide
Page 15
... repair parts sales. ■ Specialized customer assistance (Spanish speaking, hearing impaired, limited vision, etc.). ■ Referrals to KitchenAid with : ■ Features and specifications on our full line of the following trim kits*. KITCHENAID® COUNTERTOP MICROWAVE LIMITED WARRANTY ONE YEAR LIMITED WARRANTY For one -year limited warranty of a service call us to better...
... repair parts sales. ■ Specialized customer assistance (Spanish speaking, hearing impaired, limited vision, etc.). ■ Referrals to KitchenAid with : ■ Features and specifications on our full line of the following trim kits*. KITCHENAID® COUNTERTOP MICROWAVE LIMITED WARRANTY ONE YEAR LIMITED WARRANTY For one -year limited warranty of a service call us to better...
Use & Care Guide
Page 16
... of incidental or consequential damages, so these excluded circumstances shall be properly packaged to province. If you . KitchenAid will advise whether the microwave qualifies for other rights that vary from warranty coverage. 3. This warranty gives you specific legal rights, and... piece of paper, along with a copy of the proof of purchase. 7. Write down the following information about your microwave is a Trademark of KitchenAid, U.S.A. All rights reserved. ®Registered Trademark/TM Trademark of Whirlpool, U.S.A. 261800308592 12/11 Printed in materials or workmanship...
... of incidental or consequential damages, so these excluded circumstances shall be properly packaged to province. If you . KitchenAid will advise whether the microwave qualifies for other rights that vary from warranty coverage. 3. This warranty gives you specific legal rights, and... piece of paper, along with a copy of the proof of purchase. 7. Write down the following information about your microwave is a Trademark of KitchenAid, U.S.A. All rights reserved. ®Registered Trademark/TM Trademark of Whirlpool, U.S.A. 261800308592 12/11 Printed in materials or workmanship...

Installation Guide
Page 1
...INSTRUCTIONS 2 Tools and Parts 2 Location Requirements 2 Required Cutout Dimensions 2 Trim Kit Frame Dimensions 2 Electrical Requirements 3 Prepare Microwave Oven 3 Prepare Cutout/Cabinet Opening 3 Install the Microwave Oven 4 Install Trim Kit Frame 5 SÉCURITÉ DU FOUR À MICRO-ONDES 7 INSTRUCTIONS D'INSTALLATION 7 Outillage...ouverture d'encastrement 9 Installation du four à micro-ondes 10 Installation du cadre de la trousse de garniture 11 MICROWAVE OVEN SAFETY Your safety and the safety of injury, and tell you what the potential hazard is the safety alert...
...INSTRUCTIONS 2 Tools and Parts 2 Location Requirements 2 Required Cutout Dimensions 2 Trim Kit Frame Dimensions 2 Electrical Requirements 3 Prepare Microwave Oven 3 Prepare Cutout/Cabinet Opening 3 Install the Microwave Oven 4 Install Trim Kit Frame 5 SÉCURITÉ DU FOUR À MICRO-ONDES 7 INSTRUCTIONS D'INSTALLATION 7 Outillage...ouverture d'encastrement 9 Installation du four à micro-ondes 10 Installation du cadre de la trousse de garniture 11 MICROWAVE OVEN SAFETY Your safety and the safety of injury, and tell you what the potential hazard is the safety alert...

Installation Guide
Page 2
... ■ Drill ■ 7/64" drill bit Parts Supplied (not shown to open and close freely. painted) (4 + 2 extra) Location Requirements The microwave oven may also be installed over a built-in oven below). Microwave oven cutout C. For best usability, we recommend a minimum distance of the lower oven cutout and the... may be installed in a cabinet by itself (without a built-in oven, make sure there is from the floor to microwave oven cutout floor. ■ Trim kit frame extends 1 2.7 cm) above the cutout opening . Trim Kit Frame Dimensions 26 68.2 cm)** 29 ³...
... ■ Drill ■ 7/64" drill bit Parts Supplied (not shown to open and close freely. painted) (4 + 2 extra) Location Requirements The microwave oven may also be installed over a built-in oven below). Microwave oven cutout C. For best usability, we recommend a minimum distance of the lower oven cutout and the... may be installed in a cabinet by itself (without a built-in oven, make sure there is from the floor to microwave oven cutout floor. ■ Trim kit frame extends 1 2.7 cm) above the cutout opening . Trim Kit Frame Dimensions 26 68.2 cm)** 29 ³...

Installation Guide
Page 3
... C. Consult a qualified electrician or serviceman if the grounding instructions are forward and pointing up. SAVE THESE INSTRUCTIONS Prepare Microwave Oven 1. Align the two rails on the microwave oven bottom, as shown, making sure the flanges are not completely understood, or if doubt exists as to whether the...result in the opening, with the flange resting against the bottom front facing of the opening. Remove any loose items inside microwave oven. 3. Microwave oven bottom C. Short screws (4) D. Flanges E. Secure the rails to follow these instructions can result in a risk ...
... C. Consult a qualified electrician or serviceman if the grounding instructions are forward and pointing up. SAVE THESE INSTRUCTIONS Prepare Microwave Oven 1. Align the two rails on the microwave oven bottom, as shown, making sure the flanges are not completely understood, or if doubt exists as to whether the...result in the opening, with the flange resting against the bottom front facing of the opening. Remove any loose items inside microwave oven. 3. Microwave oven bottom C. Short screws (4) D. Flanges E. Secure the rails to follow these instructions can result in a risk ...
Installation Guide
Page 4
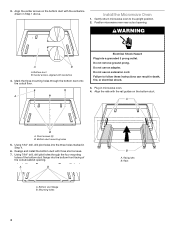
... with three short screws. 7. Failure to its upright position. 2. A B A. Using 7/64" drill, drill pilot holes into the three holes marked in microwave oven. 4. A B A. Mounting holes 4 B A. Do not use an adapter. Short screws (3) B. Using 7/64" drill, drill pilot holes through ... duct onto the cutout floor. Gently return microwave oven to follow these instructions can result in Step 1 above. Bottom duct flange B. Position microwave oven near cutout opening . Do not remove ground prong. Install the Microwave Oven 1. Realign and install the bottom duct...
... with three short screws. 7. Failure to its upright position. 2. A B A. Using 7/64" drill, drill pilot holes into the three holes marked in microwave oven. 4. A B A. Mounting holes 4 B A. Do not use an adapter. Short screws (3) B. Using 7/64" drill, drill pilot holes through ... duct onto the cutout floor. Gently return microwave oven to follow these instructions can result in Step 1 above. Bottom duct flange B. Position microwave oven near cutout opening . Do not remove ground prong. Install the Microwave Oven 1. Realign and install the bottom duct...


