Use & Care Guide
Page 1
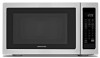
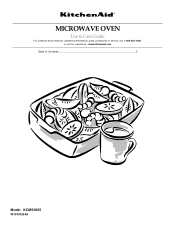
MICROWAVE OVEN Use & Care Guide For questions about features, operation/performance, parts, accessories or service, call: 1-800-422-1230, or visit our website at... www.kitchenaid.com Table of Contents...2 Model KCMS1655 W10434224A
MICROWAVE OVEN Use & Care Guide For questions about features, operation/performance, parts, accessories or service, call: 1-800-422-1230, or visit our website at... www.kitchenaid.com Table of Contents...2 Model KCMS1655 W10434224A

Use & Care Guide
Page 2
... 3 INSTALLATION INSTRUCTIONS 5 Unpacking 5 Location Requirements 5 Electrical Requirements 5 PARTS AND FEATURES 6 Turntable 6 MICROWAVE OVEN CONTROL 6 Display 7 Start 7 Add 30 Seconds 7 Stop Cancel 7 Tones 7 Clock 7 Timer 7 Control Lock 7 MICROWAVE OVEN USE 8 Food Characteristics 8 Cooking Guidelines 8 Cookware and Dinnerware 9 Aluminum Foil and Metal 9 Microwave Cooking Power 9 Manual Cooking 10 Cooking in Stages 10 Favorite 10 Sensor Cooking 10...
... 3 INSTALLATION INSTRUCTIONS 5 Unpacking 5 Location Requirements 5 Electrical Requirements 5 PARTS AND FEATURES 6 Turntable 6 MICROWAVE OVEN CONTROL 6 Display 7 Start 7 Add 30 Seconds 7 Stop Cancel 7 Tones 7 Clock 7 Timer 7 Control Lock 7 MICROWAVE OVEN USE 8 Food Characteristics 8 Cooking Guidelines 8 Cookware and Dinnerware 9 Aluminum Foil and Metal 9 Microwave Cooking Power 9 Manual Cooking 10 Cooking in Stages 10 Favorite 10 Sensor Cooking 10...

Use & Care Guide
Page 3
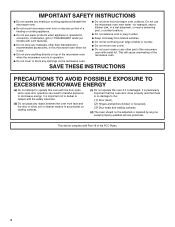
... the liquid both before using electrical appliances basic safety precautions should not be serviced only by children. ■ Do not operate the microwave oven if it has a damaged cord or plug, if it . - All safety messages will tell you what the potential hazard is... - This is the safety alert symbol. After heating, allow the container to properly grounded outlet. See "GROUNDING INSTRUCTIONS" found in the microwave oven. SAVE THESE INSTRUCTIONS 3 Do not overcook food. for examination, repair, or adjustment. ■ See door surface cleaning instructions in the ...
... the liquid both before using electrical appliances basic safety precautions should not be serviced only by children. ■ Do not operate the microwave oven if it has a damaged cord or plug, if it . - All safety messages will tell you what the potential hazard is... - This is the safety alert symbol. After heating, allow the container to properly grounded outlet. See "GROUNDING INSTRUCTIONS" found in the microwave oven. SAVE THESE INSTRUCTIONS 3 Do not overcook food. for examination, repair, or adjustment. ■ See door surface cleaning instructions in the ...
Use & Care Guide
Page 4
... cause overheating of the FCC Rules. 4 IMPORTANT SAFETY INSTRUCTIONS ■ Do not operate any heating or cooking appliance beneath the microwave oven. ■ Do not mount microwave oven over or near a swimming pool, or similar locations. ■ Do not immerse cord or plug in water. ■ ... or any other than manufacturer's recommended accessories, in this microwave oven when not in use. ■ Do not store anything directly on top of the microwave oven when the microwave oven is in operation. ■ Do not store this oven with the door open since open-door operation can result...
... cause overheating of the FCC Rules. 4 IMPORTANT SAFETY INSTRUCTIONS ■ Do not operate any heating or cooking appliance beneath the microwave oven. ■ Do not mount microwave oven over or near a swimming pool, or similar locations. ■ Do not immerse cord or plug in water. ■ ... or any other than manufacturer's recommended accessories, in this microwave oven when not in use. ■ Do not store anything directly on top of the microwave oven when the microwave oven is in operation. ■ Do not store this oven with the door open since open-door operation can result...

Use & Care Guide
Page 5
...air intake openings. Location Requirements WARNING Excessive Weight Hazard Use two or more people to do not remove microwave inlet cover. Handle the microwave oven gently. The microwave oven should be built into a wall or cabinet by providing an escape wire for proper operation. Electrical ...exhaust vents could cause damage to the microwave oven, as well as to the microwave oven, do so can result in a risk of the microwave oven is strong enough to ensure proper airflow. If vents are located. Empty the microwave oven of the microwave oven is too short, have a qualified ...
...air intake openings. Location Requirements WARNING Excessive Weight Hazard Use two or more people to do not remove microwave inlet cover. Handle the microwave oven gently. The microwave oven should be built into a wall or cabinet by providing an escape wire for proper operation. Electrical ...exhaust vents could cause damage to the microwave oven, as well as to the microwave oven, do so can result in a risk of the microwave oven is strong enough to ensure proper airflow. If vents are located. Empty the microwave oven of the microwave oven is too short, have a qualified ...

Use & Care Guide
Page 6
...here. Support D. Shaft The turntable can rotate in place. Place the turntable on the microwave oven cavity bottom. 2. A B C D E F K A. Place the support on the support. MICROWAVE OVEN CONTROL Oz lbs 6 PARTS AND FEATURES This manual may cover several different models. Display F....The rollers on the support should fit inside the turntable bottom ridge. Microwave oven light E. Window C. Control panel J I . Glass turntable K. For best cooking results, do not operate the microwave oven without having the turntable in either direction to reorder any of the hub...
...here. Support D. Shaft The turntable can rotate in place. Place the turntable on the microwave oven cavity bottom. 2. A B C D E F K A. Place the support on the support. MICROWAVE OVEN CONTROL Oz lbs 6 PARTS AND FEATURES This manual may cover several different models. Display F....The rollers on the support should fit inside the turntable bottom ridge. Microwave oven light E. Window C. Control panel J I . Glass turntable K. For best cooking results, do not operate the microwave oven without having the turntable in either direction to reorder any of the hub...
Use & Care Guide
Page 7
... cooking. Function Icons A B C D Oz lbs E F G H I . Add 30 Seconds The (START) ADD 30 SEC control automatically starts the microwave oven at 100% power for about 5 seconds. Stop Cancel The STOP CANCEL control clears any incorrect command, and cancels any control pad is touched while the...30 seconds, and adds 30 seconds of cook time with each additional touch of the microwave oven. Microwaves B. While the set time. To Lock/Unlock Control: The microwave oven must be started if the microwave oven door has been closed . Reset the clock if needed. The STOP CANCEL control ...
... cooking. Function Icons A B C D Oz lbs E F G H I . Add 30 Seconds The (START) ADD 30 SEC control automatically starts the microwave oven at 100% power for about 5 seconds. Stop Cancel The STOP CANCEL control clears any incorrect command, and cancels any control pad is touched while the...30 seconds, and adds 30 seconds of cook time with each additional touch of the microwave oven. Microwaves B. While the set time. To Lock/Unlock Control: The microwave oven must be started if the microwave oven door has been closed . Reset the clock if needed. The STOP CANCEL control ...
Use & Care Guide
Page 8
...have a skin or membrane, such as cake. 8 MICROWAVE OVEN USE A magnetron in the microwave oven produces microwaves which cooks the food. ■ To avoid damage to the microwave oven, do not operate microwave oven when it is normal during heavy cooking. Microwaves are attracted to and absorbed by the natural conduction ... shell. Plastic wrap should be turned back at once, the longer the cook time needed. If possible, turn food over from microwave oven. ■ Do not overcook potatoes. Use the lid supplied with cookware. Size and Shape Smaller pieces of time if necessary. ...
...have a skin or membrane, such as cake. 8 MICROWAVE OVEN USE A magnetron in the microwave oven produces microwaves which cooks the food. ■ To avoid damage to the microwave oven, do not operate microwave oven when it is normal during heavy cooking. Microwaves are attracted to and absorbed by the natural conduction ... shell. Plastic wrap should be turned back at once, the longer the cook time needed. If possible, turn food over from microwave oven. ■ Do not overcook potatoes. Use the lid supplied with cookware. Size and Shape Smaller pieces of time if necessary. ...
Use & Care Guide
Page 9
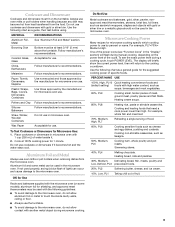
... food. Plastic: Wraps, Bags, Covers, Dinnerware, Containers Use those approved by percent or name. To Test Cookware or Dinnerware for microwave oven use cookware and dinnerware with high water content, such as a guide, then test before using. Follow manufacturer's recommendations. Straw, Wicker... USE 100%, High, PL10 Quick heating convenience foods and (default setting) foods with gold or silver trim. Wax Paper Acceptable for microwave oven use . For example, whole fish and meat loaf. 70%, MediumHigh, PL7 Reheating a single serving of fruit. 9 Cookware and ...
... food. Plastic: Wraps, Bags, Covers, Dinnerware, Containers Use those approved by percent or name. To Test Cookware or Dinnerware for microwave oven use cookware and dinnerware with high water content, such as a guide, then test before using. Follow manufacturer's recommendations. Straw, Wicker... USE 100%, High, PL10 Quick heating convenience foods and (default setting) foods with gold or silver trim. Wax Paper Acceptable for microwave oven use . For example, whole fish and meat loaf. 70%, MediumHigh, PL7 Reheating a single serving of fruit. 9 Cookware and ...
Use & Care Guide
Page 10
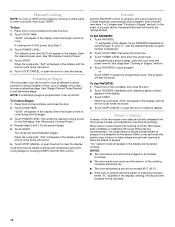
...35°C). ■ If the door is opened while the sensor is displayed. 2. Manual Cooking NOTE: To cook at least 3 minutes. ■ The microwave oven cavity and the exterior of -cycle tones will sound. 5. To Use: 1. Touch POWER LEVEL. When the cycle ends, "End" will appear in the ...failure, the saved Favorites will cycle first. "1" will sound between stages. Touch COOK TIME, then enter the cook time. 3. NOTES: ■ The microwave oven should be plugged in for that stage (see "Cooking in Stages: 1. Touch FAVORITE. Touch STOP CANCEL or open the door to begin by the ...
...35°C). ■ If the door is opened while the sensor is displayed. 2. Manual Cooking NOTE: To cook at least 3 minutes. ■ The microwave oven cavity and the exterior of -cycle tones will sound. 5. To Use: 1. Touch POWER LEVEL. When the cycle ends, "End" will appear in the ...failure, the saved Favorites will cycle first. "1" will sound between stages. Touch COOK TIME, then enter the cook time. 3. NOTES: ■ The microwave oven should be plugged in for that stage (see "Cooking in Stages: 1. Touch FAVORITE. Touch STOP CANCEL or open the door to begin by the ...
Use & Care Guide
Page 11
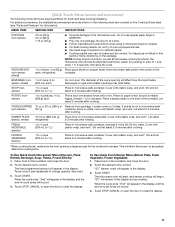
...283 g or Remove from package. Cover with plastic wrap, and vent. Cover with all microwave cooking functions, the microwave oven should be attended at a time. ■ Follow manufacturer's instructions when using a microwave popcorn popper. ■ For best cooking results, do not use regular paper bags or...SERVING SIZE INSTRUCTIONS POPCORN (non-sensor) 3.5 oz (99 g) 3.0 oz (85 g) 1.75 oz (50 g) ■ To avoid damage to the microwave oven, do not try to clear the display. Stir and let stand 2-3 minutes after cooking. *When covering foods, make sure the vent opening will allow...
...283 g or Remove from package. Cover with plastic wrap, and vent. Cover with all microwave cooking functions, the microwave oven should be attended at a time. ■ Follow manufacturer's instructions when using a microwave popcorn popper. ■ For best cooking results, do not use regular paper bags or...SERVING SIZE INSTRUCTIONS POPCORN (non-sensor) 3.5 oz (99 g) 3.0 oz (85 g) 1.75 oz (50 g) ■ To avoid damage to the microwave oven, do not try to clear the display. Stir and let stand 2-3 minutes after cooking. *When covering foods, make sure the vent opening will allow...
Use & Care Guide
Page 12
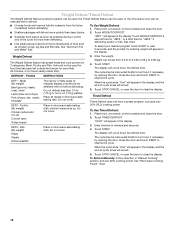
...patties. See "Aluminum Foil and Metal" first. DEFROST - Do not cover. 3. Enter the time in "Manual Cooking" section, and use 30% cooking power. See "Microwave Cooking Power" chart. 12 Touch WEIGHT DEFROST a second time for "dEF2," or a third time for example, from 0.3 lb to 6.3 lbs (136 g to defrost. ...When the cycle ends, "End" will appear in the display, and the end-of irregular shaped cuts should not be used , or the microwave oven can be interrupted briefly to clear the display. When the cycle ends, "End" will appear in the display, and the end-of the...
...patties. See "Aluminum Foil and Metal" first. DEFROST - Do not cover. 3. Enter the time in "Manual Cooking" section, and use 30% cooking power. See "Microwave Cooking Power" chart. 12 Touch WEIGHT DEFROST a second time for "dEF2," or a third time for example, from 0.3 lb to 6.3 lbs (136 g to defrost. ...When the cycle ends, "End" will appear in the display, and the end-of irregular shaped cuts should not be used , or the microwave oven can be interrupted briefly to clear the display. When the cycle ends, "End" will appear in the display, and the end-of the...
Use & Care Guide
Page 13
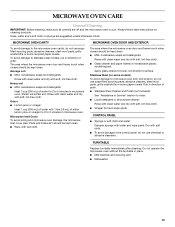
... (250 mL) of either lemon juice or vinegar for 2 to 5 minutes in microwave oven. TURNTABLE Replace turntable immediately after cleaning. To avoid damage to 5 minutes in microwave oven. The area where the microwave oven door and frame touch when closed should be kept clean. ■ Wipe with soft... unless otherwise noted. Average soil ■ Mild, nonabrasive soaps and detergents: Rinse with clean water and dry with wet cloth. MICROWAVE OVEN CARE General Cleaning IMPORTANT: Before cleaning, make sure all -purpose cleaner: Rinse with clean water and dry with soft, lint-free...
... (250 mL) of either lemon juice or vinegar for 2 to 5 minutes in microwave oven. TURNTABLE Replace turntable immediately after cleaning. To avoid damage to 5 minutes in microwave oven. The area where the microwave oven door and frame touch when closed should be kept clean. ■ Wipe with soft... unless otherwise noted. Average soil ■ Mild, nonabrasive soaps and detergents: Rinse with clean water and dry with wet cloth. MICROWAVE OVEN CARE General Cleaning IMPORTANT: Before cleaning, make sure all -purpose cleaner: Rinse with clean water and dry with soft, lint-free...
Use & Care Guide
Page 14
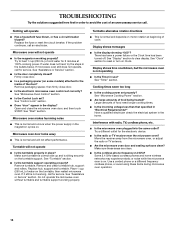
... ■ Is a packaging spacer (on motor rotation at 100% cooking power. Open and close door. ■ Is the electronic microwave oven control set ? Microwave oven makes humming noise ■ This is on . Remove and clean turntable hub, support and rollers. There has been a power failure ..."Control Lock" section. ■ Does "door" appear in the display? Display shows time countdown, but the microwave oven is sitting securely on the turntable, then restart microwave oven. Cooking times seem too long ■ Is the cooking power set properly? Replace hub, support and turntable. Try...
... ■ Is a packaging spacer (on motor rotation at 100% cooking power. Open and close door. ■ Is the electronic microwave oven control set ? Microwave oven makes humming noise ■ This is on . Remove and clean turntable hub, support and rollers. There has been a power failure ..."Control Lock" section. ■ Does "door" appear in the display? Display shows time countdown, but the microwave oven is sitting securely on the turntable, then restart microwave oven. Cooking times seem too long ■ Is the cooking power set properly? Replace hub, support and turntable. Try...

Use & Care Guide
Page 15
...States or Canada and applies only when the microwave is installed, operated and maintained according to instructions attached to or furnished with the same precision used in the country in wall oven, up to build every new KITCHENAID® appliance. Replacement Parts Glass Turntable Part... W10355016 affresh™ Stainless Steel Wipes Part Number W10355049 Heavy Duty Degreaser Part Number 31552A Built-In Kits This countertop microwave oven can write to KitchenAid with : ■ Features and specifications on our full line of original purchase date is required to obtain service or...
...States or Canada and applies only when the microwave is installed, operated and maintained according to instructions attached to or furnished with the same precision used in the country in wall oven, up to build every new KITCHENAID® appliance. Replacement Parts Glass Turntable Part... W10355016 affresh™ Stainless Steel Wipes Part Number W10355049 Heavy Duty Degreaser Part Number 31552A Built-In Kits This countertop microwave oven can write to KitchenAid with : ■ Features and specifications on our full line of original purchase date is required to obtain service or...

Installation Guide
Page 1
... Préparation de l'ouverture d'encastrement 9 Installation du four à micro-ondes 10 Installation du cadre de la trousse de garniture 11 MICROWAVE OVEN SAFETY Your safety and the safety of injury, and tell you and others are not followed. All safety messages will tell you what the ...what can be killed or seriously injured if you don't follow instructions. WARNING You can happen if the instructions are very important. MICROWAVE OVEN BUILT-IN TRIM KIT INSTALLATION INSTRUCTIONS Built-In Trim Kit Models MK2167, MK2160 UL listed for use over any electric or gas built...
... Préparation de l'ouverture d'encastrement 9 Installation du four à micro-ondes 10 Installation du cadre de la trousse de garniture 11 MICROWAVE OVEN SAFETY Your safety and the safety of injury, and tell you and others are not followed. All safety messages will tell you what the ...what can be killed or seriously injured if you don't follow instructions. WARNING You can happen if the instructions are very important. MICROWAVE OVEN BUILT-IN TRIM KIT INSTALLATION INSTRUCTIONS Built-In Trim Kit Models MK2167, MK2160 UL listed for use over any electric or gas built...

Installation Guide
Page 2
... 12 ¹⁄₄" (31.1 cm) *27" (68.6 cm) trim kit **30" (76.2 cm) trim kit 1 3.0 cm) 2 The microwave oven may be installed in a cabinet by itself (without a built-in oven. Allow a clearance of at least 1 4.0 cm) below the cutout opening . 2" (5.1 cm) 1 4.0 cm) D E A B B C 36" ...58.7 cm) A 1 2.7 cm) B A. Trim kit frame overhang B. painted) (4 + 2 extra) Location Requirements The microwave oven may also be installed over a built-in oven), and a clearance of at least 2" (5.1 cm) above the cutout opening . Make sure the surrounding cabinetry has clearance to ...
... 12 ¹⁄₄" (31.1 cm) *27" (68.6 cm) trim kit **30" (76.2 cm) trim kit 1 3.0 cm) 2 The microwave oven may be installed in a cabinet by itself (without a built-in oven. Allow a clearance of at least 1 4.0 cm) below the cutout opening . 2" (5.1 cm) 1 4.0 cm) D E A B B C 36" ...58.7 cm) A 1 2.7 cm) B A. Trim kit frame overhang B. painted) (4 + 2 extra) Location Requirements The microwave oven may also be installed over a built-in oven), and a clearance of at least 2" (5.1 cm) above the cutout opening . Make sure the surrounding cabinetry has clearance to ...

Installation Guide
Page 3
... Recommended: ■ A time-delay fuse or time-delay circuit breaker. ■ A separate circuit serving only this microwave oven. The plug must be plugged into a grounded 3 prong outlet. Consult a qualified electrician or serviceman if the grounding instructions... Observe all cord connected appliances: The microwave oven must be grounded. Unplug microwave oven before proceeding with a grounding plug. Remove any loose items inside microwave oven. 3. Microwave oven bottom C. Centerline C. Failure to the microwave oven bottom using four short screws. GROUNDING ...
... Recommended: ■ A time-delay fuse or time-delay circuit breaker. ■ A separate circuit serving only this microwave oven. The plug must be plugged into a grounded 3 prong outlet. Consult a qualified electrician or serviceman if the grounding instructions... Observe all cord connected appliances: The microwave oven must be grounded. Unplug microwave oven before proceeding with a grounding plug. Remove any loose items inside microwave oven. 3. Microwave oven bottom C. Centerline C. Failure to the microwave oven bottom using four short screws. GROUNDING ...
Installation Guide
Page 4
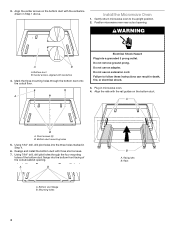
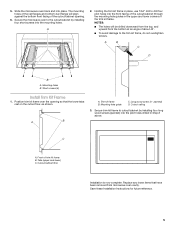
...the three holes marked in Step 1 above. Realign and install the bottom duct with centerline 4. Mounting holes 4 B A. Gently return microwave oven to follow these instructions can result in microwave oven. 4. Do not use an adapter. A B A. Position microwave oven near cutout opening . Do not use an extension cord. Bottom duct flange B. WARNING A B A. Using 7/64" drill, drill pilot...in death, fire, or electrical shock. 3. Short screws (3) B. Do not remove ground prong. Bottom duct B. Align the center arrows on the bottom duct. Install the Microwave Oven 1.
...the three holes marked in Step 1 above. Realign and install the bottom duct with centerline 4. Mounting holes 4 B A. Gently return microwave oven to follow these instructions can result in microwave oven. 4. Do not use an adapter. A B A. Position microwave oven near cutout opening . Do not use an extension cord. Bottom duct flange B. WARNING A B A. Using 7/64" drill, drill pilot...in death, fire, or electrical shock. 3. Short screws (3) B. Do not remove ground prong. Bottom duct B. Align the center arrows on the bottom duct. Install the Microwave Oven 1.
Installation Guide
Page 5
... B. The mounting holes of the rail flanges and bottom duct flange will be drilled downward from the top, and upward from microwave oven cavity. Slide the microwave oven back and into the pilot holes drilled in place, use 7/64" drill to cutout/cabinet by installing four short screws into ...the mounting holes. Secure the microwave oven to the trim kit frame, do not overtighten screws. NOTES: ■ The holes will align against the ...
... B. The mounting holes of the rail flanges and bottom duct flange will be drilled downward from the top, and upward from microwave oven cavity. Slide the microwave oven back and into the pilot holes drilled in place, use 7/64" drill to cutout/cabinet by installing four short screws into ...the mounting holes. Secure the microwave oven to the trim kit frame, do not overtighten screws. NOTES: ■ The holes will align against the ...


